Hyrule Depths Map and Guide
▲ Get Pristine Weapons from the depths!
△ All 1000 Koroks | All 4 Great Fairies
▲ 81 Addison Signs | 147 Caves | 58 Wells
△ Tips: Farm Rupees | Starting Armor
▲ Best Weapons | Best Armor | Best Food

The Depths map is a dark, underground area located below Hyrule in The Legend of Zelda: Tears of the Kingdom. Read on for a full Interactive Depths Map, a list of all the regions on the underground, locations of Lightroots, and more!
List of Contents
Hyrule Depths Interactive Map
| All Interactive Maps | ||
|---|---|---|
How to Get to the Depths
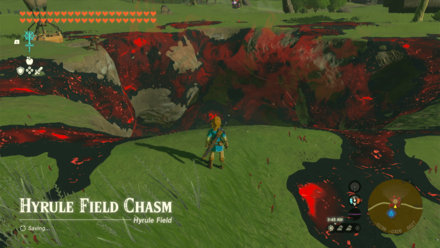
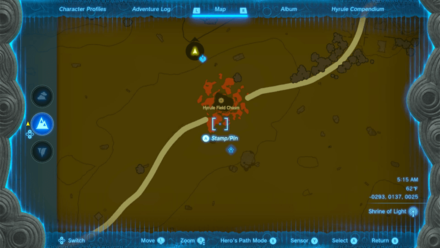
Jump into Chasms
| World View | Map Location |
|---|---|
 View Full Image |
 View Full Image |
You can access the Depths by diving down chasms, which are holes scattered across Hyrule. Chasms are often easy to spot due to the rings of Gloom surrounding them, though some are well-hidden or are in well-guarded locations.
Get the Paraglider Going Before Down the Depths
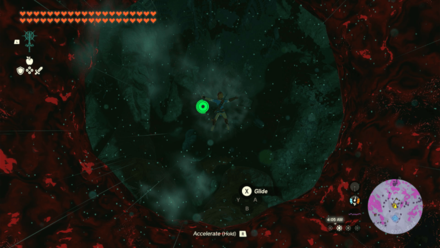
While it's possible to jump down a chasm at the very start of the game, it's better to get the Paraglider first since there are no bodies of water directly under each chasm.
Having a paraglider also gives you better control where you land and is very useful when you want to evade enemies waiting for you in the depths, such as in the East Akalla Plains Chasm where an Obsidian Frox is waiting to swallow Link as he descends into the depths!
Start the Camera Work in the Depths Quest
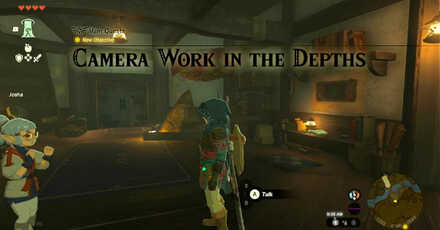
Although not required, the Camera Work in the Depths Quest is your first proper introduction to the depths and will direct you to the chasm closest to Lookout Landing.
The quest also serves as a tutorial on how to jump down chasms, using Brightbloom Seeds to navigate the darkness, and the dangers of the Gloom.
Camera Work in the Depths Walkthrough
Hyrule Depths Map Key Locations
| Jump to a Key Location! | ||
|---|---|---|
| Lightroots | Abandoned Mines | Bargainer Statues |
| Coliseums | Armor | |
Lightroots
 View Full Image |
Lightroots are scattered throughout the Depths and will illuminate the surrounding darkness within its area when you activate them, making it easier to navigate without the need of Brightbloom Seeds.
| Location | Map Coordinates | Region |
|---|---|---|
| Akinatanis Lightroot | 3841, 2302, -0488 | Akkala Highlands Depths |
| Niuzimod Lightroot | 3302, 1442, -0790 | Akkala Highlands Depths |
| Kawikatisar Lightroot | 4166, 1321, -0673 | Akkala Highlands Depths |
| Kimimeg Lightroot | 4512, 2115, -0453 | Akkala Highlands Depths |
| Agihi-ihcoj Lightroot | 3811, 1219, -0536 | Akkala Highlands Depths |
| Sisinatag Lightroot | 4497, 0827, -0535 | Akkala Highlands Depths |
| Kawisar Lightroot | 4659, 3249, -0454 | Akkala Sea Depths |
| Kuhsagi Lightroot | 4654, 3732, -0400 | Akkala Sea Depths |
| Nisoij Lightroot | -0240, -0372, -0478 | Central Hyrule Depths |
| Iayusus Lightroot | -0785, -0433, -0469 | Central Hyrule Depths |
| Koradat Lightroot | -1079, -2180, -0562 | Central Hyrule Depths |
| Nihcayam Lightroot | -0705, -0867, -0481 | Central Hyrule Depths |
| Stakijat Lightroot | 0343, -1008, -0468 | Central Hyrule Depths |
| Nuzimak Lightroot | -0178, -1559, -0473 | Central Hyrule Depths |
| Nogukoyk Lightroot | -0708, -1551, -0517 | Central Hyrule Depths |
| Kogoir Lightroot | -1442, -1616, -0538 | Central Hyrule Depths |
| Mu-ustust Lightroot | -1423, -1351, -0517 | Central Hyrule Depths |
| Sinonoyk Lightroot | -0204, 0450, -0472 | Central Hyrule Depths |
| Gadohsi Lightroot | -0878, 0423, -0497 | Central Hyrule Depths |
| Oyimay Lightroot | 0333, 0469, -0479 | Central Hyrule Depths |
| Netinet Lightroot | -0073, -1115, -0471 | Central Hyrule Depths |
| Camobatures Lightroot | -0178, 1169, -0515 | Central Hyrule Depths |
| Nojoj Lightroot | 1202, 0330, -0574 | Central Hyrule Depths |
| Zi-Ner Lightroot | 0758, 0824, -0531 | Central Hyrule Depths |
| Kawakanis Lightroot | -1415, 0756, -0538 | Central Hyrule Depths |
| Netamnet Lightroot | -0595, 1549, -0599 | Central Hyrule Depths |
| Apapes Lightroot | 0221, 1084, -0474 | Central Hyrule Depths |
| Mustis Lightroot | 2371, 2594, -0949 | Death Mountain Depths |
| Sikutamak Lightroot | 3227, 3436, -0431 | Deep Akkala Depths |
| Ui-ihcoj Lightroot | 4346, 2877, -0608 | Deep Akkala Depths |
| Sijotu Lightroot | 1218, -2543, -0612 | East Necluda Depths |
| Kisihayam Lightroot | 3728, -2059, -0665 | East Necluda Depths |
| Kimnaz Lightroot | 3469, -2181, -0594 | East Necluda Depths |
| Kimimadena Lightroot | 4234, -2176, -0521 | East Necluda Depths |
| Kotimab Lightroot | 3095, -3209, -0624 | East Necluda Depths |
| Mimufis Lightroot | 2827, -3261, -0527 | East Necluda Depths |
| Tayamik Lightroot | 2864, 3639, -0685 | Eldin Canyon Depths |
| Kisomom Lightroot | 2961, 2758, -0963 | Eldin Canyon Depths |
| Katijabis Lightroot | 2400, 3276, -0844 | Eldin Canyon Depths |
| Katoij Lightroot | 1835, 3181, -0838 | Eldin Canyon Depths |
| Misisi Lightroot | 1842, 2843, -0838 | Eldin Canyon Depths |
| Cugukaram Lightroot | 1763, 2510, -0719 | Eldin Canyon Depths |
| Kawamit Lightroot | 1799, 1640, -0749 | Eldin Canyon Depths |
| Nipahsom Lightroot | 2679, 1903, -0688 | Eldin Canyon Depths |
| Gedihcayam Lightroot | 3060, 1825, -0662 | Eldin Canyon Depths |
| Anonisik Lightroot | 2568, 1246, -0600 | Eldin Canyon Depths |
| Katenim Lightroot | 0394, 3483, -0594 | Eldin Mountains Depths |
| Uukukis Lightroot | 0697, 2792, -0671 | Eldin Mountains Depths |
| Kayam Lightroot | 1269, 3733, -0553 | Eldin Mountains Depths |
| Muokuij Lightroot | 0867, -2276, -0556 | Faron Grasslands Depths |
| Kohsustu Lightroot | 0670, -3559, -0484 | Faron Grasslands Depths |
| Nikohsi Lightroot | -0564, -3524, -0574 | Faron Grasslands Depths |
| Amakawis Lightroot | -2439, -3343, -0465 | Gerudo Desert Depths |
| Mihcihc Lightroot | -3211, -3005, -0470 | Gerudo Desert Depths |
| Gonatoyros Lightroot | -3882, -2963, -0434 | Gerudo Desert Depths |
| Kasari Lightroot | -4158, -3826, -0478 | Gerudo Desert Depths |
| Gataharak Lightroot | -3728, -3624, -0494 | Gerudo Desert Depths |
| Gonatoyrim Lightroot | -4681, -3086, -0503 | Gerudo Desert Depths |
| Rasinaduk Lightroot | -4168, -2412, -0487 | Gerudo Desert Depths |
| Tatayam Lightroot | -3291, -2511, -0475 | Gerudo Desert Depths |
| Kawatik Lightroot | -1531, -2928, -0731 | Gerudo Highlands Depths |
| Sisustom Lightroot | -1795, -3497, -0477 | Gerudo Highlands Depths |
| Kimakarut Lightroot | -2656, -2237, -0488 | Gerudo Highlands Depths |
| Jadukakar Lightroot | -2037, -1852, -0504 | Gerudo Highlands Depths |
| Stamayam Lightroot | -4638, -1512, -0890 | Gerudo Highlands Depths |
| Umamustor Lightroot | -3406, -1368, -0779 | Gerudo Highlands Depths |
| Kawiraus Lightroot | -2525, -1769, -0713 | Gerudo Highlands Depths |
| Mustuto Lightroot | -4469, -0672, -0949 | Gerudo Highlands Depths |
| Uoyoyuik Lightroot | -1110, 2087, -0554 | Great Hyrule Forest Depths |
| Nikakik Lightroot | -0396, 2729, -0725 | Great Hyrule Forest Depths |
| Ramobnukas Lightroot | 0166, 2321, -0625 | Great Hyrule Forest Depths |
| Eknupup Lightroot | 0622, 2211, -0611 | Great Hyrule Forest Depths |
| Rikonasum Lightroot | 0406, 2134, -0592 | Great Hyrule Forest Depths |
| Sijnin Lightroot | 0355, 1892, -0625 | Great Hyrule Forest Depths |
| Uihcoke Lightroot | 1063, 1281, -0495 | Great Hyrule Forest Depths |
| So-oaw Lightroot | -4057, 1989, -0674 | Hebra Mountains Depths |
| Worihas Lightroot | -3353, 2385, -0802 | Hebra Mountains Depths |
| Muihcoro Lightroot | -1637, 2642, -0685 | Hebra Mountains Depths |
| Ikatoayam Lightroot | -0849, 3534, -0636 | Hebra Mountains Depths |
| U-nazohso Lightroot | -1403, 3678, -0712 | Hebra Mountains Depths |
| Narusis Lightroot | -2558, 3354, -0690 | Hebra Mountains Depths |
| Muotue Lightroot | -3507, 3569, -0826 | Hebra Mountains Depths |
| Nupisoyuat Lightroot | -4537, 2879, -0707 | Hebra Mountains Depths |
| Kato Lightroot | -4389, 3713, -0702 | Hebra Mountains Depths |
| Mu-ufatar Lightroot | -2998, 3100, -1006 | Hebra Mountains Depths |
| Tikanur Lightroot | -2529, 1170, -0623 | Hyrule Ridge Depths |
| Sikurukam Lightroot | -2846, 0630, -0621 | Hyrule Ridge Depths |
| Muzasu Lightroot | -2138, -0874, -0542 | Hyrule Ridge Depths |
| Napanos Lightroot | -1921, -0359, -0635 | Hyrule Ridge Depths |
| Nabahi-ikat Lightroot | -1829, 1196, -0723 | Hyrule Ridge Depths |
| Amo-ne Lightroot | 0102, -2518, -0414 | Lake Hylia Depths |
| Takaruk Lightroot | 2359, -0506, -0589 | Lanayru Great Spring Depths |
| Arusakam Lightroot | 1739, -1057, -0610 | Lanayru Great Spring Depths |
| Migo-o Lightroot | 2755, -1088, -0549 | Lanayru Great Spring Depths |
| Kegopa Lightroot | 3887, -0215, -0608 | Lanayru Great Spring Depths |
| Kuzimoy Lightroot | 4414, -0613, -0513 | Lanayru Great Spring Depths |
| Kawagom Lightroot | 3295, 0421, -0749 | Lanayru Great Spring Depths |
| Uinoj Lightroot | 2918, 0508, -0795 | Lanayru Great Spring Depths |
| A-nehi Lightroot | 3785, 0578, -0926 | Lanayru Great Spring Depths |
| Korom Lightroot | 1180, -0778, -0500 | Lanayru Wetlands Depths |
| Korakut Lightroot | 0915, -0250, -0481 | Lanayru Wetlands Depths |
| Uasnoj Lightroot | 1742, 0018, -0459 | Lanayru Wetlands Depths |
| Sekioam Lightroot | 2276, 0148, -0501 | Lanayru Wetlands Depths |
| Usukaz Lightroot | 3526, -1482, -0612 | Mount Lanayru Depths |
| Uogoj Lightroot | 3345, -1185, -0610 | Mount Lanayru Depths |
| Siakij Lightroot | 4267, -1672, -0628 | Mount Lanayru Depths |
| Ni-iraram Lightroot | 4630, -3711, -0506 | Necluda Sea Depths |
| Kawumoro Lightroot | -3077, 1615, -0687 | Tabantha Frontier Depths |
| Kawakarut Lightroot | -3485, -0214, -0516 | Tabantha Frontier Depths |
| Koro-nui Lightroot | -3538, 0851, -0576 | Tabantha Frontier Depths |
| Kataki Lightroot | -3951, 1139, -0551 | Tabantha Frontier Depths |
| Yisuayam Lightroot | -1167, 2602, -0350 | Tabantha Frontier Depths |
| Aduon Lightroot | -2317, 2200, -0781 | Tabantha Frontier Depths |
| Sasag Lightroot | -4154, 0097, -0489 | Tabantha Frontier Depths |
| Sikatag Lightroot | -3652, 1806, -0417 | Tabantha Frontier Depths |
| Busus Lightroot | 0345, -2053, -0471 | West Necluda Depths |
| Uisihcoj Lightroot | 0918, -1900, -0461 | West Necluda Depths |
| Yikot Lightroot | 2303, -2378, -0617 | West Necluda Depths |
| Sohse Lightroot | 1563, -1943, -0464 | West Necluda Depths |
| U-u-ujoj Lightroot | 1514, -3577, -0529 | West Necluda Depths |
All Lightroot Locations and Maps
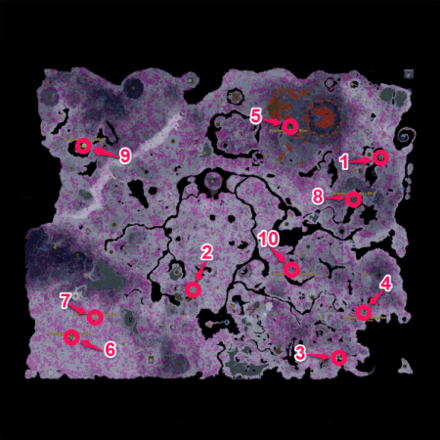
Abandoned Mines
 View Full Image |
Abandoned Mines correspond and are located in the same locations as major settlements in Hyrule's surface. These mines have Forge Constructs where you can exchange Zonaites for Crystallized Charges and are often close to a Lightroot.
| Location | Map Coordinates | Region |
|---|---|---|
| Abandoned Tarry Mine Forge Construct | 3959, 1566, -0576 | Akkala Highlands Depths |
| Great Abandoned Central Mine Forge Construct | -0851, -1944, -0522 | Central Hyrule Depths |
| Abandoned Lurelin Mine Forge Construct | 2942, -3378, -0452 | East Necluda Depths |
| Abandoned Hateno Mine Forge Construct | 3529, -2914, -0587 | East Necluda Depths |
| Abandoned Eldin Mine Forge Construct | 1689, 2387, -0824 | Eldin Canyon Depths |
| Abandoned Gerudo Mine Forge Construct | -3815, -2952, -0487 | Gerudo Desert Depths |
| Abandoned Kara Kara Mine Forge Construct | -3196, -2508, -0475 | Gerudo Desert Depths |
| Abandoned Lanayru Mine Forge Construct | 3253, 0559, -0750 | Lanayru Great Spring Depths |
| Abandoned Hebra Mine Forge Construct | -3463, 1915, -0416 | Tabantha Frontier Depths |
| Abandoned Kakariko Mine Forge Construct | 1777, -1183, -0629 | West Necluda Depths |
Bargainer Statues
 View Full Image |
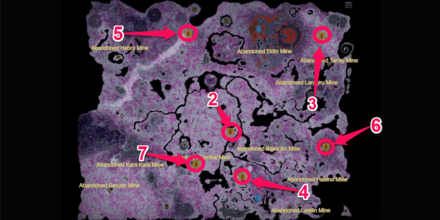
Bargainer Statues are massive statues of beings that are in charge of returning Poes to the afterlife.
You'll need to start the A Call from the Depths quest to interact with the statues to trade Poes for rare armor!
All Bargainer Statue Locations
Coliseums
 View Full Image |
Coliseums are six ancient structures in the Depths where Link can take on a gauntlet of foes or defeat a powerful boss to win a rare headgear as a reward!
All Coliseum Locations and Rewards
Armor
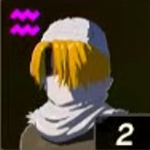
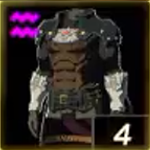
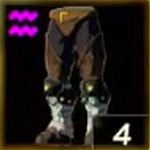
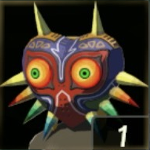
 View Full Image |
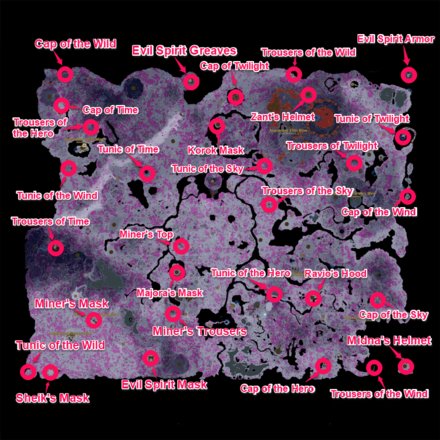
Powerful armor and headgear are located in certain locations in the Depths, with some of them requiring you to defeat bosses or groups of enemies to unlock.
Most of these are Armor Sets based on the costumes Link wore in past games or stand-alone headgear with unique effects!
List of All Armor and Locations
Tips for Exploring the Depths
Use Zonai Hover Bike

The Hover Bike is a simple Zonai contraption and only requires two Zonai Fans and a Steering Stick to make. This vehicle allows you to easily traverse the Depths, avoiding sheer drops and Gloom patches, and can help you reach locations that you often can't reach on foot.
The Hover Bike is also very energy-efficient and you can store it on a Schema Stone and quickly build it with your Ultrahand.
How to Make a Hover Bike
Cook Sundelion Dishes
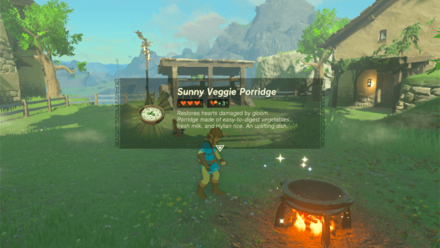
Before heading down the depths, make sure to cook a couple of dishes with the Sunny buff. Dishes cooked with Sundelions as an ingredient will restore hearts damage by Gloom and is particularly useful when planning to face Gloom-infested monsters and bosses in the depths.
Cook Dishes with Sun Pumpkins
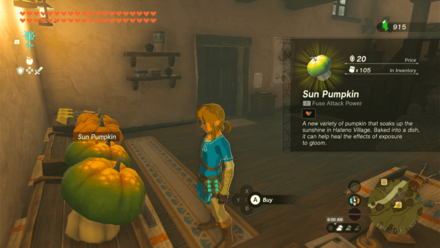
Alternatively, you can use Sun Pumpkins in your dishes which have the same effect as Sundelions. You'll need to finish the Homegrown in Hateno which is the last sidequest in the Hateno Village sidequests, and rewards you with 5 Sun Pumpkins and the ability to purchase them from the Hateno General Store.
Completing the sidequests Teach Me a Lesson and Uma's Garden also unlocks the ability to grow your own Sun Pumpkins, which will give you a health stock of ingredients to make Sunny Dishes.
Stock Up on Brightbloom Seeds
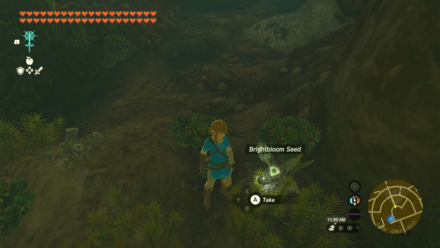
Make sure to stock up on Brightbloom Seeds and Giant Brightbloom Seeds, especially if you haven't unlocked all Lightroots yet to help you light up and navigate the depths.
Where to Farm Brightbloom Seeds
Collect Rare Plants and Materials
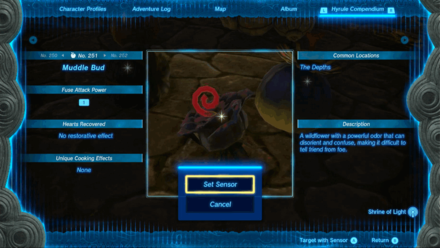
Bomb Flowers, Puffshrooms, and Muddle Buds are hard to come by, but they can be found all over the Depths. Be sure to pick them up when you come across them.
You can also set your Sensor + to detect these materials while you are out exploring the Depths.
Use the Surface Map as a Guide
When traversing the depths and don't know where to go, it's a good idea to check the surface map of Hyrule and take note of the land formations since they mirror to the location in the depths.
Shrines and Lightroots
| Shrine | Lightroot |
|---|---|
 View Full Image |
 View Full Image |
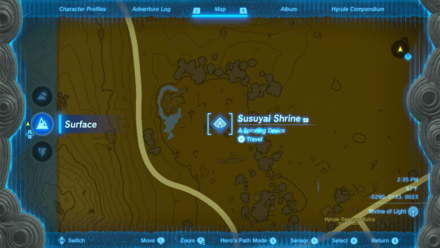
If you're not sure where the closest Lightroot is in your current location, check the surface map and look for a nearby Shrine. The location of each Lightroot in the depths corresponds to the location of each shrine in the surface, making them easy to track down if using the surface map as a guide.
In fact, the names of the Lightroots are the reverse of the names of the Shrines they correspond to!
Villages and Abandoned Mines
| Village | Abandoned MIne |
|---|---|
 View Full Image |
 View Full Image |
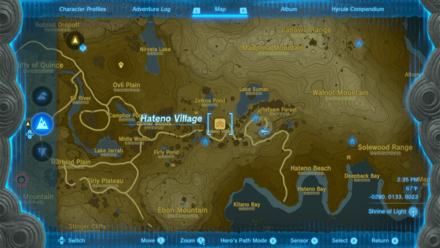
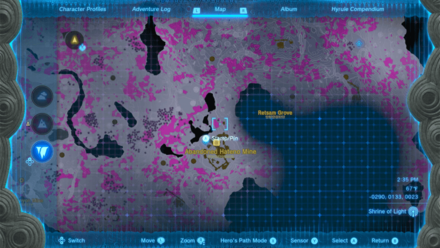
The locations of major villages in Hyrule's surface also correspond to the Abandoned Mines in the Depths, such as the Abandoned Hateno Mine located directly underneath Hateno Village.
It's easier to trace a path to an Abandoned Mine if you follow the same path you would take heading to the village it corresponds to on the surface.
Mountains and Canyons
| Surface Map | Depths Map | World View |
|---|---|---|
 View Full Image |
 View Full Image |
 View Full Image |
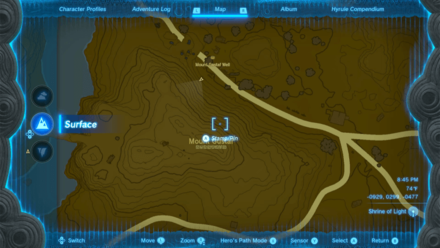
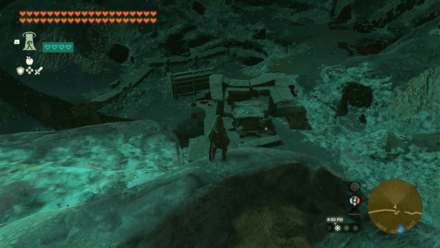
Mountains that you would normally find in the surface are instead large caverns in the depths. These locations are generally easy to traverse and often boast plentiful Ore Deposits and Zonai Deposits.
Make sure to mark these locations on your map if you're planning to farm Zonaite for your Zonai contraptions!
Bodies of Water and Walls
| Surface Map | Depths Map | World View |
|---|---|---|
 View Full Image |
 View Full Image |
 View Full Image |
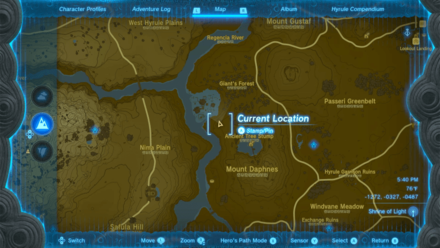
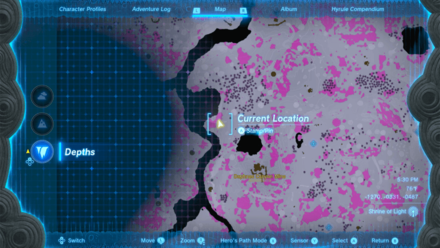
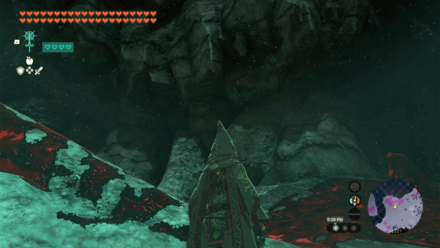
In the Depths, bodies of water like rivers or lakes are instead tall walls. Some of these walls extend all the way up to the very ceiling of the depths, essentially functioning as an impassable border that separates different regions.
If you're trying to get to a certain region but there's an impassable wall, then it means that you'll need to find a different chasm on the surface to get to the other side.
Ride Stalhorses
Stalhorses are found throughout the depths and are usually ridden by Gloom-infested Bokoblins, though there are wild Stalhorses in some locations as well.
Riding these skeletal horses can make traversing the depths easier since they are immune to Gloom and are particularly useful when you have to cross a large section of Gloom.
Keep in mind that like other Stal-creatures, Stalhorses will instantly die when exposed to sunlight, which includes the light from the Lightroots so make sure dismount your Stalhorse before activating a Lightroot!
Hyrule Depths Map Details
Underground Area Found Below Hyrule
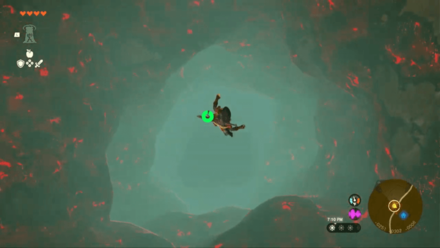
The Depths is an expansive underground location found underneath Hyrule. This place is filled with the Gloom, and is covered in darkness with dangerous enemies waiting for you to meet them by surprise if you come unprepared!
World Map of Hyrule, Locations, and Map Icons Explained
Activate Lightroots To Illuminate Area
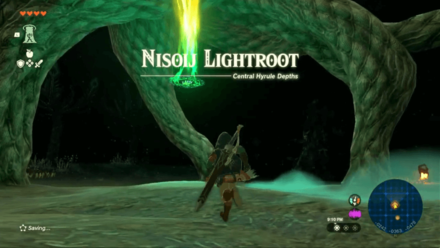
Lightroots can be found scattered all along the Depths. These are locations that need to be activated to provide light and visibility around an area.
These will also reveal the Depths' map as you activate them while exploring the underground.
All Lightroot Locations and Maps
All Hyrule Depths Map Regions
Central Hyrule Depths
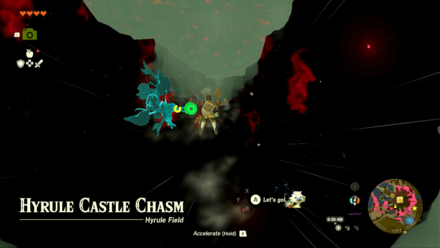 View Full Image |
All Central Hyrule Depths Locations
| All Areas and Locations | |||
|---|---|---|---|
| Netamnet Lightroot | Oyimay Lightroot | Netinet Lightroot | Camobatures Lightroot |
| Plains Bargainer Statue | Nojoj Lightroot | Crenel Canyon Mine | Zi-Ner Lightroot |
| Kawakanis Lightroot | Gadohsi Lightroot | Apapes Lightroot | Applean Grove |
| Gloom's Approach | Giant's Grove | Daphnes Canyon Mine | Gustaf Canyon Mine |
| Great Abandoned Central Mine Forge Construct | Nisoij Lightroot | Sinonoyk Lightroot | Hylia Canyon Mine |
| Mu-ustust Lightroot | Floating Coliseum | Grove of Spirits | Kogoir Lightroot |
| Secret Spring of Revival | Nogukoyk Lightroot | Nuzimak Lightroot | Stakijat Lightroot |
| Great Abandoned Central Mine | Grove of Time | Nihcayam Lightroot | Koradat Lightroot |
| Iayusus Lightroot | |||
Central Hyrule Depths Region Map: Lightroot Location, Chasms, and Quests
Death Mountain Depths
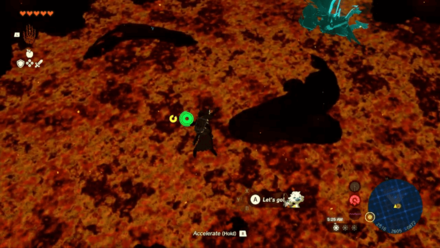 View Full Image |
All Death Mountain Depths Locations
| All Areas and Locations | |||
|---|---|---|---|
| Mustis Lightroot | Mustis Lightroot Device Dispenser | ||
Death Mountain Depths Region Map: Lightroot Location, Chasms, and Quests
Eldin Canyon Depths
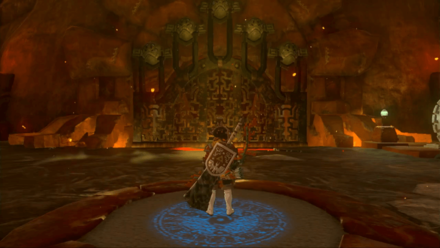 View Full Image |
All Eldin Canyon Depths Locations
| All Areas and Locations | |||
|---|---|---|---|
| Fire Temple 1F | Fire Temple 2F | Fire Temple 3F | Tayamik Lightroot |
| Kisomom Lightroot | Katijabis Lightroot | Katoij Lightroot | Misisi Lightroot |
| Cugukaram Lightroot | Kawamit Lightroot | Nipahsom Lightroot | Gedihcayam Lightroot |
| Anonisik Lightroot | Abandoned Eldin Mine | Scorching Coliseum | Abandoned Eldin Mine Forge Construct |
Eldin Canyon Depths Region Map: Lightroot Location, Chasms, and Quests
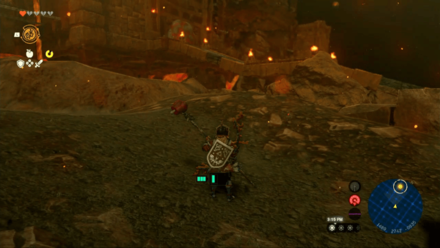
Eldin Mountains Depths
 View Full Image |
All Eldin Mountains Depths Locations
| All Areas and Locations | |||
|---|---|---|---|
| Katenim Lightroot | Uukukis Lightroot | Kayam Lightroot | Eldin Dark Skeleton |
Eldin Mountain Depths Region Map: Lightroot Location, Chasms, and Quests
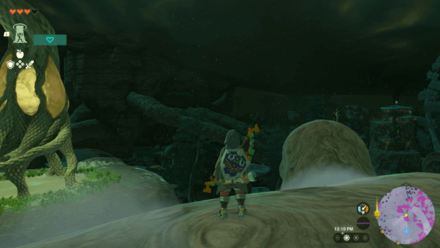
Akkala Highlands Depths
 View Full Image |
All Akkala Highlands Depths Locations
| All Areas and Locations | |||
|---|---|---|---|
| Akinatanis Lightroot | Wellspring of Power | Niuzimod Lightroot | Kawikatisar Lightroot |
| Kimimeg Lightroot | Agihi-ihcoj Lightroot | Sisinatag Lightroot | Abandoned Tarrey Mine |
| Rist Mine | Ancient Underground Fortress | Ulri Canyon Mine | Abandoned Tarry Mine Forge Construct |
Akkala Highlands Depths Region Map: Lightroot Location and Quests
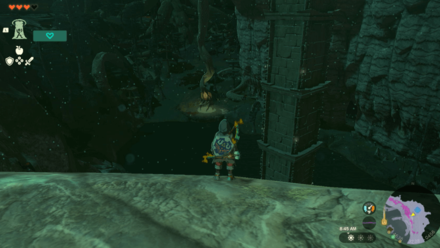
Akkala Sea Depths
 View Full Image |
All Akkala Sea Depths Locations
| All Areas and Locations | |||
|---|---|---|---|
| Kawisar Lightroot | Kuhsagi Lightroot | Lomei Depths Labyrinth | |
Akkala Sea Depths Region Map: Lightroot Location and Quests
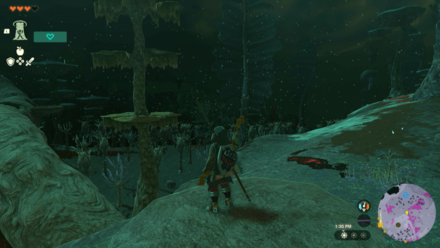
Deep Akkala Depths
 View Full Image |
All Deep Akkala Depths Locations
| All Areas and Locations | |||
|---|---|---|---|
| Akkala House of Bones | Sikutamak Lightroot | Ui-ihcoj Lightroot | Rok Grove |
Deep Akkala Depths Region Map: Lightroot Location and Quests
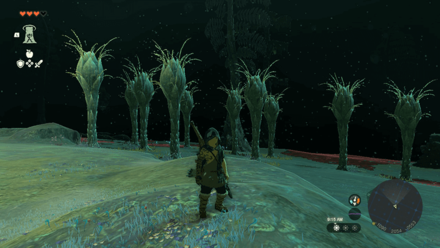
Great Hyrule Forest Depths
 View Full Image |
All Great Hyrule Forest Depths Locations
| All Areas and Locations | |||
|---|---|---|---|
| Uoyoyuik Lightroot | Nikakik Lightroot | Ramobnukas Lightroot | Eknupup Lightroot |
| Rikonasum Lightroot | Sijnin Lightroot | Uihcoke Lightroot | Korok Grove |
| Forest Coliseum | Gleeok Den | Minshi Grove | Drena Canyon Mine |
Great Hyrule Forest Depths Region Map: Lightroot Location and Quests
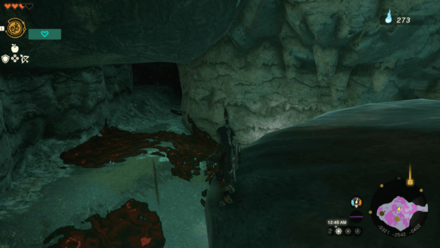
Lake Hylia Depths
 View Full Image |
All Lake Hylia Depths Locations
| All Areas and Locations | |||
|---|---|---|---|
| Amo-ne Lightroot | |||
Lake Hylia Depths Region Map: Lightroot Location and Quests
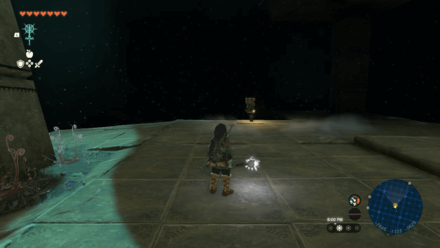
Hyrule Ridge Depths
 View Full Image |
All Hyrule Ridge Depths Locations
| All Areas and Locations | |||
|---|---|---|---|
| Tikanur Lightroot | Sikurukam Lightroot | Muzasu Lightroot | Napanos Lightroot |
| Nabahi-ikat Lightroot | Lindor Canyon Mine | Dalite Grove | |
Hyrule Ridge Depths Region Map: Lightroot Location and Quests
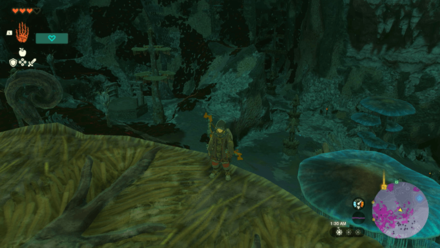
Lanayru Great Spring Depths
 View Full Image |
All Lanayru Great Spring Depths Locations
| All Areas and Locations | |||
|---|---|---|---|
| Takaruk Lightroot | Arusakam Lightroot | Migo-o Lightroot | Kegopa Lightroot |
| Kuzimoy Lightroot | Kawagom Lightroot | Uinoj Lightroot | A-nehi Lightroot |
| Ploymus Canyon Mine | Abandoned Lanayru Mine | Ruto Canyon Mine | Tabahl Grove |
| Abandoned Lanayru Mine Forge Construct | |||
Lanayru Great Spring Depths Region Map: Lightroot Location and Quests
Lanayru Wetlands Depths
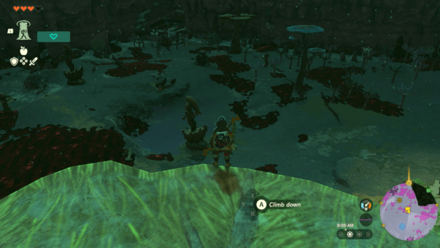 View Full Image |
All Lanayru Wetlands Depths Locations
| All Areas and Locations | |||
|---|---|---|---|
| Korom Lightroot | Korakut Lightroot | Uasnoj Lightroot | Sekioam Lightroot |
Lanayru Wetlands Depths Region Map: Lightroot Location and Quests
Mount Lanayru Depths
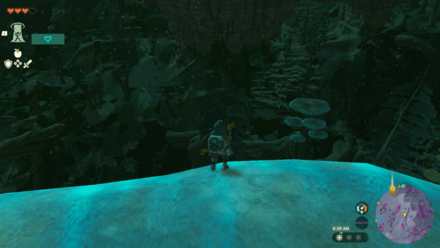 View Full Image |
All Mount Lanayru Depths Locations
| All Areas and Locations | |||
|---|---|---|---|
| Usukaz Lightroot | Uogoj Lightroot | Siakij Lightroot | Wellspring of Wisdom |
| Walnot Canyon Mine | Lanayru Canyon Mine | Madorna Canyon Mine | |
Mount Lanayru Depths Region Map: Lightroot Location and Quests
Faron Grasslands Depths
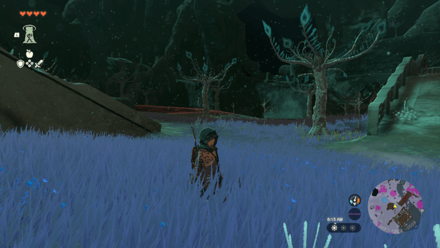 View Full Image |
All Faron Grasslands Depths Locations
| All Areas and Locations | |||
|---|---|---|---|
| Muokuij Lightroot | Left-Leg Depot | Wellspring of Courage | Kohsustu Lightroot |
| Nikohsi Lightroot | Left-Arm Depot | Dracozu Altar | Left-Leg Depot Device Dispenser |
Faron Grasslands Depths Region Map: Lightroot Location and Quests
East Necluda Depths
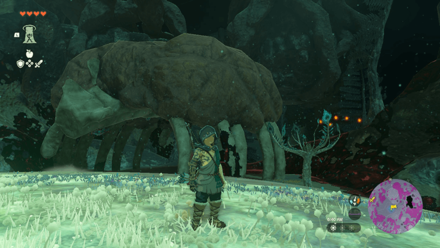 View Full Image |
All East Necluda Depths Locations
| All Areas and Locations | |||
|---|---|---|---|
| Abandoned Lurelin Mine | Abandoned Hateno Mine Forge Construct | Abandoned Lurelin Mine Forge Construct | Canyon of Awakening MIne |
| Abandoned Hateno Mine | Ginner Grove | Cresia Pit Mine | Dunsel Canyon Mine |
| Tuft Canyon Mine | Ancient Observation Deck | Floria Canyon Mine | Sijotu Lightroot |
| Ebon Canyon Mine | Midla Grove | Mimufis Lightroot | Kotimab Lightroot |
| Kimimadena Lightroot | Kimnaz Lightroot | Retsam Grove | Kisihayam Lightroot |
| Meda Canyon Mine | |||
East Necluda Depths Region Map: Lightroot Location and Quests
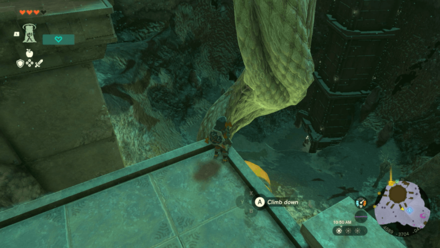
Necluda Sea Depths
 View Full Image |
All Necluda Sea Depths Locations
| All Areas and Locations | |||
|---|---|---|---|
| Ni-iraram Lightroot | Lone Island Coliseum | ||
Necluda Sea Depths Region Map: Lightroot Location and Quests
West Necluda Depths
 View Full Image |
All West Necluda Depths Locations
| All Areas and Locations | |||
|---|---|---|---|
| Busus Lightroot | Uisihcoj Lightroot | Yikot Lightroot | Construct Factory |
| Sohse Lightroot | U-u-ujoj Lightroot | Abandoned Kakariko Mine | Right-Leg Depot |
| Right-Arm Depot | Hickaly Grove | Meda Lavafalls | Rozudo Canyon Mine |
| Dueling Canyons Mine | Bubinga Grove | Secluded Coliseum | Abandoned Kakariko Mine Forge Construct |
West Necluda Depths Region Map: Lightroot Location and Quests
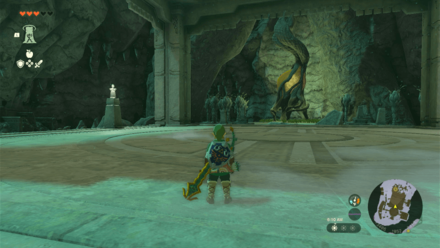
Hebra Mountains Depths
 View Full Image |
All Hebra Mountains Depths Locations
| All Areas and Locations | |||
|---|---|---|---|
| So-oaw Lightroot | Corvash Canyon Mine | Worihas Lightroot | Muihcoro Lightroot |
| Ikatoayam Lightroot | U-nazohso Lightroot | Narusis Lightroot | Muotue Lightroot |
| Nupisoyuat Lightroot | Kato Lightroot | Mu-ufatar Lightroot | North Lomei Depths Labyrinth |
| Sherfin's Lavafalls | Hebra Dark Skeleton | Goflam's Lavafalls | |
Hebra Mountains Depths Region Map: Lightroot Location and Quests
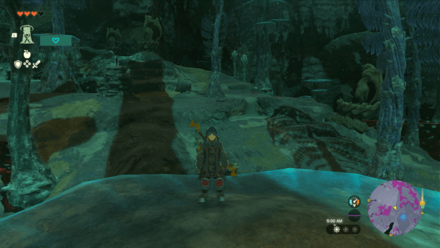
Tabantha Frontier Depths
 View Full Image |
All Tabantha Frontier Depths Locations
| All Areas and Locations | |||
|---|---|---|---|
| Kawumoro Lightroot | Kawakarut Lightroot | Koro-nui Lightroot | Kataki Lightroot |
| Cliff Bargainer Statue | Yisuayam Lightroot | Aduon Lightroot | Sasag Lightroot |
| Sikatag Lightroot | Abandoned Hebra Mine | Cuho Canyon Mine | Abandoned Hebra Mine Forge Construct |
Tabantha Frontier Depths Region Map: Lightroot Location and Quests
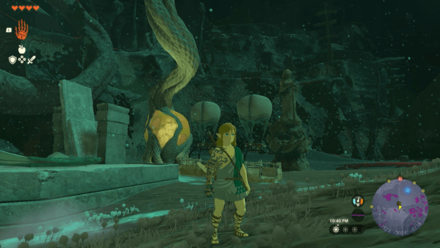
Gerudo Highlands Depths
 View Full Image |
All Gerudo Highlands Depths Locations
| All Areas and Locations | |||
|---|---|---|---|
| Kawatik Lightroot | Granajh Canyon Mine | South Lomei Depths Labyrinth | Sisustom Lightroot |
| Kimakarut Lightroot | Jadukakar Lightroot | Stamayam Lightroot | Umamustor Lightroot |
| Kawiraus Lightroot | Mustuto Lightroot | ||
Gerudo Highlands Depths Region Map: Lightroot Location and Quests
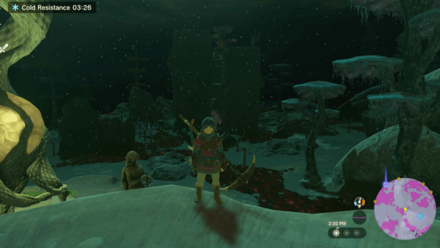
Gerudo Desert Depths
 View Full Image |
All Gerudo Desert Depths Locations
| All Areas and Locations | |||
|---|---|---|---|
| Amakawis Lightroot | Mihcihc Lightroot | Gonatoyros Lightroot | Abandoned Gerudo Mine |
| Kasari Lightroot | Gataharak Lightroot | Gerudo Underground Cemetery | Desert Coliseum |
| Gerudo Dark Skeleton | Gonatoyrim Lightroot | Rasinaduk Lightroot | Tatayam Lightroot |
| Abandoned Gerudo Mine Forge Construct | Abandoned Kara Kara Mine Forge Construct | ||
Gerudo Desert Depths Region Map: Lightroot Location and Quests
Tears of the Kingdom Related Guides

Interactive Map of Hyrule:
All Locations and Map Icons
All Area Maps and Locations
| Hyrule Map Locations | |||||
|---|---|---|---|---|---|
Other Maps
Author
The Legend of Zelda: Tears of the Kingdom Walkthrough & Guides Wiki
Hyrule Depths Map and Guide
improvement survey
03/2026
improving Game8's site?

Your answers will help us to improve our website.
Note: Please be sure not to enter any kind of personal information into your response.

We hope you continue to make use of Game8.
Rankings
- We could not find the message board you were looking for.
Gaming News
Popular Games

Genshin Impact Walkthrough & Guides Wiki

Honkai: Star Rail Walkthrough & Guides Wiki

Umamusume: Pretty Derby Walkthrough & Guides Wiki

Pokemon Pokopia Walkthrough & Guides Wiki

Resident Evil Requiem (RE9) Walkthrough & Guides Wiki

Monster Hunter Wilds Walkthrough & Guides Wiki

Wuthering Waves Walkthrough & Guides Wiki

Arknights: Endfield Walkthrough & Guides Wiki

Pokemon FireRed and LeafGreen (FRLG) Walkthrough & Guides Wiki

Pokemon TCG Pocket (PTCGP) Strategies & Guides Wiki
Recommended Games

Diablo 4: Vessel of Hatred Walkthrough & Guides Wiki

Cyberpunk 2077: Ultimate Edition Walkthrough & Guides Wiki

Fire Emblem Heroes (FEH) Walkthrough & Guides Wiki

Yu-Gi-Oh! Master Duel Walkthrough & Guides Wiki

Super Smash Bros. Ultimate Walkthrough & Guides Wiki

Pokemon Brilliant Diamond and Shining Pearl (BDSP) Walkthrough & Guides Wiki

Elden Ring Shadow of the Erdtree Walkthrough & Guides Wiki

Monster Hunter World Walkthrough & Guides Wiki

The Legend of Zelda: Tears of the Kingdom Walkthrough & Guides Wiki

Persona 3 Reload Walkthrough & Guides Wiki
All rights reserved
© Nintendo. The Legend of Zelda and Nintendo Switch are trademarks of Nintendo.
The copyrights of videos of games used in our content and other intellectual property rights belong to the provider of the game.
The contents we provide on this site were created personally by members of the Game8 editorial department.
We refuse the right to reuse or repost content taken without our permission such as data or images to other sites.
 Cap of Time
 Tunic of Time
 Trousers of Time
 Sheik's Mask
 Evil Spirit Mask
 Evil Spirit Armor
 Evil Spirit Greaves
 Majora's Mask
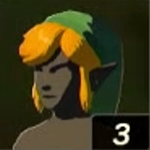 Cap of the Wind
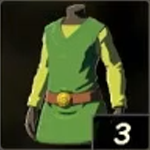 Tunic of the Wind
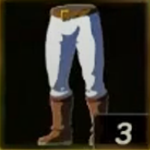 Trousers of the Wind
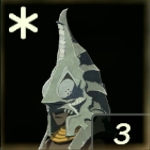 Zant's Helmet
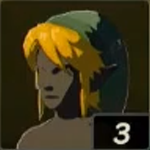 Cap of Twilight
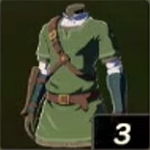 Tunic of Twilight
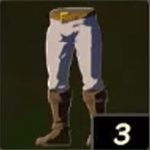 Trousers of Twilight
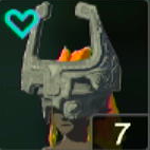 Midna's Helmet
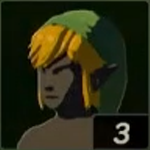 Cap of the Sky
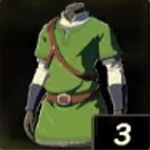 Tunic of the Sky
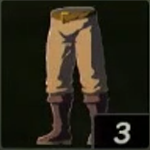 Trousers of the Sky
 Ravio's Hood
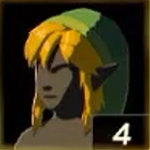 Cap of the Wild
 Tunic of the Wild
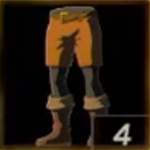 Trousers of the Wild
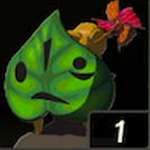 Korok Mask
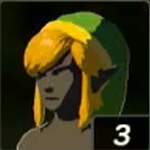 Cap of the Hero
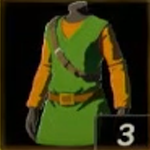 Tunic of the Hero
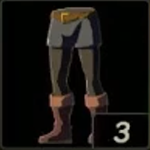 Trousers of the Hero
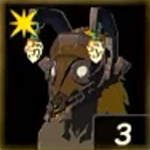 Miner's Mask
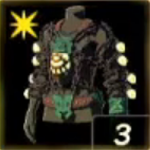 Miner's Top
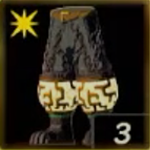 Miner's Trousers


![Monster Hunter Stories 3 Review [First Impressions] | Simply Rejuvenating](https://img.game8.co/4438641/2a31b7702bd70e78ec8efd24661dacda.jpeg/thumb)


Y’all got the ascend locations?