Guidance from Ages Past Walkthrough
▲ Get Pristine Weapons from the depths!
△ All 1000 Koroks | All 4 Great Fairies
▲ 81 Addison Signs | 147 Caves | 58 Wells
△ Tips: Farm Rupees | Starting Armor
▲ Best Weapons | Best Armor | Best Food
Guidance from Ages Past is a Main Quest in The Legend of Zelda: Tears of the Kingdom (TotK) that starts in Dragonhead Island. Read on for a detailed walkthrough of Guidance from Ages Past, its location and rewards, as well as other tips and strategies on how to complete this Main Quest!
| ◄ Previous Quest | Next Quest ▶ |
|---|---|
| Secret of the Ring Ruins | Trail of the Master Sword |
List of Contents
How to Unlock Guidance from Ages Past
Find the Zonai Relic in Dragonhead Island
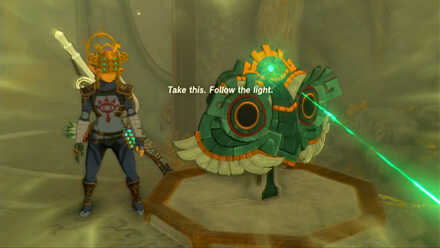
Follow the Secret of the Ring Ruins Main Quest to Dragonhead Island and examine the Zonai relic inside. This will point you to your next destination, which marks the beginning of Guidance from Ages Past.
Faron Grasslands - Dragonhead Island

The exact coordinates for this quest on the map are 1363, -3263, 0431.
Rewards
| Rewards |
|---|
| ・Vow of Mineru, Sage of Spirit |
Guidance from Ages Past Walkthrough Guide
| Guidance from Ages Past Guides | ||
|---|---|---|
| Finding the Mold | Southwest Depot | Northwest Depot |
| Northeast Depot | Southeast Depot | |
Finding the Mold
| Guidance from Ages Past Part 1 Walkthrough Guide |
|---|
Follow the Beam of Light
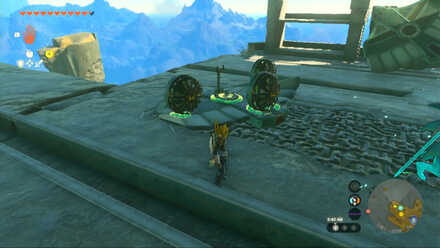
Carry the mask down the ramp and build a fanplane below using a wing, steering stick, and a couple of fans. You can also fasten rockets for faster acceleration.
When you're done, attach the mask at the tip of the wing and follow where it points.
Find the Hidden Passageway
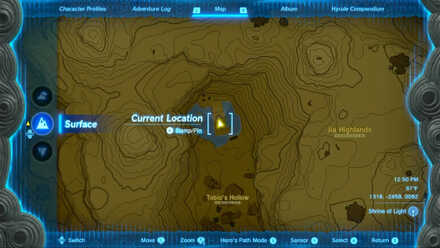
You will end up in front of a statue north of Tobio's Hollow. A hidden passageway will be revealed when you carry the mask at the pedestal, and will be where the mask points next.
Descend the Elevator
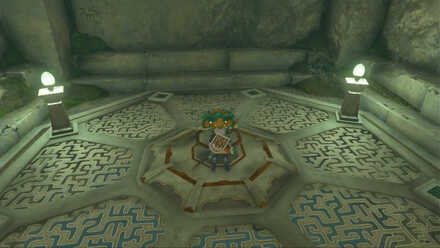
Take the mask and place it on the center of the platform to activate the elevator and start descending.
Place the Mask on the Mold
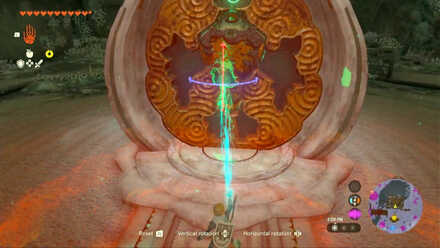
The mask will now point towards an incomplete construct at the center of the factory. Bring the mask with you and place it on the mold as the construct's head
.
Southwest Depot
| Southwest Depot Walkthrough Guide |
|---|
Head to Southwest Depot
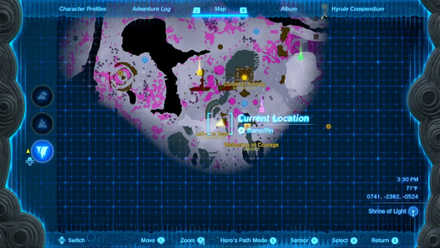
Head to the Southwest Depot (also called the Left-Arm Depot) with coordinates 0741, -2382, -0524 and interact with the terminal to drop a container holding a left arm.
This will close the entrance, forcing you to find another way back to the construct
Cross the Lava
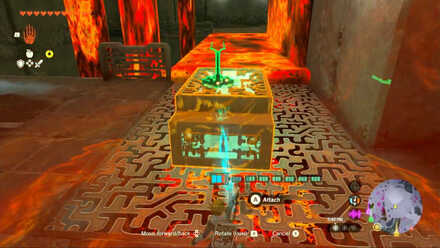
Hit the wheel next to you to open the gate. Bring the container to the other side and create a vehicle out of it so you can cross the lava.
Grab the two wheels from the other side of the gate, as well as the steering stick nearby and attach it to the container, and then drive your construct to the other side.
Repositioning and Crossing
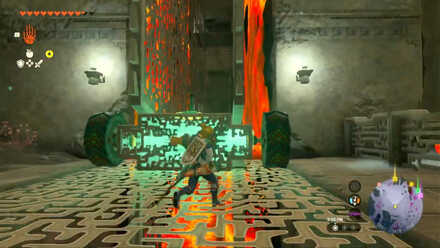
Do an overhaul on your container-vehicle and orient it sideways. Attach the wheels on the sides and reposition the steering stick. Drive it across the second lava path.
Use Recall
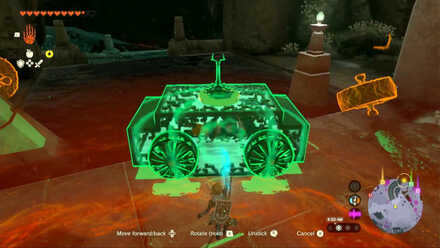
Use Recall on the closed gate to lift it back up, then slide the container under before it closes again.
Detach the wheels and attach two fans instead so you can drive it down the stream. Once you're back at the central area, take the container to the construct and place the right arm on the mold.
Northwest Depot
| Northwest Depot Walkthrough Guide |
|---|
Head to Northwest Depot
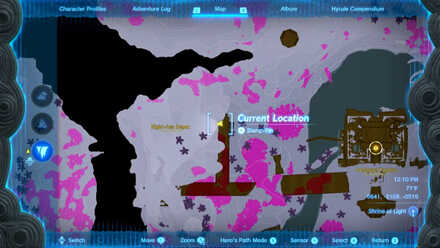
Cross the stone bridge west of the construct and head to northwest to the Right-Arm Depot at coordinates: 0641, -2108, 0519.
Use Ascend to phase through inside, and interact with the terminal to drop a contrainer with the right arm.
Cross to the Other Side
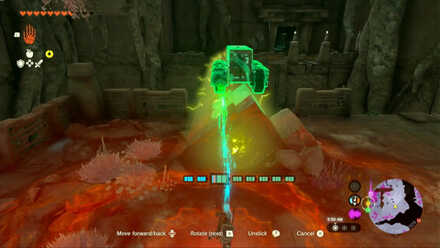
Place the container on the conveyor belt and follow it to the top. Grab four wheels and attach them on the container, two on each side.
Make sure the container is positioned horizontally, with the broad sides facing west and east. Place the makeshift box cart on the electric rail and let it cross to the other side.
Find a Steering Stick
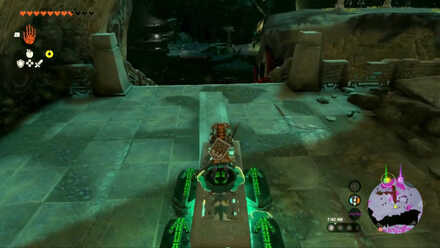
Glide to the other side and take the container to the next room, but make sure to keep the wheels attached. Grab a steering stick and attach it to the container.
Drive it down the slope and towards the construct mold at the center and place the right arm.
Northeast Depot
| Northeast Depot Walkthrough Guide |
|---|
Head to Northeast Depot
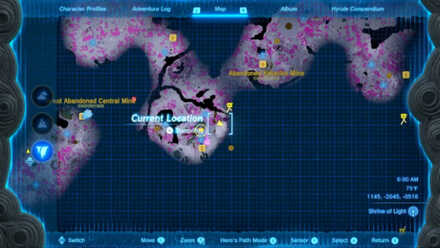
The Right-Leg Depot is at the northeast side of the factory at coordinates: 1145, -2045, -0516 and requires scaling the cliffs to reach it. Glide down from the platform near the lightroot to reach the depot.
Head inside and interact with the terminal to release a right leg container. Take the container to one of the lifts on the side and ride with it to the top.
Crossing the Rail
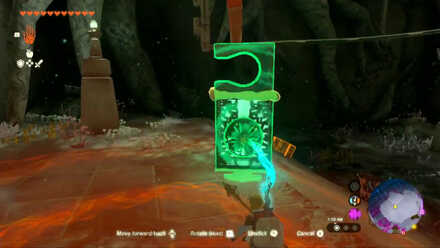
Attach a fan (from the lift) at the back of the container and a hook oriented like a reverse C
. Place it on the rail and turn on the fan to let it slide to the top.
Run to the spot beneath where the container is now and use Ascend to reach the next room.
Create a Fanplane
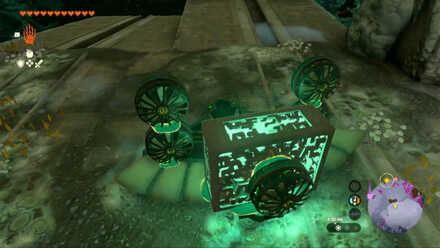
Take another lift to the upper floor with the container. You should find wings and more fans on the right side of the room.
Create a fanplane, by attaching fans and a steering stick on a wing, and use it to carry the container down to the central area and place the right leg on the mold.
Southeast Depot
| Northeast Depot Walkthrough Guide |
|---|
Head to Southeast Depot
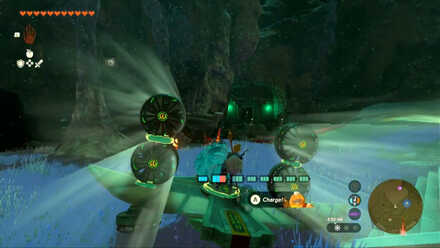
Return to the fanplane you used to descend and fly it southeast to reach the Left-Leg Depot at Coordinates: 0973, -2307, -0557.
Touch the terminal inside and take the container to the top via the rocket-propelled lift.
Fly to the Other Room
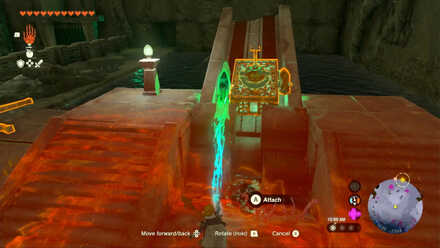
Turn the crank counter-clockwise until the moving bridge until it's sloped up to the next room. Attach a steering stick and rockets on the container, place it on the bridge, and fly it into the other room.
Heading Back to the Mold
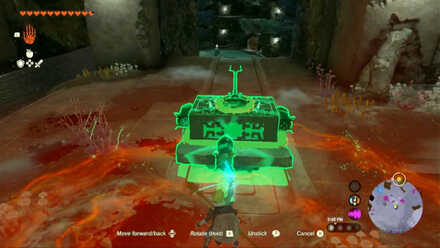
There are carts and some more rockets on the right side of the room that you can use. The carts are inside a room blocked by several beams, so you can either snatch them with Ultrahand or use the container as cover while you sneak beneath it, allowing you to reach the chest as well.
Fly straight to the construct and complete the vessel for Mineru.
Controlling Mineru's Construct
Mineru's construct can be used to traverse hazardous environments or attack enemies using various attachable objects. However, be extra careful in combat as you'll get easier to hit due to the construct's size.
Being a Zonai device itself, Mineru's construct's every move consumes battery charge. Make sure to increase your energy capacity to as much as you can to maximize its potential.
| Input | Action |
|---|---|
| Block incoming attacks from the front | |
| Attack with the attached left arm weapon or melee attack if unarmed | |
| Attack with the attached right arm weapon or melee attack if unarmed | |
| Use weapon attached on the construct's back | |
| Attach an object or a Zonai device on the construct. Press L, R, or Y to attach the item to their corresponding body parts. |
How to Use Vow of Mineru, Sage of Spirit
Head to the Spirit Temple
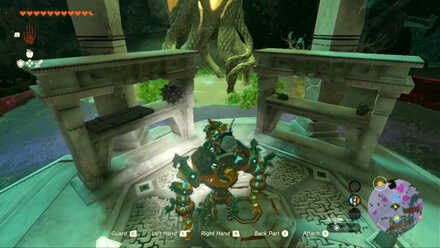
Hop on Mineru's construct and walk it towards the platform ahead to weaponize it further. Before you travel towards the temple, attach weapons and shields to the construct's arm, like how Captain Constructs do it.
Head to the location Mineru marked on your map to find the Spirit Temple.Defeat the Seized Construct and obtain the Vow of Mineru, Sage of Spirit, completing the quest.
| ◄ Previous Quest | Next Quest ▶ |
|---|---|
| Secret of the Ring Ruins | Trail of the Master Sword |
The Legend of Zelda: Tears of the Kingdom Related Guides

List of All Walkthroughs
| All Quest Types | ||
|---|---|---|
 Main Quests Main Quests |
 Side Quests Side Quests |
 Side Adventures Side Adventures |
List of All Main Quests
Comment
Author
The Legend of Zelda: Tears of the Kingdom Walkthrough & Guides Wiki
Guidance from Ages Past Walkthrough
improvement survey
03/2026
improving Game8's site?

Your answers will help us to improve our website.
Note: Please be sure not to enter any kind of personal information into your response.

We hope you continue to make use of Game8.
Rankings
- We could not find the message board you were looking for.
Gaming News
Popular Games

Genshin Impact Walkthrough & Guides Wiki

Honkai: Star Rail Walkthrough & Guides Wiki

Umamusume: Pretty Derby Walkthrough & Guides Wiki

Pokemon Pokopia Walkthrough & Guides Wiki

Resident Evil Requiem (RE9) Walkthrough & Guides Wiki

Monster Hunter Wilds Walkthrough & Guides Wiki

Wuthering Waves Walkthrough & Guides Wiki

Arknights: Endfield Walkthrough & Guides Wiki

Pokemon FireRed and LeafGreen (FRLG) Walkthrough & Guides Wiki

Pokemon TCG Pocket (PTCGP) Strategies & Guides Wiki
Recommended Games

Diablo 4: Vessel of Hatred Walkthrough & Guides Wiki

Fire Emblem Heroes (FEH) Walkthrough & Guides Wiki

Yu-Gi-Oh! Master Duel Walkthrough & Guides Wiki

Super Smash Bros. Ultimate Walkthrough & Guides Wiki

Pokemon Brilliant Diamond and Shining Pearl (BDSP) Walkthrough & Guides Wiki

Elden Ring Shadow of the Erdtree Walkthrough & Guides Wiki

Monster Hunter World Walkthrough & Guides Wiki

The Legend of Zelda: Tears of the Kingdom Walkthrough & Guides Wiki

Persona 3 Reload Walkthrough & Guides Wiki

Cyberpunk 2077: Ultimate Edition Walkthrough & Guides Wiki
All rights reserved
© Nintendo. The Legend of Zelda and Nintendo Switch are trademarks of Nintendo.
The copyrights of videos of games used in our content and other intellectual property rights belong to the provider of the game.
The contents we provide on this site were created personally by members of the Game8 editorial department.
We refuse the right to reuse or repost content taken without our permission such as data or images to other sites.


