The Surging Darkness Archon Quest Guide
✉ Send your thoughts in our Genshin 6.4 Patch Survey!
★ Exclusive: Dive back in time with the Meta History
◆ Hot: Version 6.4, Luna 5 Codes
◆ Builds: Varka, Flins, Skirk, Escoffier
◆ Events: Travelers' Tales, He Who Caught the Wind
◆ Future: Linnea, Version 6.5 Luna VI
The Surging Darkness is the third part of the Archon Quest Chapter 5, Act 4 in Genshin Impact. See how to unlock this quest, its walkthrough, and all the rewards of this quest here in this guide!
| Chapter 5: Act 4 Quests | ||
|---|---|---|
| Beneath the Secret Source | As One We Watch the Setting Sun | The Surging Darkness |
| Despair Engulfs the Heavens | No One Fights Alone | A Fuel Named ''Fate'' |
List of Contents
How to Unlock The Surging Darkness
Complete As One We Watch the Setting Sun
The Surging Darkness is a quest followed immediately after completing the previous subquest of the same act, As One We Watch the Setting Sun.
As One We Watch the Setting Sun
The Surging Darkness Walkthrough
Leave the Weary Inn and Join the Battle

Leave the Inn and talk to Mavuika just outside to assess the situation. It's now the time for war!
Before proceeding, make sure you have prepped your teams and characters as there will be multiple combat stages for the entirety of this next two quests. Bring your best teams to breeze through the challenges!
Best Team Comp | Party Building Guide
Battle Hotspots Basics
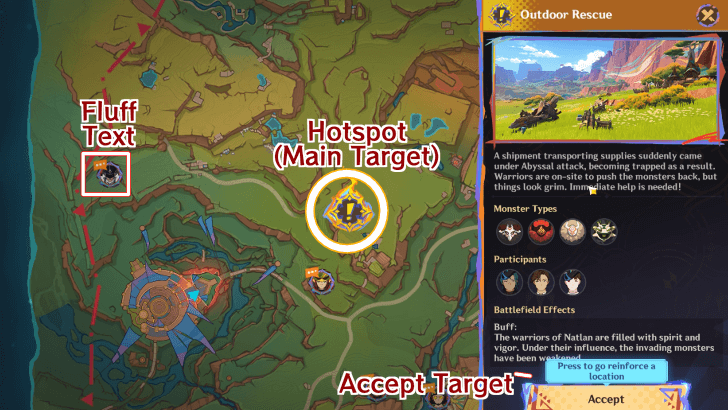
Opening the map will have you choose a battle Hotspot by clicking the icons that have an exclamation mark, then accepting them like a commission. Upon confirmation, you will either board the hot air balloon so it can transport you to those locations, or be teleported immediately.
The goal is to help the warriors ward off the enemies and destroy any Abyssal Pylons within the area, with optional objectives for added lore and context as you keep the area safe.
The rest of the icons on the map (with an ellipsis speech bubble) are just fluff. These serves as added context so you can read through the status of nearby tribes and characters fighting for Natlan.
Ride the Hot Air Balloon to Reinforce the Hotspot

After accepting the hotspot commission for Outdoor Rescue, you may choose to configure your party first before proceeding.
Once you're ready, ride the Hot Air Balloon found on the left side before the bridge.
Outdoor Rescue
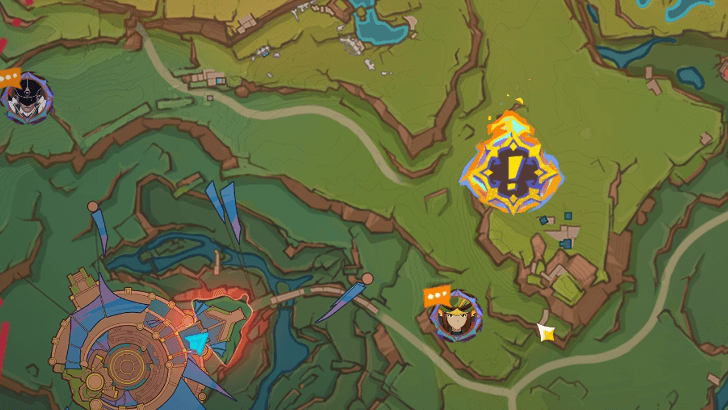
This serves as the tutorial for the hotspot battles. As the Hot Air Balloon closes in the location, you will see friendly Natlan warriors already fighting the Hilichurls.
The only real threat are the Dendro Samachurl and the Wooden Shield Mitachurl, but there's a chance that the attacks from the Pyro Hilichurl Shooter are already burning the Mitachurl's shield.
Optional Objectives
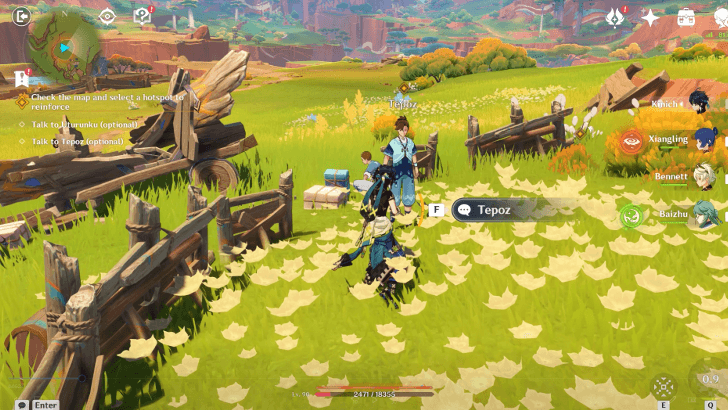
There will also be optional objectives for each hotspots. After every successful defense, you may choose to move to the next Hotspot by checking the map, or going around the area to talk or help warriors in need.
Check the Map and Select a Hotspot to Reinforce
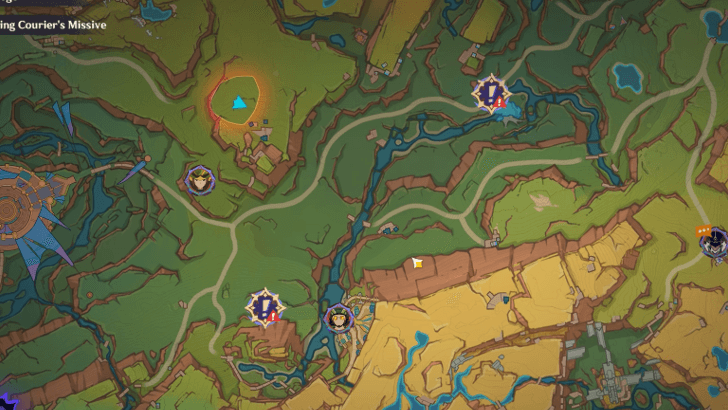
From this point, the path diverges to two possible choices, whichever you choose will have you going to the location and defeat enemies once more. You will need to accomplish two more diverging hotspots in total.
The next hotspot will have you destroy the Abyssal Pylon as well. As before, focus on hitting the Abyssal Pylon and fill the bar with fast attacks or any Elemental DMG to remove its protection, then destroy it to prevent further enemies from spawning.
More information will be included here as we confirm each choices.
Key Site Defense
Once you have completed two hotspots, there will only be one last hotspot to choose for this quest (indicated by a blazing exclamation point). Like before, go north to find the Abyssal Pylon then destroy it.
Rest here for a while
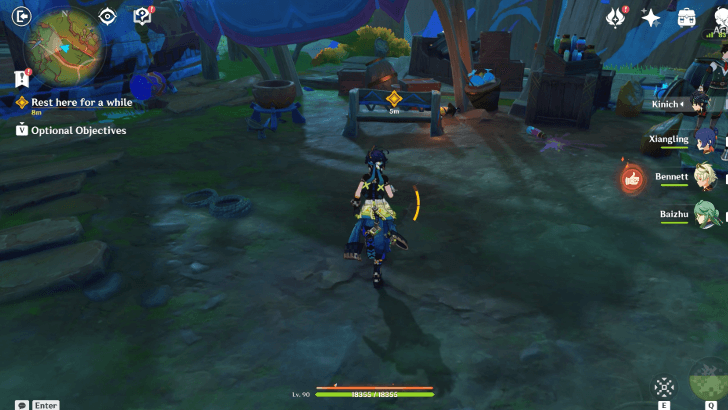
Take a moment of respite and rest alongside Kinich in the area. You may choose to talk to the people around you, or proceed to the next objective by sitting on the bench under a tent nearby the building.
Once you have fully rested, talk to Kinich once more.
Defeat the monsters and destroy the Abyssal Pylons
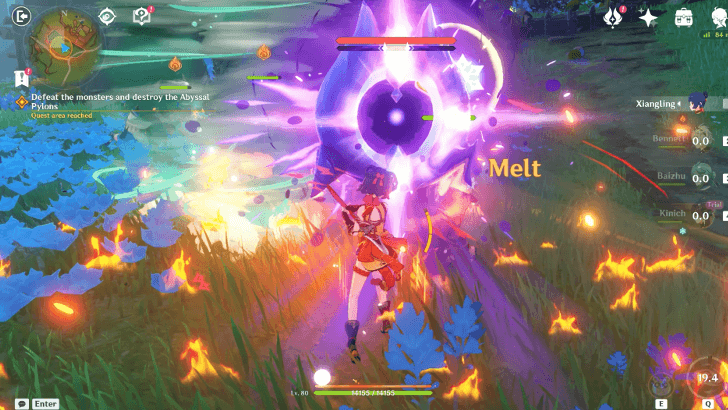
The Abyss pulls a surprise attack! Urgently help the warriors destroy the Abyssal Pylons once more. There will be two in total, so prioritize focusing on attacking the Pylon to prevent exhausting your team.
After a successful defense, a lengthy cutscene will play so sit back and relax as we finish the first half of this war!
The Surging Darkness Rewards
Total Quest Rewards
| Total Quest Rewards |
 Primogem x30 |
 Mora x60450 |
|---|---|---|
 Hero's Wit x5 |
||
Genshin Impact Related Guides

Other The Rainbow Destined to Burn Quest Guides
| The Rainbow Destined to Burn Quest Guides | ||
|---|---|---|
| Beneath the Secret Source | As One We Watch the Setting Sun | The Surging Darkness |
| Despair Engulfs the Heavens | No One Fights Alone | A Fuel Named "Fate" |
Comment
Author
The Surging Darkness Archon Quest Guide
improvement survey
03/2026
improving Game8's site?

Your answers will help us to improve our website.
Note: Please be sure not to enter any kind of personal information into your response.

We hope you continue to make use of Game8.
Rankings
Gaming News
Popular Games

Genshin Impact Walkthrough & Guides Wiki

Honkai: Star Rail Walkthrough & Guides Wiki

Umamusume: Pretty Derby Walkthrough & Guides Wiki

Pokemon Pokopia Walkthrough & Guides Wiki

Resident Evil Requiem (RE9) Walkthrough & Guides Wiki

Monster Hunter Wilds Walkthrough & Guides Wiki

Wuthering Waves Walkthrough & Guides Wiki

Arknights: Endfield Walkthrough & Guides Wiki

Pokemon FireRed and LeafGreen (FRLG) Walkthrough & Guides Wiki

Pokemon TCG Pocket (PTCGP) Strategies & Guides Wiki
Recommended Games

Diablo 4: Vessel of Hatred Walkthrough & Guides Wiki

Fire Emblem Heroes (FEH) Walkthrough & Guides Wiki

Yu-Gi-Oh! Master Duel Walkthrough & Guides Wiki

Super Smash Bros. Ultimate Walkthrough & Guides Wiki

Pokemon Brilliant Diamond and Shining Pearl (BDSP) Walkthrough & Guides Wiki

Elden Ring Shadow of the Erdtree Walkthrough & Guides Wiki

Monster Hunter World Walkthrough & Guides Wiki

The Legend of Zelda: Tears of the Kingdom Walkthrough & Guides Wiki

Persona 3 Reload Walkthrough & Guides Wiki

Cyberpunk 2077: Ultimate Edition Walkthrough & Guides Wiki
All rights reserved
Copyright© 2012-2024 HoYoverse — COGNOSPHERE. All Rights Reserved.
The copyrights of videos of games used in our content and other intellectual property rights belong to the provider of the game.
The contents we provide on this site were created personally by members of the Game8 editorial department.
We refuse the right to reuse or repost content taken without our permission such as data or images to other sites.


![Everwind Review [Early Access] | The Shaky First Step to A Very Long Journey](https://img.game8.co/4440226/ab079b1153298a042633dd1ef51e878e.png/thumb)

![Monster Hunter Stories 3 Review [First Impressions] | Simply Rejuvenating](https://img.game8.co/4438641/2a31b7702bd70e78ec8efd24661dacda.jpeg/thumb)


