Zhongli, Kokomi, and Arataki Itto, Zhongli Hypercarry Deck Build and How to Play
✉ Send your thoughts in our Genshin 6.4 Patch Survey!
★ Exclusive: Dive back in time with the Meta History
◆ Hot: Version 6.4, Luna 5 Codes
◆ Builds: Varka, Flins, Skirk, Escoffier
◆ Events: Travelers' Tales, He Who Caught the Wind
◆ Future: Linnea, Version 6.5 Luna VI

This is the user-submitted Zhongli Hypercarry Deck build for Zhongli, Kokomi, and Arataki Itto by BoomyLewis in Genshin Impact's Genius Invokation TCG. Check out all character and action cards for the Zhongli Hypercarry Deck and a guide on how to play it!
Zhongli Hypercarry Deck Build
List of Cards
| Main Characters Cards | |||||||||||
|---|---|---|---|---|---|---|---|---|---|---|---|
 Zhongli Zhongli
|
 Kokomi Kokomi
|
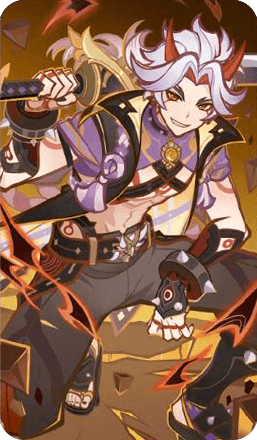 Arataki Itto Arataki Itto
|
|||||||||
| Action Cards |
 Archaic Petra Archaic Petra×1 |
 Tenacity of the Millelith Tenacity of the Millelith×2 |
 Paimon Paimon×1 |
 Elemental Resonance: Woven Stone Elemental Resonance: Woven Stone×2 |
|||||||
 Elemental Resonance: Enduring Rock Elemental Resonance: Enduring Rock×2 |
 Minty Meat Rolls Minty Meat Rolls×2 |
 Lotus Flower Crisp Lotus Flower Crisp×2 |
 Northern Smoked Chicken Northern Smoked Chicken×2 |
||||||||
 Mushroom Pizza Mushroom Pizza×2 |
 NRE NRE×2 |
 Favonius Cathedral Favonius Cathedral×2 |
 Vanarana Vanarana×2 |
||||||||
 Tenshukaku Tenshukaku×1 |
 Thunder and Eternity Thunder and Eternity×2 |
 Tamakushi Casket Tamakushi Casket×2 |
 Dominance of Earth Dominance of Earth×2 |
||||||||
 Vortex Vanquisher Vortex Vanquisher×1 |
|||||||||||
Submitted by a Reader!
The Zhongli Hypercarry Deck was built and submitted to us by our dear reader, BoomyLewis! You can check out his detailed strategy of how to play this deck by viewing his HoYoLab post!
Zhongli Hypercarry Deck How to Play
Zhongli Hypercarry Explanation
Strengths and Weaknesses
| Zhongli Hypercarry Deck Strengths | |||
|---|---|---|---|
|
• Extremely high survivability rate due to layers of shields and healing. • High DMG output once Zhongli has been fully built. • Action cards and Event cards synergize well with characters • Two characters of the same elemental type make for ensured usable dice. |
|||
| Zhongli Hypercarry Deck Weaknesses | |||
|
• Slightly slow-paced, which may pose a problem for battles with round limitations (win within 5 rounds). • Highly dependent on dice and cards on hand, which may be disruptive if roll and hand are not as desired. • Zhongli's shield is expensive in terms of dice cost. |
Zhongli Hypercarry Combo Cards
| Combo Card 1 | Combo Card 2 | Result |
|---|---|---|
 Archaic Petra Archaic Petra
|
 Dominance of Earth Dominance of Earth
|
- Ensures 2 Geo dice per roll. - Dominance of Earth automatically props up Zhongli's shield, and his Steele deals +1 DMG. |
 Vortex Vanquisher Vortex Vanquisher
|
 Tenacity of the Millelith Tenacity of the Millelith
|
- Provides a shield at the beginning of every phase. - Vortex Vanquisher reinforces shield provided by the Tenacity of the Milellith artifact set. |
 Elemental Resonance: Woven Stone Elemental Resonance: Woven Stone
|
 Elemental Resonance: Enduring Rock Elemental Resonance: Enduring Rock
|
- Provides one Geo die with Woven Stone. - Shields are reinforced with Enduring Rock. |
 Vanarana Vanarana
|
 Thunder and Eternity Thunder and Eternity
|
- Contributes to great dice management by reclaiming any unused dice in the previous round. - Thunder and Eternity is excellent for emergency purposes should your dice be completely unaligned. |
How to Play Zhongli Hypercarry Deck
Starting Cards
| Recommended Starting Hand | |||
|---|---|---|---|
 Archaic Petra Archaic Petra
|
 Tenacity of the Millelith Tenacity of the Millelith
|
 Vortex Vanquisher Vortex Vanquisher
|
 Dominance of Earth Dominance of Earth
|
 NRE NRE
|
 Thunder and Eternity Thunder and Eternity
|
 Vanarana Vanarana
|
 Favonius Cathedral Favonius Cathedral
|
The main focal point of this deck is none other than Zhongli, with both Kokomi and Itto on stand-by most of the time for support. With any luck, all your food cards, and the Favonius Cathedral, Kokomi might sit this one out and let you focus on Zhongli.
When playing support cards, one must be able to balance putting them on the field while ensuring action for Zhongli. Therefore, it's good to keep in mind that you should only play these support cards with whatever leftover dice you may have after acting.
Zhongli's Full Potential
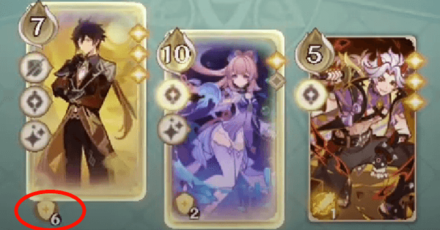
At first glance, one might think that Zhongli is purely for support and hefty shields. However, with the proper support cards and gameplay, his full potential for taking down enemies relentlessly can be unlocked.
Pairing his shield with DMG boosting cards and keeping his supports up, you are set to win even the hardest duels and even win battles against fellow Travelers with ease!
Reinforced Shield, Sharpened Spear
| Recommended Cards | |||
|---|---|---|---|
 Vortex Vanquisher Vortex Vanquisher
|
 Archaic Petra Archaic Petra
|
 Tenacity of the Millelith Tenacity of the Millelith
|
 Elemental Resonance: Enduring Rock Elemental Resonance: Enduring Rock
|
In order to unlock Zhongli's full combat prowess, the cards above are the most recommended to play. Tha Archaic Petra set should go to Itto as the main selling point of this card is to ensure 2 Geo dice for usage.
Vortex Vanquisher will be able to give you +1 DMG on all of Zhongli's attacks as well as shield reinforcement. Pair that with the Tenacity of the Millelith set and Elemental Resonance: Enduring Rock, you basically have a walking fortress.
Game Phases
Early Game
 Zhongli Zhongli
|
 Tenacity of the Millelith Tenacity of the Millelith
|
 Vanarana Vanarana
|
 Favonius Cathedral Favonius Cathedral
|
Start with Zhongli and get a kickstart on his shields. Before anything else, equip him with the Tenacity of the Millelith set if you're lucky enough to get it the first round. In the subsequent rounds, lay down the Favonius Cathedral card to keep Zhongli alive.
Make sure to attack at least once each round. Even if it's just a Normal ATK, at least it will move things forward. If you need any active healing, do not hesitate to consume restorative foods or swap to Kokomi. Make sure that Vanarana is on-field as well.
Mid-Game
 Vortex Vanquisher Vortex Vanquisher
|
 Archaic Petra Archaic Petra
|
 Elemental Resonance: Enduring Rock Elemental Resonance: Enduring Rock
|
 Thunder and Eternity Thunder and Eternity
|
If you pulled the Vortex Vanquisher, it will be in your best interest to let Zhongli have it, and equip Itto with the Archaic Petra set to guarantee usable dice. When push comes to shove, Thunder and Eternity will be able to pull you out of the fire.
Around this time, you should have a fully built Zhongli. Keep spamming his shields and swap to your other characters in case of emergencies. Your support cards will be able to keep Zhongli alive well into the late game.
Late Game
 Arataki Itto Arataki Itto
|
 NRE NRE
|
 Paimon Paimon
|
 Elemental Resonance: Woven Stone Elemental Resonance: Woven Stone
|
Towards the end, you can speed things along by switching to Itto should he be protected by a Shield. The Paimon card is a staple for any deck as it give a huge amount of Omni-element dice for usage.
If you played your cards right and Itto has multiple stacks of shields on him, you can keep attacking until he has enough Energy charges for his Elemental Burst. Unleash it and take down as many enemies as possible. Should he fall, you can switch back to Zhongli.
Zhongli Hypercarry Deck Best Used Against
Friendly Fracas
|
|
|
|
Due to this deck's survivability rate and DMG potential, it works extremely well when going up against formidable opponents like the ones in Tavern Challenges, boss cards, and battles against fellow Travelers in co-op!
However, due to this deck's slow start, as well lack of multi-targeting Elemental Reactions, it could be difficult to have it against decks that specialize in those said fields. Additionally, your strategy may be disrupted if your rolls and cards don't align.
What does this Deck Counter?
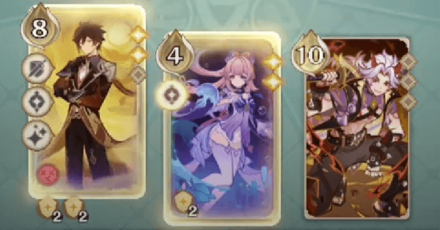
This is an exceptional deck for when you are expected to last a duel for a long time, and when you're going up against opponents with prodigious strikes, to the point that even Noelle or Itto's Bursts won't be able to break it easily.
When you see that your opponent's lineup contains cards with high DMG potential, this deck is a very good one to have in your arsenal.
How to Counter Zhongli Hypercarry Deck
Bypass Shields with Frozen Decks (Best)
 Mona Mona
|
 Kamisato Ayaka Kamisato Ayaka
|
 Ganyu Ganyu
|
Despite shields negating DMG, it does not mean that characters protected by them are immune to Elemental Reactions. Due to the Tenacity of the Millelith set, attacking an opponent protected by a shield will give them one aligned die.
In order to negate the sense of this as well, the best thing to do is to immobilize your targets and prevent them from acting at all. Even if they are protected by a shield, they won't be doing much if they can't act.
Pierce Your Way Through!
 Keqing Keqing
|
 Mona Mona
|
 Raiden Shogun Raiden Shogun
|
Another good way of circumventing shields is Piercing DMG. As the name suggests, attacks that deal Piercing DMG bypass shields, and the synergy of the cards above excels in doing just that.
Keqing's Elemental Burst, paired with the Raiden Shogun's Eye of Stormy Judgement and Mona's Illusory Bubble, as well as the Electro-Charged reaction, you can potentially cut the time to win the duel against this deck by half!
Genshin Impact Related TCG Guides

Genius Invokation Deck Building Guide
List of Decks
Author
Zhongli, Kokomi, and Arataki Itto, Zhongli Hypercarry Deck Build and How to Play
improvement survey
03/2026
improving Game8's site?

Your answers will help us to improve our website.
Note: Please be sure not to enter any kind of personal information into your response.

We hope you continue to make use of Game8.
Rankings
Gaming News
Popular Games

Genshin Impact Walkthrough & Guides Wiki

Honkai: Star Rail Walkthrough & Guides Wiki

Umamusume: Pretty Derby Walkthrough & Guides Wiki

Pokemon Pokopia Walkthrough & Guides Wiki

Resident Evil Requiem (RE9) Walkthrough & Guides Wiki

Monster Hunter Wilds Walkthrough & Guides Wiki

Wuthering Waves Walkthrough & Guides Wiki

Arknights: Endfield Walkthrough & Guides Wiki

Pokemon FireRed and LeafGreen (FRLG) Walkthrough & Guides Wiki

Pokemon TCG Pocket (PTCGP) Strategies & Guides Wiki
Recommended Games

Diablo 4: Vessel of Hatred Walkthrough & Guides Wiki

Fire Emblem Heroes (FEH) Walkthrough & Guides Wiki

Yu-Gi-Oh! Master Duel Walkthrough & Guides Wiki

Super Smash Bros. Ultimate Walkthrough & Guides Wiki

Pokemon Brilliant Diamond and Shining Pearl (BDSP) Walkthrough & Guides Wiki

Elden Ring Shadow of the Erdtree Walkthrough & Guides Wiki

Monster Hunter World Walkthrough & Guides Wiki

The Legend of Zelda: Tears of the Kingdom Walkthrough & Guides Wiki

Persona 3 Reload Walkthrough & Guides Wiki

Cyberpunk 2077: Ultimate Edition Walkthrough & Guides Wiki
All rights reserved
Copyright© 2012-2024 HoYoverse — COGNOSPHERE. All Rights Reserved.
The copyrights of videos of games used in our content and other intellectual property rights belong to the provider of the game.
The contents we provide on this site were created personally by members of the Game8 editorial department.
We refuse the right to reuse or repost content taken without our permission such as data or images to other sites.


![Everwind Review [Early Access] | The Shaky First Step to A Very Long Journey](https://img.game8.co/4440226/ab079b1153298a042633dd1ef51e878e.png/thumb)

![Monster Hunter Stories 3 Review [First Impressions] | Simply Rejuvenating](https://img.game8.co/4438641/2a31b7702bd70e78ec8efd24661dacda.jpeg/thumb)


This deck did not work for me. I lost like every single match using it