This survey will take about 1 minute.
Your answers will help us to improve our website.
Pokemon Legends: Arceus
The Slumbering Lord of the Tundra Walkthrough: How to Beat Sabi
✬ Pokemon HOME Dex Completion Shiny Rewards:
┗ Meloetta | Manaphy | Enamorus | Keldeo | Meltan
☆ Check out all PLA Pokemon Transferrable to BDSP!
★ Finish the story → Story Walkthrough
┣ Complete the Dex → Pokemon Locations / Trading Board
┗ Research Tasks → Best Tasks / Farm Research Points
The Slumbering Lord of the Tundra is a Mission in Pokemon Legends: Arceus. Read on to learn the Snowpoint Temple Puzzle Solution, with a walkthrough of the quest, including rewards, location, how to complete, and the Pokemon you need!
| ◀ Previous Mission | Next Mission ▶ | Scaling Perilous Heights | Disaster Looming |
|---|
List of Contents
The Slumbering Lord of the Tundra Walkthrough
Video Explanation
Mission Objectives
| Steps to proceed through The Slumbering Lord of the Tundra | |
|---|---|
| 1 | After speaking to Commander Kamado about the final Frenzied Lord, enter Captain Cyllene's office to recieve more information about the next area. You need to reach the rank of Fifth Star first before you can continue the mission. ▶ How to Increase Star Rank |
| 2 | Head over to the village gate and defeat Rei/Akari. You will be against a Lv46 Mr. Mime, a Lv46 Staravia, and a Lv47 Pikachu in this battle. |
| 3 | 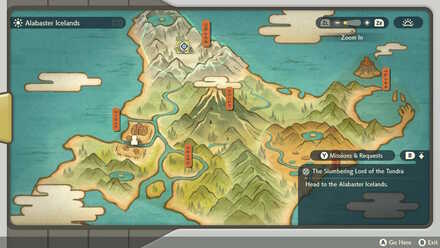 Travel to Alabaster Icelands and head to Avalugg's Legacy at the center of the map, where Gaeric will challenge you to a battle. Gaeric will send out a Lv48 Glalie and a Lv24 Froslass. |
| 4 | Talk to Sabi and follow her to Whiteout Valley. |
| 5 | Head north to Snowpoint Temple and reach to the top floor by solving the puzzles. First door: Rock → Steel → Ice Second door: Ice → Rock → Steel → Rock → Ice Third Door: Steel → Ice → Rock → Ice → Steel → Rock ▶ Snowpoint Temple Door Puzzle Solution |
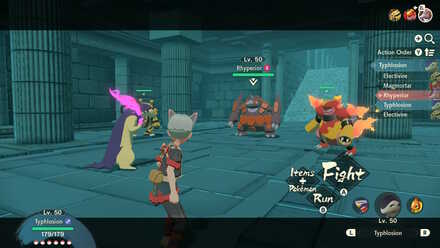
| 6 | Defeat Sabi in a trainer battle once at the top. Sabi will send in a Lv50 Rhyperior, a Lv30 Magmortar, and a Lv30 Electivire in this 3v1 battle. ▶ How to Beat Sabi |
| 7 | Prepare for the next battle, ascend the stairs, and prove your strength to Braviary next, which will be at Lv54. Braviary will be unlocked as a Rideable Pokemon after winning. |
| 8 | Fly down to the large mass of ice at the center of Avalugg's Legacy and obtain a piece of Eternal Ice. |
| 9 | Make your way to Icepeak Arena and quell the Frenzied Noble Hisuian Avalugg. ▶ Frenzied Noble Hisuian Avalugg Boss Guide |
| 10 | Report back to Commander Kamado to complete the mission. |
| ◀ Previous Mission | Next Mission ▶ | Scaling Perilous Heights | Disaster Looming |
|---|
The Slumbering Lord of the Tundra Tips and Strategies
Set Up the Icepeak Camp
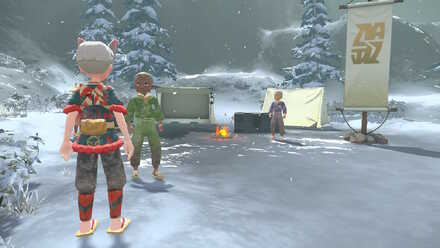
Before you proceed to the Pearl Settlement, make a left and find Brice south of Lake Acuity and accept his Request. Next, cross the river and find Craig by the tree and speak to him. Return to Brice to complete the Request and set up the Icepeak Camp.
This camp will make it easier for you to reach Snowpoint Temple and other areas on the upper half of the map.
Setting Up the Icepeak Camp Guide and Walkthrough
Opening the Doors in Snowpoint Temple
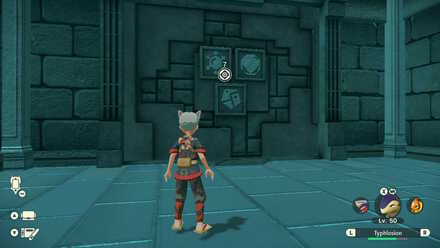
| Order to touch the panels | |
|---|---|
| 1st door | Rock → Steel → Ice |
| 2nd door | Ice → Rock → Steel → Rock → Ice |
| 3rd door | Steel → Ice → Rock → Ice → Steel → Rock |
To unlock the doors inside the Snowpoint Temple, you'll have to touch the panels in the order shown above. These marks are found on the statues along the path before the door.
Snowpoint Temple Door Puzzle Solutions
Best Pokemon to Use Against Sabi
| Recommended Pokemon | ||
|---|---|---|
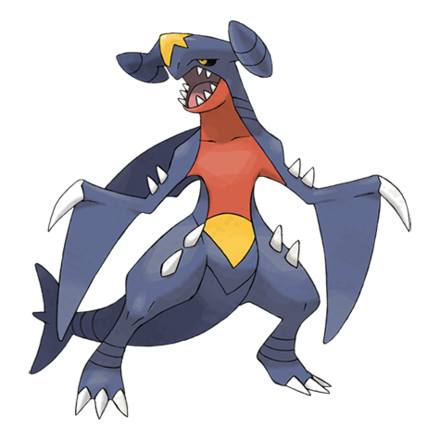 Garchomp Garchomp
|
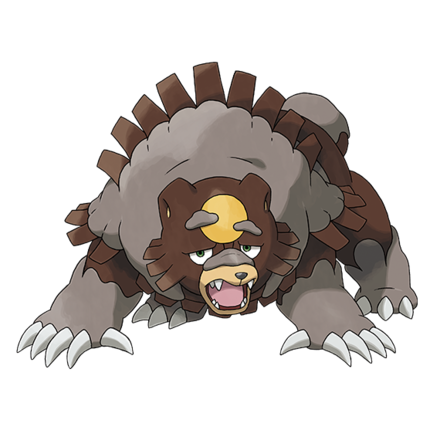 Ursaluna Ursaluna
|
 Hippowdon Hippowdon
|
All three Pokemon that Sabi will send out are weak to Ground type moves so it's best to bring Pokemon with strong Ground type moves that are also not weak to Electric, Ground, and Fire type moves like Garchomp, Ursaluna, and Hippowdon.
Additionally, you can take out Electivire first and let your Water type Pokemon handle Rhyperior and Magmortar.
Keep Dodging Avalugg's Attacks until the Ice Beam
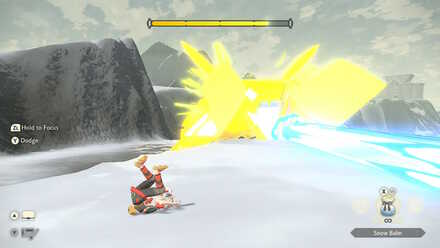
Most of Avalugg's attacks will have you running around the arena and dodging that you won't have enough chance to throw Snow Balms.
Keep dodging its attacks until the Ice Beam then throw in your strongest Pokemon with a Fighting or Steel type move. Defeat Avalugg in battle to stun and make it more vulnerable to balms for a short while.
The Slumbering Lord of the Tundra Information
| #12 The Slumbering Lord of the Tundra | |
|---|---|
 |
|
| Requested By | Commander Kamado |
| Description | Avalugg, the Lord of the Tundra, has been driven into a frenzy by the strange lightning. Investigate the matter and find a way to quell his frenzy. |
| Recommended Rank | 5 |
The Slumbering Lord of the Tundra Location
| The Slumbering Lord of the Tundra Map |
|---|
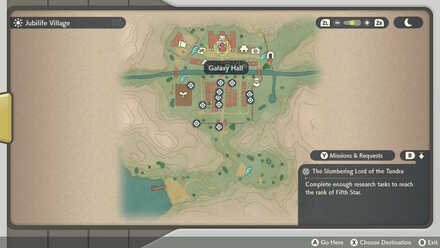 Alabaster Icelands |
How to Unlock The Slumbering Lord of the Tundra
Quell the Frenzied Noble Electrode
Following the events of the previous mission, once you have quelled the Noble Electrode, speak to Commander Kamado to unlock this mission.
Previous and Next Guides
| ◀ Previous Mission | Next Mission ▶ | Scaling Perilous Heights | Disaster Looming |
|---|
Pokemon Legends: Arceus Related Links

Story Walkthrough Guides
Other Story Walkthrough Guides
| Other Story Guides | |
|---|---|
| Arezu Location in Mission 8 | How to Get to Brava Arena |
| Snowpoint Temple Door Puzzle Solution | Story Summary and Ending Explained |
List of All Missions
| No. | Mission | No. | Mission |
|---|---|---|---|
| 1 | In an Unfamiliar Land | 2 | The Galaxy Team's Entry Trial |
| 3 | The Basics of Crafting | 4 | Getting to Work on Research Tasks |
| 5 | A Request from Mai | 6 | Summoned by Commander Kamado |
| 7 | The Frenzy of the Lord of the Woods | 8 | Arezu's Predicament |
| 9 | A New Mission | 10 | The Lordless Island |
| 11 | Scaling Perilous Heights | 12 | The Slumbering Lord of the Tundra |
| 13 | Disaster Looming | 14 | The Trial of Lake Verity |
| 15 | The Trial of Lake Valor | 16 | The Trial of Lake Acuity |
| 17 | Atop Mount Coronet | 18 | The Counterpart |
| 19 | A New Day Dawns | 20 | The Researcher of Myths |
| 21 | The Plate of the Lakes | 22 | The Plate of Firespit Island |
| 23 | The Plate of Moonview Arena | 24 | The Plate of Snowpoint Temple |
| 25 | The Plate of Prelude Beach | 26 | Seeking the Remaining Plates |
| 27 | The Deified Pokemon |
Author

The Slumbering Lord of the Tundra Walkthrough: How to Beat Sabi
Please participate in our site
improvement survey
03/2026
improvement survey
03/2026
Would you assist in
improving Game8's site?
improving Game8's site?

×
We are listening to our users' valuable opinions and discussing how to act on them.
The information collected through this survey will be used for the purpose of improving our services. In addition, the information will only be disclosed a part of a statistic in a format that will not allow identification of personal information.
Begin Survey
Not Now
×
Please rate each item regarding Game8.co's Advertisements.
Amount of Ads
Very Dissatisfied
Somewhat Dissatisfied
Fine
Somewhat Satisfied
Highly Satisfied
Placement of Ads
Timing of Ad Display
Ad Loading Speed
Safeness of Ads
Content of Ads
×
Please rate each item regarding Game8.co's Quality of Articles.
Amount of information
Very Dissatisfied
Somewhat Dissatisfied
Fine
Somewhat Satisfied
Highly Satisfied
Frequency of updates
Speed of new information
Accuracy of articles
Understandibility of articles
Readability of sentences
×
Please rate each item regarding Game8.co's Usability of the Site.
Ease of finding information
Very Dissatisfied
Somewhat Dissatisfied
Fine
Somewhat Satisfied
Highly Satisfied
Loading Speed
Use of Color
Font Size
Visibility of Images
Easy to Understand Layout
×
Please rate each item regarding Game8.co's Message Boards, Comments.
Ease of Writing
Very Dissatisfied
Somewhat Dissatisfied
Fine
Somewhat Satisfied
Highly Satisfied
Readability
Ease in Finding Information
Comment Quality
Comment Quantity
Admin Response
×
Please rate each item regarding Game8.co's Site's new design.
Please rate our site's new design
Very Dissatisfied
Somewhat Dissatisfied
Fine
Somewhat Satisfied
Highly Satisfied
Do you think that the website's design change makes the site easier to use?
Has the new design made it easier for you to find information on the site?
Has the new design improved the overall visual appeal of the site?
How would you rate your overall satisfaction with the new design of the site?
×
How likely are you to recommend Game8 to someone you know?
Very Unlikely
0
1
2
3
4
5
6
7
8
9
10
Very Likely
If you have other opinions regarding potential improvement to the website, please share them with us. We would appreciate your honest opinion.
Note: This is a free response section, so you can proceed without entering anything.
Note: Please be sure not to enter any kind of personal information into your response.
Note: Please be sure not to enter any kind of personal information into your response.
×
Thank You
×
Thank you for participating in our survey! Your answers will help us to improve the quality of our website and services.
We hope you continue to make use of Game8.
We hope you continue to make use of Game8.
Close
Rankings
- We could not find the message board you were looking for.
Gaming News


![Monster Hunter Stories 3 Review [First Impressions] | Simply Rejuvenating](https://img.game8.co/4438641/2a31b7702bd70e78ec8efd24661dacda.jpeg/thumb)
Popular Games

Genshin Impact Walkthrough & Guides Wiki
Honkai: Star Rail Walkthrough & Guides Wiki
Umamusume: Pretty Derby Walkthrough & Guides Wiki
Pokemon Pokopia Walkthrough & Guides Wiki
Resident Evil Requiem (RE9) Walkthrough & Guides Wiki
Monster Hunter Wilds Walkthrough & Guides Wiki
Wuthering Waves Walkthrough & Guides Wiki
Arknights: Endfield Walkthrough & Guides Wiki
Pokemon FireRed and LeafGreen (FRLG) Walkthrough & Guides Wiki
Pokemon TCG Pocket (PTCGP) Strategies & Guides Wiki


Recommended Games
Diablo 4: Vessel of Hatred Walkthrough & Guides Wiki
Cyberpunk 2077: Ultimate Edition Walkthrough & Guides Wiki
Fire Emblem Heroes (FEH) Walkthrough & Guides Wiki
Yu-Gi-Oh! Master Duel Walkthrough & Guides Wiki
Super Smash Bros. Ultimate Walkthrough & Guides Wiki
Pokemon Brilliant Diamond and Shining Pearl (BDSP) Walkthrough & Guides Wiki
Elden Ring Shadow of the Erdtree Walkthrough & Guides Wiki
Monster Hunter World Walkthrough & Guides Wiki
The Legend of Zelda: Tears of the Kingdom Walkthrough & Guides Wiki
Persona 3 Reload Walkthrough & Guides Wiki


All rights reserved
©2021 Pokémon. TM, ®Nintendo.
The copyrights of videos of games used in our content and other intellectual property rights belong to the provider of the game.
The contents we provide on this site were created personally by members of the Game8 editorial department.
We refuse the right to reuse or repost content taken without our permission such as data or images to other sites.