This survey will take about 1 minute.
Your answers will help us to improve our website.
Zelda: Tears of the Kingdom (TotK)
Armor Sets List and All Set Bonuses
▲ Get Pristine Weapons from the depths!
△ All 1000 Koroks | All 4 Great Fairies
▲ 81 Addison Signs | 147 Caves | 58 Wells
△ Tips: Farm Rupees | Starting Armor
▲ Best Weapons | Best Armor | Best Food

Armor Sets can be equipped to gain Set Bonuses in The Legend of Zelda: Tears of the Kingdom (TotK). Read on to learn where to find all 36 armor sets, and see all effects and set bonuses they provide.
| Armor Guides | ||
|---|---|---|
| Armor List | Armor Sets | How to Upgrade Armor |
List of Contents
All Armor Sets and Set Bonuses List
There are 36 Armor Sets including the Ancient Hero's Aspect in The Legend of Zelda: Tears of the Kingdom and equipping some of the sets will grant Set Bonuses which are passives that will massively help in exploration or in battle.
Some of the armor sets are acquirable through scanning certain amiibos but they are still obtainable within the game.
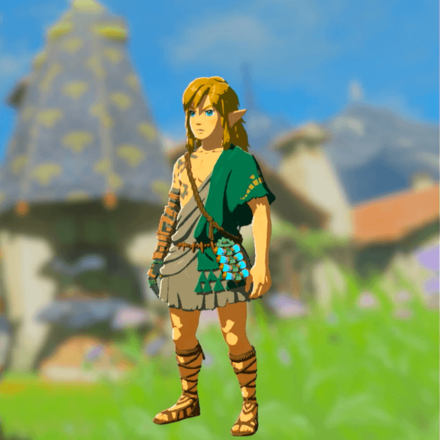
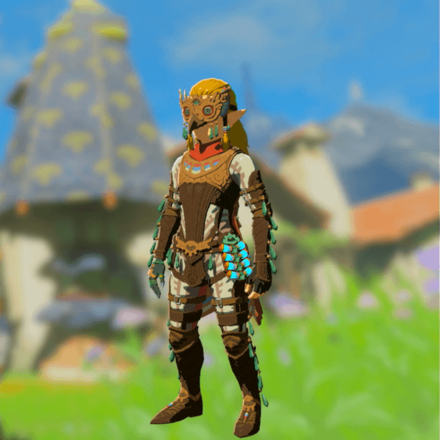
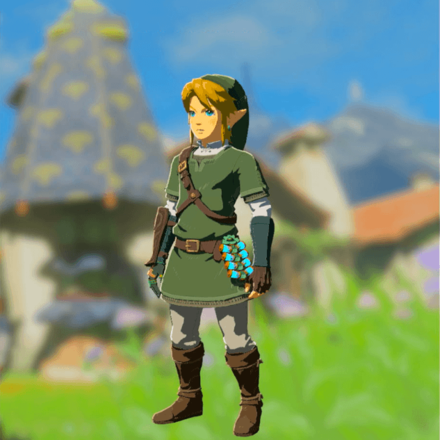
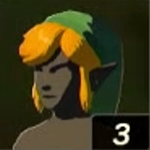
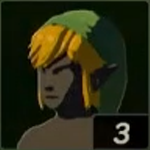
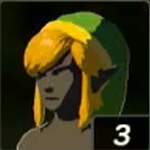
Ancient Hero's Aspect
| Ancient Hero's Aspect Location and Set Bonus | ||
|---|---|---|
 |
||
|
|
Location: Temple of Time Coordinates: 0453, - 0762, 1467 |
|
|
|
Location: Temple of Time Coordinates: 0453, - 0762, 1467 |
|
|
|
Location: Temple of Time Coordinates: 0453, - 0762, 1467 |
|
| Set Bonus | ||
| Master Sword Beam Up: Increases the attack power of Master Sword Beam | ||
You can get the Ancient Hero's Aspect from the Temple of Time after completing all 152 Shrines. Equipping the set allows you to power up your Master Sword's Beam.
How to Get the Ancient Hero's Aspect Armor
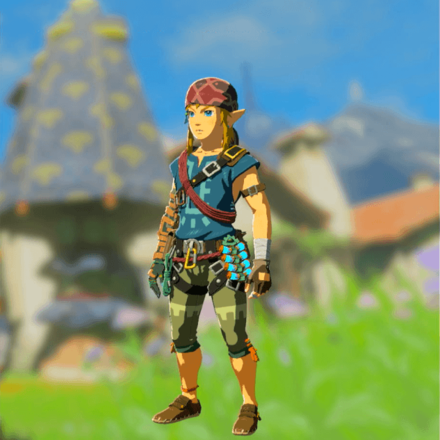
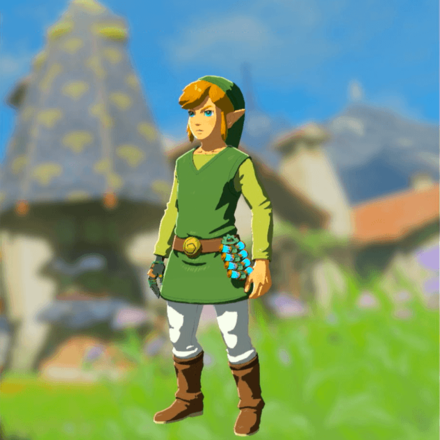
Archaic Set
| Archaic Set Location and Set Bonus | |
|---|---|
 |
|
| No Headgear | - |
|
|
Location: Room of Awakening |
|
|
Location: Pondside Cave (Sky Islands) |
| Set Bonus | |
| None | |
The Archaic Set is readily available at the beginning of the game. You can find the complete set while exploring the Great Sky Island.
Barbarian Set
| Barbarian Set Location and Set Bonus | ||
|---|---|---|
 |
||
|
|
Location: Robred Dropoff Cave, East Necluda Coordinates: 2519, - 1532, - 0024 |
|
|
|
Location: Crenel Hills Cave Coordinates: 2519, - 1532, - 0024 |
|
|
|
Location: Walnot Mountain Cave, East Necluda Coordinates: 2519, - 1532, - 0024 |
|
| Set Bonus | ||
| Charge Atk. Stamina Up: Decreases the stamina used by charged attacks. | ||
The Barbarian Set is one of the best armors to equip as it allows you to use charge attacks without losing too much stamina. You can get the complete Barbarian Set from Misko's Treasures side quests. Keep on the lookout for Meeshy to get the map trackers.
Charged Set
| Charged Set Location and Set Bonus | ||
|---|---|---|
 |
||
|
|
Location: Dracozu River near Dracozu Lake Coordinates: 0984, -2827, 0012 |
|
|
|
Location: Dracozu Lake near Spring of Courage Coordinates: 0984, -2827, 0012 |
|
|
|
Location: Damel Forest near Dracozu Lake Coordinates: 0984, -2827, 0012 |
|
| Set Bonus | ||
| Stormy Weather Charge: Charge attacks are faster on stormy weather. | ||
To get the Charged Set, make sure to have the Secret of the Ring Ruins main quest active first before going to Dracozu Lake. Head to Kakariko Village and talk to Paya to unlock this main quest.
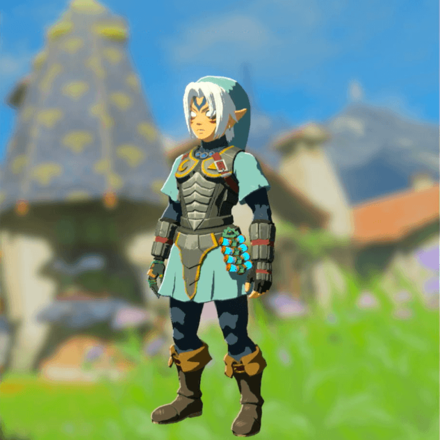
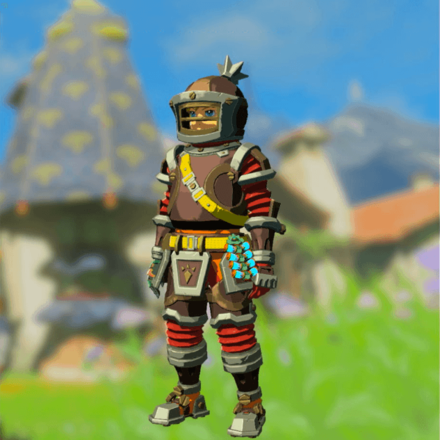
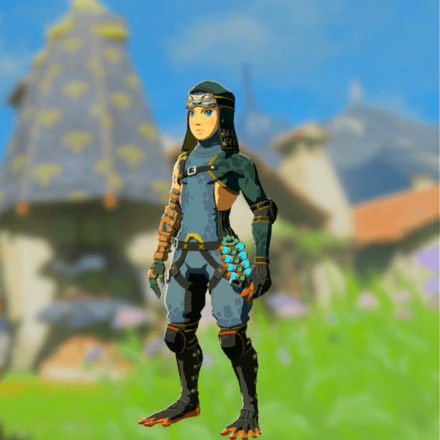
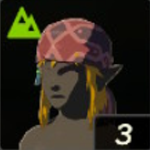
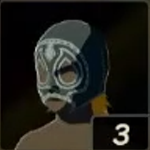
Climbing Set
| Climbing Set Location and Set Bonus | ||
|---|---|---|
 |
||
|
|
Location: Upland Zorana Byroad Coordinates: 3726, 0492, 0309 |
|
|
|
Location: North Hyrule Plain Cave Coordinates: 3726, 0492, 0309 |
|
|
|
Location: Ploymus Mountain Cave Coordinates: 3726, 0492, 0309 |
|
| Set Bonus | ||
| Climbing Jump Stamina Up: Decreases the stamina used when jumping while climbing. | ||
Equipping the Climbing Set can help you climb surfaces effectively with the added speed. You can also get the Climbing Gear through Misko's Treasure Side Quest.
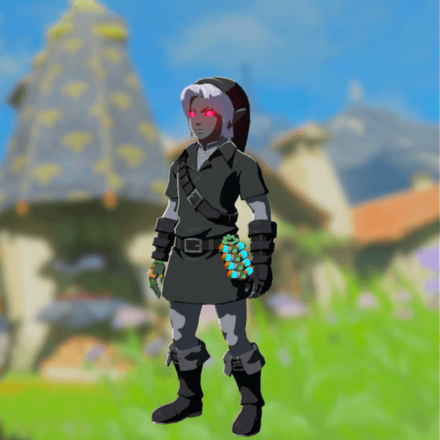
Dark Set
| Dark Set Location and Set Bonus | ||
|---|---|---|
 |
||
|
|
Location: Bargainer Statue (Depths) Coordinates: 0883, - 2404, - 0393 |
|
|
|
Location: Bargainer Statue (Depths) Coordinates: 0883, - 2404, - 0393 |
|
|
|
Location: Bargainer Statue (Depths) Coordinates: 0883, - 2404, - 0393 |
|
| Set Bonus | ||
| Night Speed Up: Increases movement speed when it's night. | ||
The Dark Set can help you boost your movement speed when exploring at night. You can get the complete set from the Bargainer Statue, so make sure to bring in a lot of poes.
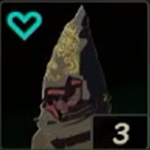
Depths Set
| Depths Set Location and Set Bonus | ||
|---|---|---|
 |
||
|
|
Location: Bargainer Statue (Depths) Coordinates: - 1029, 2691, - 0273 |
|
|
|
Location: Bargainer Statue (Depths) Coordinates: - 1029, 2691, - 0273 |
|
|
|
Location: Bargainer Statue (Depths) Coordinates: - 1029, 2691, - 0273 |
|
| Set Bonus | ||
| Gloom Attack Resist: Gives additional Gloom resistance(another heart). | ||
The Depths Set is one of the best armor sets to equip when exploring the Depths as it can help you resist gloom attacks from enemies. It is also the recommended armor set to wear when facing Gloom Hands and Phantom Ganon. You can also buy this from Bargainer Statues using poes.
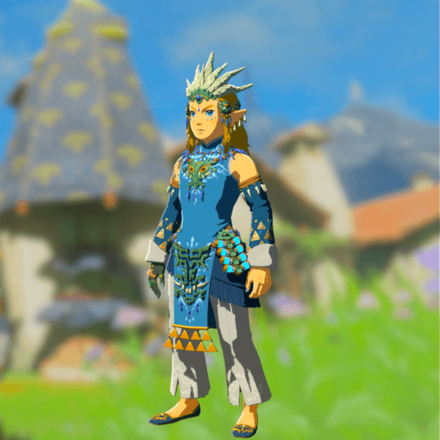
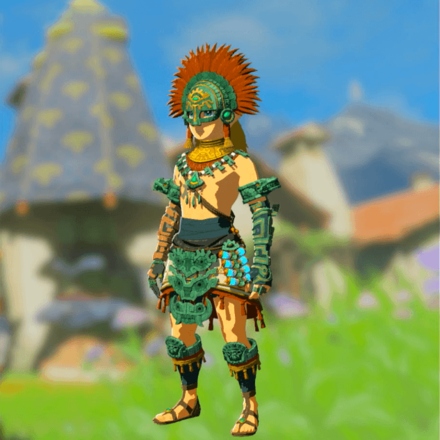
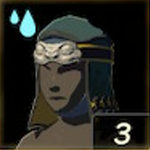
Desert Voe Set
| Desert Voe Set Location and Set Bonus | ||
|---|---|---|
 |
||
|
|
Location: Kara Kara Bazaar (Gerudo Desert) Coordinates: - 3273, - 2556, 0023 |
|
|
|
Location: Gerudo Secret Club (Gerudo Town) Coordinates: - 3273, - 2556, 0023 |
|
|
|
Location: Gerudo Secret Club (Gerudo Town) Coordinates: - 3273, - 2556, 0023 |
|
| Set Bonus | ||
| Shock Damage Resist: Reduce damage from electric attacks. | ||
The Desert Voe Set is one of the most ideal armor set to equip when exploring Gerudo Desert. The set bonus can also protect your from taking shock damages from roaming Electric Lizalfos and Electric Keeses in the region.
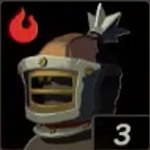
Ember Set
| Ember Set Location and Set Bonus | ||
|---|---|---|
 |
||
|
|
Location: YunoboCo HQ South Cave north of Goron City Coordinates: 1579, 2756, 0382 |
|
|
|
Location: Goronbi River Cave southwest of Goron Hot Springs Coordinates: 1579, 2756, 0382 |
|
|
|
Location: Cephla Lake Cave in Eldin Canyon Coordinates: 1579, 2756, 0382 |
|
| Set Bonus | ||
| Hot Weather Charge: Charge attacks are faster on hot weather. | ||
The Ember Set allows you to use charge attacks faster on areas with hot weather. You can also get the Ember Trousers as part of the Misko's Cave of Chests side quest.
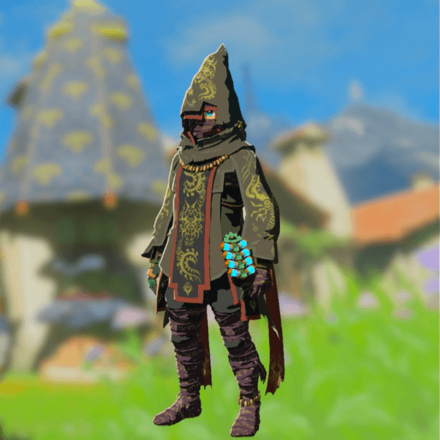
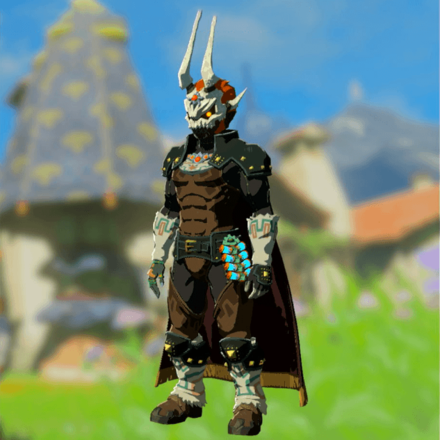
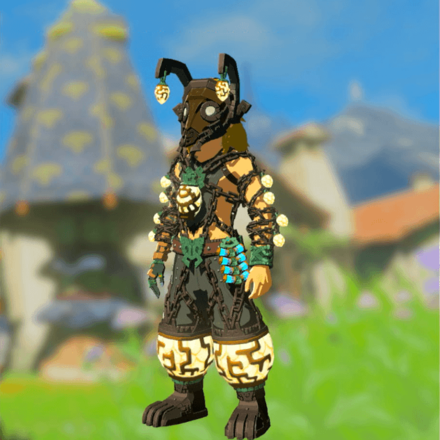
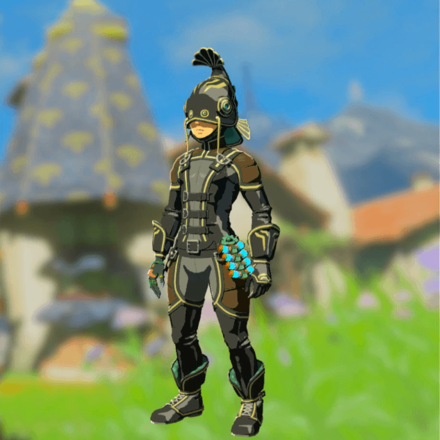
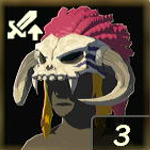
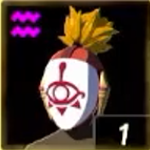
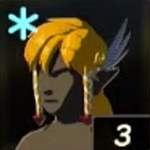
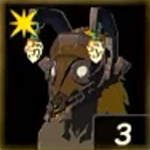
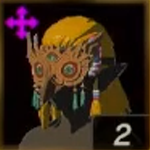
Evil Spirit Set
| Evil Spirit Set Location and Set Bonus | ||
|---|---|---|
 |
||
|
|
Location: South Lomei Coordinates: - 1793, - 3462, - 0522 |
|
|
|
Location: Lomei Labyrinth Island Coordinates: - 1793, - 3462, - 0522 |
|
|
|
Location: North Lomei Coordinates: - 1793, - 3462, - 0522 |
|
| Set Bonus | ||
| Disguise; Bone Weap. Prof.: Makes Stal enemies not attack and increases your damage with bone weapons. | ||
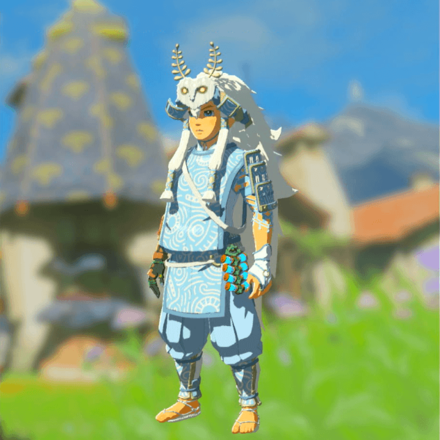
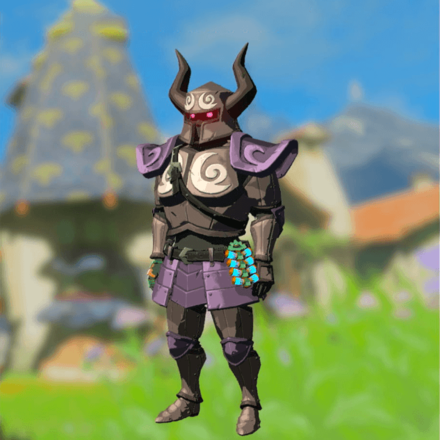
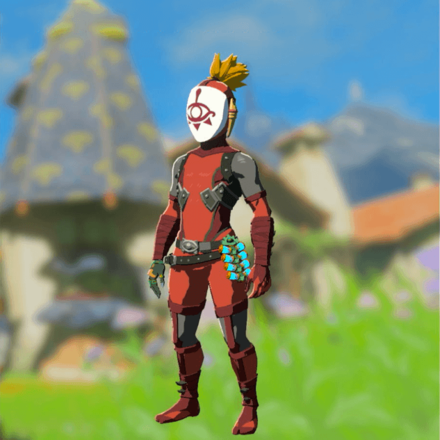
The Evil Spirit Set can protect you from getting ambushed by Stal enemies. The set also upgrades your bone weapons, making them more efficient to use on combats.
This armor set takes its inspiration from Phantom Ganon's design in Ocarina of Time.
How to Get the Evil Spirit Set
Fierce Deity Set
| Fierce Deity Set Location and Set Bonus | ||
|---|---|---|
 |
||
|
|
Location: Skull Lake Cave Coordinates: 3428, 3299, - 0125 |
|
|
|
Location: Akkala Citadel Ruins Summit Cave Coordinates: 3428, 3299, - 0125 |
|
|
|
Location: Ancient Tree Stump Coordinates: 3428, 3299, - 0125 |
|
| Set Bonus | ||
| Charge Atk. Stamina Up: Decreases the stamina used by charged attacks. | ||
The Fierce Deity Set is one of the best armor sets to have as it allows you to do charge attacks without using too much stamina. You can get the complete set from Misko's Treasure side quest.
How to Get the Fierce Deity Set
Flamebreaker Set
| Flamebreaker Set Location and Set Bonus | ||
|---|---|---|
 |
||
|
|
Location: Goron City Armor Store Coordinates: 1643, 2408, 0384 |
|
|
|
Location: Near Darunia Lake Goron City Armor Store Coordinates: 1643, 2408, 0384 |
|
|
|
Location: Goron City Armor Store Coordinates: 1643, 2408, 0384 |
|
| Set Bonus | ||
| Fireproof: Provides protection from fire. | ||
The Flamebreaker Set is a readily available armor set that you can purchase at the Armor Shop in Goron City. You can use this set to prevent yourself from getting continuous heat damage in the Fire Temple.
How to Get the Flamebreaker Set
Froggy Set
| Froggy Set Location and Set Bonus | ||
|---|---|---|
 |
||
|
|
Location: Lucky Clover Gazette Coordinates: - 3257, 1764, 0119 |
|
|
|
Location: Lucky Clover Gazette Coordinates: - 3257, 1764, 0119 |
|
|
|
Location: Lucky Clover Gazette Coordinates: - 3257, 1764, 0119 |
|
| Set Bonus | ||
| Slip Proof: Prevents slipping when climbing during the rain. | ||
Equipping the Froggy Set can help you climb wet surfaces effectively without slipping. This is a good set to equip when exploring wet areas such as river caves and West Necluda's rain forests. You can get this set as you progress through the Potential Princess Sightings side quest.
Frostbite Set
| Frostbite Set Location and Set Bonus | ||
|---|---|---|
 |
||
|
|
Location: Brightcap Cave Coordinates: - 3885, 2888, - 0007 |
|
|
|
Location: Lake Kilsie Cave, Hebra Mountains Coordinates: - 3885, 2888, - 0007 |
|
|
|
Location: Hebra Headspring Cave, Tabantha Frontier Coordinates: - 3885, 2888, - 0007 |
|
| Set Bonus | ||
| Cold Weather Charge: Charge attacks are faster on cold weather. | ||
The Frostbite Set allows you to use charge attacks faster on areas with cold weather. This is a good set to equip when doing the Bring Peace to Hebra side adventure as it requires you to take down monster camps under the cold weather of Hebra Mountains.
Glide Set
| Glide Set Location and Set Bonus | ||
|---|---|---|
 |
||
|
|
Location: Valor Island Coordinates: 4548, - 0846, 1120 |
|
|
|
Location: Courage Island Coordinates: 4548, - 0846, 1120 |
|
|
|
Location: Bravery Island Coordinates: 4548, - 0846, 1120 |
|
| Set Bonus | ||
| Impact Proof: Negates fall damage. | ||
The Glide Set allows you to take free falls without getting damage from the impact. You can get the complete set by partaking in the dive ceremonies on Valor Island, Courage Island, and Bravery Island.
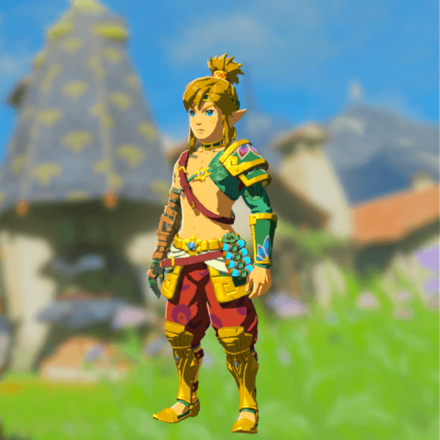
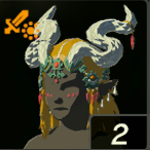
Hero of Awakening Set
| Hero of Awakening Set Location and Set Bonus | ||
|---|---|---|
 |
||
|
|
Location: Thundra Plateau Cave, Hyrule Ridge Coordinates: - 2267, 0851, 0081 |
|
|
|
Location: Ancient Columns Cave, Tabantha Frontier Coordinates: - 2267, 0851, 0081 |
|
|
|
Location: Coliseum Ruins Cave, Hyrule Field Coordinates: - 2267, 0851, 0081 |
|
| Set Bonus | ||
| Attack Up: Increases attack power. | ||
You can get the complete Hero of Awakening Set from either completing the Misko's Treasure of Awakening or scanning the Link's Awakening amiibo.
This armor set takes inspiration from Link's design in the latest remake of Link's Awakening.
How to Get the Hero of Awakening Set
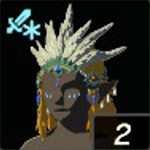
Hero of the Sky Set
| Hero of the Sky Set Location and Set Bonus | ||
|---|---|---|
 |
||
|
|
Location: Retsam Grove, East Necluda Depths Coordinates: 3822, - 1985, - 0632 |
|
|
|
Location: Minshi Grove, Great Hyrule Forest Depths Coordinates: 3822, - 1985, - 0632 |
|
|
|
Location: Crenel Canyon Mine, Central Hyrule Depths Coordinates: 3822, - 1985, - 0632 |
|
| Set Bonus | ||
| Attack Up: Increases attack power. | ||
Using Old Maps, you can get trackers to find the Hero of the Sky Set in the Depths. You can also get the Hero of the Sky Set by scanning Link's Skyward Sword amiibo.
This armor set takes inspiration from Link's design and outfit in Skyward Sword.
How to Get the Hero of the Sky Set
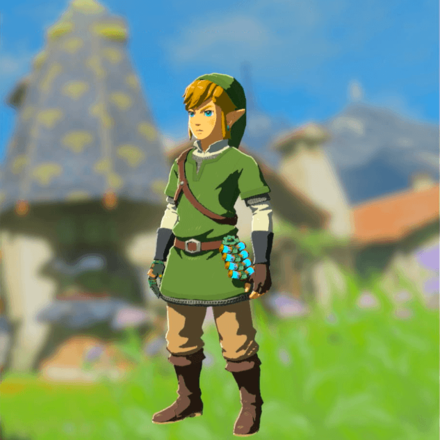
Hero of the Wild Set
| Hero of the Wild Set Location and Set Bonus | ||
|---|---|---|
 |
||
|
|
Location: Hebra Dark Skeleton, Hebra Mountains Depths Coordinates: - 3956, 3724, - 0858 |
|
|
|
Location: Gerudo Dark Skeleton, Gerudo Desert Depths Coordinates: - 3956, 3724, - 0858 |
|
|
|
Location: Eldin Dark Skeleton, Eldin Canyon Depths Coordinates: - 3956, 3724, - 0858 |
|
| Set Bonus | ||
| Attack Up: Increases attack power. | ||
Using Old Maps, you can get trackers to find the Hero of the Wild Set in the Depths. You can also get the Hero of the Wild Set by scanning Link's Breath of the Wild amiibo.
This armor set takes inspiration from Link's design in Super Smash Bros. Ultimate.
How to Get the Hero of the Wild Set
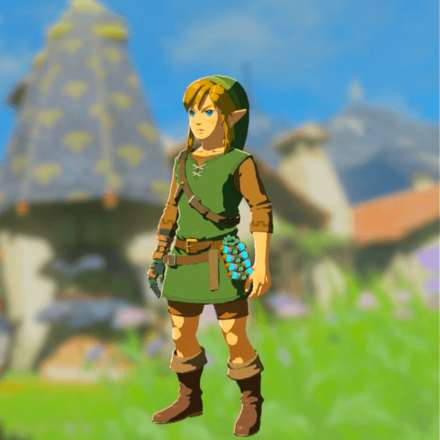
Hero of Time Set
| Hero of Time Set Location and Set Bonus | ||
|---|---|---|
 |
||
|
|
Location: Sturnida Lavafalls, Hebra Mountain Depths Coordinates: - 4078, 2800, -0450 |
|
|
|
Location: Lindor Canyon Mine (Hyrule Ridge Depths) Coordinates: - 4078, 2800, -0450 |
|
|
|
Location: Gerudo Canyon Mine Coordinates: - 4078, 2800, -0450 |
|
| Set Bonus | ||
| Attack Up: Increases attack power. | ||
Using Old Maps, you can get trackers to find the Hero of Time Set in the Depths. You can also get the Hero of Time Set by scanning Link's Ocarina of Time amiibo.
This armor set takes inspiration from Link's design in Ocarina of Time.
How to Get the Hero of Time Set
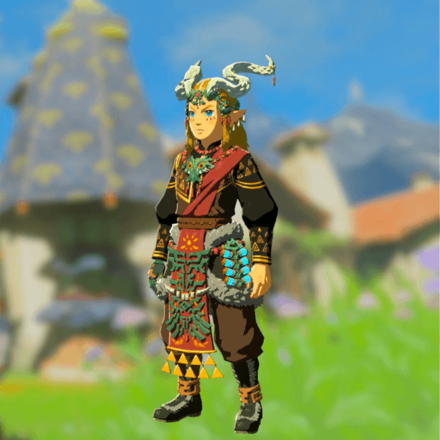
Hero of Twilight Set
| Hero of Twilight Set Location and Set Bonus | ||
|---|---|---|
 |
||
|
|
Location: Gleeok Den, Great Hyrule Forest Depths Coordinates: 0250, 3122, - 0623 |
|
|
|
Location: Rist Mine, Akkala Sea Depths Coordinates: 0250, 3122, - 0623 |
|
|
|
Location: Ancient Underground Fortress, Akkala Highlands Depths Coordinates: 0250, 3122, - 0623 |
|
| Set Bonus | ||
| Attack Up: Increases attack power. | ||
Using Old Maps, you can get trackers to find the Hero of Twilight Set in the Depths.You can also get the Hero of Twilight Set from scanning Link's Super Smash Bros. amiibo.
This armor set takes inspiration from Link's design in Twilight Princess.
How to Get the Hero of Twilight Set: Location and Set Bonus
Hero of Winds Set
| Hero of Winds Set Location and Set Bonus | ||
|---|---|---|
 |
||
|
|
Location: Tingel Island Chasm Coordinates: 4653, 0622, - 0723 |
|
|
|
Location: Cuho Canyon Mine, Tabantha Frontier Depths Coordinates: 4653, 0622, - 0723 |
|
|
|
Location: Cresia Pit Mine, East Necluda Depths Coordinates: 4653, 0622, - 0723 |
|
| Set Bonus | ||
| Attack Up: Increases attack power. | ||
Using Old Maps, you can get trackers to find the Hero of Winds Set in the Depths.You can also get the Hero of Winds Set from scanning Link's Super Smash Bros. amiibo.
This armor set takes inspiration from Link's design in Wind Waker.
How to Get the Hero of Winds Set
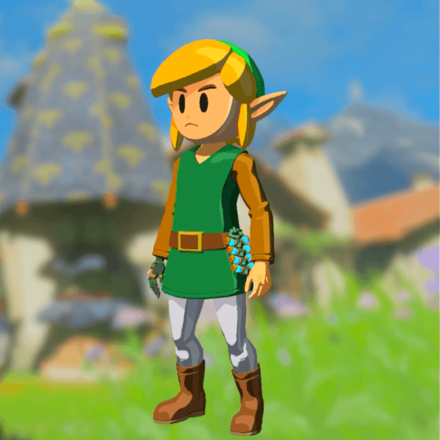
Hero Set
| Hero Set Location and Set Bonus | ||
|---|---|---|
 |
||
|
|
Location: Tuft Canyon Mine, East Necluda Depths Coordinates: 2525, - 3601, - 0626 |
|
|
|
Location: Dueling Canyons Mine, West Necluda Depths Coordinates: 2525, - 3601, - 0626 |
|
|
|
Location: Corvash Canyon Mine, Hebra Mountains Depths Coordinates: 2525, - 3601, - 0626 |
|
| Set Bonus | ||
| Attack Up: Increases attack power. | ||
Using Old Maps, you can get trackers to find the Hero Set in the Depths. You can also get the Hero Set from scanning Link's Pixel amiibo.
This armor set takes inspiration from Link's design in the original Legend of Zelda.
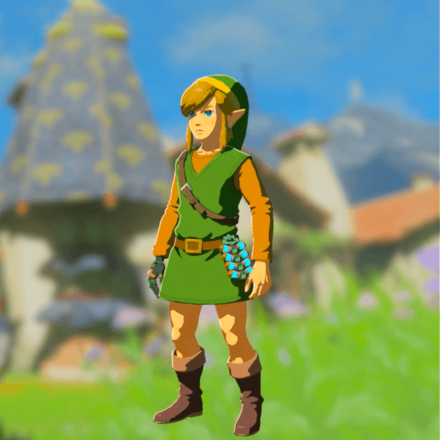
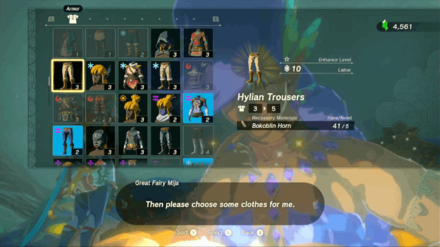
Hylian Set
| Hylian Set Location and Set Bonus | ||
|---|---|---|
 |
||
|
|
Location: Lookout Landing Armor Store Coordinates: - 0208, 0083, 0019 |
|
|
|
Location: Lookout Landing Armor Store Coordinates: - 0208, 0083, 0019 |
|
|
|
Location: Lookout Landing Armor Store Coordinates: - 0208, 0083, 0019 |
|
| Set Bonus | ||
| None | ||
The Hylian Set is also one of the most accessible sets you can easily get. You can buy the complete set from the Lookout Landing Armor Store.
Miner Set
| Miner Set Location and Set Bonus | ||
|---|---|---|
 |
||
|
|
Location: Abandoned Kara Kara Mine, Gerudo Desert Depths Coordinates: - 3228, - 2476, - 0476 |
|
|
|
Location: Daphnes Canyon Mine, Central Hyrule Depths Coordinates: - 3228, - 2476, - 0476 |
|
|
|
Location: Hylia Canyon Mine, Central Hyrule Depths Coordinates: - 3228, - 2476, - 0476 |
|
| Set Bonus | ||
| Shining Steps: Leaves a trail of glowing petal when Link is walking which illuminates the area. | ||
Equipping the Mine Set can help light up dark areas for extra vision. You can find the Miner Set in the abandoned mines of the Depths.
Mystic Set
| Mystic Set Location and Set Bonus | ||
|---|---|---|
 |
||
|
|
Location: Koltin's Shop Coordinates: 3659, 2066, 0168 |
|
|
|
Location: Koltin's Shop Coordinates: 3659, 2066, 0168 |
|
|
|
Location: Koltin's Shop Coordinates: 3659, 2066, 0168 |
|
| Set Bonus | ||
| None | ||
You can get the complete Mystic Set from Koltin's Shop. Make sure to get 45 Bubbul Gems first to complete the set.
Phantom Set
| Phantom Set Location and Set Bonus | ||
|---|---|---|
 |
||
|
|
Location: Puffer Beach, Farron Grasslands Coordinates: 0297, -3777, 0051 |
|
|
|
Location: Hyrule Ridge Coordinates: 0297, -3777, 0051 |
|
|
|
Location: East Barrens, Gerudo Desert Coordinates: 0297, -3777, 0051 |
|
| Set Bonus | ||
| None | ||
The Phantom Set can also help you boost your attack damage on combats. You can also get the Phantom Armor as one of Misko's Treasures.
This armor set takes inspiration from the Phantom Suit that Zelda inhabits in Spirit Tracks.
How to Get the Phantom Set
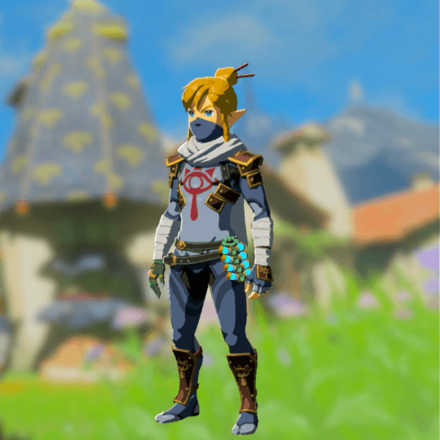
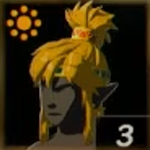
Radiant Set
| Radiant Set Location and Set Bonus | ||
|---|---|---|
 |
||
|
|
Location: Kakariko Village (Enchanted) Coordinates: 1846, - 0975, 0117 |
|
|
|
Location: Kakariko Village (Enchanted) Coordinates: 1846, - 0975, 0117 |
|
|
|
Location: Kakariko Village (Enchanted) Coordinates: 1846, - 0975, 0117 |
|
| Set Bonus | ||
| Disguise; Bone Weap. Prof.: Makes Stal enemies not attack and increases your damage with bone weapons. | ||
You can get the complete Radiant Set in the armor shop in Kakariko Village. You can lower the selling price of this by completing the Gloom-Borne Illness side quest.
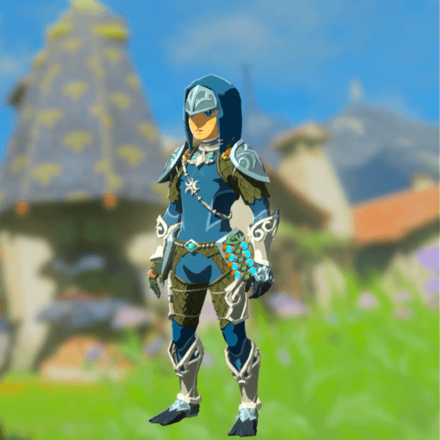
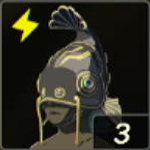
Royal Guard Set
| Royal Guard Set Location and Set Bonus | ||
|---|---|---|
 |
||
|
|
Location: Princess Zelda's Room, Hyrule Castle Coordinates: - 0331, 1005, 0300 |
|
|
|
Location: Guards' Chamber, Hyrule Castle Coordinates: - 0331, 1005, 0300 |
|
|
|
Location: Hyrule Castle Coordinates: - 0331, 1005, 0300 |
|
| Set Bonus | ||
| Charge Atk. Stamina Up: Decreases the stamina used by charged attacks. | ||
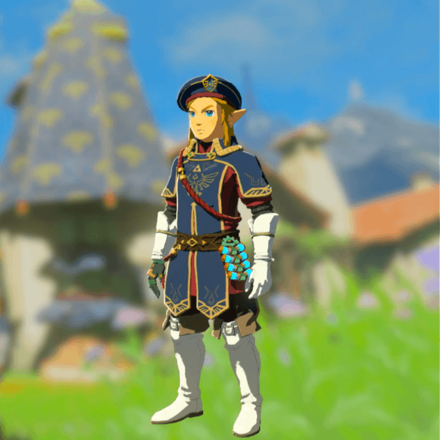
Reach the Hyrule Castle and find the rooms mentioned above to get the Royal Guard Set.
How to Get the Royal Guard Set
Rubber Set
| Rubber Set Location and Set Bonus | ||
|---|---|---|
 |
||
|
|
Location: Sarjon Woods Cave Coordinates: 1586, - 2958, - 0024 |
|
|
|
Location: Whistling Hill Cave Coordinates: 1586, - 2958, - 0024 |
|
|
|
Location: Horon Lagoon Cave Coordinates: 1586, - 2958, - 0024 |
|
| Set Bonus | ||
| Lightning Proof: Immune to lightning strikes. | ||
Equipping the Rubber Set can prevent you from getting hit by lightning strikes during thunderstorms. The Rubber Armor is also part of Misko's Treasures, so make sure to speak to Meeshy to get the tracker.
Snowquill Set
| Snowquill Set Location and Set Bonus | ||
|---|---|---|
 |
||
|
|
Location: Rito Village (Brazen Beak) Coordinates: 3629, 1799, 0187 |
|
|
|
Location: Rito Village (Brazen Beak) Coordinates: 3629, 1799, 0187 |
|
|
|
Location: Rito Village (Brazen Beak) Coordinates: 3629, 1799, 0187 |
|
| Set Bonus | ||
| Unfreezable: Cannot be frozen by ice attacks. | ||
The Snowquill Set is also one of the accessible armor sets in the game and it can protect you from the cold weather while progressing the Tulin of Rito Village main quest. You can purchase this set from the armor shop in Rito Village.
Soldier Set
| Soldier Set Location and Set Bonus | ||
|---|---|---|
 |
||
|
|
Location: Royal Hidden Passage Coordinates: - 0230, 0467, - 0039 |
|
|
|
Location: Royal Hidden Passage Coordinates: - 0230, 0467, - 0039 |
|
|
|
Location: Royal Hidden Passage Coordinates: - 0230, 0467, - 0039 |
|
| Set Bonus | ||
| None | ||
To get the Soldier Set, progress through the main quest first to unlock the Royal Hidden Passage in the Emergency Shelter.
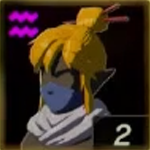
Stealth Set
| Stealth Set Location and Set Bonus | ||
|---|---|---|
 |
||
|
|
Location: Kakariko Village (Enchanted) Coordinates: 1846, - 0975, 0117 |
|
|
|
Location: Kakariko Village (Enchanted) Coordinates: 1846, - 0975, 0117 |
|
|
|
Location: Kakariko Village (Enchanted) Coordinates: 1846, - 0975, 0117 |
|
| Set Bonus | ||
| Night Speed Up: Increases movement speed when it's night. | ||
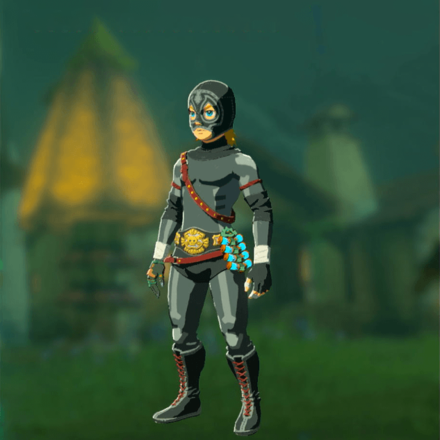
You can also buy the complete Stealth Set in Kakariko Village and for a lower price after completing the Gloom-Borne Illness side quest.
This armor set takes inspiration from Sheik's design in Super Smash Bros. Ultimate with the exception of the mask.
How to Get the Stealth Set
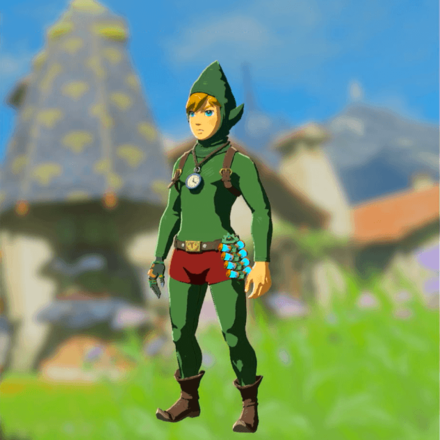
Tingle Set
| Tingle Set Location and Set Bonus | ||
|---|---|---|
 |
||
|
|
Location: Statue of the Eighth Heroine, Gerudo Highlands Coordinates: -4448, -0639, 0456 |
|
|
|
Location: Dueling Peaks Coordinates: -4448, -0639, 0456 |
|
|
|
Location: Cape Cales, East Necluda Coordinates: -4448, -0639, 0456 |
|
| Set Bonus | ||
| Night Speed Up: Increases movement speed when it's night. | ||
You can get the Tingle set from completing the all the Misko's Manuscript side quests.
Yiga Set
| Yiga Set Location and Set Bonus | ||
|---|---|---|
 |
||
|
|
Location: Shack in Great Plateau Coordinates: - 0803, - 2256, 0087 |
|
|
|
Location: Akkala Ancient Lab Coordinates: - 0803, - 2256, 0087 |
|
|
|
Location: Yiga Clan Maritta Branch, Great Hyrule Forest Coordinates: - 0803, - 2256, 0087 |
|
| Set Bonus | ||
| Night Speed Up: Increases movement speed when it's night. | ||
In addition to the Set Bonus, equpping the Yiga Set also allows you to infiltrate the Yiga Clan Hideout and prevent Yiga Enemies from ambushing you.
Zonaite Set
| Zonaite Set Location and Set Bonus | ||
|---|---|---|
 |
||
|
|
Location: Lightcast Island, Tabantha Frontier Sky Coordinates: - 3591, 0942, 1723 |
|
|
|
Location: Zonaite Forge Island, East Necluda Sky Coordinates: - 3591, 0942, 1723 |
|
|
|
Location: Near Sky Mine, Akkala Sea Sky Coordinates: - 3591, 0942, 1723 |
|
| Set Bonus | ||
| Energy Recharge Up: Doubles Battery recharge speed. | ||
You can only find the Zonaite Set in the Sky Islands, so make sure to increase your stamina to safely explore the islands with your paraglider. Wearing the set can helps you improve your Zonai energy usage as it allows you to charge your batteries faster.
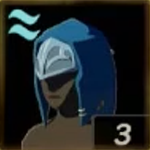
Zora Set
| Zora Set Location and Set Bonus | ||
|---|---|---|
 |
||
|
|
Location: Floating Scales Island Coordinates: 4106, 0519, 0585 |
|
|
|
Location: Zora's Domain Coordinates: 4106, 0519, 0585 |
|
|
|
Location: Ancient Zora Waterworks, Lanayru Great Spring Coordinates: 4106, 0519, 0585 |
|
| Set Bonus | ||
| Swim Dash Stamina Up: Decreases the stamina used when swim dashing. | ||
To complete the Zora Set, make sure to progress through the Sidon of the Zora main quest first. You can get the Zora Armor through the Restoring the Zora Armor main quest and the Zora Greaves from the A Token of Friendship side quest which only appears after completing the main quest.
Armor Set Bonuses Explained
Attack Up
| Armor Set | |||
|---|---|---|---|
 Hero of Twilight Set Hero of Twilight Set
|
 Hero of Winds Set Hero of Winds Set
|
 Hero of the Sky Set Hero of the Sky Set
|
 Hero of Time Set Hero of Time Set
|
 Hero Set Hero Set
|
 Hero of Awakening Set Hero of Awakening Set
|
 Hero of the Wild Set Hero of the Wild Set
|
|
The listed armor sets grant the Attack Up Set Bonus when all three armor pieces within a set is upgraded to 2 Stars from Great Fairies.
The Attack Up Set Bonus increases your attack power and is helpful if you want to deal increased damage against strong enemies.
These armor sets can be acquired through certain amiibos or within locations in Hyrule.
Return to Armor Set Bonuses Table
Charge Atk. Stamina Up
| Armor Set | |||
|---|---|---|---|
 Fierce Deity Set Fierce Deity Set
|
 Royal Guard Set Royal Guard Set
|
 Barbarian Set Barbarian Set
|
|
These sets grant the Charge Atk. Stamina Up Set Bonus when all three armor pieces within a set is upgraded to 2 Stars from Great Fairies.
Charge Atk. Stamina Up decreases the stamina used when using charged attacks. This is incredibly useful if you like using charge attacks and want to save stamina.
Return to Armor Set Bonuses Table
Night Speed Up
| Armor Set | |||
|---|---|---|---|
 Yiga Set Yiga Set
|
 Stealth Set Stealth Set
|
 Dark Set Dark Set
|
 Tingle Set Tingle Set
|
With the exception of the Tingle Set and Dark Set, the Yiga Set and Stealth Set give the Night Speed Up Set Bonus when all three armor pieces within a set is upgraded to 2 Stars from Great Fairies.
Night Speed Up increases your movement speed when it is night, making this set bonus helpful when you are running away from monsters during nighttime.
Return to Armor Set Bonuses Table
Climbing Jump Stamina Up
| Armor Set | |||
|---|---|---|---|
 Climbing Set Climbing Set
|
|||
The Climbing Set grants the Climbing Jump Stamina Up Set Bonus when all three armor pieces within the set is upgraded to 2 Stars from Great Fairies.
Climbing Jump Stamina Up decreases the stamina used when jumping while you are climbing. This set bonus is incredibly useful when climbing tall structures or mountains and you want to get to the top quickly.
Return to Armor Set Bonuses Table
Disguise and Bone Weap. Prof.
| Armor Set | |||
|---|---|---|---|
 Radiant Set Radiant Set
|
 Evil Spirit Set Evil Spirit Set
|
||
These sets grant the Disguise; Bone Weap. Prof. Set Bonus when all three armor pieces within a set is upgraded to 2 Stars from Great Fairies.
Disguise; Bone Weap. Prof. prevents Stal enemies from attacking and will increase your damage output when you equip a bone-type weapon. This is ideal to equip when you don't want to deal against Stal monsters and if you like using bone weapons.
Return to Armor Set Bonuses Table
Fireproof
| Armor Set | |||
|---|---|---|---|
 Flamebreaker Set Flamebreaker Set
|
|||
The Flamebreaker Set grants the Fireproof Set Bonus when all three armor pieces within the set is upgraded to 2 Stars from Great Fairies.
Fireproof makes Link unburnable, making it ideal when you are traversing a hot environment or fighting enemies that use fire attacks.
Return to Armor Set Bonuses Table
Unfreezable
| Armor Set | |||
|---|---|---|---|
 Snowquill Set Snowquill Set
|
|||
The Snowquill Set grants the Unfreezable Set Bonus when all three armor pieces within the set is upgraded to 2 Stars from Great Fairies.
Unfreezable, like the name implies, gives Link the immunity from being frozen. This is ideal against enemies that uses ice attacks.
Return to Armor Set Bonuses Table
Shock Damage Resist
| Armor Set | |||
|---|---|---|---|
 Desert Voe Set Desert Voe Set
|
|||
The Desert Voe Set grants the Shock Damage Resist Set Bonus when all three armor pieces within the set is upgraded to 2 Stars from Great Fairies.
Shock Damage Resist reduces damage from electric attacks making it useful against enemies that use liightning type attack.
Return to Armor Set Bonuses Table
Lightning Proof
| Armor Set | |||
|---|---|---|---|
 Rubber Set Rubber Set
|
|||
The Rubber Set gives the Set Bonus Lightning Proof when all three armor pieces within the set is upgraded to 2 Stars from Great Fairies.
Lightning Proof gives full immunity from lightning strikes. Equip the Rubber Set if you like using metallic weapons during a thunderstorm.
Return to Armor Set Bonuses Table
Swim Dash Stamina Up
| Armor Set | |||
|---|---|---|---|
 Zora Set Zora Set
|
|||
The Zora Set gives the Set Bonus Swim Dash Stamina Up when all three armor pieces within the set is upgraded to 2 Stars from Great Fairies.
Swim Dash Stamina Up decreases the stamina usage when swim dashing, making it ideal to have when you want to swim faster.
Return to Armor Set Bonuses Table
Slip Proof
| Armor Set | |||
|---|---|---|---|
 Froggy Set Froggy Set
|
|||
The Froggy Set gives the Set Bonus Slip Proof when all three armor pieces within the set is upgraded to 2 Stars from Great Fairies.
Slip Proof prevents slipping while climbing during a rainy weather. This is incredibly useful to have when you want to climb something and you don't want to slip if there's a rain.
Return to Armor Set Bonuses Table
Gloom Attack Resist
| Armor Set | |||
|---|---|---|---|
 Depths Set Depths Set
|
|||
The Depths Set gives the Set Bonus Gloom Attack Resist when all three armor pieces within the set is upgraded to 2 Stars from Great Fairies.
Gloom Attack Resist adds a fourth heart that will take the gloom damage instead of your actual hearts. This set bonus is essential if you are traversing through areas with gloom or fighting gloom-type enemies like Gloom Hands.
Return to Armor Set Bonuses Table
Shining Steps
| Armor Set | |||
|---|---|---|---|
 Miner Set Miner Set
|
|||
The Miner Set gives the Set Bonus Shining Steps when all three armor pieces within the set is upgraded to 2 Stars from Great Fairies.
Shining Steps leaves trails of glowing petals when Link is walking which illuminates within the darkness. This set bonus is perfect when exploring the Depths which is an incredbly dark environment.
Return to Armor Set Bonuses Table
Impact Proof
| Armor Set | |||
|---|---|---|---|
 Glide Set Glide Set
|
|||
The Glide Set gives the Set Bonus Impact Proof when all three armor pieces within the set is upgraded to 2 Stars from Great Fairies.
Impact Proof completely negates fall damage making it useful when diving from the sky to get to the surface faster without taking damage.
Return to Armor Set Bonuses Table
Hot Weather Charge
| Armor Set | |||
|---|---|---|---|
 Ember Set Ember Set
|
|||
The Ember Set gives the Set Bonus Hot Weather Charge when all three armor pieces within the set is upgraded to 2 Stars from Great Fairies.
Hot Weather Charge makes charge attacks faster on hot weather. Make sure to equip this armor set and have it upgraded to 2 stars if you want to utilize fast charge attacks on a hot weather.
Return to Armor Set Bonuses Table
Cold Weather Charge
| Armor Set | |||
|---|---|---|---|
 Frostbite Set Frostbite Set
|
|||
The Frostbite Set gives the Set Bonus Cold Weather Charge when all three armor pieces within the set is upgraded to 2 Stars from Great Fairies.
Cold Weather Charge makes charge attacks faster on cold weather. Make sure to equip this armor set and have it upgraded to 2 stars if you want to utilize fast charge attacks on a cold weather.
Return to Armor Set Bonuses Table
Stormy Weather Charge
| Armor Set | |||
|---|---|---|---|
 Charged Set Charged Set
|
|||
The Charged Set gives the Set Bonus Stormy Weather Charge when all three armor pieces within the set is upgraded to 2 Stars from Great Fairies.
Stormy Weather Charge makes charge attacks faster on stormy weather. Make sure to equip this armor set and have it upgraded to 2 stars if you want to utilize fast charge attacks on a stormy weather.
Return to Armor Set Bonuses Table
Energy Recharge Up
| Armor Set | |||
|---|---|---|---|
 Zonaite Set Zonaite Set
|
|||
The Zonaite Set gives the Set Bonus Energy Recharge Up when all three armor pieces within the set is upgraded to 2 Stars from Great Fairies.
Energy Recharge Up doubles the Battery cell recharge speed. This is incredibly useful when you like using contraptions or vehicles made through Ultrahand.
Return to Armor Set Bonuses Table
Master Sword Beam Up
| Armor Set | |||
|---|---|---|---|
 Ancient Hero's Aspect Ancient Hero's Aspect
|
|||
The Ancient Hero's Aspect gives the Set Bonus Master Sword Beam Up when all three armor pieces within the set is upgraded to 2 Stars from Great Fairies.
Master Sword Beam Up increases the damage dealt when using Master Sword Beam. This is ideal to have when you finally have the Master Sword in your arsenal.
Return to Armor Set Bonuses Table
How to Unlock Set Bonuses
Equip All 3 Set Pieces
The additional effect of a set piece only activates when you have all three set pieces equipped. If the Armor Set can be upgraded, you must upgrade them to 2-Stars or higher before the additional effect works. Armor that cannot be upgraded can have its Set Bonus activated simply by equipping all three pieces of the same set.
The Legend of Zelda: Tears of the Kingdom Related Guides
List of Armor By Type
| Tears of the Kingdom Armor Types | |||
|---|---|---|---|
| Headgear | Body Armor | Legwear | Armor Sets |
Comment
23  Anonymous over 2 years
the inventory says that the warm greaves are. Just warm greaves >:(
Author

The Legend of Zelda: Tears of the Kingdom Walkthrough & Guides Wiki
Armor Sets List and All Set Bonuses
Please participate in our site
improvement survey
03/2026
improvement survey
03/2026
Would you assist in
improving Game8's site?
improving Game8's site?

×
We are listening to our users' valuable opinions and discussing how to act on them.
The information collected through this survey will be used for the purpose of improving our services. In addition, the information will only be disclosed a part of a statistic in a format that will not allow identification of personal information.
Begin Survey
Not Now
×
Please rate each item regarding Game8.co's Advertisements.
Amount of Ads
Very Dissatisfied
Somewhat Dissatisfied
Fine
Somewhat Satisfied
Highly Satisfied
Placement of Ads
Timing of Ad Display
Ad Loading Speed
Safeness of Ads
Content of Ads
×
Please rate each item regarding Game8.co's Quality of Articles.
Amount of information
Very Dissatisfied
Somewhat Dissatisfied
Fine
Somewhat Satisfied
Highly Satisfied
Frequency of updates
Speed of new information
Accuracy of articles
Understandibility of articles
Readability of sentences
×
Please rate each item regarding Game8.co's Usability of the Site.
Ease of finding information
Very Dissatisfied
Somewhat Dissatisfied
Fine
Somewhat Satisfied
Highly Satisfied
Loading Speed
Use of Color
Font Size
Visibility of Images
Easy to Understand Layout
×
Please rate each item regarding Game8.co's Message Boards, Comments.
Ease of Writing
Very Dissatisfied
Somewhat Dissatisfied
Fine
Somewhat Satisfied
Highly Satisfied
Readability
Ease in Finding Information
Comment Quality
Comment Quantity
Admin Response
×
Please rate each item regarding Game8.co's Site's new design.
Please rate our site's new design
Very Dissatisfied
Somewhat Dissatisfied
Fine
Somewhat Satisfied
Highly Satisfied
Do you think that the website's design change makes the site easier to use?
Has the new design made it easier for you to find information on the site?
Has the new design improved the overall visual appeal of the site?
How would you rate your overall satisfaction with the new design of the site?
×
How likely are you to recommend Game8 to someone you know?
Very Unlikely
0
1
2
3
4
5
6
7
8
9
10
Very Likely
If you have other opinions regarding potential improvement to the website, please share them with us. We would appreciate your honest opinion.
Note: This is a free response section, so you can proceed without entering anything.
Note: Please be sure not to enter any kind of personal information into your response.
Note: Please be sure not to enter any kind of personal information into your response.
×
Thank You
×
Thank you for participating in our survey! Your answers will help us to improve the quality of our website and services.
We hope you continue to make use of Game8.
We hope you continue to make use of Game8.
Close
Rankings
- We could not find the message board you were looking for.
Gaming News


![Everwind Review [Early Access] | The Shaky First Step to A Very Long Journey](https://img.game8.co/4440226/ab079b1153298a042633dd1ef51e878e.png/thumb)

![Monster Hunter Stories 3 Review [First Impressions] | Simply Rejuvenating](https://img.game8.co/4438641/2a31b7702bd70e78ec8efd24661dacda.jpeg/thumb)
Popular Games

Genshin Impact Walkthrough & Guides Wiki
Honkai: Star Rail Walkthrough & Guides Wiki
Umamusume: Pretty Derby Walkthrough & Guides Wiki
Pokemon Pokopia Walkthrough & Guides Wiki
Resident Evil Requiem (RE9) Walkthrough & Guides Wiki
Monster Hunter Wilds Walkthrough & Guides Wiki
Wuthering Waves Walkthrough & Guides Wiki
Arknights: Endfield Walkthrough & Guides Wiki
Pokemon FireRed and LeafGreen (FRLG) Walkthrough & Guides Wiki
Pokemon TCG Pocket (PTCGP) Strategies & Guides Wiki


Recommended Games
Diablo 4: Vessel of Hatred Walkthrough & Guides Wiki
Fire Emblem Heroes (FEH) Walkthrough & Guides Wiki
Yu-Gi-Oh! Master Duel Walkthrough & Guides Wiki
Super Smash Bros. Ultimate Walkthrough & Guides Wiki
Pokemon Brilliant Diamond and Shining Pearl (BDSP) Walkthrough & Guides Wiki
Elden Ring Shadow of the Erdtree Walkthrough & Guides Wiki
Monster Hunter World Walkthrough & Guides Wiki
The Legend of Zelda: Tears of the Kingdom Walkthrough & Guides Wiki
Persona 3 Reload Walkthrough & Guides Wiki
Cyberpunk 2077: Ultimate Edition Walkthrough & Guides Wiki


All rights reserved
© Nintendo. The Legend of Zelda and Nintendo Switch are trademarks of Nintendo.
The copyrights of videos of games used in our content and other intellectual property rights belong to the provider of the game.
The contents we provide on this site were created personally by members of the Game8 editorial department.
We refuse the right to reuse or repost content taken without our permission such as data or images to other sites.
Did you upgrade it at a great fairy twice?