
This survey will take about 1 minute.
Your answers will help us to improve our website.
Cyberpunk 2077
Best Sandevistan Build
★ Coming to Switch 2
★ New: Metro System, Car Racing, Romantic Hangouts
★ Phantom Liberty: Dogtown Map & Relics System
★ See our Best Builds here!
┗ HOT: Blades Build, Netrunner Build, & Assassin Build

This is a guide to the best Sandevistan Build for Cyberpunk 2077: Phantom Liberty. Read our guide for details about the build, what attributes to level up, which perks to choose, and what weapons and cyberware to use.
List of Contents
Sandevistan Build Overview
Basic Information
| Sandevistan Build | |
|---|---|
| Main Attributes | |
| Main Weapons / Arm Cyberware | ・Thermal Mantis Blades ・Archangel / Ol' Reliable ・Comrade's Hammer / Pariah ・Byakko |
| Operating System | Militech "Apogee" Sandevistan
or Militech "Falcon" Sandevistan |
Strengths and Weaknesses
Strengths
Wipe out mobs before they even figure out where you are! The Sandevistan playstyle gives you all the time in the world to get your headshots in, dodge enemy bullets, and take them out with ease. You get to be Cyberpunk: Edgerunners' David Martinez without the cyberpsychosis (kinda)!
Weaknesses
You'll equip a Sandevistan Operating System here, so quickhacking or acquiring components from access points are not available to you. This build also realizes its full potential with melees and Revolver-type weapons.
Sandevistan Build Best Attributes
Attribute Progression
| Build Attributes | |||||
|---|---|---|---|---|---|
| Lv. | Body | Reflex | Tech | Int | Cool |
| 1 | 3 | 6 | 4 | 3 | 6 |
| 10 | 6 | 9 | 4 | 3 | 9 |
| 50 | 15 | 18 | 20 | 3 | 15 | 60 | 18 | 20 | 20 | 3 | 20 |
The max level is only up until 50 in the base game. Purchase Phantom Liberty to reach level 60.
It's best to use Blades and/or Revolvers while Sandevistan is active, as this will make closing the gap on enemies easier and headshots more effective. For this reason, focus on putting points in Reflex and Cool in early levels, working your way up to get the Finisher: Bladerunner and Deadeye perks.
Afterwards, invest in the Technical Ability attribute to and work your way up to get the Ticking Time Bomb and Edgerunner perk. These two perks will greatly increase the effectiveness of your Sandevistan mode, wiping out mobs with ease!
Then, for survivability, put points into the Body tree until you get Adrenaline Rush. Along with perks from Technical Ability tree, such as Glutton for War and Health Freak, health recharge items increase their effectiveness and will also give you damage and movement boosts while it's active.
Sandevistan Build Best Perks
This is the full list of perks that you can get if you achieve the maximum level 60 with the Phantom Liberty DLC. Optional perks are also listed in their own section in case you have not purchased the DLC.
| Jump to Each Attribute for Their Perks! | |||
|---|---|---|---|
| Optional Perks | |||
Reflexes
Put points into this attribute tree to increase your mobility with Dash and Air Dash and your blade's effectiveness with Lead and Steel and Finisher: Bladerunner.
Perk List
| Main Perk | Secondary Perk(s) |
|---|---|
|
(1 pt) |
|
|
(2 pt) |
|
|
(2 pt) |
|
|
(3 pt) |
|
|
(3 pt) |
Final Perks
| Final Perks | |||
|---|---|---|---|
|
|
|
||
Cross-Branch Perk
| Perk | Requirement |
|---|---|
|
|
Get this perk when you have specific secondary perks unlocked.
Vehicle Perk
| Vehicle Perk | ||
|---|---|---|
|
|
||
Cool
The Cool attribute will increase your Revolver's headshot and weakspot damage. This is especially useful since you'll be hitting easy headshots during Sandevistan mode.
Perk List
| Main Perk | Secondary Perk(s) |
|---|---|
|
(2 pt) |
|
|
(3 pt) |
Final Perks
| Final Perks | |||
|---|---|---|---|
|
|
|||
Vehicle Perk
| Vehicle Perk | ||
|---|---|---|
|
|
||
Technical Ability
In this attribute tree, you'll be focusing on putting in points until you reach the Edgerunner and Ticking Time Bomb perks
With Edgerunner equipped, it's important to fill in the slots for your cyberware and exceed your cyberware capacity for boosts in your damage. The Ticking Time Bomb, on the other hand, will allow you release an EMP charge that does AoE damage after using your Sandevistan.
Perk List
| Main Perk | Secondary Perk(s) |
|---|---|
|
(1 pt) |
|
|
(2 pt) |
|
|
(2 pt) |
|
|
(3 pt) |
|
|
(3 pt) |
|
|
(3 pt) |
Main Perk Only |
Final Perks
| Final Perks | |||
|---|---|---|---|
|
|
|
||
Vehicle Perk
| Vehicle Perk | ||
|---|---|---|
|
|
||
Body
The Edgerunner sacrifices 0.05% of your Health per exceeded points in your cyberware capacity, so it's important to keep your health up!
The Adrenaline Rush perk helps out by increasing your health and your health item's effectiveness. Its secondary perks also boosts your damage while this is active. Along with the Glutton for War and Health Freak perks from the Technical Ability tree, this attribute will make sure you stay alive to flatline the gonks that dare stand in your way!
Perk List
| Main Perk | Secondary Perk(s) |
|---|---|
|
(1 pt) |
|
|
(3 pt) |
Vehicle Perk
| Vehicle Perk | ||
|---|---|---|
|
|
||
Optional Perks
If you still have not purchased the Phantom Liberty DLC and have no access to the 10 additional perk points that came with it, these perks are optional and can be removed.
| Removable Perks (10 pts) | |
|---|---|
Sandevistan Build Relic Skill Priority
Take Jailbreak and Spatial Mapping First
| Priority | Main Skill | → | Branch Skill |
|---|---|---|---|
| 1st |
|
→ |
|
| 2nd |
|
||
| 3rd |
|
||
For the Sandevistan build, take the Jailbreak relic skill first then branch off to Spatial Mapping.
Jailbreak gives the Mantis Blades more options to leap and dismember enemies. While in Sandevistan mode, this makes the Mantis Blades deadly against mobs, especially if you take the Spatial Mapping skill.
When you have enough points, make sure to take Emergency Cloaking next. This improves on your Optical Camo which helps you survive when you get detected by enemies.
The last branch to take here is Vulnerability Analytics. This essentially improves on your other weapons by introducing weakspots on enemies. This is going to increase your damage with Revolvers and Blades.
Relic Skill Tree Available in the DLC
Please take note that the Phantom Liberty expansion is needed to access the Relic Skill Tree.
Relic Skill Tree Guide and List
Sandevistan Build Recommended Weapons
Base Game Only
| Recommended Weapons (Base Game only) |
||
|---|---|---|
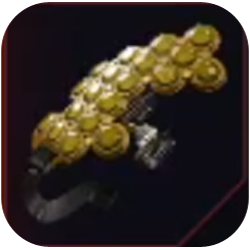
| Archangel | Comrade's Hammer | Byakko |
- Use the Archangel Power Revolver to get significant headshot damage, which will be pretty easy while in Sandevistan mode.
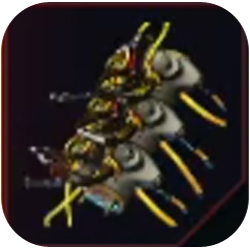
- Comrade's Hammer provides huge damage, especially with headshots. Cancel the long reload time by landing a melee hit while zooming from one enemy to the another.
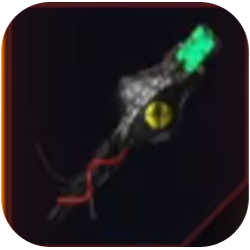
- Other than your Mantis Blades, use the Byakko Katana to slice enemies up!
Base Game + Phantom Liberty
| Recommended Weapons (with Phantom Liberty) |
||
|---|---|---|
| Ol' Reliable |
Comrade's Hammer
or Pariah |
Byakko |
- You'll get guaranteed Crit Hits when Deadye is active. The Ol' Reliable Power Revolver adds more Crit Damage with every headshot, making this the best revolver to use.
- You can still use the Comrade's Hammer Tech Revolver for this build since it still takes advantage of the Revolver-related perks.
- However, you can also use the Pariah Tech Pistol, which can deal as much damage especially with Vulnerability Analytics. This weapon is locked behind a choice in the later parts of the DLC.
- The Byakko Katana is still the best Blade for this build, so be sure to get it as soon as you can!.
Sandevistan Build Best Cyberwares
Sandevistan Cyberware Selection
| Jump to Each Cyberware! | |||
|---|---|---|---|
| Operating System | Arms | Face | Hands |
| Circulatory System | Legs | Frontal Cortex | Skeleton |
| Nervous System | Integumentary System | ||
Operating System
| Cyberware | Effect (Tier 5) |
|---|---|
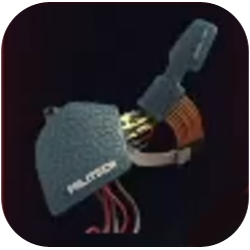
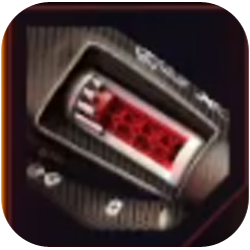
 Militech "Apogee" Sandevistan Militech "Apogee" Sandevistan
|
Press L1 and R1 to activate and deactivate. It can be activated at any charged level. When active: Slows time by 85% (you are not slowed) +10% headshot damage +9% Crit Chance +13% Crit Damage Neutralizing an enemy when active gives: +20% extended duration +22% Stamina Max Duration: 8 sec. Cooldown: 30 sec. |
The Militech "Apogee" Sandevistan has a low cooldown of 25 seconds. Not only that, but everytime you neutralize an enemy, its duration is extended. This is the best Sandevistan for this build.
Alternative: Militech Falcon Sandevistan
| Cyberware | Effect (Tier 5) |
|---|---|
 Militech "Falcon" Sandevistan Militech "Falcon" Sandevistan
|
When active: Slows time by 70% (you are not slowed), +10% damage, +10% Crit Chance, +5% Crit Damage. Neutralizing an enemy when active gives: +10% extended duration, +5% Health. Max Duration: 9 sec., Cooldown: 35 sec. |
In case you missed the Militech "Apogee" Sandevistan in the Riders on the Storm mission, you can use the Militech "Falcon" Sandevistan as an alternative. This can be bought from Ripperdocs around Night City!
▲ Back to Cyberware Selection ▲
Arms Cyberware
| Cyberware | Effect (Tier 5) |
|---|---|
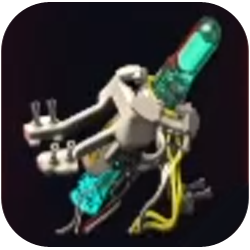
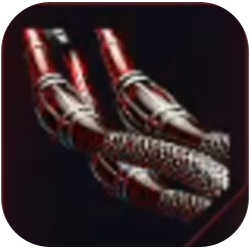
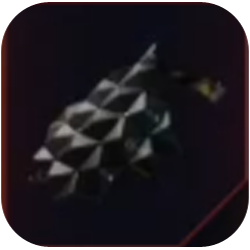
 Thermal Mantis Blades Thermal Mantis Blades
|
+3.1% Explosion Damage +3.1% Grenade Recharge Speed. |
Go all out with the Thermal Mantis Blades while on Sandevistan mode. This Arms Cyberware deals Thermal damage and has a chance to set enemies on fire, which will help your damage-over-time while fighting mobs.
▲ Back to Cyberware Selection ▲
Face
| Cyberware | Effect (Tier 5) |
|---|---|
 Kiroshi "Clairvoyant" Optics Kiroshi "Clairvoyant" Optics
|
Effect active when scanning: Highlights enemies within 17.5 m. The effect remains for 60 sec. after scanning. |
The Kiroshi Clairvoyant
Optics is attuned to the Cool attribute, increasing headshot and weakspot damage per attribute point.
▲ Back to Cyberware Selection ▲
Hands
| Cyberware | Effect (Tier 5) |
|---|---|
 Shock Absorber Shock Absorber
|
-20% Recoil |
Shock Absorber lowers recoil, so your Revolvers are more accurate and easier to control.
▲ Back to Cyberware Selection ▲
Circulatory System
| Cyberware | Effect (Tier 5) |
|---|---|
 Adrenaline Booster Adrenaline Booster
|
Stamina +23% whenever you use a melee weapon to neutralize an enemy. |
 Heal-on-Kill Heal-on-Kill
|
Health +7% when you neutralize an enemy. |
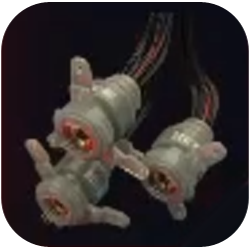 Microrotors Microrotors
|
Increase melee attack speed by 23%. (Melee attack speed cannot exceed 2 attacks per second.) |
Heal-On-Kill helps you survive the onslaught you will bring to your enemies while Adrenaline Booster and Microrotors help your melee attacks become much more effective.
▲ Back to Cyberware Selection ▲
Legs
| Cyberware | Effect (Tier 5) |
|---|---|
 Reinforced Tendons Reinforced Tendons
|
Press Space Bar in midair to perform a double jump. |
Reinforced Tendons enables double jump. This option will allow you to reach enemies on higher levels while also making it harder for them to hit you.
▲ Back to Cyberware Selection ▲
Frontal Cortex
| Cyberware | Effect (Tier 5) |
|---|---|
 Newton Module Newton Module
|
-1.25% Cooldown instantly for all cyberware after neutralizing an enemy. |
The Newton Module can lower the cooldown of your cyberware after successfully neutralizing an enemy, making possible to access more Sandevistan modes in a single fight!
▲ Back to Cyberware Selection ▲
Skeleton
| Cyberware | Effect (Tier 5) |
|---|---|
 Dense Marrow Dense Marrow
|
+24% melee damage +15% melee Stamina cost |
 Universal Booster Universal Booster
|
Health Items now also give: +10% Armor for 5 sec. -30% all Stamina costs for 5 sec. These effects do not stack. |
 Scar Coalescer Scar Coalescer
|
+22% Armor when below 50% Health. |
This set of cyberware increases damage while still being tanky enough to power through mobs of enemies.
▲ Back to Cyberware Selection ▲
Nervous System
| Cyberware | Effect (Tier 5) |
|---|---|
 Kerenzikov Kerenzikov
|
Allows you to aim and perform ranged attacks while sliding, dodging or Dashing. Slows time by 60% for 3.5 sec. when you aim a ranged attack during a slide, dodge or Dash. Cooldown 6.5 sec. |
 Synaptic Accelerator Synaptic Accelerator
|
Slows time by 50% for 3.5 sec. when enemy detection reaches 50%. Cooldown 60 sec. |
 Stabber Stabber
|
+16.75% Crit Chance with Blades and throwable weapons. |
Time slowing down is a great way to start fights. Kerenzikov and Synaptic Accelerator can help you with that! For extra Blade damage, slot in the Stabber cyberware.
▲ Back to Cyberware Selection ▲
Integumentary System
| Cyberware | Effect (Tier 5) |
|---|---|
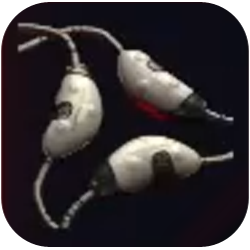
 Subdermal Armor Subdermal Armor
|
+0.5 Armor per Attribute Point. +1.3% Decreased enemy vision +2.6 Health |
 Pain Editor Pain Editor
|
-7% all incoming damage +0.1% damage reduction per Attribute Point. +0.5% Mitigation Chance +2.1% Damage Over Time Resistance |
 Proxishield Proxishield
|
The closer an attacking enemy is, the less damage they deal to you. -20% incoming damage at 3 m. Damage reduction tapers off to 0% at 6 m. +0.5 Health per Attribute Point. +2.1% Melee Damage Resistance +2.5% Melee Damage |
While using melees, Proxishield and Subdermal armor will help you mitigate damage as much as possible so you can output your own more effectively. Pain Editor further increases your tankiness.
▲ Back to Cyberware Selection ▲
How to Play the Sandevistan Build
Activate Sandevistan Before Every Fight
With Sandevistan mode on, you can easily aim your crosshair on enemy heads or close the gap quickly to slice them with blades. When this is done right, you can even go toe to toe with Adam Smasher!
Get Headshots With Revolvers or Slice Enemies Up With Blades
We recommend Revolvers or Blades as your main weapons while Sandevistan is active. It's quicker to take down mobs of enemies with these two, especially with Militech "Apogee" Sandevistan equipped, which extends the cyberware's duration.
Cyberpunk 2077: Phantom Liberty Related Guides
All Build Guides
All Cyberpunk 2077 Guides
Comment
13  Anonymous over 2 years
If you complete all the gigs in Watson and get the reward from Regina, she gives you the " Axolotl " which max upgraded will give +12% cyberwear charge per kill. works a lot better then the normal newton cyberwear.
Author

Best Sandevistan Build
Please participate in our site
improvement survey
03/2026
improvement survey
03/2026
Would you assist in
improving Game8's site?
improving Game8's site?

×
We are listening to our users' valuable opinions and discussing how to act on them.
The information collected through this survey will be used for the purpose of improving our services. In addition, the information will only be disclosed a part of a statistic in a format that will not allow identification of personal information.
Begin Survey
Not Now
×
Please rate each item regarding Game8.co's Advertisements.
Amount of Ads
Very Dissatisfied
Somewhat Dissatisfied
Fine
Somewhat Satisfied
Highly Satisfied
Placement of Ads
Timing of Ad Display
Ad Loading Speed
Safeness of Ads
Content of Ads
×
Please rate each item regarding Game8.co's Quality of Articles.
Amount of information
Very Dissatisfied
Somewhat Dissatisfied
Fine
Somewhat Satisfied
Highly Satisfied
Frequency of updates
Speed of new information
Accuracy of articles
Understandibility of articles
Readability of sentences
×
Please rate each item regarding Game8.co's Usability of the Site.
Ease of finding information
Very Dissatisfied
Somewhat Dissatisfied
Fine
Somewhat Satisfied
Highly Satisfied
Loading Speed
Use of Color
Font Size
Visibility of Images
Easy to Understand Layout
×
Please rate each item regarding Game8.co's Message Boards, Comments.
Ease of Writing
Very Dissatisfied
Somewhat Dissatisfied
Fine
Somewhat Satisfied
Highly Satisfied
Readability
Ease in Finding Information
Comment Quality
Comment Quantity
Admin Response
×
Please rate each item regarding Game8.co's Site's new design.
Please rate our site's new design
Very Dissatisfied
Somewhat Dissatisfied
Fine
Somewhat Satisfied
Highly Satisfied
Do you think that the website's design change makes the site easier to use?
Has the new design made it easier for you to find information on the site?
Has the new design improved the overall visual appeal of the site?
How would you rate your overall satisfaction with the new design of the site?
×
How likely are you to recommend Game8 to someone you know?
Very Unlikely
0
1
2
3
4
5
6
7
8
9
10
Very Likely
If you have other opinions regarding potential improvement to the website, please share them with us. We would appreciate your honest opinion.
Note: This is a free response section, so you can proceed without entering anything.
Note: Please be sure not to enter any kind of personal information into your response.
Note: Please be sure not to enter any kind of personal information into your response.
×
Thank You
×
Thank you for participating in our survey! Your answers will help us to improve the quality of our website and services.
We hope you continue to make use of Game8.
We hope you continue to make use of Game8.
Close
Rankings
Gaming News


![Monster Hunter Stories 3 Review [First Impressions] | Simply Rejuvenating](https://img.game8.co/4438641/2a31b7702bd70e78ec8efd24661dacda.jpeg/thumb)
Popular Games

Genshin Impact Walkthrough & Guides Wiki
Honkai: Star Rail Walkthrough & Guides Wiki
Umamusume: Pretty Derby Walkthrough & Guides Wiki
Pokemon Pokopia Walkthrough & Guides Wiki
Resident Evil Requiem (RE9) Walkthrough & Guides Wiki
Monster Hunter Wilds Walkthrough & Guides Wiki
Wuthering Waves Walkthrough & Guides Wiki
Arknights: Endfield Walkthrough & Guides Wiki
Pokemon FireRed and LeafGreen (FRLG) Walkthrough & Guides Wiki
Pokemon TCG Pocket (PTCGP) Strategies & Guides Wiki


Recommended Games
Diablo 4: Vessel of Hatred Walkthrough & Guides Wiki
Cyberpunk 2077: Ultimate Edition Walkthrough & Guides Wiki
Fire Emblem Heroes (FEH) Walkthrough & Guides Wiki
Yu-Gi-Oh! Master Duel Walkthrough & Guides Wiki
Super Smash Bros. Ultimate Walkthrough & Guides Wiki
Pokemon Brilliant Diamond and Shining Pearl (BDSP) Walkthrough & Guides Wiki
Elden Ring Shadow of the Erdtree Walkthrough & Guides Wiki
Monster Hunter World Walkthrough & Guides Wiki
The Legend of Zelda: Tears of the Kingdom Walkthrough & Guides Wiki
Persona 3 Reload Walkthrough & Guides Wiki


All rights reserved
CD PROJEKT®, Cyberpunk®, Cyberpunk 2077® are registered trademarks of CD PROJEKT S.A. © 2020 CD PROJEKT S.A. All rights reserved. All other copyrights and trademarks are the property of their respective owners.
The copyrights of videos of games used in our content and other intellectual property rights belong to the provider of the game.
The contents we provide on this site were created personally by members of the Game8 editorial department.
We refuse the right to reuse or repost content taken without our permission such as data or images to other sites.
necroposting more than a little here, but no mention for Mancinella the silenced revolver from PL?