Ghost Town Walkthrough | How to Get Free Car Rayfield Caliburn
★ Coming to Switch 2
★ New: Metro System, Car Racing, Romantic Hangouts
★ Phantom Liberty: Dogtown Map & Relics System
★ See our Best Builds here!
┗ HOT: Blades Build, Netrunner Build, & Assassin Build
This is a walkthrough for Ghost Town, a Main Quest in Cyberpunk 2077. Read on to learn all the available choices in Ghost Town, how to get the best possible result, how to get the free Rayfield Caliburn, tips and strategies for the Quest, and all available rewards.
| Previous Quest | Current Quest | Next Quest |
|---|---|---|
| Automatic Love | Ghost Town | - |
List of Contents
Ghost Town Basic Information
| Quest Type | Main |
|---|---|
| Act | Act 2 |
| Quest No. | 3 |
| Lifepath | All |
How to Unlock Ghost Town
Complete Playing For Time.
Ghost Town Rewards
| Rewards |
|---|
|
・ 4705Street Cred ・ 45 XP ・ 45 Eddies ・ Widow Maker |
Ghost Town Walkthrough
Video Walkthrough and Guide
Ghost Town Quest Objectives
Afterlife
| Objectives | |
|---|---|
| 1 | 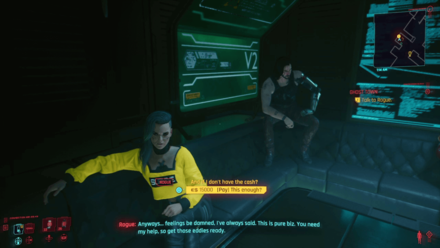 |
| 2 |  |
Rancho Coronado/Rocky Ridge
| 3 |  |
|---|---|
| 4 |  |
| 5 |  |
| 6 | 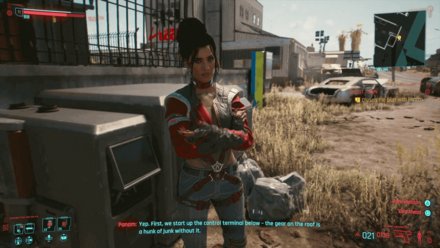 |
| 7 | 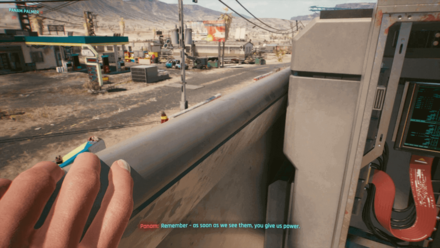 |
| 8 |  |
| 9 | 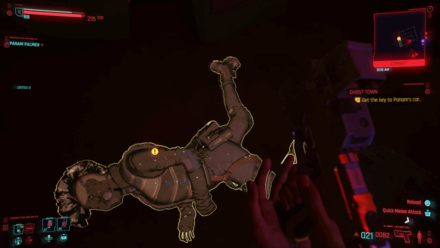 |
| 10 | 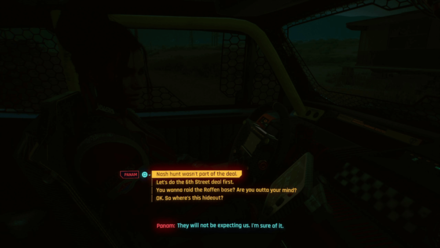 ▶Possible Outcomes |
| 11a | |
| 11a-1 | |
| 11a-2 | |
| 11b | |
| 11b-1 |
Obtainable Items
This list contains only rare Items and those which have a high chance of appearing.
| Item | How to Get |
|---|---|
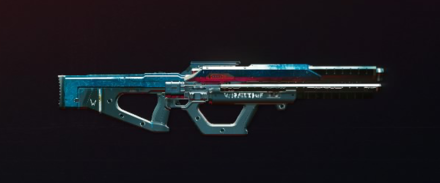 Widow Maker
(Rare) Widow Maker
(Rare)
|
Dropped by Nash when killed |
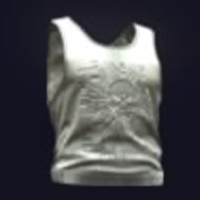 Thermoactive Tear-Resistant Techie Shirt
(Legendary) Thermoactive Tear-Resistant Techie Shirt
(Legendary)
|
This is found in the very same cave you fought Nash during one of Panam's side quest. If you found the free Caliburn car, this shirt is directly behind it. |
Ghost Town Choices and Best Choice
Deal With Nash or Don't Deal With Nash
| Choice | Outcome |
|---|---|
| Deal With Nash | If you decide to help Panam out by taking out Nash and all of his men the quest will still proceed as before, but you will earn points towards romancing her if you are playing a male character. You will get a slightly annoyed text from Rogue but this doesn't appear to affect anything. |
| Don't Deal With Nash | Not dealing with Nash means you will lock yourself out of Panam's romance, though you'll still be able to do her side quests. |
Best Choice
Even if playing as a female character, dealing with Nash seems to be the better choice because you can get some extra loot and exp from the shootout. Rogue's response seems to have no affect on future quests so there's really no reason not to do it.
How to Beat Nash
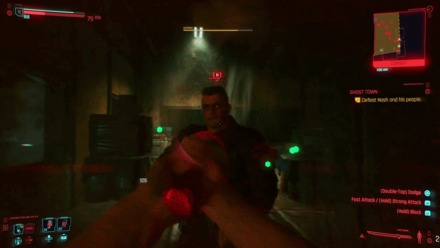
Taking on Nash and his army can be overwhelming, but it can be pulled off. Kill your way to the stairs until you reach Nash in his office. It is recommended to use a powerful shotgun or strong melee weapon to take him down quickly.
Use Widow Maker
After killing Nash, more enemies will surround you from below. You can use Nash's Widow Maker precision rifle to pick off enemies one by one. Panam can guard the stairs but still keep an eye on it for anyone that get pasts her.
Take Out the NetRunners
There are two NetRunners in the fight with Nash that can cause you trouble with their Overheat ability that sets you on fire. Try to find them and take them out as soon as you can.
How to Get the Free Rayfield Caliburn

| Note: You might need to wait for a few in-game days before this vehicle appears. If you can't find the Caliburn where it's supposed to be, leave the area (go back to Night City just to be sure), use the time skip feature and skip up to three days, then go back to the tunnel. |
After this Main Job, you can go back to where you fought Nash and the others to find a Rayfield Caliburn. Drive back to the tunnel until you reach the area where Nash's corpse was then go a little further to the south until you find the wheels.

You'll eventually find the Caliburn in the tunnel along with some items. It's probably Nash's or Nash stole it from someone else but who cares. Enter the car and it will automatically register as one of your vehicles.
Cyberpunk 2077 Story Walkthrough

All Main Quest Guides
Act 1
| No. | Quest | |||||
|---|---|---|---|---|---|---|
| 1 | The Streetkid | The Nomad | The Corpo-Rat | |||
| 2 | The Rescue | |||||
| 3 | The Ripperdoc | |||||
| 4 | The Ride | |||||
| 5 | The Information | The Pickup | ||||
| 6 | The Heist | |||||
Act 2
Act 3
1.5*: Only available in the Secret Ending
Phantom Liberty Main Quests
All Quest Types
| Quest Types | ||
|---|---|---|
Author

Ghost Town Walkthrough | How to Get Free Car Rayfield Caliburn
Rankings
- We could not find the message board you were looking for.
Gaming News

![Monster Hunter Stories 3 Review [First Impressions] | Simply Rejuvenating](https://img.game8.co/4438641/2a31b7702bd70e78ec8efd24661dacda.jpeg/show)


![Monster Hunter Stories 3 Review [First Impressions] | Simply Rejuvenating](https://img.game8.co/4438641/2a31b7702bd70e78ec8efd24661dacda.jpeg/thumb)
Popular Games

Genshin Impact Walkthrough & Guides Wiki
Honkai: Star Rail Walkthrough & Guides Wiki
Umamusume: Pretty Derby Walkthrough & Guides Wiki
Pokemon Pokopia Walkthrough & Guides Wiki
Resident Evil Requiem (RE9) Walkthrough & Guides Wiki
Monster Hunter Wilds Walkthrough & Guides Wiki
Wuthering Waves Walkthrough & Guides Wiki
Arknights: Endfield Walkthrough & Guides Wiki
Pokemon FireRed and LeafGreen (FRLG) Walkthrough & Guides Wiki
Pokemon TCG Pocket (PTCGP) Strategies & Guides Wiki


Recommended Games
Diablo 4: Vessel of Hatred Walkthrough & Guides Wiki
Cyberpunk 2077: Ultimate Edition Walkthrough & Guides Wiki
Fire Emblem Heroes (FEH) Walkthrough & Guides Wiki
Yu-Gi-Oh! Master Duel Walkthrough & Guides Wiki
Super Smash Bros. Ultimate Walkthrough & Guides Wiki
Pokemon Brilliant Diamond and Shining Pearl (BDSP) Walkthrough & Guides Wiki
Elden Ring Shadow of the Erdtree Walkthrough & Guides Wiki
Monster Hunter World Walkthrough & Guides Wiki
The Legend of Zelda: Tears of the Kingdom Walkthrough & Guides Wiki
Persona 3 Reload Walkthrough & Guides Wiki


All rights reserved
CD PROJEKT®, Cyberpunk®, Cyberpunk 2077® are registered trademarks of CD PROJEKT S.A. © 2020 CD PROJEKT S.A. All rights reserved. All other copyrights and trademarks are the property of their respective owners.
The copyrights of videos of games used in our content and other intellectual property rights belong to the provider of the game.
The contents we provide on this site were created personally by members of the Game8 editorial department.
We refuse the right to reuse or repost content taken without our permission such as data or images to other sites.
You can still have romance with Pam if you avoid dealing with Nash. In fact there's an alternate vehicle reward from your fixer. Although the Rayfield Caliburn will still show up after a few days it is sadly locked, but you will have a very rad desert car. You must choose but remember that the Mizutani Shion "Coyote" (from Dakota Smith) is made free and has a unique paint job.