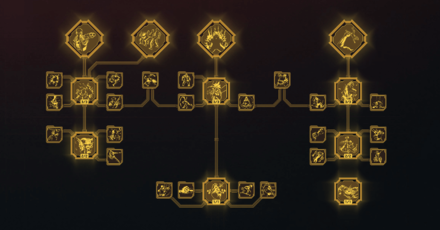
Perks Tier List
★ Coming to Switch 2
★ New: Metro System, Car Racing, Romantic Hangouts
★ Phantom Liberty: Dogtown Map & Relics System
★ See our Best Builds here!
┗ HOT: Blades Build, Netrunner Build, & Assassin Build
This is our Tier List on the best perks for certain attributes in Cyberpunk 2077: Ultimate Edition. See which perk you should be investing in based on your playstyle, as well as know why they are the best!
| Character Building Guides | |||||||||||
|---|---|---|---|---|---|---|---|---|---|---|---|
| Phantom Liberty Builds | Best Builds | ||||||||||
| Best Attributes | Best Perks by Playstyle |
Best Perks by Attribute |
|||||||||
| Build Element Lists | |||||||||||
| Relics | Attributes | Perks | |||||||||
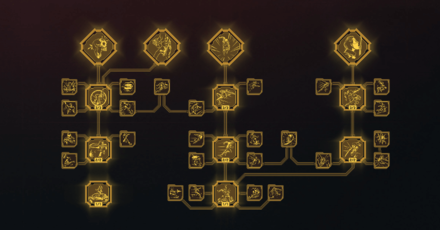
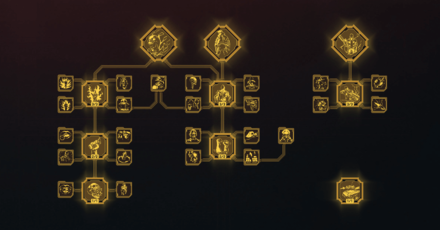
List of Contents
Body Perk Tier List
The perks in the Body attribute promotes increased survivability in fights, as well as those that improve close-range weapons like Shotguns and Blunt weapons.
S-Tier Perks
| Jump to a Tier Section Here! | |||
|---|---|---|---|
| S | A | B | C |
| Perk | Effect / Explanation |
|---|---|
 Pain to Gain Pain to Gain
|
Perk Effect: When Adrenaline Rush is active: +20% Health Item recharge after neutralizing an enemy. Tier Explanation: Makes you more tanky the more enemies you kill when Adrenaline Rush is active. |
 Rip and Tear Rip and Tear
|
Perk Effect: +100% damage for the next Quick Melee Attack after shooting an enemy with a Shotgun. +100% damage for the next Shotgun shot after hitting an enemy with a Quick Melee Attack. Tier Explanation: Gives you access to shotgun and quick melee combo thanks to the perk's damage boosts. |
 Adrenaline Rush Adrenaline Rush
|
Perk Effect: +35 Max Health. +20% Health Regen bonus to all Health Regen effects from all sources. Unlocks Adrenaline Rush mode. In addition to their base effects, Blood Pump cyberware and health items now also give Adrenaline equal to 30% Max Health. (up to a max of 50% Max Health). Adrenaline is indicated by a yellow bar and acts like extra health by absorbing damage. It also decays over time. Adrenaline Rush remains active as long as you have Adrenaline available. Tier Explanation: Getting additional health before jumping into a firefight or even during combat is very useful for aggressive playstyles. |
 Wrecking Ball Wrecking Ball
|
Perk Effect: -15% stamina cost for attacks with Blunt Weapons. Allows you to barrel into enemies while sprinting and blocking with Blunt Weapons, causing damage and a chance to knock them down. Tier Explanation: Transforms melee builds into very agile bulldozers with the chance to knock enemies down. |
 Juggernaut Juggernaut
|
Perk Effect: When Adrenaline Rush is active: +20% movement speed, +10% damage Tier Explanation: Allows you to move faster and deal more damage so you can maximize Adrenaline Rush's duration. |
 Epicenter Epicenter
|
Perk Effect: When Quake is performed from the midair (a Superhero Landing), its area of effect and damage scale with your fall speed and fall distance. Tier Explanation: Using Quake midair increases its area-of-effect, and deals more damage the higher you are. |
 Skullcracker Skullcracker
|
Perk Effect: Increases damage of Quick Melee Attacks as Stamina decreases (max. +200% at 0 Stamina). Tier Explanation: Very useful with constant low stamina, and synergizes well with Rip and Tear combo. |
A-Tier Perks
| Jump to a Tier Section Here! | |||
|---|---|---|---|
| S | A | B | C |
| Perk | Effect / Explanation |
|---|---|
 Finisher: Savage Sling Finisher: Savage Sling
|
Perk Effect: Unlocks a Blunt Weapon Finisher. Press F when an enemy's Health is low. Enemies affected by Stun are more susceptible. Restores 20% Health. Hold F to throw the enemy instead, killing them and damaging other enemies where they land. Tier Explanation: Useful for melee weapons as you'll have access to a long range attack. Very effective against enemies that are grouped up together but not as useful for those that are spread apart. |
 Onslaught Onslaught
|
Perk Effect: +20% ammo refill after neutralizing an enemy with a Light Machine Gun. Tier Explanation: Lets you deal more damage since you'll get more ammo as you kill with an LMG, which has a long animation for reloading. |
 Spontaneous Obliteration Spontaneous Obliteration
|
Perk Effect: +12.5% Crit Chance +10% damage against nearby enemies. Unlocks Obliterate – the ability to sometimes instantly kill and dismember enemies at low Health. The chance increases as enemy Health decreases (max. 20% Obliterate chance). Tier Explanation: Instakill chance with dismembering enemies is very useful with shotguns and LMGs so you can quickly wipe out a group of enemies. |
 Painkiller Painkiller
|
Perk Effect: Unlocks slow Health Regen in combat. Tier Explanation: Essential to get health regen in combat. |
 Calm Mind Calm Mind
|
Perk Effect: When Adrenaline Rush is active: +3 sec. delay before Adrenaline begins to decay. Tier Explanation: The extra three seconds before Adrenaline Rush decays essentially extend its duration, so you'll have more health to either fight for longer or retreat. |
 Close-Quarters Carnage Close-Quarters Carnage
|
Perk Effect: Increased chance to Obliterate enemies with ranged attacks at close range (max. 10%). Tier Explanation: Useful for a higher chance to proc Obliterate and gets its effects from related perks. |
 Fly Swatter Fly Swatter
|
Perk Effect: -40% incoming ranged damage when blocking with Blunt weapons. Tier Explanation: Allows you to brush off bullets while charging, receiving less damage as you run across the field. |
 Breakthrough Breakthrough
|
Perk Effect: -40% enemy Armor for 7 sec. after hitting them with a Strong Attack. Tier Explanation: Allows you to mix up strong melee attacks with regular attacks to reduce your target's armor and deal more damage. |
 Speed Junkie Speed Junkie
|
Perk Effect: +60% Health Regen Rate while sprinting. Tier Explanation: Pairs well with Wrecking Ball for melee. Also useful when retreating to find cover while healtrh is low. |
 Comeback Kid Comeback Kid
|
Perk Effect: +1% Health Regen Rate for each percent of missing Health. Tier Explanation: Great for very aggressive playstyles, as you'll have reliable health regen even at low health. |
 Bloodlust Bloodlust
|
Perk Effect: When Adrenaline Rush is active: +50 Adrenaline on dismemberment of a nearby enemy. Tier Explanation: Extends Adrenaline Rush if you're able to dismember a target. |
 Fury Road Fury Road
|
Perk Effect: In vehicle collisions: +50% damage to enemy vehicles and their occupants. -50% damage to your vehicles. You take no damage as a vehicle occupant in collisions. Tier Explanation: Incentivizes aggressive driving on the road. Lets you pay less attention to your vehicle's health and focus on shooting. |
B-Tier Perks
| Jump to a Tier Section Here! | |||
|---|---|---|---|
| S | A | B | C |
| Perk | Effect / Explanation |
|---|---|
 Quake Quake
|
Perk Effect: -15% Stamina cost for attacks with Blunt Weapons. +20% attack speed with Blunt Weapons. Press Q to violently slam the ground, damaging and staggering nearby enemies with a chance of Knockdown. Quake can also be performed from midair (a Superhero Landing). Cooldown: 10 sec. Tier Explanation: Good AoE attack when used on the ground but becomes better if used in the air with the Epicenter perk. |
 Die! Die! Die! Die! Die! Die!
|
Perk Effect: +12.5% Crit Chance Increased fire rate and improves weapon handling as Stamina decreases (max. +25% at 0 Stamina). Tier Explanation: Higher DPS if your stamina is always being used, which you can easily get by shooting and dashing, but may be limited by the clip size of the weapon you are using. |
 Rush of Blood Rush of Blood
|
Perk Effect: +20% reload speed for 8 sec. after dismembering an enemy. Tier Explanation: Useful for faster reload speed, but is not always reliable as dismembering enemies is tied to chance. |
 Dread Dread
|
Perk Effect: -15% enemy Armor when using ranged attacks. Dismemberment spreads the effect to nearby enemies. Tier Explanation: Increases a light machine gun's DPS by reducing armor simply by shooting at a target. |
 Bullet Ballet Bullet Ballet
|
Perk Effect: -25% bullet spread when moving. Tier Explanation: Less bullet spread means you'll be able to hit more accurately with heavy weapons even if you're moving around. |
 Like a Feather Like a Feather
|
Perk Effect: No movement speed penalty with Shotguns, Light Machine Guns and Heavy Machine Guns. Tier Explanation: Useful when equipping heavier guns as you'll be able to quickly run around, instead of being hardly mobile. |
 Army of One Army of One
|
Perk Effect: +10% Health Regen Rate for each nearby enemy. Tier Explanation: Useful for melee and shotguns as you'll be up close with enemies most of the time due to your weapon's range. |
 Ripple Effect Ripple Effect
|
Perk Effect: +15% health for each enemy hit by Quake. Tier Explanation: Additional health to make you more tanky, but loses its effectiveness when you're only against a few enemies. |
C-Tier Perks
| Jump to a Tier Section Here! | |||
|---|---|---|---|
| S | A | B | C |
| Perk | Effect / Explanation |
|---|---|
 Aftershock Aftershock
|
Perk Effect: +30 stamina for each enemy hit with Quake. Tier Explanation: Additional stamina is useful for melee weapons but loses its effectiveness when you're only against a few enemies. |
 Unstoppable Force Unstoppable Force
|
Perk Effect: When Adrenaline Rush is active: Gain immunity to movement penalties and non-damaging status effects such as Knockdown, Blinding, etc. Tier Explanation: Removes potential downtime from getting knocked down or bilnded while Adrenaline Rush is active, but is less of a priority as other health regen or damage-boosting perks are more important. |
 Clapback Clapback
|
Perk Effect: +100% Knockdown chance with Defensive Attacks. Cooldown: 10 sec. +100% Stun chance with Counterattacks. Tier Explanation: Counterattacking takes too long compared to simply charging towards your target with Wrecking Ball to knock them down. |
 Kinetic Absorption Kinetic Absorption
|
Perk Effect: Blocking an attack gives: +10% stamina +30% damage with Blunt Weapons for 5 sec. Tier Explanation: Good defense boost, but enemies don't use melee attacks often. Use the time instead to attack. |
 Don't Stop Me Now Don't Stop Me Now
|
Perk Effect: When below 33% Stamina: +15% Mitigation Chance +5% Mitigation Strength. Tier Explanation: Good defense boost if your stamina is low, but less prioritized as you'll have health regen perks. |
 Dorph-Head Dorph-Head
|
Perk Effect: When using Blood Pump Cyberware or a Health Item: +100% Mitigation Chance for 2 sec. Mitigation - grants a chance to reduce incoming damage by current Mitigation Strength (default 50%). Tier Explanation: Useful since you're taking less damage after each health item use, but effects are too short. |
Reflexes Perk Tier List
The perks in the Reflexes attribute promotes extreme mobility in fights, as well as perks that increases the power of medium weapons like blades and rifles.
S-Tier Perks
| Jump to a Tier Section Here! | |||
|---|---|---|---|
| S | A | B | C |
| Perk | Effect / Explanation |
|---|---|
 Slaughterhouse Slaughterhouse
|
Perk Effect: All attacks, counterattacks and deflected bullets apply Bleeding, which increases dismemberment chance. Bleeding cannot kill enemies, but does make them more susceptible to Finishers. +25 stamina from dismemberments. Tier Explanation: Ideal perk to easily apply Bleeding on enemies, making it easier to execute Blade Finishers. |
 Salt in the Wound Salt in the Wound
|
Perk Effect: Shooting the same target a 7th consecutive time deals bonus damage equal to 100% of the total damage from the preceding shots. Tier Explanation: This perk gives you the damage boost you need while using the Assault Rifle. Very useful while fighting a boss. |
 Finisher: Bladerunner Finisher: Bladerunner
|
Perk Effect: -15% Stamina cost for attacks with Blades. +20% attack speed with Blades. Unlocks a Blade Finisher. Press F when an enemy's Health is low. Restores 25% Health. Tier Explanation: Grants an extra option to your Blade-focused playstyle. |
 Air Dash Air Dash
|
Perk Effect: -20% Dash Stamina cost. +20% Dash speed. Unlocks the ability to Dash in midair. Tier Explanation: Not only will this help reach enemies faster, it also helps in exploring Night City and Dogtown. Synergizes well with the Reinforced Tendons Legs Cyberware. |
 Dash Dash
|
Perk Effect: -20% Stamina cost for dodging and Dashing. Unlocks the ability to Dash. Press LCTRL to perform a Dash. Dashing replaces dodging, allowing you to cover more ground and automatically vault over low obstacles. Tier Explanation: The ability to dash gives you more options to reposition in a fight or close the gap on enemies faster. This will also greatly help your exploration, being able to zoom from point a to b in a matter of seconds. |
 Slippery Slippery
|
Perk Effect: The faster you move, the more difficult for enemies to shoot you. Effect increases when Dashing, dodging, sliding, sprinting and vaulting. Tier Explanation: While fighting, this perk makes it harder for enemies to hit you, giving you a degree of survivability. A must-have to access the Dash and Air Dash perks. |
 Flash of Steel Flash of Steel
|
Perk Effect: +25% movement speed and attack speed for 6 sec. after performing a Finisher. Tier Explanation: Speeds up neutralizing enemies one by one with Blades |
 Practice Makes Perfect Practice Makes Perfect
|
Perk Effect: +7% Crit Chance and Crit Damage per stack of Sharpshooter. Tier Explanation: You'll be stacking up Sharpshooter a lot while shooting with your Assault Rifles and Submachine Guns, so this perk is a free damage buff. |
 Shoot to Chill Shoot to Chill
|
Perk Effect: +4% Armor penetration. Tier Explanation: Synergizes well with Sharpshooter, making your stamina management while using automatic weapons easier. |
 Bullet Deflect Bullet Deflect
|
Perk Effect: When your Stamina is above 33%, blocking projectiles will Deflect them to wherever your reticle is aimed. Well-timed blocking just before being hit increases the damage you deal with deflected bullets. Tier Explanation: Having this perk makes your Blade combat even more fun! To get the maximum potential from this perk, time your deflects well. |
A-Tier Perks
| Jump to a Tier Section Here! | |||
|---|---|---|---|
| S | A | B | C |
| Perk | Effect / Explanation |
|---|---|
 Tailwind Tailwind
|
Perk Effect: +25 stamina from performing Air Dashes and double jumps. Air Dashes do not cost Stamina. Tier Explanation: Supports Air Dash well, negating stamina consumption while using it. However, only take it when you can push your Reflexes attribute to 20. |
 Submachine Fun Submachine Fun
|
Perk Effect: Swapping Submachine Guns is faster and automatically reloads them. +22% fire rate after swapping to an SMG. Normal reloading ends the effect. Tier Explanation: The automatic reload effect in swapping to your Submachine Gun is faster than waiting for a long reload animation. The increased fire rate after swapping also ups your DPS. To use this effectively, however, you need to keep in mind that you don't need to reload. |
 Ready, Rested, Reloaded Ready, Rested, Reloaded
|
Perk Effect: -10% stamina cost for shooting with AR and SMGs. Level 2: +30% reload speed when above 50% stamina. Tier Explanation: Useful in making your Assault Rifles or Submachine Guns more effective early. Get this perk to also access Sharpshooter and Salt in the Wound. |
 Sharpshooter Sharpshooter
|
Perk Effect: +15% aim speed. Improved weapon handling. Each successful shot grants a stack of Sharpshooter, +7% stamina regeneration for 2 sec. per stack. Stacks 7 times. New stacks reset duration. All stacks are removed when the duration ends. New stamina cost added as of the 2.1 Update. Tier Explanation: Stamina management with Assault Rifles and Submachine Guns are easier with this perk. |
 Lead and Steel Lead and Steel
|
Perk Effect: -15% Stamina cost for attacks with Blades. Unlocks ability to block incoming projectiles with Blades. This consumes Stamina. Tier Explanation: Decreases stamina consumption with Blades which uses it up a lot. Unlocks the ability to deflect projectiles, but will only realize its full potential after getting the Bullet Deflect perk. |
 Multitasker Multitasker
|
Perk Effect: Allows you to shoot while sprinting, sliding and vaulting. Tier Explanation: Get this perk to work well with the Kerenzikov Cyberware. |
 Parkour! Parkour!
|
Perk Effect: Increased vaulting and climbing speed. Tier Explanation: Gives you the mobility to run around an area during a gunfight. This perk will also make exploring easier. |
 Tunnel Vision Tunnel Vision
|
Perk Effect: +20% effective range and accuracy. Tier Explanation: Increases range, allowing you to gun down enemies from afar. |
 Mind Over Matter Mind Over Matter
|
Perk Effect: -25% recoil when aiming. Tier Explanation: Aiming down with your Assault Rifle or SMG will make it much more accurate. |
 Mean Streak Mean Streak
|
Perk Effect: +40% Stamina after neutralizing an enemy while Dashing. Tier Explanation: Useful when you're running around, slashing enemies with your Blade, which can consume a lot of stamina. |
 Mad Dash Mad Dash
|
Perk Effect: +100% Dash range toward enemies. Tier Explanation: Allows you to reach enemies faster with Dash. Unlock this perk to access Flash and Thunderclap. |
 Bullet Time Bullet Time
|
Perk Effect: Whenever time is slowed, Bullet Deflect does not consume Stamina and deflections automatically hit enemies for Crit Damage. Tier Explanation: This perk is only effective with Sandevistan activated or with cyberwares such as the Kerenzikov, Synaptic Accelerator, or Reflex Tuner. |
 Spray and Pray Spray and Pray
|
Perk Effect: -10% Stamina cost for hip-firing. Tier Explanation: Makes hip-firing much more stamina-friendly. |
 Gundancer Gundancer
|
Perk Effect: Aiming no longer slows movement. Allows you to shoot while vaulting. Tier Explanation: Allows you to be more mobile while aiming, which will make it hard for enemies to hit you. |
 Aerial Acrobat Aerial Acrobat
|
Perk Effect: Improves midair maneuverability. Tier Explanation: Gives you more control while Air Dashing. |
 Aerodynamic Aerodynamic
|
Perk Effect: +30% Mitigation strength in midair. Tier Explanation: Gives you a chance at reduce damaged while Air Dashing, which will be often. |
 Opportunist Opportunist
|
Perk Effect: Enemies affected by Stagger, Stun, Blinding and Bleeding are more susceptible to Finishers. Tier Explanation: Make enemies much more susceptible to a Blade Finisher by acquiring this perk. |
 Can't Touch This Can't Touch This
|
Perk Effect: +100% Mitigation Chance when performing a Dash. Mitigation - grants a chance to reduce incoming damage by current Mitigation Strength (default 50%). Tier Explanation: Gives you a chance at reduce damaged while Dashing, which will be often. |
 Flash and Thunderclap Flash and Thunderclap
|
Perk Effect: When performing Strong Attacks, you now automatically leap to enemies within range. These Leap Attacks can be also performed from midair, and deal additional damage that scales with the distance of the leap (max. +50%). Tier Explanation: This provides a quick gap closer to easily connect your Blade attacks or if you want to pull of a Finisher. |
 Stuntjock Stuntjock
|
Perk Effect: Unlocks preem new ways to exit vehicles: Jump out - double-tap F Slide out - hold F while at high speed You can also draw and fire weapons during these stunts. While driving: No bullet spread penalty from movement -50% bullet spread overall Tier Explanation: Gives you a stylish way to exit the vehicle, allowing you to be more prepared in combat. Useful for engaging enemies. |
B-Tier Perks
| Jump to a Tier Section Here! | |||
|---|---|---|---|
| S | A | B | C |
| Perk | Effect / Explanation |
|---|---|
 Seeing Double Seeing Double
|
Perk Effect: Increased damage and Stun chance with Counterattacks. Tier Explanation: You'll be running around hacking and slashing your way through enemies so you'll rarely do counterattacks. Only take it when you want to access the Flash and Thunderclap perk. |
 Air Kerenzikov Air Kerenzikov
|
Perk Effect: Activating Kerenzikov in midair keeps you suspended in the air and extends its duration. Tier Explanation: Use the standard Kerenzikov midair for some style points! Only applicable for certain playstyles but is definitely fun to use. |
C-Tier Perks
| Jump to a Tier Section Here! | |||
|---|---|---|---|
| S | A | B | C |
| Perk | Effect / Explanation |
|---|---|
 Going the Distance Going the Distance
|
Perk Effect: +100% Finisher range Tier Explanation: Using the Blade will always have you close enough to activate a Blade Finisher. Only useful for certain playstyles. |
 Steady Grip Steady Grip
|
Perk Effect: Allows you to shoot while Dashing. Tier Explanation: Only really useful for a quick playstyle. It's better to just shoot after dashing. |
 Spice of Life Spice of Life
|
Perk Effect: +15% weapon swap speed, -30% bullet spread briefly after swapping weapons. Tier Explanation: Only good for early levels and can easily be swapped out for another when you get more points in your Reflexes attribute. |
 Power Slide Power Slide
|
Perk Effect: Increased slide distance. Tier Explanation: Only useful for certain playstyles. |
 Muscle Memory Muscle Memory
|
Perk Effect: Allows you to reload weapons while sprinting, sliding and vaulting. Tier Explanation: Only useful for certain playstyles. It's best to just find cover and reload. |
Intelligence Perk Tier List

The perks in the Intelligence attribute promotes the hacking gameplay, so it improves both quickhacks and smart weapons.
2.0 List of Intelligence Perks
S-Tier Perks
| Jump to a Tier Section Here! | |||
|---|---|---|---|
| S | A | B | C |
| Perk | Effect / Explanation |
|---|---|
 Spillover Spillover
|
Perk Effect: When Overclock is active: +50% chance for quickhacks to spread to an additional target. Tier Explanation: Increase the chance to spread quickhack with Overclock, making it easier to deal with mobs of enemies. |
 Eye in the Sky Eye in the Sky
|
Perk Effect: Automatically highlights nearby Access Points and cameras. When uploaded through cameras, Control quickhacks, Covert quickhacks and the Distract Enemies quickhack have: -1 RAM cost, +50% duration. Tier Explanation: Easier spotting of Access Points and cameras makes your exploration and sneaking easier. This also helps in making your Control and Covert quickhacks last longer. |
 Optimization Optimization
|
Perk Effect: +35% RAM Recovery Rate. Tier Explanation: Increases RAM recovery rate, which is helpful when uploading multiple quickhacks. |
 Hack Queue Hack Queue
|
Perk Effect: +1 Max RAM. Unlocks quickhacks queues, allowing 2 quickhacks on a single enemy. Queued quickhacks automatically upload in the order they are added, +30% upload speed for the second quickhack queue. Tier Explanation: This perk unlocks the queueing of 2 or more quickhacks on an enemy, which opens you up for quickhack combos like Contagion into Overheat or Cyberware Malfunction to Short Circuit! |
 Embedded Exploit Embedded Exploit
|
Perk Effect: +10% RAM recovery rate. +60% quickhack damage against enemies affected by Control quickhacks, Covert quickhacks or the Distract Enemies quickhack. Tier Explanation: Increases your damage for your Netrunner builds. Just make sure you use Covert, Control, or the Distract Enemies quickhack on them first! |
 Queue Acceleration Queue Acceleration
|
Perk Effect: +1 max RAM. -1 RAM cost to quickhack devices and vehicles. +1 quickhack queue size, +60 upload speed for quickhacks third or later in the queue. Tier Explanation: Speeds up quickhack upload that can make your Netrunning build easier to use. |
 Overclock Overclock
|
Perk Effect: +10% RAM recovery rate. +10% quickhack damage. Unlocks Overclock mode. If you have a cyberdeck installed, press E to activate. In this mode, you can use quickhacks even with insufficient RAM, but each RAM unit over your max costs 10 Health instead. Duration: 14 sec. Cooldown: 30 sec. Tier Explanation: With Overclock, you will not have to worry about not having enough RAM for your quickhacks. To mitigate the effect on your health, taking perks like Sublimation is ideal. Using this playstyle with the perks from the Body attribute will essentially give you endless RAM for your quickhacks! |
 Finisher: Live Wire Finisher: Live Wire
|
Perk Effect: Unlocks a Monowire finisher. Press F when an enemy's health is low. The more quickhacks you have queued on an enemy, the more susceptible they are. Restores 15% Health and 5 RAM. Tier Explanation: You'll be using you're Monowire in between quickhack cooldowns. This perk makes it much more rewarding, as Monowire Finishers restore RAM. Along with the Siphon perk, RAM recovery is quicker. |
 Speculation Speculation
|
Perk Effect: Neutralizing an enemy with a Combat quickhack recovers RAM equal to 25% of the total cost of all quickhacks affecting the target. Tier Explanation: Works best when either uploaded quickhacks cost a lot of RAM or when you have uploaded multiple. |
 Siphon Siphon
|
Perk Effect: Monowire attacks recover 0.5 RAM. Increases to 1 if the enemy is affected by or targeted by a quickhack. Tier Explanation: You'll be using you're Monowire in between quickhack cooldowns. Recover lost RAM just by slicing away at enemies. |
 Shadowrunner Shadowrunner
|
Perk Effect: -100% trace progress after performing a Takedown. Tier Explanation: This perk helps you stay undetected longer as long as you takedown enemies. |
 Counter-A-Hack Counter-A-Hack
|
Perk Effect: When you're the target of an enemy netrunner, you can quickhack them back through walls and obstacles. -1 RAM cost for such quickhacks. Tier Explanation: Enemy Netrunners like to hang back in a fight, so take this perk to easily reach and counter-hack them. |
 Data Recycler Data Recycler
|
Perk Effect: After neutralizing an enemy, recover 80% of the RAM cost from all quickhacks remaining in their queue. Tier Explanation: Helps your RAM management by giving back most of the RAM you have spent on queued quickhacks. |
 Feedback Loop Feedback Loop
|
Perk Effect: +25% RAM recovery rate for each quickhack currently in a queue. Tier Explanation: The more quickhacks you queued, the more RAM recovery rate you have. |
 Queue Prioritization Queue Prioritization
|
Perk Effect: +50% upload speed for the first quickhack when you have at least 2 quickhacks queued on an enemy. Tier Explanation: Increased upload speed for the first quickhack as long as you have 2 or more queued. Ideal for most quickhack combos. |
 Sublimation Sublimation
|
Perk Effect: When Overclock is active, all RAM recovery effects also regenerate health. Tier Explanation: Any RAM recovery effects also affect health regen, which helps you stay alive while Overclock is active. |
 Encryption Encryption
|
Perk Effect: -30% traceability for all quickhacks. Tier Explanation: Makes it harder for enemies to detect you after uploading your quickhacks. |
 Race Against Mind Race Against Mind
|
Perk Effect: When Overclock is active: increased quickhack damage as health decreases (max +50%). Health is measured when you begin upload. Tier Explanation: Using Overclock will deplete your health, so this perk ensures you get the damage boost you need for your quickhacks. |
A-Tier Perks
| Jump to a Tier Section Here! | |||
|---|---|---|---|
| S | A | B | C |
| Perk | Effect / Explanation |
|---|---|
 Smart Synergy Smart Synergy
|
Perk Effect: When Overclock is active, smart weapons gain instant target lock, and +25% damage if the enemy is affected by a quickhack. Tier Explanation: Goes hand in hand with Overclock and will deal significant damage on enemies affected by quickhacks. |
 Queue Mastery Queue Mastery
|
Perk Effect: +1 quickhack queue size. The last quickhack to fill a queue has -50% RAM cost and locks the queue until all quickhacks are uploaded, +15% damage against enemies with a locked queue. Tier Explanation: Upload as much quickhack as you can to maximize the potential of this perk. |
 Power Surge Power Surge
|
Perk Effect: Activating Overclock instantly restores Health equal to 5 times your max RAM. Tier Explanation: This perk grants a degree of survivability in activating Overclock. |
 System Overwhelm System Overwhelm
|
Perk Effect: +7% quickhack damage for each unique quickhack and DOT effect affecting the target. Tier Explanation: Increases your DPS for quickhacks as long as each is unique from each other. |
 Icepick Icepick
|
Perk Effect: -1 RAM cost for Combat quickhacks used on enemies affected by or targeted Control quickhacks, Covert quickhacks or the Distract Enemies quickhack. Tier Explanation: Requires you to upload Control, Covert, or Distract Enemies quickhacks first. Solid perk for reducing RAM costs and unlocking this skill also unlocks Siphon. |
 Copy-Paste Copy-Paste
|
Perk Effect: When you're the target of an enemy netrunner, using the quickhack against them will also spread the quickhack's effect to their allies. Tier Explanation: Let the enemy Netrunner target you to spread the quickhack you upload on them on their allies. |
 Subordination Subordination
|
Perk Effect: +100% duration for Control quickhacks used on full-health enemies. Tier Explanation: Makes Control Quickhacks last longer, allowing for more quickhack combos and combat oppportunities. |
 Blood Daemon Blood Daemon
|
Perk Effect: When Overclock is active: +40 health for each quickhack queued on an enemy at the time you neutralize them. Tier Explanation: Gives you health depending on the number of quickhacks you queue, which, ideally, should be a lot. |
 Carhacker Carhacker
|
Perk Effect: Unlocks Vehicle quickhacks, allowing you to take control, set off alarms or even blow them up. The availability of a given quickhack depends on the Tier of your installed cyberdeck. Tier Explanation: This perk gives you more options in your Netrunning playstyle. Combo this vehicle quickhacks with some of your Combat ones! |
B-Tier Perks
| Jump to a Tier Section Here! | |||
|---|---|---|---|
| S | A | B | C |
| Perk | Effect / Explanation |
|---|---|
 Target Lock Transfer Target Lock Transfer
|
Perk Effect: 10% larger targeting reticle for Smart weapons. Switching from aiming to hip-fire does not disengage target-lock on headshots and weakspots. Switching from one smart weapon to another no longer interrupts target lock. Tier Explanation: No interruption on target lock between switching Smart Weapons will make it much more convenient for this playstyle. |
 Acquisition Specialist Acquisition Specialist
|
Perk Effect: +10% larger targeting reticle for smart weapons. Reloading smart weapons no longer interrupts target lock, +15 lock-on speed when hip-firing, +20% lock-on speed when aiming. Tier Explanation: A solid perk when you want to use Smart Weapons. |
 Targeting Prism Targeting Prism
|
Perk Effect: Enables multiple target locks when aiming and increases the number of simultaneous targets for all smart weapons by 1. Tier Explanation: Allows you to target multiple enemies with your Smart Weapon, making weapon usage much more convenient. |
 Terminal Velocity Terminal Velocity
|
Perk Effect: Increased projectile velocity and lock-on range for 10 sec. after neutralizing an enemy with smart weapon. Stacks 3 times. New stacks reset duration. All stacks are removed when duration ends. Tier Explanation: Effectively increases range; helpful for Smart Sniper Rifles. |
 Queue Hack_Root Queue Hack_Root
|
Perk Effect: -1 RAM cost for the first quickhack of each unique category that is second or later in the queue. Tier Explanation: Decreased RAM usage is negligible since you'll be getting better RAM recovery from other perks. Only unlock this perk if you want Blood Daemon. |
 No Escape No Escape
|
Perk Effect: When using Smart weapons, if the target lock on an enemy is about to end, shooting them resets it. Tier Explanation: Always have target lock on an enemy just by shooting them. Works best with Smart Submachine Guns. |
 Precision Subroutines Precision Subroutines
|
Perk Effect: +2% accuracy with Smart weapons for each unit in your cyberdeck's Max RAM. Tier Explanation: Solid perk for a max RAM, Smart Weapons-focused build. |
 Proximate Propagation Proximate Propagation
|
Perk Effect: Reduced RAM cost the closer you are to the target (max -35%). Tier Explanation: Netrunning playstyle usually has you uploading quickhacks from far away. Run this perk only when you plan to have a close-ranged gameplay. |
 Warning: Explosion Hazard Warning: Explosion Hazard
|
Perk Effect: +40% explosion damage from hacked devices, +80% additional explosion damage to enemies affected by quickhacks (including Distract Enemies) Tier Explanation: Run this perk when you want make devices go boom! |
 Recirculation Recirculation
|
Perk Effect: +2 RAM after neutralizing an enemy with a Smart weapon. If the enemy is affected by quickhacks, restores additional RAM equal to +50% of their total RAM cost. Tier Explanation: Restores your RAM but only if you use Smart Weapons. Ideal only for a certain playstyle. |
C-Tier Perks
| Jump to a Tier Section Here! | |||
|---|---|---|---|
| S | A | B | C |
| Perk | Effect / Explanation |
|---|---|
 Forcekill Cypher Forcekill Cypher
|
Perk Effect: Reduces sequence length required to hack Access Points by 1. Total sequence length cannot be reduced below 2 characters. Tier Explanation: Makes Access Points easier, but once you get the hang of it, it's safe to re-invest the point here to some other perk. |
Technical Ability Perk Tier List
The perks in the Technical Ability attribute promotes general utility in builds which includes increasing your capabilities to slot more cyberware and improving the effects of items like grenades and health stims. This is also where you improve the capabilities of your tech weapons.
2.0 List of Technical Ability Perks
S-Tier Perks
| Jump to a Tier Section Here! | |||
|---|---|---|---|
| S | A | B | C |
| Perk | Effect / Explanation |
|---|---|
 Chain Lightning Chain Lightning
|
Perk Effect: Bolt now deals Electrical damage and releases an electric arc that can electrocute up to 3 nearby enemies. Tier Explanation: Makes Bolt shots deal AoE damage on top of electrical damage. Very useful when eliminating groups of enemies from cover. |
 Edgerunner Edgerunner
|
Perk Effect: Allows you to exceed your Cyberware Capacity by up to 50 points, but at the cost of -0.5% Max Health per point. When you neutralize an enemy during combat, there is a 0.1% chance for each point you're over capacity that you will enter a Fury state. In this state, you gain: +10% damage, +30% Critical Chance, +50% Critical Damage. Duration: 12 sec. Tier Explanation: Allows you to chip in more cyberware with +50 cyberware capacity, and gives you a chance to activate Fury to deal more damage. |
 License to Chrome License to Chrome
|
Perk Effect: +10% to all cyberware stats modifiers. +40 armor. Unlocks a new cyberware slot for the Skeleton. All Skeleton cyberware have boosted stats. Tier Explanation: Increases your defenses with armor boost and an additional slot for Skeleton cyberware which are mostly defense-boosting parts. |
 Health Freak Health Freak
|
Perk Effect: +8% recharge speed for Health Items and grenades. +1 Health Item charge, +150% recharge speed for Health Items outside of combat. Tier Explanation: Additional health item charge and faster recharge is very useful for all playstyles, as you cannot spam healing items anymore. |
 In Charge In Charge
|
Perk Effect: Tech weapons no longer fire automatically when reaching full charge. Tier Explanation: Allows you to hold your fire even after fully charging a tech weapon, which helps you aim better when used behind cover or attempting to shoot through walls. |
 Borrowed Time Borrowed Time
|
Perk Effect: +100% instant recharge of a Health Item after neutralizing an enemy if you're below 25% Health and have no charges remaining. Tier Explanation: Can save you from dying if you meet the perk's conditions. Very useful when in combat with a lot of enemies around you. |
A-Tier Perks
| Jump to a Tier Section Here! | |||
|---|---|---|---|
| S | A | B | C |
| Perk | Effect / Explanation |
|---|---|
 Ticking Time Bomb Ticking Time Bomb
|
Perk Effect: Charges a powerful EMP that hits nearby enemies after 3 sec. whenever you activate Operating System cyberware (Berserk, Sandevistan) or Overlock mode. Applies Stun and deals damage proportionate to the quantity and Tier of cyberware implants you have installed, -50% incoming damage while charging EMP. Tier Explanation: Useful extra damage from EMP blast whenever you activate an Operating System cyberware, but is tied to their cooldowns. |
 Bolt Bolt
|
Perk Effect: +20% charge speed for Tech weapons. +15% damage for charged shots with Tech weapons. Unlocks Bolt shots. To fire a Bolt, release the trigger for a charged shot right before it fully charges: counts as a fully charged shot, +30% damage, -50% penalty for penetrating cover. Tier Explanation: Improves tech weapon usage with better charged shots. |
 All Things Cyber All Things Cyber
|
Perk Effect: +10% to all cyberware stats modifiers. -20% Cyberware Capacity cost for cyberware in the Integumentary System and Skeleton. Tier Explanation: Bonus stat modifiers from equipped cyberware can be handy, especially early in the game. Works best if you have a lot of cyberware equipped. |
 Glutton for War Glutton for War
|
Perk Effect: 5% instant recharge of Health items and grenades after neutralizing an enemy. Tier Explanation: Faster health item and grenade recharge during combat is always useful. |
 Internal Clock Internal Clock
|
Perk Effect: Increased time window to fire a Bolt. Tier Explanation: Very useful so you can fire off Bolt shots easier. |
 Lightning Storm Lightning Storm
|
Perk Effect: +10% charge speed after firing a Bolt. Stacks 3 times. Swapping weapons or firing a non-Bolt shot resets the stack. Tier Explanation: Allows you to charge up a tech weapon faster as long as you can keep your timing. |
 Extended Warranty Extended Warranty
|
Perk Effect: +15% duration for all cyberware effects. Tier Explanation: Very useful to extend cyberware effects with no conditions. |
 Renaissance Punk Renaissance Punk
|
Perk Effect: +4 Cyberware Capacity for each Attribute at 9 or higher. Tier Explanation: Additional cyberware capacity can be useful, but not worth spreading points to all attributes as you will miss out on more useful perks from other trees. |
 Chrome Constitution Chrome Constitution
|
Perk Effect: -5% incoming damage if all Integumentary System and Skeleton cyberware slots are filled. Tier Explanation: Useful damage reduction which is easy to get; Skeleton and Integumentary System cyberware slots are easy to fill in especially with All Things Cyber perk. |
 Driver Update Driver Update
|
Perk Effect: All cyberware gain an additional stat modifier. Tier Explanation: WIll be more useful if you have all cyberware slots filled in as the bonus stat modifiers will stack. |
 Field Medic Field Medic
|
Perk Effect: 15% faster use of Health Items in combat. Tier Explanation: Allows you to use healing items faster to fill up your HP quicker. |
 Transfusion Transfusion
|
Perk Effect: +30% health from the final charge of your Health Item. Tier Explanation: More health from your last health item charge can save you from dying, especially when you're in a tight spot. |
B-Tier Perks
| Jump to a Tier Section Here! | |||
|---|---|---|---|
| S | A | B | C |
| Perk | Effect / Explanation |
|---|---|
 Pyromania Pyromania
|
Perk Effect: +8% recharge speed for health items and grenades. +10% explosion radius for grenades and the Projectile Launch System. +5% movement speed and +10% explosion damage for 12 sec. After hitting an enemy with an explosion in combat. If you take damage from the explosion, the effect adds 2 stacks instead of 1. Effect and duration can stack 5 times. Tier Explanation: Gives several boosts to grenades, but is limited by its charges even with faster recharge from other perks. |
 Shock Value Shock Value
|
Perk Effect: Bolt shots ignore enemy Armor. Tier Explanation: Improves tech weapon damage by ignoring your target's armor. Less priority than other tech weapon perks which improve its charge mechanic. |
 Ambidextrous Ambidextrous
|
Perk Effect: Unlocks a new cyberware slot for your Hands. Tier Explanation: Situational perk to get if you want to add another cyberware for for the Hands slot. |
 Cyborg Cyborg
|
Perk Effect: 15% reduced Cooldown for all cyberware if all available slots are filled. Tier Explanation: Useful to lower your cyberwares' cooldowns, but is tied to your cyberware capacity. |
 Built Different Built Different
|
Perk Effect: Unlocks Cellular Adapter cyberware for the Integumentary System. It can be purchased and installed at ripperdoc clinics. This Perk is required to use it properly. Tier Explanation: Optional perk to get to be able to equip Cellular Adapter. Works best with the Tech tree maxed out. |
 Flash Sale Flash Sale
|
Perk Effect: For Flash, Smoke, and Recon grenades: Double grenade charges. Double recharge rate. Tier Explanation: Very handy for non-explosive grenades and makes them viable to use during combat, but not important if you want to focus on dealing damage. |
 Lucky Day Lucky Day
|
Perk Effect: +25% crafting components from looting. Tier Explanation: Useful perk to get more resources, but optional. |
 Demolitions Surplus Demolitions Surplus
|
Perk Effect: +1 max grenade charge, +250% recharge speed for grenades outside of combat. Tier Explanation: Can be useful for an extra grenade charge, but not a priority as health perks are more important. |
 Doomlauncher Doomlauncher
|
Perk Effect: Projectile Launch System cyberware receives: +1 max charges, +20% recharge speed, +25% additional recharge speed when you have no charges available, +200% additional recharge speed outside of combat, +5% instant recharge after neutralizing an enemy. It also receives the same bonus as grenades from Burn This City Perk. Tier Explanation: Powers up the Projectile Launch System, but still needs Relic skills to maximize faster recharge speed. |
C-Tier Perks
| Jump to a Tier Section Here! | |||
|---|---|---|---|
| S | A | B | C |
| Perk | Effect / Explanation |
|---|---|
 Burn This City Burn This City
|
Perk Effect: When you accumulate 5 stacks of Pyromania, they will be consumed to instantly replenish a grenade charge, but all bonuses from those stacks will remain active for 6 sec. Tier Explanation: Can be useful to instantly get a grenade charge, but is tied to how fast you can accumulate Pyromania stacks. |
 Heat Shield Heat Shield
|
Perk Effect: +10% Mitigation Chance per stack of Pyromania. Tier Explanation: Useful to get defense boosts from Pyromania, but you need to stack it up to be able to maximize it. |
 Friendlier Fire Friendlier Fire
|
Perk Effect: +50% resistance to damage and effects from explosions you cause. Tier Explanation: Useful to get Pyromania stacks, but you'll have to always be near grenade explosions which may be disruptive to your positioning. |
 Chipware Connoisseur Chipware Connoisseur
|
Perk Effect: When upgrading cyberware, you can choose from two stat modifier options. A third option is available at Tier 3 and higher. Tier Explanation: Optional perk due to cost of upgrading cyberware. Not useful if you don't have a lot of resources. |
 Coming In Hot Coming In Hot
|
Perk Effect: +50% recharge speed for grenades when you have none available. Tier Explanation: Can be useful if you like chucking grenades, but not as important to get compared to health perks. |
 First Aid First Aid
|
Perk Effect: +15% recharge speed for Health Items when you've only used 1 charge. Tier Explanation: Handy when fighting only a couple of enemies, but loses effectiveness if you're being shot at from all sides and need to use health items consecutively just to avoid dying. |
 Gearhead Gearhead
|
Perk Effect: +33% vehicle health. Vehicle-mounted weapons receive: +25% damage and -0.7 sec. lock-on time. Tier Explanation: Useful perk if you're using a weaponized vehicle most of the time, but otherwise not a priority. |
Cool Attribute Perk Tier List
The perks in the Cool attribute promotes the stealth gameplay. This includes perks that improves the sneaking capabilities of V, the damage of throwing knives, and the power of handguns.
S-Tier Perks
| Jump to a Tier Section Here! | |||
|---|---|---|---|
| S | A | B | C |
| Perk | Effect / Explanation |
|---|---|
 Style Over Substance Style Over Substance
|
Perk Effect: Guaranteed Crit Hits with throwable weapons when crouch-sprinting, sliding, dodging or Dashing. No movement speed penalty when aiming a throwable weapon. Tier Explanation: You'll have guaranteed critical hits when throwing your knives as long as you are throwing them while crouch-sprinting. |
 Nerves of Tungsten-Steel Nerves of Tungsten-Steel
|
Perk Effect: When Deadeye is active: Guaranteed Crit Hits for headshots and weak spots Increased damage as distance increases (max. +25%). Tier Explanation: You'll be able to deal high damage with the combined headshot damage from Deadeye and Focus and guaranteed crit hits from this perk. Also pairs well with the Vulnerability Analytics Relic skill |
 Juggler Juggler
|
Perk Effect: -15% recovery time for throwable weapons +20% headshot and weakspot damage with throwable weapons. Instant Cooldown reset for all throwable weapons after neutralizing an enemy with a throwable weapon via headshot, Crit Hit, or Poison. Tier Explanation: Instantly get your throwing knife if you kill a target in one hit via headshot. No need to wait for it to refresh or retrieve it. |
 Ninjutsu Ninjutsu
|
Perk Effect: +15% crouch movement speed. +15% Mitigation Chance when crouched. Unlocks the ability to spring while crouching. Press LSHIFT while crouching. Crouch-sprinting allows you to move more quickly while staying silent, but it consumes Stamina. Tier Explanation: Sneak around faster with crouch-sprinting. |
 Deadeye Deadeye
|
Perk Effect: +10% headshot and weakspot damage -25% Stamina cost for shooting. Unlocks Deadeye mode, which is active above 85% stamina. When active: +20% headshot damage +20% weakspot damage No bullet spread Tier Explanation: Essential for gunslingers. Extra headshot and weakspot damage raises your DPS. You'll be able to keep your stamina up almost all the time if you keep killing targets thanks to your perks. |
 Pay It Forward Pay It Forward
|
Perk Effect: After retrieving a thrown knife or axe from an enemy, your first melee attack with a throwable weapon gains +200% damage. Tier Explanation: Very useful for follow up melee attacks when your initial knife throw doesn't kill your target. |
 Vanishing Act Vanishing Act
|
Perk Effect: Optical Camo activates automatically and consumes its charge gradually while crouch-sprinting or sliding Tier Explanation: Essential for assassins to stay hidden. Crouch-sprinting gradually uses Optical Camo instead of a one-time activation that has a long cooldown. |
 Rinse and Reload Rinse and Reload
|
Perk Effect: +10 reload speed for your next reload after neutralizing an enemy while aiming. Stacks 2 times. The stack resets to 0 whenever you reload or start aiming again. Tier Explanation: Useful for revolvers where you need to constantly reload. Make sure that at least your last two bullets can kill something to maximize the perk's effects. |
A-Tier Perks
| Jump to a Tier Section Here! | |||
|---|---|---|---|
| S | A | B | C |
| Perk | Effect / Explanation |
|---|---|
 Killer Instinct Killer Instinct
|
Perk Effect: +25% damage with knives, axes and silenced guns outside of combat. They also provide a preview of estimated damage. Tier Explanation: Extra damage from stealth. Health preview is useful against tougher enemies so you'll know if your attack will kill the target in one hit or you need to follow up with another. |
 Long Shot Long Shot
|
Perk Effect: When Deadeye is active, your shots always deal full damage regardless of distance. Tier Explanation: No damage reduction is useful for gunslingers that shoot from faraway or close-range silenced pistol eliminations. |
 Sleight of Hand Sleight of Hand
|
Perk Effect: +20% Crit damage for 8 sec. whenever Juggler is activated. Stacks 5 times. New stacks reset duration. All stacks are removed when duration ends. Tier Explanation: Increases your DPS as an assassin. Get critical damage as long as you can kill with throwing knives. |
 Serpentine Serpentine
|
Perk Effect: +30% Mitigation Chance when crouch-sprinting. Tier Explanation: Extra mitigation can be useful while crouch-sprinting, even during active combat. |
 Shinobi Sprint Shinobi Sprint
|
Perk Effect: -75% stamina cost for crouch-sprinting during combat. Tier Explanation: Very useful to conserve stamina while crouch-sprinting in active combat, as you'll need it to run away safely. |
 California Reaper California Reaper
|
Perk Effect: +30% Stamina after neutralizing an enemy with a ranged attack via headshot or weakspot. Tier Explanation: Killing enemies will fill up your stamina, allowing you to get access to Focus again and again. |
 Accelerated Toxin Absorption Accelerated Toxin Absorption
|
Perk Effect: Strong Attacks and thrown weapons used against Poisoned enemies instantly deal substantial Poison damage then remove all Poison effects. Tier Explanation: Useful on a targets with high health when following up with another thrown knife. Essentially skips Poison's damage over time by simply dealing poison damage instantly, so you can utilize this even when in stealth. |
 Parasite Parasite
|
Perk Effect: +15 Health on Crit Hits and headshots with thrown weapons. Tier Explanation: Great way to recover some health after eliminating targets with a knife to the head. |
 Head to Head Head to Head
|
Perk Effect: When Focus is active, neutralizing an enemy with a ranged attack resets its duration. Tier Explanation: Great for gunslingers after getting Deadeye and Nerves of Tungsten-Steel as you can keep Focus up for a long time as long as you're killing enemies. |
 No Sweat No Sweat
|
Perk Effect: -50% stamina cast from Focus made for each enemy neutralized while it was active. Tier Explanation: Can make Focus consume the least stamina possible after it ends simply by killing enemies when it is active. |
 Quick Getaway Quick Getaway
|
Perk Effect: +10% movement speed after neutralizing and enemy while undetected. Duration: 30 sec, or until you are detected. Stacks 2 times. New stacks reset duration. All stacks are removed when duration ends. Tier Explanation: Useful in stealth, so you can quickly move on to your next target. |
B-Tier Perks
| Jump to a Tier Section Here! | |||
|---|---|---|---|
| S | A | B | C |
| Perk | Effect / Explanation |
|---|---|
 Scorpion Sting Scorpion Sting
|
Perk Effect: -15% recovery time for throwable weapons. Crit Hits, headshots and hits to weakspots with throwable weapons apply Poison for 5 sec. Tier Explanation: Damage over time from poison is useful against tougher enemies that won't be killed in a single knife throw in active combat, but less useful when you're sneaking and your main goal is to eliminate enemies in a single hit. |
 Focus Focus
|
Perk Effect: +10% headshot and weakspot damage. Unlocks Focus mode. This mode automatically activates when you aim while at full Stamina. When active: No Stamina cost for shooting, allowing for more accurate shots. When it ends: -40 Stamina Duration: 2.5 sec. Tier Explanation: Not as effective at low levels on its own as you need more headshot/weakspot damage boosts, but will become more important once you get Deadeye. |
 Feline Footwork Feline Footwork
|
Perk Effect: When crouched: +15% Movement Speed, +15 Mitigation Chance. Mitigation - grants a chance to reduce incoming damage by current Mitigation Strength (default: 50%). Tier Explanation: Can be used to sneak around faster. Mitigation is useful during active combat, but if you're playing stealth it's better to avoid open fights completely. |
 High Noon High Noon
|
Perk Effect: When Deadeye is active: +35% reload speed for your next reload after neutralizing an enemy via headshot or weak spot. Effect available for 3 sec. Slows time by 50% during reload. Tier Explanation: Faster reload speed is good, but time slowing down while reloading can be disruptive. |
 Finisher: Act of Mercy Finisher: Act of Mercy
|
Perk Effect: Unlocks a Throwable Weapons Finisher. Press F when an enemy's Health is low. Automatically activates Juggler. Restores 25% Health. Tier Explanation: Most of the time you'll kill enemies in one throwing knife headshot or, if not, just throw another knife, so it's unnecessary. It also has a long animation and there's a big chance you'll get detected if another enemy is nearby. |
 Creeping Death Creeping Death
|
Perk Effect: When Optical Camo is active or you are undetected, neutralizing an enemy grants: +15% health +15% Stamina +10% movement speed for 6 sec. Tier Explanation: Stealth kills make you faster for a limited amount of time. also good recovery option if you are at low health |
 Deep Breath Deep Breath
|
Perk Effect: Slows time by 25% for you and enemies when Focus is active. Tier Explanation: Minor time slow can be useful to track your next target if Sandevistan cannot be used. |
 Unexposed Unexposed
|
Perk Effect: +20% Mitigation Chance when aiming from cover Tier Explanation: Great defense boost for gunslingers when firing behind cover. |
 Small Target Small Target
|
Perk Effect: +20% Mitigation Chance when crouched and not moving. Tier Explanation: Only useful if you stay in one spot. Useful for gunslingers firing behind cover but less useful for stealth since you'll always be moving around. |
C-Tier Perks
| Jump to a Tier Section Here! | |||
|---|---|---|---|
| S | A | B | C |
| Perk | Effect / Explanation |
|---|---|
 Run 'N' Gun Run 'N' Gun
|
Perk Effect: Hip-firing does not consume stamina. When Focus is active: +25% movement speed. Tier Explanation: Hip-firing is less effective than Nerves of Tungsten-Steel, where a single headshot can kill and all you need to do is aim. |
 Pounce Pounce
|
Perk Effect: Allows you to perform Finishers from a greater distance if you've hit the enemy with a throwable weapon. Each successful throw also makes them more susceptible to Finishers. To perform a Finisher, press F when an enemy's Health is low. Tier Explanation: Extends Act of Mercy's range, but you can also just follow up with another knife to the head. |
 Quick Draw Quick Draw
|
Perk Effect: +30% weapon swap speed when swapping to Pistols, Revolvers, Sniper Rifles and Precision rifles +30% Stamina when swapping during combat. Tier Explanation: Only becomes useful if you want to use a sniper rifle along with a revolver, but you'll get more mileage with your perks if you only stick with your revolver. |
 Corrosion Corrosion
|
Perk Effect: Allows you to apply Poison to mechs, robots, drones and turrets. Tier Explanation: Useful against robots and drones, but only during active combat. |
 Neurotoxin Neurotoxin
|
Perk Effect: Applying poison to an enemy via Scorpion Sting now also applies Blinding and disables sprinting for 6 sec. Tier Explanation: Poison, bleeding, and not being able to sprint are useful against enemies during active combat. not needed during stealth where you can kill in a single hit. |
 Pull! Pull!
|
Perk Effect: When Focus is active, shooting grenades out of the air is easier and the blast is more powerful. Tier Explanation: Only useful if you can aim fast at an incoming grenade. Not really worth using Sandevistan; simply run away to reposition. |
 Gag Order Gag Order
|
Perk Effect: Landing an attack on an enemy right after they detect you will delay detection from other nearby enemies. Tier Explanation: Good backup in case you get detected, but you need to immediately finish off the previous target and other nearby enemies who can potentially detect you. |
 Blind Spot Blind Spot
|
Perk Effect: When crouched, the higher your Mitigation Chance, the longer it takes for enemies to detect you. Tier Explanation: Only becomes effective if you get more mitigation from other perks and cyberware. You'll also sneak around better as you get other stealth perks. |
 Road Warrior Road Warrior
|
Perk Effect: Allows you to use Sandevistan to slow time while driving. Allows Kerenzikov to be activated when aiming and handbraking simultaneously. +25% weapon damage when your vehicle is drifting or airborne. Tier Explanation: May get some use during car chases but using vehicle quickhacks is better. Additionally, you can only get boosted vehicle weapon damage when you're drifting or airborne; most of the time you'll be driving so you won't be able to take advantage of the boost. |
Tier List Criteria
General Useability
When we evaluated this tier list, we thought about how a certain perk would apply to a plethora of builds in the game. Most of the perks that satisfy this have increased tier rankings.
Ease of Perk Activation
We also thought about how easy it is to activate the effect of a certain perk. Some perks require the players to satisfy certain conditions first before activating so we had to evaluate if the effect has enough upside to compensate.
Cyberpunk 2077: Phantom Liberty Related Guides

List of Perks and Skill Tree Guide
All Attributes and Perks
| All Attributes and Perk List | |||||
|---|---|---|---|---|---|
| Body | Reflexes | Intelligence | |||
| Technical Ability | Cool | ||||
Attribute and Perk Guides
| Perk and Attribute Lists | |
|---|---|
| List of Perks | List of Attributes |
| List of Phantom Liberty Perks | |
| Character Building Guides | |
| Best Builds List | Best Perks by Build |
| Best Attributes | Perk Tier List by Attribute |
All Cyberpunk 2077 Guides
Author

Rankings
- We could not find the message board you were looking for.
Gaming News


![Monster Hunter Stories 3 Review [First Impressions] | Simply Rejuvenating](https://img.game8.co/4438641/2a31b7702bd70e78ec8efd24661dacda.jpeg/thumb)
Popular Games

Genshin Impact Walkthrough & Guides Wiki
Honkai: Star Rail Walkthrough & Guides Wiki
Umamusume: Pretty Derby Walkthrough & Guides Wiki
Pokemon Pokopia Walkthrough & Guides Wiki
Resident Evil Requiem (RE9) Walkthrough & Guides Wiki
Monster Hunter Wilds Walkthrough & Guides Wiki
Wuthering Waves Walkthrough & Guides Wiki
Arknights: Endfield Walkthrough & Guides Wiki
Pokemon FireRed and LeafGreen (FRLG) Walkthrough & Guides Wiki
Pokemon TCG Pocket (PTCGP) Strategies & Guides Wiki


Recommended Games
Diablo 4: Vessel of Hatred Walkthrough & Guides Wiki
Cyberpunk 2077: Ultimate Edition Walkthrough & Guides Wiki
Fire Emblem Heroes (FEH) Walkthrough & Guides Wiki
Yu-Gi-Oh! Master Duel Walkthrough & Guides Wiki
Super Smash Bros. Ultimate Walkthrough & Guides Wiki
Pokemon Brilliant Diamond and Shining Pearl (BDSP) Walkthrough & Guides Wiki
Elden Ring Shadow of the Erdtree Walkthrough & Guides Wiki
Monster Hunter World Walkthrough & Guides Wiki
The Legend of Zelda: Tears of the Kingdom Walkthrough & Guides Wiki
Persona 3 Reload Walkthrough & Guides Wiki


All rights reserved
CD PROJEKT®, Cyberpunk®, Cyberpunk 2077® are registered trademarks of CD PROJEKT S.A. © 2020 CD PROJEKT S.A. All rights reserved. All other copyrights and trademarks are the property of their respective owners.
The copyrights of videos of games used in our content and other intellectual property rights belong to the provider of the game.
The contents we provide on this site were created personally by members of the Game8 editorial department.
We refuse the right to reuse or repost content taken without our permission such as data or images to other sites.
Currently (and afaik since launch) any increases to reload speed actually decrease weapon damage (because the dps stays fixed - thus the game lowers damage to compensate for the increased attack speed provided by faster reloads. This applies to rate of fire increases too.