Automatic Love Quest Walkthrough and Rewards
★ Coming to Switch 2
★ New: Metro System, Car Racing, Romantic Hangouts
★ Phantom Liberty: Dogtown Map & Relics System
★ See our Best Builds here!
┗ HOT: Blades Build, Netrunner Build, & Assassin Build
This is a walkthrough for Automatic Love, a Main Quest in Cyberpunk 2077. Read on to learn all the available choices in Automatic Love, how to get the best possible result, tips and strategies for the Quest, and all available rewards.
| All Judy Quests (Judy Romance Guide) | |
|---|---|
| 1 | The Information |
| 2 | Automatic Love |
| 3 | The Space In Between |
| 4 | Disasterpiece |
| 5 | Double Life |
| 6 | Both Sides, Now |
| 7 | Ex-Factor |
| 8 | Talkin' 'Bout A Revolution |
| 9 | Pisces |
| 10 | Pyramid Song |
List of Contents
Automatic Love Overview
| Quest Type | Main |
|---|---|
| Act | Act 2 |
| Quest No. | 3 |
| Lifepath | All |
How to Unlock Automatic Love
| Quest Unlock Conditions | Talk with Takemura in the diner after Playing For Time. |
|---|
Automatic Love Rewards
| Rewards |
|---|
|
・ 552 Street Cred ・ 1102 XP ・ 484 Eddies |
Automatic Love Walkthrough
Video Walkthrough and Guide
Automatic Love Quest Objectives
Megabuilding H8
| Objectives | |
|---|---|
| 1 | 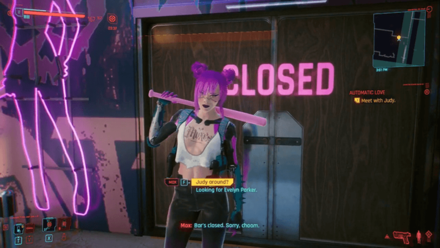 |
| 2 | 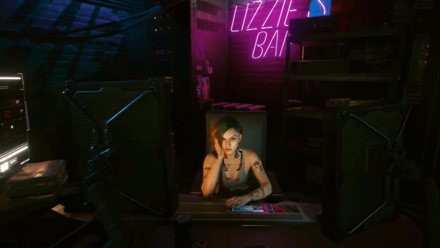 |
| 3 | 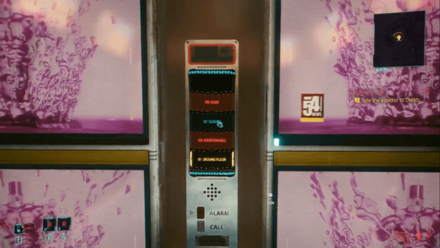 |
| 4 |  |
| 5 | 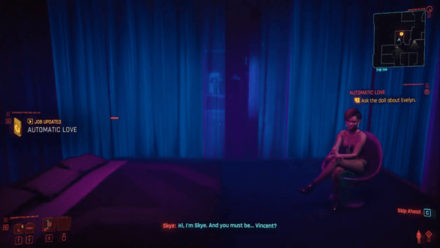 |
| 6 | 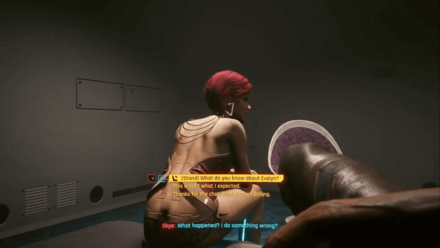 Optional: Witness the man arguing with security then wait for the manager to go into the bathroom. Take him down stealthily to get his VIP access card and make your way upstairs without issue. |
| 7 | 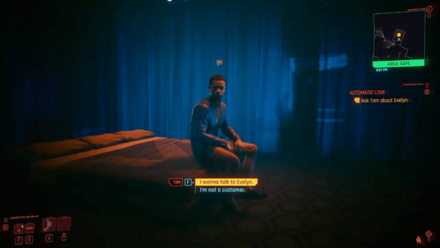 |
Threaten or Make a Deal with Woodman
| Objectives | |
|---|---|
| 1 | ▶Possible Outcomes |
| 2 | Optional: You can still kill him if you choose certain dialog options that antagonizes him. Check the Kill Woodman decision below for how to proceed after. |
| 3 |
Kill Woodman
| Objectives | |
|---|---|
| 1 | ▶Possible Outcomes |
| 2 | |
| 3 | |
| 4 |
All Completion Routes
Best Completion Route
| Route | Rating |
|---|---|
| Main Floor | |
| Getting the VIP Card | ★★★★★ |
| Forcing the Door | ★★★★ |
| The Shutters | ★★★ |
| Guns Blazing | ★ |
| Upper Floor | |
| Use Technical or Body to Open the Door | ★★★★★ |
| The Private Lounge | ★★★★ |
| Guns Blazing | ★★★ |
The best way to go about the lower floor is to get the VIP card as it allows you to pass through most of the upper level with no conflict.
Stealth Route Guides - Main Floor
There are three stealthy approaches to this mission:
| Getting the VIP Card | In front of the VIP area you'll see two Tyger Claws kick out an unruly patron, and then one of them will go to the bathroom. You can take out the thug that goes to the bathroom for a VIP card, which will allow you to enter the VIP Lounge without sneaking. |
|---|---|
| Forcing Open The Door | There's a door next to the bathroom that you can force open with Body attribute. It leads you to a backroom with a guard, who you can sneak past or take down. There's an elevator in the back you can access. |
| The Shutters | You go through the shutters right by the VIP door when the camera and guard are looking elsewhere. Use the walkway outside to reach the backroom. |
Stealth Route Guides - Upper Floor
There are two different ways to find your way to make your way to Woodman's office.
| Using Technical or Body to Open the Door | If you have a high enough Technical or Body, you can simply open the locked door in the back area, then find Woodman's office by taking a left, first door on your right. |
|---|---|
| The Private Lounge | You can go through the private lounge and either deal with the lone Tyger Claw or sneak through the door on your left into the makeup room and open the shutters to pass the Tyger Claw using the balcony. |
Guns Blazing Route Guide
Going the combat route here is inadvisable, moreso for the main floor than the second floor. Since you give up your weapons, in the main floor you practically have to fight through using only your fists. In the upper floors however, if you choose to take the combat route in the restricted area, there are weapons lying around that you can find, including iconic weapons. However, they're mostly melee so if you don't have a melee build it's best to avoid conflict.
Obtainable Items
This list contains only rare Items and those which have a high chance of appearing.
| Item | How to Get |
|---|---|
 Cocktail Stick
(Rare) Cocktail Stick
(Rare)
|
The katana called The Cocktail Stick can be found in the make-up room of the Clouds, next to Evelyn's jacket. You can find this room adjacent to the dark room that overlooks the public upstairs lounge. |
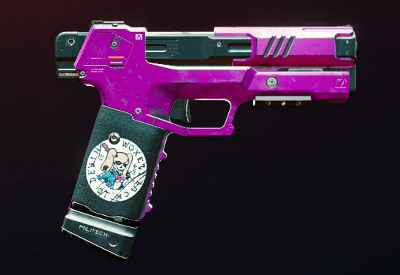 Lizzie
(Rare) Lizzie
(Rare)
|
Can be found in the basement of Lizzie's during the Automatic Love main job. Just before entering Judy's office, look to the left. On top of a table, you'll find the weapon. |
Automatic Love Choices and Best Choice
Best Choice - Do Not Kill Woodman
If Woodman lives, you will have an easier time dealing with Maiko in the later side-job Ex-Factor, as well as being able to kill him later on as well. It's best that you leave him alive.
Handling Woodman
| Choice | Outcome |
|---|---|
| Make A Deal With Woodman | You can make a deal with Woodman to resolve the whole matter peacefully. If you do this, he'll activate an elevator that leads you to the exit. |
| Threaten Woodman | Woodman can give you the info you need without having to kill him. There are multiple ways to go about this. If you succeed he will let you off the hook and even lead you safely out of the building. ・ If you saw the holoprojection of what happened to Evelyn, you can threaten to tell the media everything and take it to the news. ・ If you completed the gig Monster Hunt, you can bring up Jotaro Shobo and threaten Woodman. ・ If you completed the side mission I Fought The Law, you can threaten to call NCPD through River Ward. |
| Kill Woodman | If your conversation with Woodman doesn't go well, you will have to kill him for the info. Meanwhile, going into his office guns blazing won't give you a chance to speak to him. Either way, you still have to kill him. Doing so will get you some decent loot from his body. You will also find out on the computer about Evelyn's location a bit earlier. |
Angel or Skye?
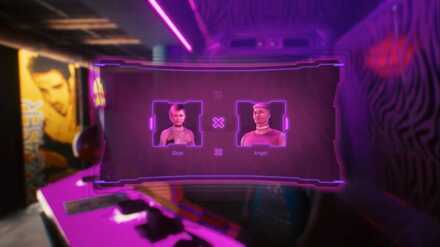
The receptionist at Clouds will ask you to choose between two dolls: Angel and Skye. No matter who you pick, there is no difference in the outcome of the quest. You will have the same conversation with either of them.
Tips and Strategies
Finding Evidence of Evelyn
If you go to Booth 11, you'll find a recording of what happened to Evelyn. You can use this later on to threaten or cut a deal with Woodman.
Grab a Katana or a Knife
If you choose to fight Woodman, you may want to get a weapon to help you out. The guard with the VIP access card also has a fairly strong katana you can make use of. There is also a high powered knife in the security room next to Woodman's office. Alternatively, you can look for the weapons below.
Cyberpunk 2077 Related Guides

All Main Quest Guides
Act 1
| No. | Quest | |||||
|---|---|---|---|---|---|---|
| 1 | The Streetkid | The Nomad | The Corpo-Rat | |||
| 2 | The Rescue | |||||
| 3 | The Ripperdoc | |||||
| 4 | The Ride | |||||
| 5 | The Information | The Pickup | ||||
| 6 | The Heist | |||||
Act 2
Act 3
1.5*: Only available in the Secret Ending
Phantom Liberty Main Quests
All Quest Types
| Quest Types | ||
|---|---|---|
Author

Automatic Love Quest Walkthrough and Rewards
Rankings
- We could not find the message board you were looking for.
Gaming News


![Monster Hunter Stories 3 Review [First Impressions] | Simply Rejuvenating](https://img.game8.co/4438641/2a31b7702bd70e78ec8efd24661dacda.jpeg/thumb)
Popular Games

Genshin Impact Walkthrough & Guides Wiki
Honkai: Star Rail Walkthrough & Guides Wiki
Umamusume: Pretty Derby Walkthrough & Guides Wiki
Pokemon Pokopia Walkthrough & Guides Wiki
Resident Evil Requiem (RE9) Walkthrough & Guides Wiki
Monster Hunter Wilds Walkthrough & Guides Wiki
Wuthering Waves Walkthrough & Guides Wiki
Arknights: Endfield Walkthrough & Guides Wiki
Pokemon FireRed and LeafGreen (FRLG) Walkthrough & Guides Wiki
Pokemon TCG Pocket (PTCGP) Strategies & Guides Wiki


Recommended Games
Diablo 4: Vessel of Hatred Walkthrough & Guides Wiki
Cyberpunk 2077: Ultimate Edition Walkthrough & Guides Wiki
Fire Emblem Heroes (FEH) Walkthrough & Guides Wiki
Yu-Gi-Oh! Master Duel Walkthrough & Guides Wiki
Super Smash Bros. Ultimate Walkthrough & Guides Wiki
Pokemon Brilliant Diamond and Shining Pearl (BDSP) Walkthrough & Guides Wiki
Elden Ring Shadow of the Erdtree Walkthrough & Guides Wiki
Monster Hunter World Walkthrough & Guides Wiki
The Legend of Zelda: Tears of the Kingdom Walkthrough & Guides Wiki
Persona 3 Reload Walkthrough & Guides Wiki


All rights reserved
CD PROJEKT®, Cyberpunk®, Cyberpunk 2077® are registered trademarks of CD PROJEKT S.A. © 2020 CD PROJEKT S.A. All rights reserved. All other copyrights and trademarks are the property of their respective owners.
The copyrights of videos of games used in our content and other intellectual property rights belong to the provider of the game.
The contents we provide on this site were created personally by members of the Game8 editorial department.
We refuse the right to reuse or repost content taken without our permission such as data or images to other sites.
If you have Inteligence attribute 20 you can offer to Woodman to help them secure their private net exchange for info about evelyn