Gimme Danger Quest Walkthrough and Rewards
★ Coming to Switch 2
★ New: Metro System, Car Racing, Romantic Hangouts
★ Phantom Liberty: Dogtown Map & Relics System
★ See our Best Builds here!
┗ HOT: Blades Build, Netrunner Build, & Assassin Build
This is a walkthrough for Gimme Danger, a Main Quest in Cyberpunk 2077. Read on to learn all the available choices in Gimme Danger, how to get the best possible result, tips and strategies for the Quest, and all available rewards.
| Previous Quest | Current Quest | Next Quest |
|---|---|---|
| Down On The Street | Gimme Danger | Play It Safe |
List of Contents
Gimme Danger Basic Information
| Quest Type | Main |
|---|---|
| Act | Act 2 |
| Quest No. | 5 |
| Lifepath | All |
How to Unlock Gimme Danger
| Quest Unlock Conditions | Complete Down on the Street and wait 24 in-game hours. |
|---|
Gimme Danger Rewards
| Quest Rewards | 1256 Street Cred |
|---|
Gimme Danger Walkthrough
Gimme Danger Quest Objectives
Japantown
| Objectives | |
|---|---|
| 1 | 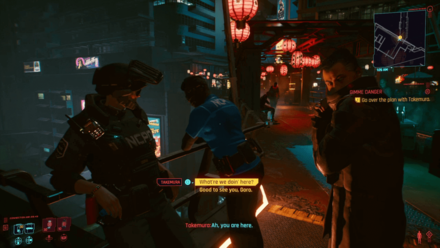 |
| 2 |  Method 1: If you have 6 points in your Body attribute, you can force the door open. Method 2: Use the dumpster to your left to jump up to a grate. |
| 3 |  |
| 4 |  |
| 5a |  ▶Possible Outcomes |
| 5a-1 |  |
| 5a-2 | 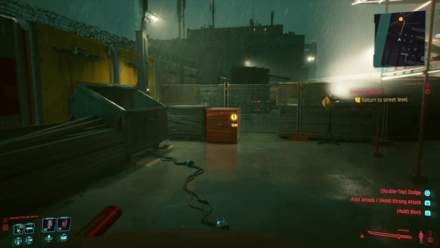 |
| 5a-3 | 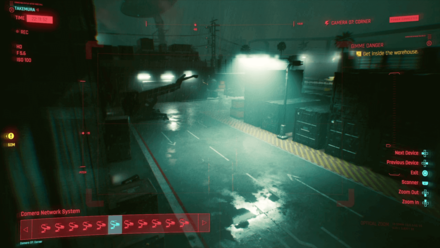 |
| 5a-4 | 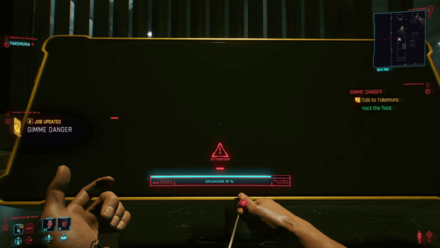 Optional: If you choose to stealth your way into the warehouse, there will be someone guarding the entrance to the float. To avoid the guard, you can use the second floor window from the right side of the float to enter the float. |
| 5a-5 | 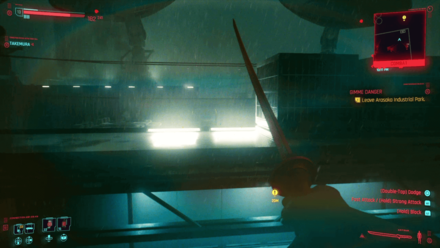 |
| 5b | ▶Possible Outcomes |
All Completion Routes
Best Completion Route
| Route | Rating |
|---|---|
| Convince Guard to Let You In | ★★★★★ |
| Maintenance Tunnel | ★★★★ |
| The Van | ★★★★ |
| Footbridge | ★★★ |
| Side Entrance | ★★ |
| Guns Blazing | ★ |
Using the Convincing the Guard to Let You In is the best because it doesn't require sneaking and allows you to wander the area without resistance.
Stealth Route Guides

| Convince Guard to Let You In (Corpo) | As a Corpo, if you convince the guard that you work in the warehouse, he will let you in and the rest of personnel won't bat an eye on you. However, some guards will ask you about your identity so make sure you fool them as well or they will start shooting at you. |
|---|---|
| Footbridge | You can climb on to the footbridge via the crates in the worksite where you were with Takemura. Follow the path to the security building and sneak past or eliminate every sentry you run into. Enter the security building from the ground floor. |
| The Van | You can hijack a van that turns the corner from the road. Once you get it, you'll be able to enter the compound from its side entrance (you will be instructed by the guards if you enter the wrong gate). Once you go in there, simply park near the containers. Crouch walk to the pile of pallets past the security booth, and then hop onto the blue barrels, then the gas tank, then the adjacent rooftop. This will leave you near a door that leads into the warehouse. |
| Side Entrance | Past the facility's front door is a side entrance (same place you would arrive via the van if you hijacked it). Crouch walk to the pile of pallets past the security booth, and then hop onto the blue barrels, then the gas tank, then the adjacent rooftop. This will leave you near a door that leads into the warehouse. |
| Maintenance Tunnel | In the facility, left of the footbridge, there will be a ramp and stairs descending down surrounded by red lights. Once you reach the bottom, to the left is a door that leads into the maintenance tunnel. You can sneak through it and come out right next to the door of the warehouse. |
Guns Blazing Route Guide
The best route to go through here would be the side entrance's warehouse door, as the main door is guarded by a robot which is particularly hard to beat.
Obtainable Items
This list contains only rare Items and those which have a high chance of appearing.
| Item | How to Get |
|---|---|
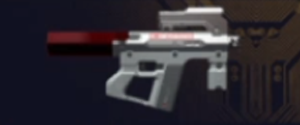 Prototype: Shingen Mark V
(-) Prototype: Shingen Mark V
(-)
|
Can be found inside shipping container 667 in Arasaka Industrial Park. |
Gimme Danger Choices and Best Choice
Join Takemura or Let Takemura Do Recon Alone
| Choice | Outcome |
|---|---|
| Join Takemura | If you choose to join Takemura on recon, the quest will be slightly longer as you have to inspect the warehouse you're about to infiltrate. This will give you multiple ways to enter and escape Arasaka Industrial Park. There will also be a scene where Takemura will share important details about Jackie while doing reconnaissance, only if you chose to send him to the RIpperdoc's at the end of The Heist. |
| Let Takemura Do Recon Alone | You won't have to go to the trouble of doing recon. Takemura will do it alone. However, you will miss out on a lot of important story elements, as well as multiple entry and escape routes in the warehouse |
Best Choice
It is recommended to join Takemura on doing recon. As mentioned above, you will have multiple approaches to infiltrate the warehouse. This will also give you the opportunity to get to know Takemura better as he shares his backstory with you.
Tips and Strategies
Stay Hidden
There are a lot of enemies in this area, so try to stay hidden as much as possible to avoid them.
Cyberpunk 2077 Story Walkthrough

All Main Quest Guides
Act 1
| No. | Quest | |||||
|---|---|---|---|---|---|---|
| 1 | The Streetkid | The Nomad | The Corpo-Rat | |||
| 2 | The Rescue | |||||
| 3 | The Ripperdoc | |||||
| 4 | The Ride | |||||
| 5 | The Information | The Pickup | ||||
| 6 | The Heist | |||||
Act 2
Act 3
1.5*: Only available in the Secret Ending
Phantom Liberty Main Quests
All Quest Types
| Quest Types | ||
|---|---|---|
Comment
As Corpo/Female character you can not convince the guard. 2nd playthrough..
Author

Gimme Danger Quest Walkthrough and Rewards
Rankings
Gaming News

![Monster Hunter Stories 3 Review [First Impressions] | Simply Rejuvenating](https://img.game8.co/4438641/2a31b7702bd70e78ec8efd24661dacda.jpeg/show)


![Monster Hunter Stories 3 Review [First Impressions] | Simply Rejuvenating](https://img.game8.co/4438641/2a31b7702bd70e78ec8efd24661dacda.jpeg/thumb)
Popular Games

Genshin Impact Walkthrough & Guides Wiki
Honkai: Star Rail Walkthrough & Guides Wiki
Umamusume: Pretty Derby Walkthrough & Guides Wiki
Pokemon Pokopia Walkthrough & Guides Wiki
Resident Evil Requiem (RE9) Walkthrough & Guides Wiki
Monster Hunter Wilds Walkthrough & Guides Wiki
Wuthering Waves Walkthrough & Guides Wiki
Arknights: Endfield Walkthrough & Guides Wiki
Pokemon FireRed and LeafGreen (FRLG) Walkthrough & Guides Wiki
Pokemon TCG Pocket (PTCGP) Strategies & Guides Wiki


Recommended Games
Diablo 4: Vessel of Hatred Walkthrough & Guides Wiki
Cyberpunk 2077: Ultimate Edition Walkthrough & Guides Wiki
Fire Emblem Heroes (FEH) Walkthrough & Guides Wiki
Yu-Gi-Oh! Master Duel Walkthrough & Guides Wiki
Super Smash Bros. Ultimate Walkthrough & Guides Wiki
Pokemon Brilliant Diamond and Shining Pearl (BDSP) Walkthrough & Guides Wiki
Elden Ring Shadow of the Erdtree Walkthrough & Guides Wiki
Monster Hunter World Walkthrough & Guides Wiki
The Legend of Zelda: Tears of the Kingdom Walkthrough & Guides Wiki
Persona 3 Reload Walkthrough & Guides Wiki


All rights reserved
CD PROJEKT®, Cyberpunk®, Cyberpunk 2077® are registered trademarks of CD PROJEKT S.A. © 2020 CD PROJEKT S.A. All rights reserved. All other copyrights and trademarks are the property of their respective owners.
The copyrights of videos of games used in our content and other intellectual property rights belong to the provider of the game.
The contents we provide on this site were created personally by members of the Game8 editorial department.
We refuse the right to reuse or repost content taken without our permission such as data or images to other sites.
Im playing fem corpo and i just convinced the guard and did the whole thing stealth. did you do the Abernathy side quest? that might be it