Best Assault Rifle Build
★ Coming to Switch 2
★ New: Metro System, Car Racing, Romantic Hangouts
★ Phantom Liberty: Dogtown Map & Relics System
★ See our Best Builds here!
┗ HOT: Blades Build, Netrunner Build, & Assassin Build
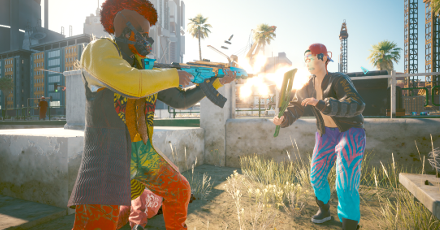
This is a guide to the best Assault Rifle Build for Cyberpunk 2077: Ultimate Edition. Read our guide for details about the build, what attributes to level up, which perks to choose, and what weapons and cyberwares to use.
List of Contents
Assault Rifle Build Overview
Build Basic Information
| Assault Rifle Build | |
|---|---|
| Main Attributes | |
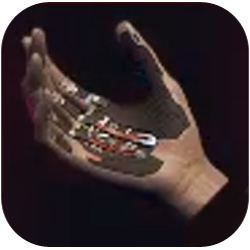
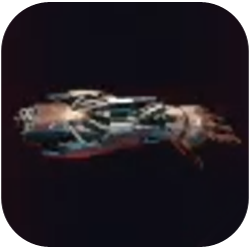
| Main Weapons / Arm Cyberware | ・Psalm 11:6 ・Moron Labe ・Errata ・Projectile Launch System |
| Operating System | ・Militech “Apogee” Sandevistan |
Strengths and Weaknesses
Strengths
This Assault Rifle build pairs up Power Assault Rifle gunplay with a nearly-undeterred run and gun playstyle thanks to various perks under Reflexes, Body, and Tech.
Perks under Reflexes improve Assault Rifle aiming, crit chance and damage, and reduced stamina cost when shooting, as well as more movement options like dashing. Those under Body and Tech improve your survivability and combat performance, like the Adrenaline Rush and Edgerunner perks.
If you have Phantom Liberty, you can obtain a Relic-exclusive skill which lets you spot weakpoints of your target, which will deal additional damage if shot.
Weaknesses
Even if this build is meant to take you dive straight into combat, you will not be built like a tank, so you still need to be wary of your health and back out whenever you need to recover HP.
Furthermore, how long you can stay alive in combat is tied directly on how quickly you can kill your enemies while Adrenaline Rush is active to charge up Blood Pump, which is your main option for recovering health for this build (outside of retreating).
You are also at a disadvantage if a combat encounter takes too long, as you will eventually run out of ammo.
Assault Rifle Best Attribute Build
Attribute Progression
| Build Attributes | |||||
|---|---|---|---|---|---|
| Lv. | Body | Reflex | Tech | Intel | Cool |
| 1 | 6 | 6 | 4 | 3 | 3 |
| 10 | 6 | 11 | 8 | 3 | 3 |
| 50 | 20 | 20 | 20 | 3 | 8 |
| 60 | 20 | 20 | 20 | 3 | 18 |
The max level is only up until 50 in the base game. Purchase Phantom Liberty to reach level 60.
The primary Attribute for this build is Reflexes, which includes Assault Rifle and Dash perks. These are vital to the run and gun playstyle for this build.
After the 2.0 update, you are no longer able to spam healing items as these are now locked behind cooldowns. This led to the build getting certain perks under Body and Technical Ability which help you get faster health item recharge and get some extra HP during combat via Adrenaline Rush. Some perks under the Tech tree will also net you bonuses from equipped cyberware and slowly build up to the Edgerunner perk which synergizes with this build's aggressive playstyle.
The remaining attribute points, including those obtained from Phantom Liberty, are used on Cool to get more crit damage.
Assault Rifle Build Best Perks
This is the full list of perks that you can get if you achieve the maximum level 60 with the Phantom Liberty DLC. Optional perks are also listed in their own section in case you have not purchased the DLC.
| Jump to Each Attribute for Their Perks! | ||
|---|---|---|
| Optional Perks | ||
Reflexes Attribute
The main perk tree for Assault Rifles are found under Reflexes. The bonuses you can get from these perks start from reduced stamina costs and recoil when shooting, which you will be doing a lot.
This will lead up to getting better stamina regeneration, improved weapon control, and higher damage output once you get Sharpshooter and Salt in the Wound.
You will also get movement perks under Reflexes, with Dash and Air Dash being key movement techs once you get them.
These two trees will merge with the Air Kerenzikov perk, which allows you to use the cyberware to stop and slow down time while midair. Not only will you look cool, you'll also be able to eliminate targets while you're suspended in the air!
If you have Phantom Liberty, you can use the additional perk points from the increased level cap to add blades perks in the build. You can then wield a katana that can deflect bullets with Lead and Steel or even use the Bladerunner finisher.
Perk List
| Main Perk | Secondary Perk(s) |
|---|---|
|
(1 pt) |
|
|
(2 pt) |
|
|
(2 pt) |
|
|
(2 pt) |
|
|
(3 pt) |
|
|
(3 pt) |
|
|
(3 pt) |
Final Perks
| Final Perks | |||
|---|---|---|---|
|
|
|
||
Cross-Branch Perk
| Perk | Requirement |
|---|---|
|
|
Get this perk when you have specific secondary perks unlocked.
Technical Ability Attribute
After the 2.0 update, you can no longer spam health items to heal as these are now locked behind cooldowns per use, which warranted the need of some perks under the reworked Technical Ability tree to be included in this build.
The Glutton for War and Health Freak perks improve health item usage and will also lower its cooldown. These two will also benefit from buffs received from Adrenaline Rush perks, which is under the Body attribute.
For cyberwares, the Edgerunner perk tree is obtained to improve all of your equipped cyberwares. Edgerunner also has a chance to activate Fury, which will make you even deadlier when it activates.
Both perk trees will merge with the Ticking Time Bomb perk, which incentivizes frequent use of your Sandevistan and jumping right into the center of a firefight.
Perk List
| Main Perk | Secondary Perk(s) |
|---|---|
|
(1 pt) |
|
|
(2 pt) |
|
|
(2 pt) |
|
|
(3 pt) |
|
|
(3 pt) |
Final Perks
| Final Perks | |||
|---|---|---|---|
|
|
|
||
Cross-Branch Perk
| Perk | Requirement |
|---|---|
|
|
Get this perk when you have specific secondary perks unlocked.
Body Attribute
Perks under the Body tree are centered around Adrenaline Rush, a buff which gives you extra health upon using your Blood Pump cyberware.
Adrenaline Rush is used in combination with your Sandevistan or Kerenzikov cyberware to get extra health as you head right into enemy frontlines.
As Adrenaline Rush is limited by Blood Pump's recharge time, the perk is paired with Glutton for War and Health Freak perks under the Tech tree so you can quickly charge up Blood Pump by simply killing your enemies.
Perk List
| Main Perk | Secondary Perk(s) |
|---|---|
|
(1 pt) |
|
|
(3 pt) |
Final Perks
| Final Perks | |||
|---|---|---|---|
|
|
|||
Optional Perks
If you still have not purchased the Phantom Liberty DLC and have no access to the 10 additional perk points that came with it, these perks are optional and can be removed.
| Removable Perks (10 pts) | |
|---|---|
| -- | |
Assault Rifle Build Relic Skill Priority
Take Vulnerability Analytics and Machine Learning First
| Priority | Main Skill | → | Branch Skill |
|---|---|---|---|
| 1st |
|
→ |
|
| 2nd |
|
→ |
|
Vulnerability Analytics and Machine Learning are the main Relic skills for guns in the game, including Assault Rifles. These skills will highlight enemy weakspots that you can shoot to deal bonus damage.
Once you get these, you can next obtain Jailbreak and Launch Capacity Override to gain extra Projectile Launch System shots and charges.
Relic Skill Tree Available in the DLC
Please take note that the Phantom Liberty expansion is needed to access the Relic Skill Tree.
Relic Skill Tree Guide and List
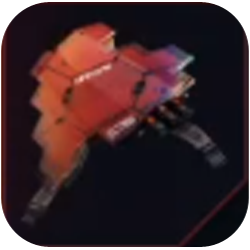
Assault Rifle Build Recommended Weapons
Base Game Only
| Recommended Weapons (Base Game only) |
||
|---|---|---|
| Psalm 11:6 | Moron Labe | Errata |
- The Psalm 11:6's thermal damage properties can help deal more damage over time and lets you kill your targets faster. It also synergizes well with Errata.
- The Moron Labe is another great rifle thanks to its high fire rate, although it is less effective the farther you are from your target due to its low effective range and handling.
- The Errata is a perfect pair for the Psalm 11:6, as you can guarantee critical hits when used on burning enemies.
Base Game + Phantom Liberty
| Recommended Weapons (with Phantom Liberty) |
||
|---|---|---|
| Psalm 11:6 | Moron Labe | Errata |
- All three weapons still work as a loadout in Phantom Liberty. With more perk points, you can also improve your Errata by getting blades-oriented perks.
Assault Rifle Build Best Cyberwares
| Jump to a Cyberware section! | |||||||
|---|---|---|---|---|---|---|---|
| Operating System | Face | Hands | Circulatory System | ||||
| Legs | Frontal Cortex | Arms | Skeleton | ||||
| Nervous System | Integumentary System | ||||||
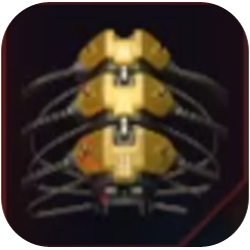
Operating System
| Cyberware | Effect (Tier 5) |
|---|---|
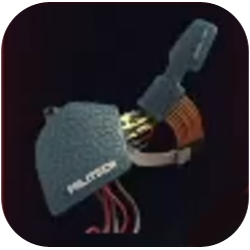
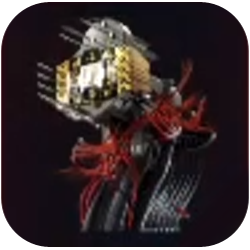
 Militech "Apogee" Sandevistan Militech "Apogee" Sandevistan
|
Press L1 and R1 to activate and deactivate. It can be activated at any charged level. When active: Slows time by 85% (you are not slowed) +10% headshot damage +9% Crit Chance +13% Crit Damage Neutralizing an enemy when active gives: +20% extended duration +22% Stamina Max Duration: 8 sec. Cooldown: 30 sec. |
A Sandevistan is an important part of the gameplay loop for this build, as this will help you easily jump right into the faces of your targets and bury them in bullets.
Activating a Sandevistan will also cause an EMP blast after 3 seconds once you get the Ticking Time Bomb perk.
Alternative: Militech Falcon Sandevistan
| Cyberware | Effect (Tier 5) |
|---|---|
 Militech "Falcon" Sandevistan Militech "Falcon" Sandevistan
|
When active: Slows time by 70% (you are not slowed), +10% damage, +10% Crit Chance, +5% Crit Damage. Neutralizing an enemy when active gives: +10% extended duration, +5% Health. Max Duration: 9 sec., Cooldown: 35 sec. |
A good alternative to the Apogee, in case you missed it during the Riders On the Storm mission, as this can be bought in Ripperdocs all over Night City.
Face
| Cyberware | Effect (Tier 5) |
|---|---|
 Kiroshi "The Oracle" Optics Kiroshi "The Oracle" Optics
|
Effect active when scanning: Highlights enemies within 17.5 m.including enemies behind cover. Highlights cameras and turrets within 35m. Highlights explosive devices and traps near your crosshair within 26m. |
The Oracle variant of a Kiroshi Optics lets you track enemies, which is useful to keep track of who to kill next.
Hands
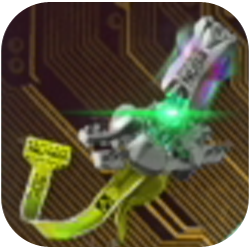
| Cyberware | Effect (Tier 5) |
|---|---|
 Ballistic Coprocessor Ballistic Coprocessor
|
Increased ricochet chance with Power weapons. +30% ricochet damage. |
 Shock Absorber Shock Absorber
|
-20% Recoil |
Power Assault Rifles are to be used for this build, which is why you should equip a Ballistic Coprocessor so you can also capitalize on ricochets. A Shock Absorber, on the other hand, will reduce recoil.
Do note that you need the Ambidextrous perk to unlock a second cyberware slot for Hands.
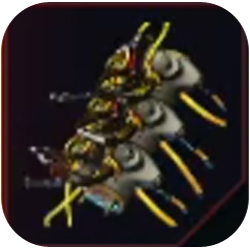
Circulatory System
| Cyberware | Effect (Tier 5) |
|---|---|
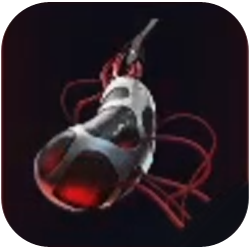
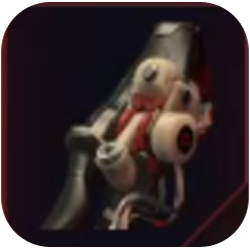
 Blood Pump Blood Pump
|
Activate to instantly restore 90% of max Health. Cooldown 30 sec. |
 Clutch Padding Clutch Padding
|
-18% Stamina cost for shooting. |
Blood Pump is another key cyberware for this build, as this will activate Adrenaline Rush and all of its effects, apart from it being your main healing item.
Clutch Padding will further decrease stamina used when shooting, which you'll be doing a lot.
Legs
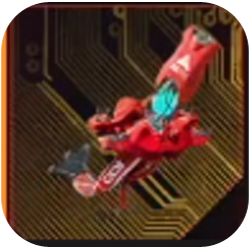
| Cyberware | Effect (Tier 5) |
|---|---|
 Reinforced Tendons Reinforced Tendons
|
Press Space Bar in midair to perform a double jump. |
Reinforced Tendons enable double jumping, which you can use to move around or activate Kerenzikov in midair without the need to climb buildings or platforms.
Simply double jump, aim your weapon, and air dash to activate Kerenzikov and slow down time.
Frontal Cortex
| Cyberware | Effect (Tier 5) |
|---|---|
 Kerenzikov Boost System Kerenzikov Boost System
|
When Kerenzikov is active: -100% stamina cost for shooting. Slows time by 15% relative to your enemies. |
 Mechatronic Core Mechatronic Core
|
+35% damage against drones, robots, mechs and turrets. +2 Max RAM. |
Equipping a Kerenzikov Boost System will give you more stat boosts when you use Kerenzikov.
Mechatronic Core will let you deal more damage against robots, which you will encounter as you progress through the game.
Arms
| Cyberware | Effect (Tier 5) |
|---|---|
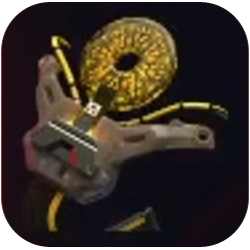
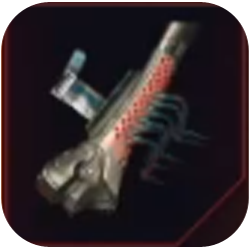
 Projectile Launch System Projectile Launch System
|
Charged shots gain: +30% damage, +25% explosion radius, +40% dismemberment chance |
A Projectile Launch System will act as a sidearm of sorts, which you can use to fire an explosive at enemies to deal extra damage.
This cyberware also gains benefits from Pyromania and its related perks once you get them, at which point you can then incorporate while in combat.
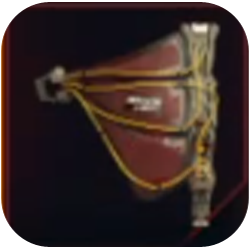
Skeleton
| Cyberware | Effect (Tier 5) |
|---|---|
 Bionic Joints Bionic Joints
|
Armor - Simple but effective. |
 Spring Joints Spring Joints
|
+19% Mitigation Strength (Total Mitigation Strength cannot exceed 90%) Mitigation grants achance to reduce incoming damage by current Mitigation Strength (default: 50%). |
 Titanium Bones Titanium Bones
|
+62% Carrying Capacity. |
These Skeleton cyberware are slotted in to reduce the damage you will take.
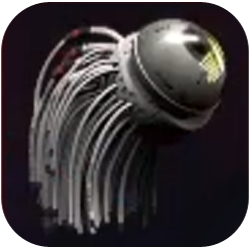
Nervous System
| Cyberware | Effect (Tier 5) |
|---|---|
 Kerenzikov Kerenzikov
|
Allows you to aim and perform ranged attacks while sliding, dodging or Dashing. Slows time by 60% for 3.5 sec. when you aim a ranged attack during a slide, dodge or Dash. Cooldown 6.5 sec. |
 Neofiber Neofiber
|
+10% Mitigation Chance, +9% Mitigation Strength Mitigation grants a chance to reduce incoming damage by current Mitigation Strength (default: 50%). |
 Reflex Tuner Reflex Tuner
|
Slows time by 60% for 4 sec. when your Health drops below 25%. Cooldown 40 sec. |
Kerenzikov acts as your second Sandevistan of sorts, which you can activate when dashing on the ground or in the air thanks to the Air Kerenzikov perk.
Meanwhile, a Reflex Tuner can be you third time-slowing cyberware, but will only activate on low health, in which case you should use Blood Pump to heal.
Neofiber grants you more mitigation stats and is slotted in for defensive purposes.
Integumentary System
| Cyberware | Effect (Tier 5) |
|---|---|
 Defenzikov Defenzikov
|
When Kerenzikove ends: +90% Mitigation Chance for 4 sec. Mitigation grants a chance to reduce incoming damage by current Mitigation Strength (default: 50%). +0.1% Crit Chance per Attribute Point. +2.6% Weapon Handling +2.1% Damage Over Time Resistance |
 Nano-Plating Nano-Plating
|
7% chance to block an incoming projectile. +100% bonus chance after performing a dodge or Dash. This bonus lasts 1.7 sec. or until the next projectile is blocked, whichever comes first. Cannot block more than 3 projectiles in a 5 sec. span. +0.2 headshot and weakspot damage per Attribute Point. +1.3% Bonus Ricochet Damage +1.3% Decreased enemy vision |
 Painducer Painducer
|
Converts 30% of damage taken into damage-over-time. +0.5% damage-over-time resistance per Attribute Point. +1.3% Health Item Effect +2.5% Reduced damage from Poisoned enemies |
Defenzikov is a cyberware which gives Kerenzikov defensive stats after using it.
Nano-Plating has a chance to reflect projectiles whenever you dash, which is your main way of getting around. You can take even less damage if you also equip Painducer.
How to Play the Assault Rifle Build
Use Blood Pump and Cyberware Combo
At the beginning of a firefight, use Blood Pump to activate Adrenaline Rush, which gives you extra health.
Then, double jump towards your enemies, aim with your weapon, and air dash to activate Kerenzikov in the air. Start shooting your targets and kill them to quickly recharge Blood Pump.
Once Kerenzikov ends, use your Sandevistan and continue mowing down your enemies. Use another Blood Pump if you need to heal.
Be Aggressive
This build rewards an aggressive style of running and gunning, so keep on shooting and killing even if you cannot use the recommended combo.
Take full advantage of time-slowing cyberware, Blood Pump's Adrenaline Rush and the extra health you get from it, Projectile Launch System charges, EMP blasts from the Ticking Time Bomb perk, and Fury from the Edgerunner perk.
Take Cover to Recover Health
There will be times that you may be overwhelmed by a ton of tough enemies. It's better to retreat, find cover, and wait for your health, cyberwares, and perks to be fully refreshed before continuing to fight.
Equip a Katana
After getting additional perk points in Phantom Liberty, get the blades perks under the Reflexes tree and equip a katana.
You can use this defensively to deflect bullets as you move around, or as a way to quickly finish off enemies.
Cyberpunk 2077: Phantom Liberty Related Guides

All Build Guides
All Cyberpunk 2077 Guides
Author

Best Assault Rifle Build
Rankings
Gaming News

![Monster Hunter Stories 3 Review [First Impressions] | Simply Rejuvenating](https://img.game8.co/4438641/2a31b7702bd70e78ec8efd24661dacda.jpeg/show)


![Monster Hunter Stories 3 Review [First Impressions] | Simply Rejuvenating](https://img.game8.co/4438641/2a31b7702bd70e78ec8efd24661dacda.jpeg/thumb)
Popular Games

Genshin Impact Walkthrough & Guides Wiki
Honkai: Star Rail Walkthrough & Guides Wiki
Umamusume: Pretty Derby Walkthrough & Guides Wiki
Pokemon Pokopia Walkthrough & Guides Wiki
Resident Evil Requiem (RE9) Walkthrough & Guides Wiki
Monster Hunter Wilds Walkthrough & Guides Wiki
Wuthering Waves Walkthrough & Guides Wiki
Arknights: Endfield Walkthrough & Guides Wiki
Pokemon FireRed and LeafGreen (FRLG) Walkthrough & Guides Wiki
Pokemon TCG Pocket (PTCGP) Strategies & Guides Wiki


Recommended Games
Diablo 4: Vessel of Hatred Walkthrough & Guides Wiki
Cyberpunk 2077: Ultimate Edition Walkthrough & Guides Wiki
Fire Emblem Heroes (FEH) Walkthrough & Guides Wiki
Yu-Gi-Oh! Master Duel Walkthrough & Guides Wiki
Super Smash Bros. Ultimate Walkthrough & Guides Wiki
Pokemon Brilliant Diamond and Shining Pearl (BDSP) Walkthrough & Guides Wiki
Elden Ring Shadow of the Erdtree Walkthrough & Guides Wiki
Monster Hunter World Walkthrough & Guides Wiki
The Legend of Zelda: Tears of the Kingdom Walkthrough & Guides Wiki
Persona 3 Reload Walkthrough & Guides Wiki


All rights reserved
CD PROJEKT®, Cyberpunk®, Cyberpunk 2077® are registered trademarks of CD PROJEKT S.A. © 2020 CD PROJEKT S.A. All rights reserved. All other copyrights and trademarks are the property of their respective owners.
The copyrights of videos of games used in our content and other intellectual property rights belong to the provider of the game.
The contents we provide on this site were created personally by members of the Game8 editorial department.
We refuse the right to reuse or repost content taken without our permission such as data or images to other sites.