This survey will take about 1 minute.
Your answers will help us to improve our website.
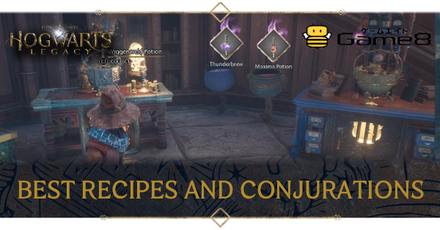
Hogwarts Legacy
Best Recipes and Room of Requirement Conjurations
This is a guide on which Recipes should you buy first, and which Conjurations you should spend Moonstone on to maximize your farming output in the Room of Requirement in Hogwarts Legacy. Learn the advantages and disadvantages of each Recipe and Conjuration, and tips for maximizing your output in the Room of Requirement.
| Best Build Guides | |
|---|---|
| Best Character Builds | Best Talents |
| Best Potions | Best Gear |
| Best Traits | Best Recipes and Conjurations |
List of Contents
Tips for Getting Started
Handling these first of all will allow you to maximize your production of Potions, Plants, Beast offspring, and Beast Materials in the Room of Requirement. It's possible to farm without the following conditions, but you'll be best off setting everything up in advance so you can farm freely.
Get the Phoenix
Completing the Phoenix Rising side quest earns you the only Phoenix in the game, who not only provides Phoenix Feathers, but also opens up the door to the fourth Vivarium and expands your Beast inventory size by 10. This lets you maximize your earnings each time you breed Beasts.
Phoenix Rising Walkthrough and How to Unlock
Catch 16 Male and Female Beast Pairs

You'll want to catch a pair of Beasts to breed at each of 16 Breeding Pens. This might seem like a pain, but simply taking a single trip around the Beast farming route above will net you the majority of the species, and since each Den has several beasts you'll probably obtain 1 or even 2 mating pairs at each.
Breeding 10 species of beasts will also net you the Breed Unique Beasts challenge, so try to catch different types of beasts to breed while doing this instead of focusing on a few species.
Use Evanesco on all the Furniture in the Room of Requirement
The Room of Requirement is stocked with furniture and wall hangings which will be converted into Moonstone when hit with Evanesco. All together, removing all these furniture items will yield over 100 Moonstone, which is plenty for most of what you'll want to make to start farming resources. At a certain point, you won't really need more Moonstone so this initial windfall will actually get you most of the way there on its own.
Best Recipes and Room of Requirement Conjurations
S-Tier Recipes and Conjurations
These are the conjurations you should prioritize purchasing the recipes and securing the Moonstone for.
Breeding Pen
The conjuration used for breeding Beasts, you should aim to have four of these in each Vivarium for a total of 16. This allows you to breed 16 pairs of Beasts each time you go to the Vivarium, resulting in 16 offspring which can be sold for 120 gold each yielding a total of 1920 gold each time you stop into the Room of Requirement between quests.
You also get this recipe for free meaning the only investment here is Moonstone, and the work of catching the actual beasts to breed.
Small Potions Station
As the Small Potions Station is already capable of brewing any Potion, and 7 of them can be placed for only 2 Moonstone apiece, you've got no reason not to set up 7 of these right away. This is plenty to produce Potions for all the ingredients you've already picked up so far, and from here, you'lll use your Potting Tables to produce more of the ingredients you need to make potions.
Potting Table with a Large Pot
The Large Planter seems like a heavy investment for 1,000 gold for the recipe, but it gives you access to all three of the Combat Plants as well as Shrivelfig Fruit needed to make Thunderbrew and Fluxweed Stems needed for the Focus Potion and Felix Felicis. Instead of buying a Potting Table with more pots, invest in the single Large Pot as it gives you the full variety of equipment, and with a limit of 7 Potting Tables at only 10 Moonstone apiece, you can simply make 7 of these and will rarely find yourself needing more.
A-Tier Recipes and Conjurations
These Conjurations are not a necessity but can still be a big help if you decide to purchase them early on.
Potting Table with a Small Pot
If you're not ready to buy the Large Pot Table, feel free to make 7 of these first since you can recollect all the Moonstone for making them and replace them with Large Pot Tables later, so there's no downside to using them when it's all you have.
Material Refiner
In case you find yourself running low on Moonstone, setting up one of these early on is a good way to ensure that you'll never have to worry about Moonstone again. It produces 10 Moonstone every 10 minutes, creating an endless source which will be more than enough for anything you decide to make going forward.
Hopping Pots
Hopping Pots are not really a necessity as you can make all the potions yourself, and at 3,000 gold for the recipe they're a steep investment. That said, the unfortunate truth is that just a Large Potting Table and a Potions Station cannot mass-produce Potions as every Potion has at least one ingredient which must be found in the overworld. Although you'll mostly pick these up while playing with no problem, Hopping Pots will ensure you have a strong variety of all types of Potions, not just the ones you have ingredients available for.
Potting Table with Two Large Pots
For the most part, 7 Potting Tables with one Large Pot will be enough to grow all the plants you need, but if you've bought everything else and still feel like you want to make more plants then this is the best purchase as it'll allow you to double your plant output.
B-Tier Recipes and Conjurations
These Conjurations are not really necessary but will still improve your quality of life to some degree.
Beast Feeder
In all honesty, farming Monster Materials is just not that necessary unless you plan on continuously upgrading new Gear to the max tier and switching out Traits regularly. Not having a way to brush Beasts automatically also makes this process impossible to fully automate, so you can just feed and brush your Beasts yourself and get the Materials you need manually, which should be enough to upgrade all your current Gear to max if you have all the Vivarium rooms filled with Beasts. Still, it's good to have to make the (slightly annoying) process of collecting Monster Materials a bit easier.
Small Potting Tables with Multiple Pots
Don't bother with these either as 7 Potting Tables with Two Large Pots is almost always enough. The one with 5 Small Pots could be workable if you just want to have 12 Mandrakes at all times.
Dung Composter
The Composter is not really worth it as you can simply double your Plant output by making 7 Potting Tables with Two Large Pots. On the other hand, you can only make 3 Composters, and they only increase the output of a Potting Table by 1 (1→2 or 5→6 plants depending on the product). It doesn't hurt to have but isn't the best way to increase your output.
C-Tier Recipes and Conjurations
All Other Potion Stations
Small Potion Stations can make any potion much more quickly than Potting Tables can make the plants used in them. You'll never be producing ingredients faster than Potion Tables are creating potions, so having anything more than 7 Small Potion Stations is totally unnecessary.
Medium Potting Tables
The Medium Pot series should be skipped over. It's the Large Pot but worse, so just spend 1,000 Gold and get yourself access to everything Potting Tables can make right away.
Chopping Station
This table gives a measly 1 ingredient from the set which any Large Potting Table with a single pot can make 5 of in one go (Dittany, Mallowsweet, Knotgrass, Shrivelfig, or Fluxweed). You can produce all of these yourself easily since there is no cost to making more plants, at a much greater quantity and being able to choose which you want. Hard pass.
Beast Toybox
This conjuration actually has no effect. It seems like it should replace the need to brush the beast or make it produce more materials, but from our testing, it doesn't do anything so only buy it for the fun of watching your Beasts at play.
Hogwarts Legacy Related Guides

Early Game Guides
Game Mechanics Guides
Tier Lists
| All Tier Lists | |
|---|---|
| Best Wizard and Witch Names | Best Wand Cores |
| Best Optional Quests | Best Custom Character Designs |
| Best Talents | Best Potions |
| Best Gear | Best Traits |
| Best Recipes and Room of Requirement Conjurations | Best Brooms |
| Best Spell Loadouts and Combos | |
Story Guides
Dueling Feats
Settings Guides
Other Guides
Author

Best Recipes and Room of Requirement Conjurations
Please participate in our site
improvement survey
03/2026
improvement survey
03/2026
Would you assist in
improving Game8's site?
improving Game8's site?

×
We are listening to our users' valuable opinions and discussing how to act on them.
The information collected through this survey will be used for the purpose of improving our services. In addition, the information will only be disclosed a part of a statistic in a format that will not allow identification of personal information.
Begin Survey
Not Now
×
Please rate each item regarding Game8.co's Advertisements.
Amount of Ads
Very Dissatisfied
Somewhat Dissatisfied
Fine
Somewhat Satisfied
Highly Satisfied
Placement of Ads
Timing of Ad Display
Ad Loading Speed
Safeness of Ads
Content of Ads
×
Please rate each item regarding Game8.co's Quality of Articles.
Amount of information
Very Dissatisfied
Somewhat Dissatisfied
Fine
Somewhat Satisfied
Highly Satisfied
Frequency of updates
Speed of new information
Accuracy of articles
Understandibility of articles
Readability of sentences
×
Please rate each item regarding Game8.co's Usability of the Site.
Ease of finding information
Very Dissatisfied
Somewhat Dissatisfied
Fine
Somewhat Satisfied
Highly Satisfied
Loading Speed
Use of Color
Font Size
Visibility of Images
Easy to Understand Layout
×
Please rate each item regarding Game8.co's Message Boards, Comments.
Ease of Writing
Very Dissatisfied
Somewhat Dissatisfied
Fine
Somewhat Satisfied
Highly Satisfied
Readability
Ease in Finding Information
Comment Quality
Comment Quantity
Admin Response
×
Please rate each item regarding Game8.co's Site's new design.
Please rate our site's new design
Very Dissatisfied
Somewhat Dissatisfied
Fine
Somewhat Satisfied
Highly Satisfied
Do you think that the website's design change makes the site easier to use?
Has the new design made it easier for you to find information on the site?
Has the new design improved the overall visual appeal of the site?
How would you rate your overall satisfaction with the new design of the site?
×
How likely are you to recommend Game8 to someone you know?
Very Unlikely
0
1
2
3
4
5
6
7
8
9
10
Very Likely
If you have other opinions regarding potential improvement to the website, please share them with us. We would appreciate your honest opinion.
Note: This is a free response section, so you can proceed without entering anything.
Note: Please be sure not to enter any kind of personal information into your response.
Note: Please be sure not to enter any kind of personal information into your response.
×
Thank You
×
Thank you for participating in our survey! Your answers will help us to improve the quality of our website and services.
We hope you continue to make use of Game8.
We hope you continue to make use of Game8.
Close
Rankings
- We could not find the message board you were looking for.
Gaming News


![Everwind Review [Early Access] | The Shaky First Step to A Very Long Journey](https://img.game8.co/4440226/ab079b1153298a042633dd1ef51e878e.png/thumb)

![Monster Hunter Stories 3 Review [First Impressions] | Simply Rejuvenating](https://img.game8.co/4438641/2a31b7702bd70e78ec8efd24661dacda.jpeg/thumb)
Popular Games

Genshin Impact Walkthrough & Guides Wiki
Honkai: Star Rail Walkthrough & Guides Wiki
Umamusume: Pretty Derby Walkthrough & Guides Wiki
Pokemon Pokopia Walkthrough & Guides Wiki
Resident Evil Requiem (RE9) Walkthrough & Guides Wiki
Monster Hunter Wilds Walkthrough & Guides Wiki
Wuthering Waves Walkthrough & Guides Wiki
Arknights: Endfield Walkthrough & Guides Wiki
Pokemon FireRed and LeafGreen (FRLG) Walkthrough & Guides Wiki
Pokemon TCG Pocket (PTCGP) Strategies & Guides Wiki


Recommended Games
Diablo 4: Vessel of Hatred Walkthrough & Guides Wiki
Fire Emblem Heroes (FEH) Walkthrough & Guides Wiki
Yu-Gi-Oh! Master Duel Walkthrough & Guides Wiki
Super Smash Bros. Ultimate Walkthrough & Guides Wiki
Pokemon Brilliant Diamond and Shining Pearl (BDSP) Walkthrough & Guides Wiki
Elden Ring Shadow of the Erdtree Walkthrough & Guides Wiki
Monster Hunter World Walkthrough & Guides Wiki
The Legend of Zelda: Tears of the Kingdom Walkthrough & Guides Wiki
Persona 3 Reload Walkthrough & Guides Wiki
Cyberpunk 2077: Ultimate Edition Walkthrough & Guides Wiki


All rights reserved
HOGWARTS LEGACY software © 2022 Warner Bros. Entertainment Inc. Developed by Avalanche Software. WIZARDING WORLD and HARRY POTTER Publishing Rights © J.K. Rowling. PORTKEY GAMES, HOGWARTS LEGACY, WIZARDING WORLD AND HARRY POTTER characters, names and related indicia © and ™ Warner Bros. Entertainment Inc.
The copyrights of videos of games used in our content and other intellectual property rights belong to the provider of the game.
The contents we provide on this site were created personally by members of the Game8 editorial department.
We refuse the right to reuse or repost content taken without our permission such as data or images to other sites.