Dissending for Sweets Side Quest Walkthrough
Dissending for Sweets is one of the side quests in Hogwarts Legacy. Read on to see a detailed walkthrough, rewards, location, and tips on how to unlock and how to complete this side quest!
Dissending for Sweets Overview
General Info
| Dissending for Sweets | |
|---|---|
| Quest Giver | Garreth Weasley |
| Description | It appears Garreth Weasley wants to speak with me. |
Dissending for Sweets Rewards
| Completion Rewards |
|---|
| 180 XP, Quidditch Board Conjuration Recipe, 300 Gold (optional) |
Obtain Quidditch Board Conjuration Recipe
You will obtain a Quidditch Board conjuration recipe after you complete this side quest, which you can use to decorate your Room of Requirement.
How to Unlock Dissending for Sweets and Location
After Live as a Student Task
Dissending for Sweets is unlocked after completing the latter quests in the Live as a Student Until Professor Fig Returns task, Potions Class and Trials of Merlin.
Location
| Map View | World View |
|---|---|
 Hogwarts Castle |
 Entrance Hall |
Dissending for Sweets Walkthrough
Video Walkthrough
Objectives and Walkthrough
| Objectives | |
|---|---|
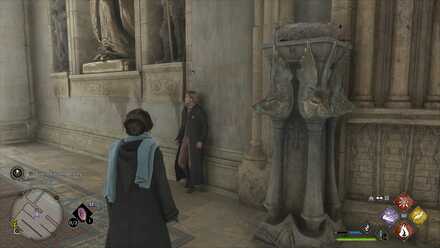
| 1 | Talk to Garreth Weasley Head to the Great Hall and look for Garreth Weasley. He is located near the Entrance Hall. He'll tell you that he is looking for Billywig stings. |
| 2 | 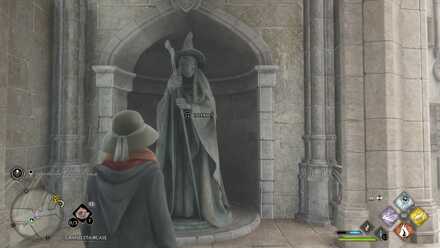 Find the statue of the one-eyed witch Follow the waypoint leading to a corridor until you reach an area called One-Eyed Witch Passage. The location is near a Floo Flame fast travel point, and your character will mention that you have found the statue. |
| 3 | Open the one-eyed witch statue Interact with the statue. Your character will say the password Dissendium and you will be transported to a new area. |
| 4 | 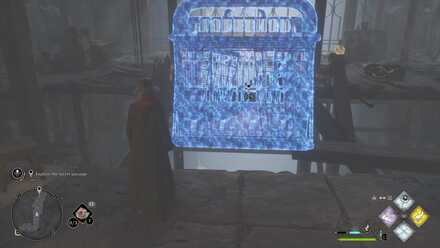 Look for an elevator and use Reparo Follow the path until you find a broken elevator. Cast Reparo on it to fix it, then head inside. Interact with the lever and you will descend below to a cave. |
| 5 | 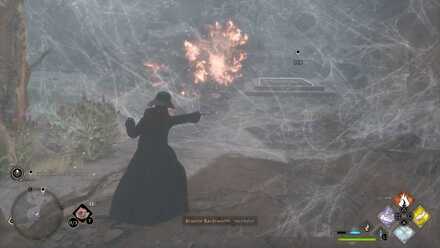 Follow the path and cast Incendio to burn webs Head inside a cave until you come across a wall of spider webs that is blocking the path. Cast Incendio to remove it. |
| 6 | 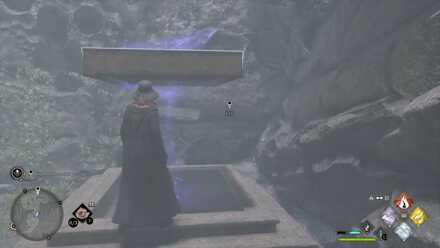 Cast Levioso on a wooden platform You'll encounter a wooden platform and a high wall. Use Levioso on the platform to make it float, then jump on it and scale the wall to continue. |
| 7 | 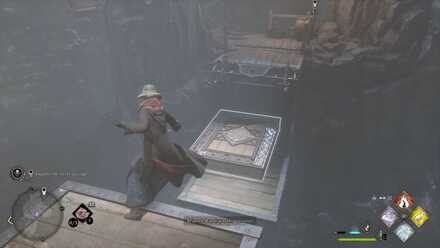 Use Levioso to cross broken bridge As you head deeper into the cave, you will encounter a broken bridge. Look down to locate another wooden platform and use Levioso to make it float. |
| 8 | 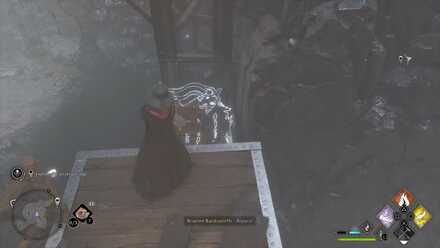 Use spells to cross second broken bridge Continue walking forward until you see another bridge and a broken platform. Cast Reparo on the platform to fix it then use Levioso to make the platform float. Move on until you spot another wall of webs and use Incendio to remove it. |
| 9 | 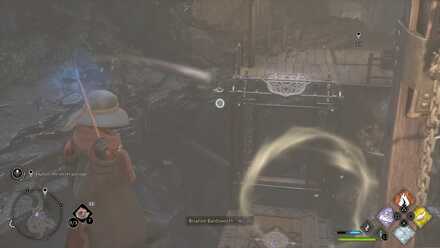 Use spells to fix lift Head left and climb on the wooden walkway. Look down to locate another platform and a lift. Use Reparo on the wooden platform then jump on it. Cast Accio on the metal frames, then use Levioso on the platform to move on. |
| 10 | 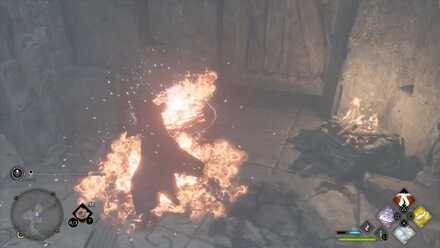 Use Incendio on fire pits Walk forwards and follow the waypoint until you see a door next to 2 fire pits. Cast Incendio on both fire pits to open the door, then interact with the ladder in the next room to exit to Honeydukes |
| 11 | 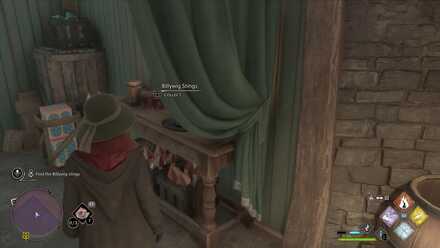 Find the Billywig stings Follow the path which will lead you to a table. The Billywig stings are placed on top of the table. |
| 12 |  Return to Garreth After obtaining the Billywig stings, you can head back to Hogwarts Castle. Fast travel to Viaduct Courtyard and follow the marker leading back to Garreth. Talk to him to finish the quest and get your reward. |
Dissending for Sweets Tips and Strategies
Use Revelio to Locate Platforms
If you are having a hard time locating the platforms that you need to fix or climb onto to progress through the cave, use Revelio to highlight them in the overworld.
Loot Items in the Cave and Honeydukes
There are several items you can obtain inside the cave and when you reach Honeydukes. You can get Horklump Juices, Sanguine Mask, Trifecta School Robe, and Stylish Informal School Uniform during this side quest.
Ask for Gold at the End
Asking for gold in the dialogue options at the end of the quest will net you a 300 Gold bonus, with no repercussions.
Hogwarts Legacy Related Guides

All Side Quests
All Relationship Quests
Author

Dissending for Sweets Side Quest Walkthrough
Rankings
- We could not find the message board you were looking for.
Gaming News

![Death Stranding 2: On The Beach [PC] Review | A Port That Delivers](https://img.game8.co/4447392/15310a0c9aa1b6843bb713b2ea216930.jpeg/show)


Popular Games

Genshin Impact Walkthrough & Guides Wiki
Umamusume: Pretty Derby Walkthrough & Guides Wiki
Crimson Desert Walkthrough & Guides Wiki
Monster Hunter Stories 3: Twisted Reflection Walkthrough & Guides Wiki
Honkai: Star Rail Walkthrough & Guides Wiki
Pokemon Pokopia Walkthrough & Guides Wiki
The Seven Deadly Sins: Origin Walkthrough & Guides Wiki
Wuthering Waves Walkthrough & Guides Wiki
Zenless Zone Zero Walkthrough & Guides Wiki
Arknights: Endfield Walkthrough & Guides Wiki


Recommended Games
Fire Emblem Heroes (FEH) Walkthrough & Guides Wiki
Diablo 4: Vessel of Hatred Walkthrough & Guides Wiki
Cyberpunk 2077: Ultimate Edition Walkthrough & Guides Wiki
Yu-Gi-Oh! Master Duel Walkthrough & Guides Wiki
Super Smash Bros. Ultimate Walkthrough & Guides Wiki
Pokemon Brilliant Diamond and Shining Pearl (BDSP) Walkthrough & Guides Wiki
Elden Ring Shadow of the Erdtree Walkthrough & Guides Wiki
Monster Hunter World Walkthrough & Guides Wiki
The Legend of Zelda: Tears of the Kingdom Walkthrough & Guides Wiki
Persona 3 Reload Walkthrough & Guides Wiki


All rights reserved
HOGWARTS LEGACY software © 2022 Warner Bros. Entertainment Inc. Developed by Avalanche Software. WIZARDING WORLD and HARRY POTTER Publishing Rights © J.K. Rowling. PORTKEY GAMES, HOGWARTS LEGACY, WIZARDING WORLD AND HARRY POTTER characters, names and related indicia © and ™ Warner Bros. Entertainment Inc.
The copyrights of videos of games used in our content and other intellectual property rights belong to the provider of the game.
The contents we provide on this site were created personally by members of the Game8 editorial department.
We refuse the right to reuse or repost content taken without our permission such as data or images to other sites.