All Merlin Trials Locations and Solutions
Merlin Trials are puzzles in Hogwarts Legacy that reward players with additional inventory spaces through challenges, as well as the Merlin's Beard! Trophy. Learn how to solve each Merlin Trial puzzle, challenge rewards, and how to get the trophy.
List of Contents
All Merlin Trial Locations
North Ford Bog Trial Locations
| 1 | 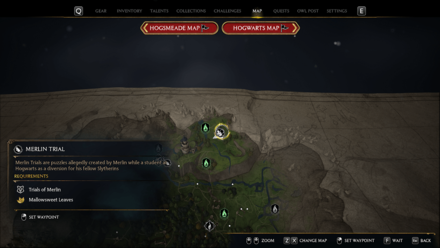 Location: East of North Ford Bog Trial Type: Cracked Slabs |
|---|---|
| 2 | 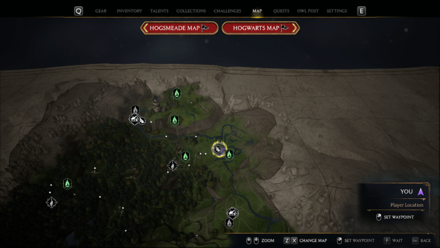 Location: Northwest of Easth North Ford Bog Trial Type: Giant Ball |
| 3 | 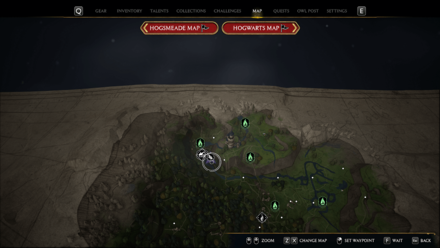 Location: Near Pitt-Upon-Ford Trial Type: Standing Stones |
| 4 | 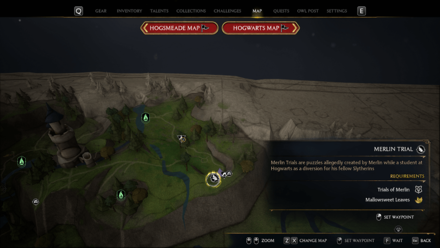 Location: East of San Bakar's Tower Trial Type: Cubes with Symbols |
North Ford Bog Merlin Trial Locations and Solutions
Forbidden Forest Trial Locations
| 1 | 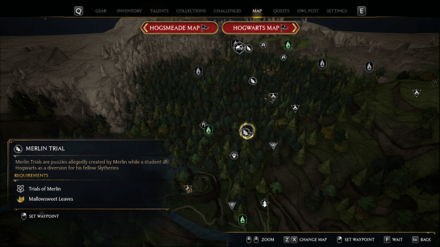 Location: East of Jackdaw's Tomb Trial Type: Burning Pyres |
|---|---|
| 2 | 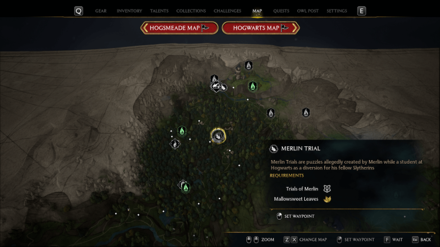 Location: East of West Forbidden Forest Trial Type: Butterflies |
| 3 | 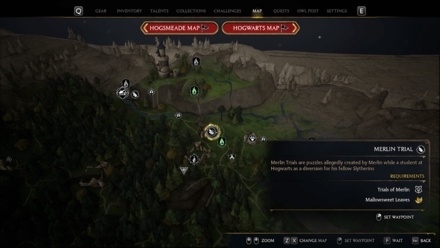 Location: Near the North Ford Bog Entrance Trial Type: Standing Stones |
Forbidden Forest Merlin Trial Locations and Solutions
Hogsmeade Valley Locations
| 1 | 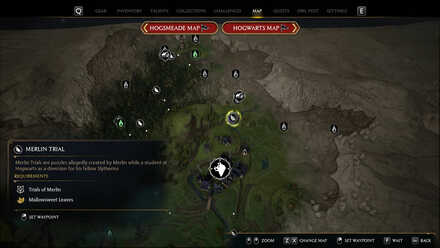 Location: South of Upper Hogsfield, North of Hogsmeade Village Trial Type: Cracked Slabs |
|---|---|
| 2 | 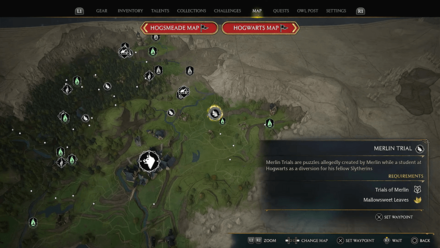 Location: Northwest of the East Hogsmeade Valley Floo Flame Trial Type: Burning Pyres |
| 3 | 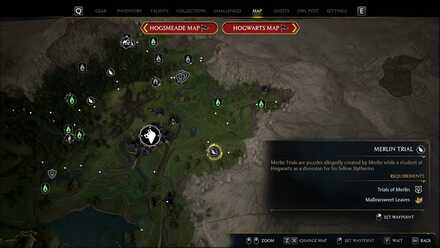 Location: South of East Hogsmeade Valley, east of Hogsmeade Village Trial Type: Butterflies |
| 4 | 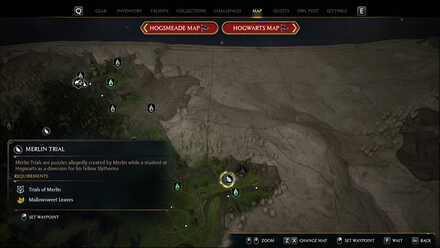 Location: Inside the Falbarton Castle Walls Trial Type: Butterflies |
| 5 | 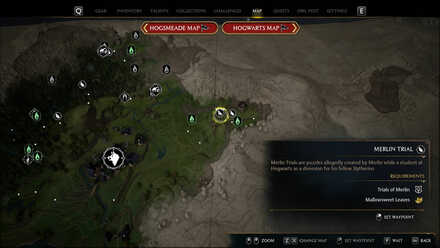 Location: West of Falbarton Castle, northeast of East Hogsmeade Valley Trial Type: Giant Ball |
Hogsmeade Valley Merlin Trial Locations and Solutions
North Hogwarts Region Trial Locations
| 1 | 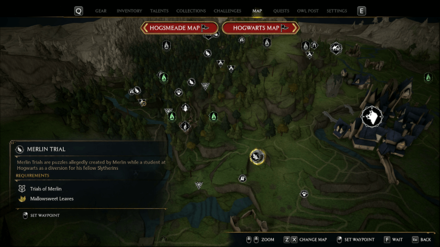 Location: Southeast of the Collector's Cave Trial Type: Butterflies |
|---|---|
| 2 |  Location: West of the Forbidden Forest Floo Flame Trial Type: Balls on Pillars |
| 3 | 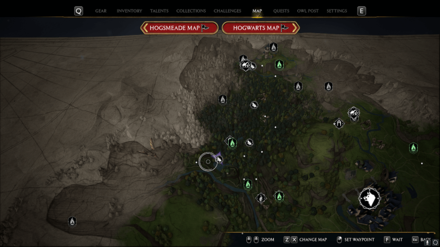 Location: Southwest of Jackdaw's Tomb Trial Type: Cubes with Symbols |
| 4 | 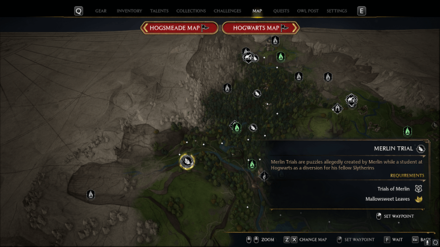 Location: West of East North Hogwarts Region Trial Type: Broken Statues |
| 5 | 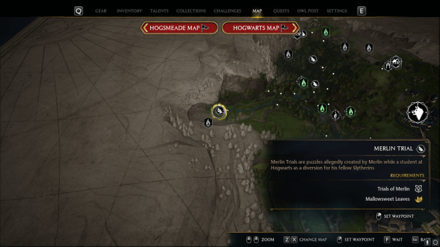 Location: Northeast of Korrow Ruins Trial Type: Burning Pyres |
North Hogwarts Region Merlin Trial Locations and Solutions
South Hogwarts Region Trial Locations
| 1 | 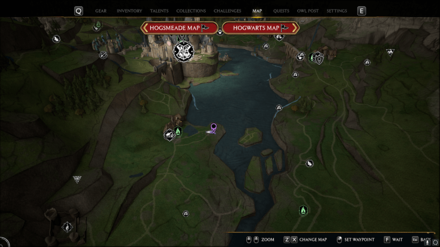 Location: Near Lower Hogsfield Trial Type: Burning Pyres Trial (Tutorial Trial) ▶Trials of Merlin Quest Walkthrough |
|---|---|
| 2 | 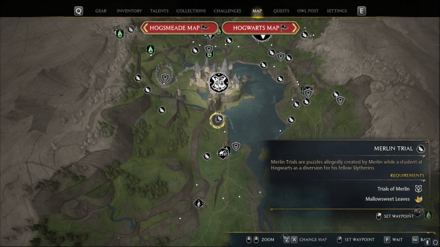 Location: South of Hogwarts Castle Trial Type: Giant Ball Trial |
| 3 | 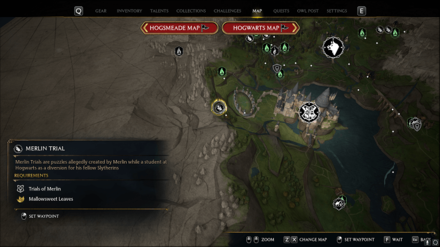 Location: West of Quidditch Arena Trial Type: Giant Ball |
| 4 | 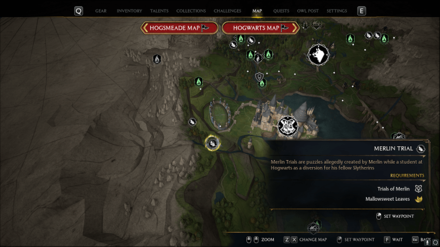 Location: Southwest of Quidditch Arena Trial Type: Butterflies |
| 5 | 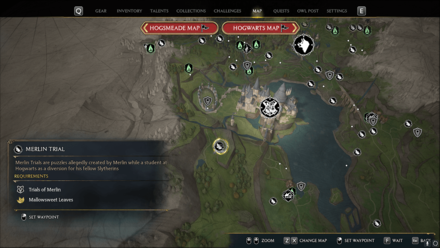 Location: Southwest of Hogwarts South Wing, far south of the Quidditch Arena Trial Type: Cracked Slabs |
| 6 | 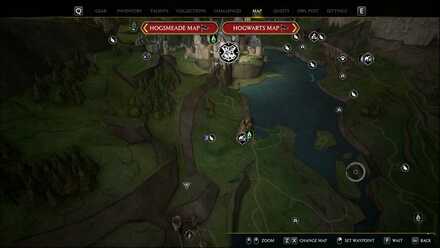 Location: West of Lower Hogsfield Trial Type: Balls in Slots |
| 7 | 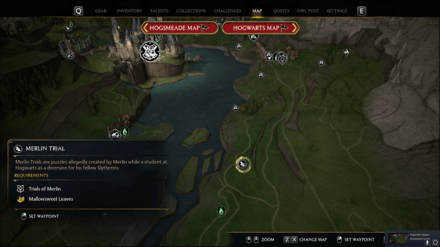 Location: North of Central Hogwarts Valley Trial Type: Cracked Slabs |
| 8 | 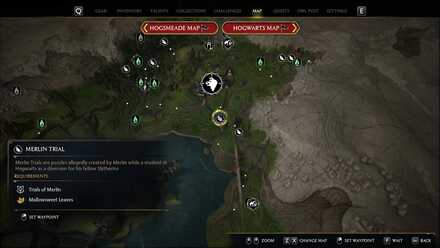 Location: South of Hogsmeade Village, beside the bridge Trial Type: Balls on Pillars |
| 9 | 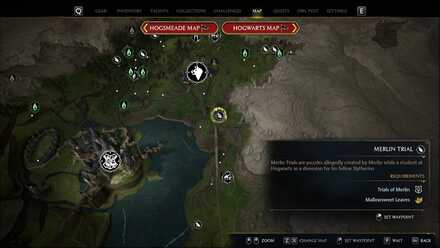 Location: Beside Hogsmeade Station Trial Type: Burning Pyres |
| 10 | 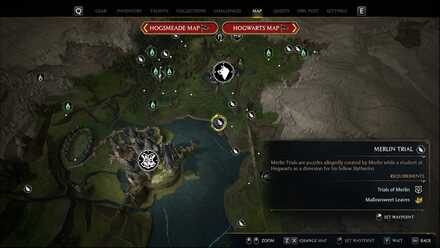 Location: East of Hogsmeade Station, south of Hogsmeade Village Trial Type: Standing Stones |
| 11 | 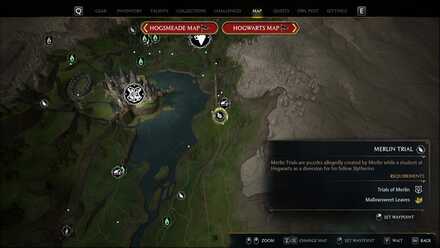 Location: South of Aranshire, beside the railway Trial Type: Balls in Slots |
| 12 | 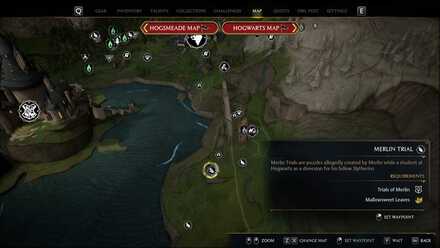 Location: Southwest of Aranshire, beside the railway Trial Type: Butterflies |
| 13 | 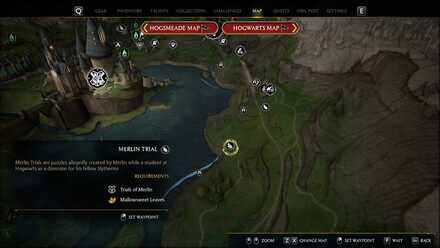 Location: Further southwest of Aranshire, beside the water Trial Type: Giant Ball |
| 14 | 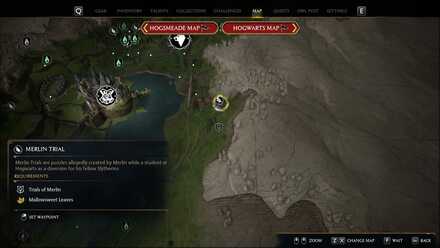 Location: East of Aranshire Trial Type: Giant Ball |
| 15 | 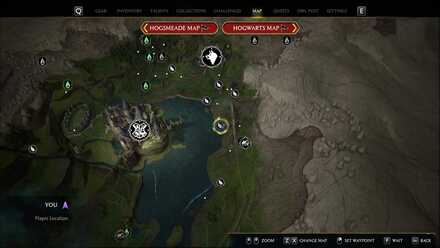 Location: Northwest of Aranshire, beside the bridge Trial Type: Butterflies |
South Hogwarts Region Merlin Trial Locations and Solutions
Hogwarts Valley Trial Locations
| 1 | 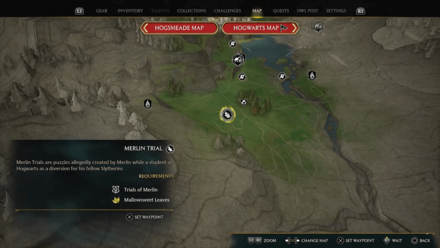 Location: East of West Hogwarts Valley, in a Goblin Camp Trial Type: Balls in Slots ▶Goblin Camp Merlin Trial Walkthrough: All Ball Locations |
|---|---|
| 2 | 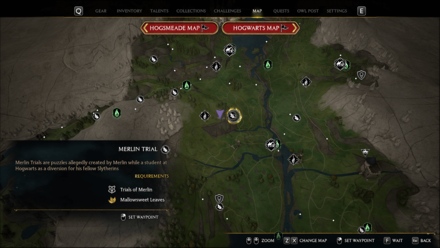 Location: Southeast of West Hogwarts Valley, within some ruins Trial Type: Balls on Pillars |
| 3 | 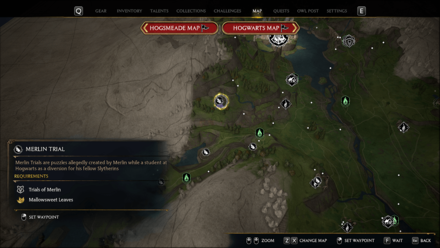 Location: Northwest of West Hogwarts Valley Trial Type: Balls in Slots |
| 4 | 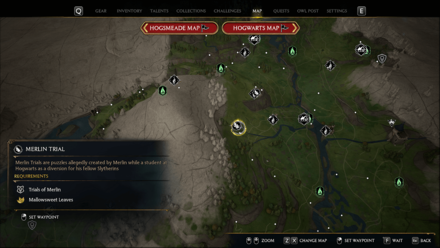 Location: Far South of West Hogwarts Valley, by the mountain Trial Type: Standing Stones |
| 5 | 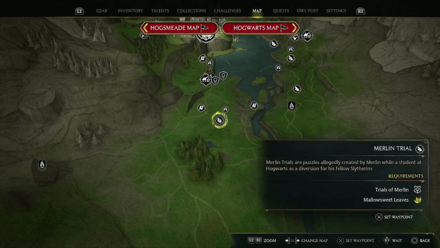 Location: South of Lower Hogsfield, West of Central Hogwarts Valley Trial Type: Balls on Pillars |
| 6 | 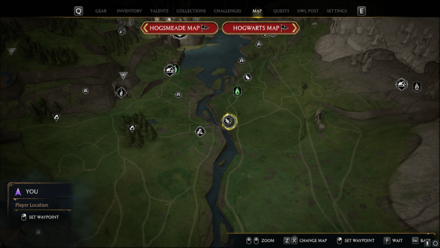 Location: South of Central Hogwarts Valley, near bridge Trial Type: Burning Pyres |
| 7 | 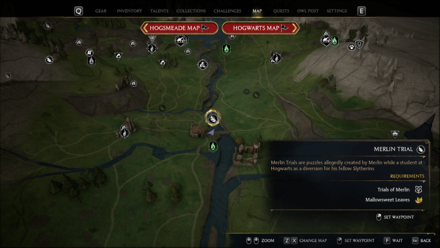 Location: In the Hamlet of Keenbridge Trial Type: Giant Ball |
| 8 | 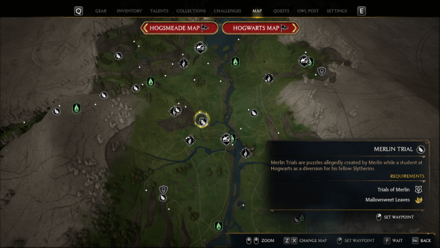 Location: Northwest of Keenbridge, near the river Trial Type: Butterflies |
| 9 |  Location: Northeast of Keenbridge Trial Type: Cracked Slabs |
| 10 | 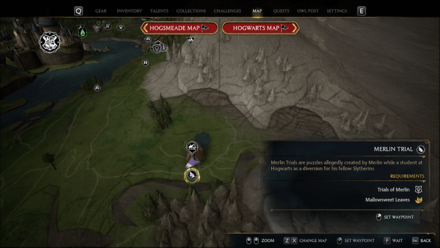 Location: In the Hamlet of Brocburrow Trial Type: Giant Ball |
| 11 | 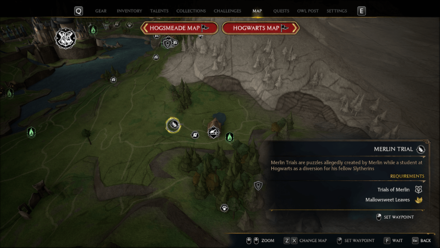 Location: West of Brocburrow Trial Type: Butterflies |
| 12 | 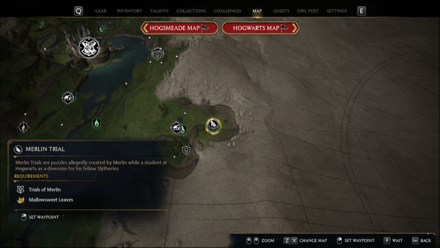 Location: East of Brocburrow Trial Type: Standing Stones |
| 13 | 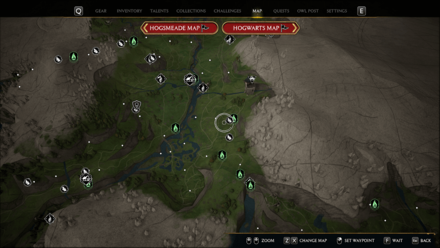 Location: Near the Mine's Eye Floo Flame Trial Type: Giant Ball |
| 14 | 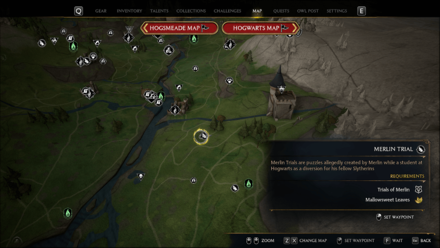 Location: Northwest of the Mine's Eye Trial Type: Standing Stones |
| 15 | 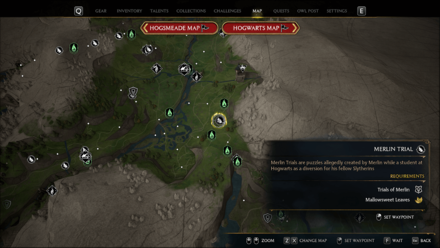 Location: South of The Mine's Eye, by some rails Trial Type: Burning Pyres |
| 16 | 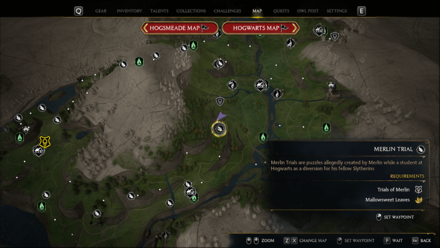 Location: Northwest of Northern South Sea Bog Trial Type: Broken Statues |
Hogwarts Valley Merlin Trial Locations and Solutions
Feldcroft Region Trial Locations
| 1 | 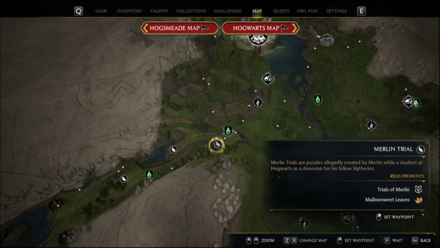 Location: Southwest of West Hogwarts Valley Trial Type: Cracked Slabs |
|---|---|
| 2 | 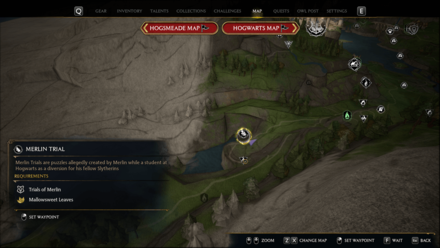 Location: Northeast of North Feldcroft, by a Bandit Camp Trial Type: Cubes with Symbols |
| 3 | 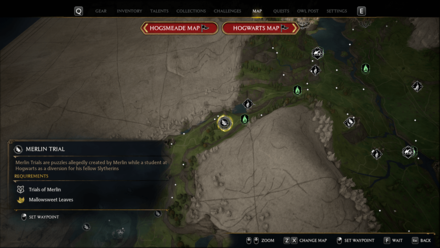 Location: West of North Feldcroft, by a bandit camp Trial Type: Standing Stones |
| 4 | 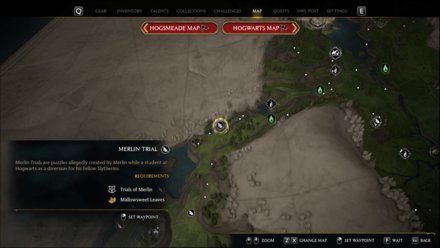 Location: Far West of North Feldcroft, by a cliff Trial Type: Cracked Slabs |
| 5 | 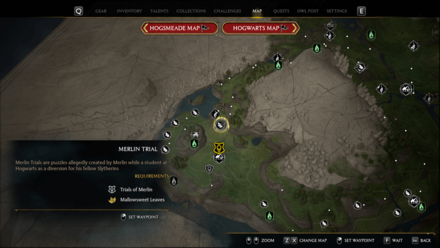 Location: Northeast of Rookwood Castle Trial Type: Broken Statues |
| 6 | 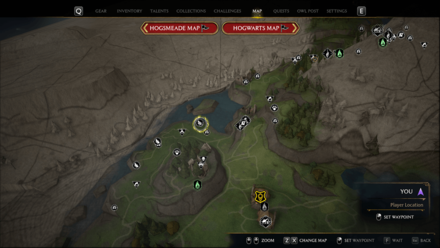 Location: North of Rookwood Castle, by the water Trial Type: Balls on Pillars |
| 7 | 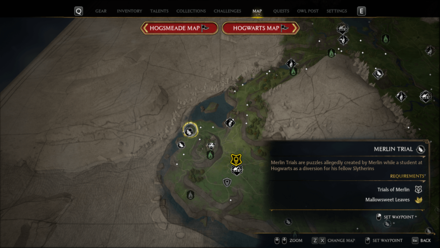 Location: Northwest of Rookwood Castle Trial Type: Burning Pyres |
| 8 | 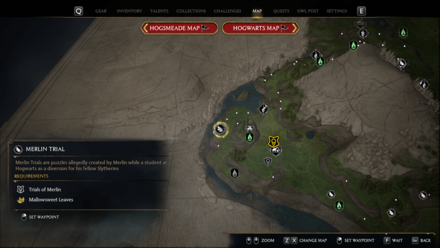 Location: West of Rookwood Castle Trial Type: Standing Stones |
| 9 | 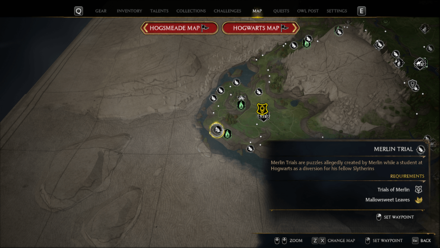 Location: West of South Feldcroft, by the coast Trial Type: Cracked Slabs |
| 10 | 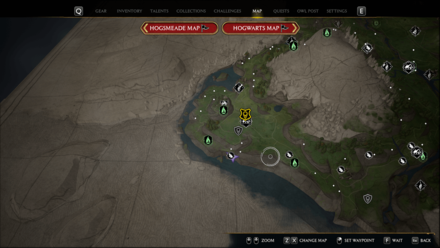 Location: Southeast of South Feldcroft, by the coast Trial Type: Giant Ball |
| 11 | 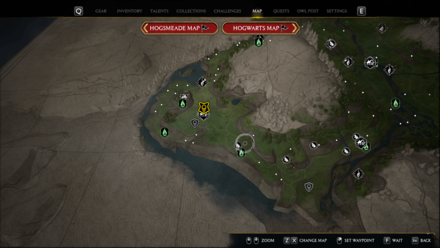 Location: By the Feldcroft Catacomb Trial Type: Cracked Slabs |
| 12 | 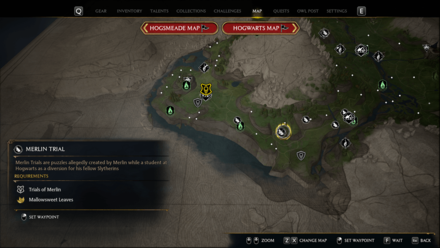 Location: East of Feldcroft Catacomb Trial Type: Butterflies |
| 13 | 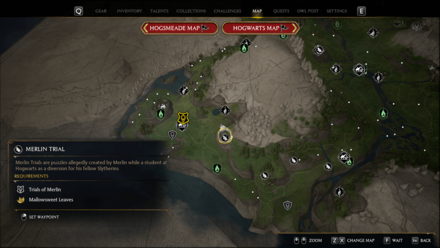 Location: Far north of Feldcroft Catacomb Trial Type: Balls on Pillars |
| 14 | 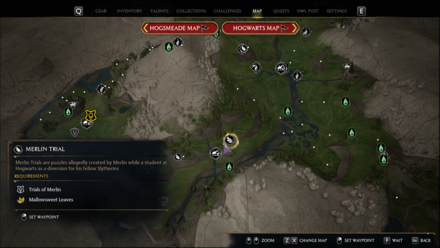 Location: Beside the hamlet of Irondale Trial Type: Balls on Pillars |
| 15 |  Location: West of Irondale, near a bridge just outside the Irondale hamlet Trial Type: Burning Pyres |
| 16 | 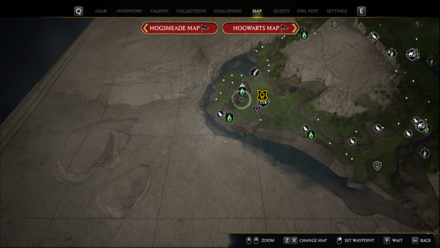 Location: Far west of Irondale, by a bandit camp Trial Type: Cracked Slabs |
Feldcroft Region Merlin Trial Locations and Solutions
South Sea Bog Trial Locations
| 1 | 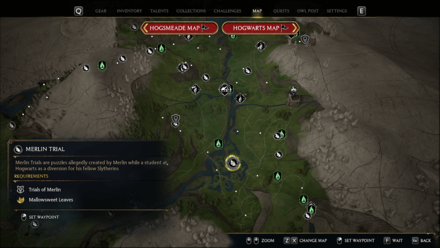 Location: Southeast of Northern South Sea Bog, near the water Trial Type: Butterflies |
|---|---|
| 2 | 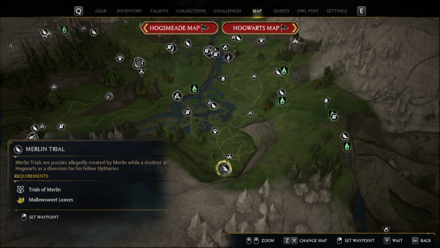 Location: Southwest of East South Sea Bog, near the mountains Trial Type: Balls on Pillars |
South Sea Bog Merlin Trial Locations and Solutions
Coastal Cavern Trial Locations
| There are no Merlin Trials in this location. |
Poidsear Coast Trial Locations
| 1 | 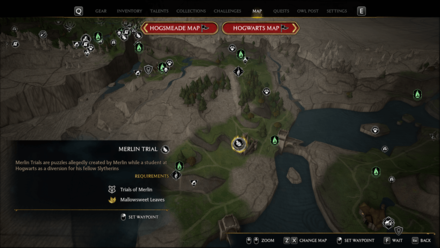 Location: West of Marunweem Bridge Trial Type: Giant Ball |
|---|---|
| 2 |  Location: Southeast of Phoenix Mountain Cave, northeast of Marunweem Bridge Trial Type: Broken Statues |
| 3 | 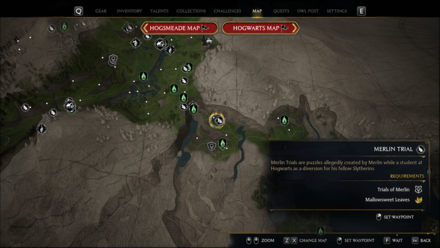 Location: North of Poidsear Castle Trial Type: Burning Pyres |
| 4 | 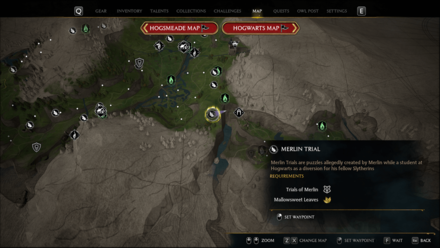 Location: Near the Tomb of Treachery, at the bottom of the Waterfall Trial Type: Standing Stones |
| 5 |  Location: Far West of Poidsear Castle, by the coast Trial Type: Cracked Slabs |
| 6 | 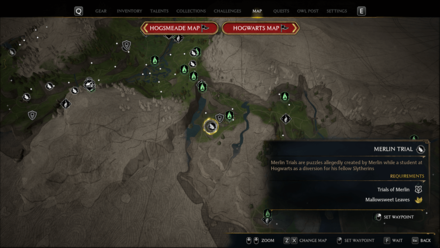 Location: West of Poidsear Castle Trial Type: Butterflies |
| 7 | 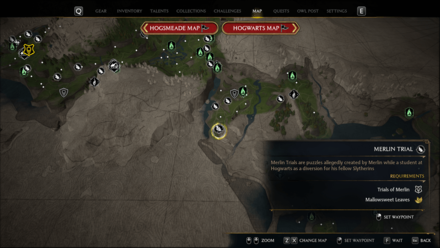 Location: Far Southwest of Poidsear Castle, atop some cliffs Trial Type: Broken Statues |
| 8 | 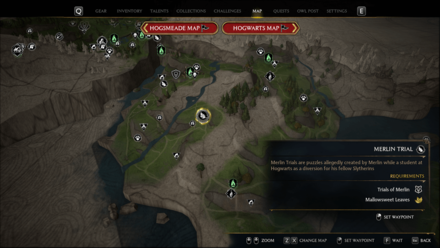 Location: North of South Poidsear Coast Trial Type: Giant Ball |
| 9 | 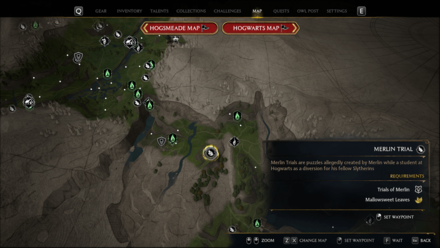 Location: East of Poidsear Castle, atop the mountain Trial Type: Butterflies |
| 10 | 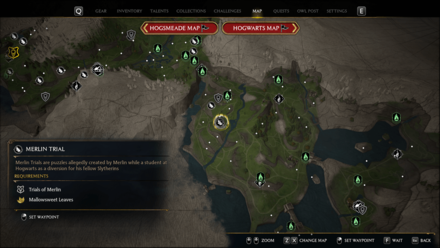 Location: South of Poidsear Castle, by some ruins Trial Type: Balls in Slots |
Poidsear Coast Merlin Trials Locations and Solutions
Marunweem Lake Trial Locations
| 1 | 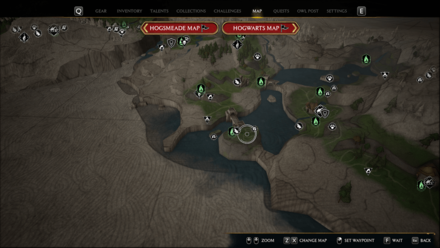 Location: In the Marunweem Ruins Trial Type: Butterflies |
|---|---|
| 2 | 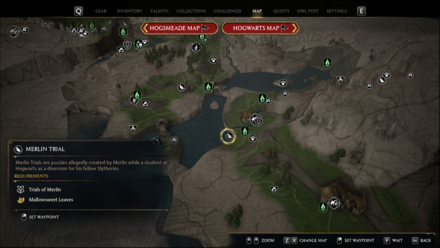 Location: Near Marunweem Trial Type: Standing Stones |
| 3 | 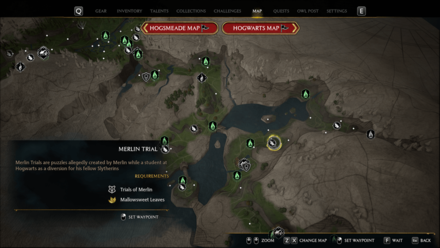 Location: East of Marunweem Lake Trial Type: Giant Ball |
| 4 | 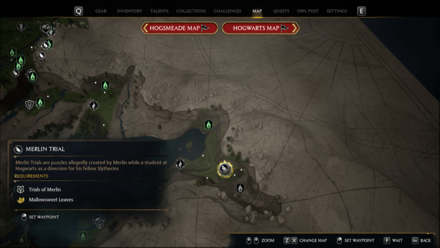 Location: Northwest of Tower Tunnel, beside the Thestral Den Trial Type: Cubes with Symbols |
Marunweem Lake Merlin Trials Locations and Solutions
Manor Cape Trial Locations
| 1 | 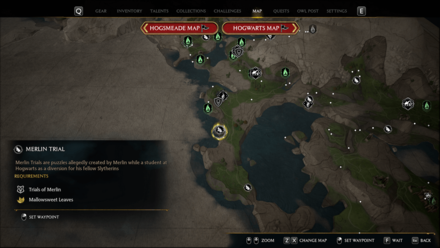 Location: Southeast of West Manor Cape, by the coast Trial Type: Giant Ball |
|---|---|
| 2 | 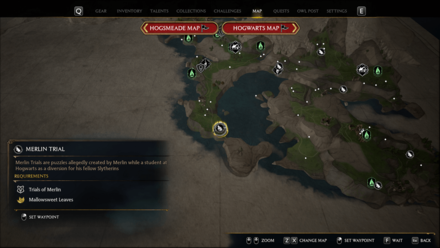 Location: Far Southeast of West Manor Cape, near the southmost portion of the cape Trial Type: Butterflies |
| 3 | 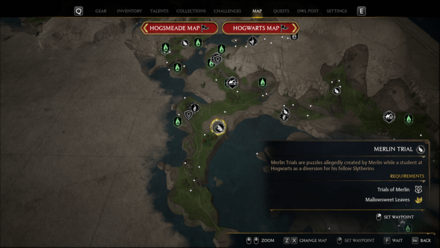 Location: East of West Manor Cape Trial Type: Cubes with Symbols |
| 4 |  Location: Northeast of West Manor Cape, near the ruined house Trial Type: Burning Pyres |
| 5 | 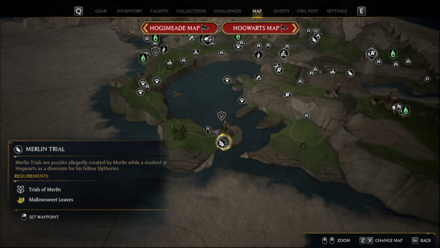 Location: Southmost part of the cape, in some ruins Trial Type: Cracked Slabs |
Cragcroftshire Trial Locations
| 1 | 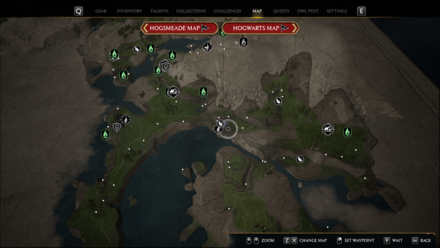 Location: Southeast of Cragcroft Shore, by some ruins Trial Type: Cracked Slabs |
|---|---|
| 2 | 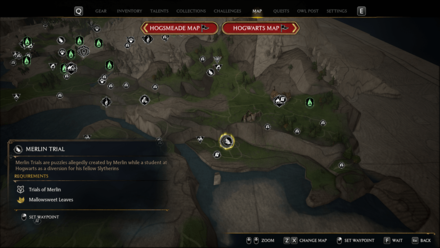 Location: Southwest of Cragcroft Trial Type: Balls on Pillars |
| 3 | 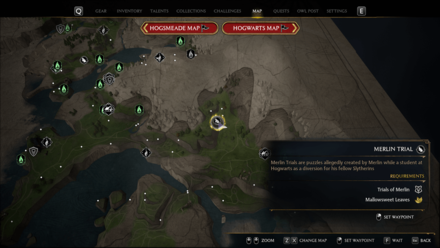 Location: Northwest of Cragcroft Trial Type: Butterflies |
| 4 | 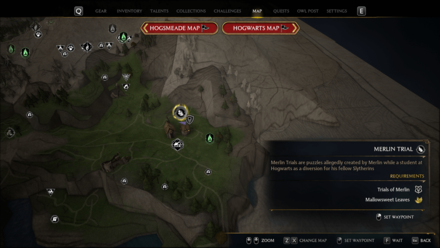 Location: In the hamlet of Cragcroft Trial Type: Burning Pyres |
| 5 | 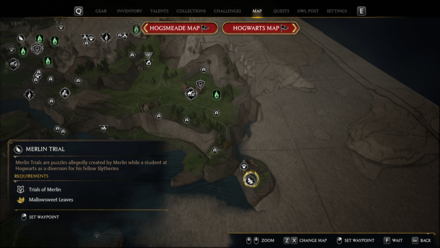 Location: Far Southeast of Cragcroft, on the edge of the land Trial Type: Standing Stones |
Clagmar Coast Trial Locations
| 1 | 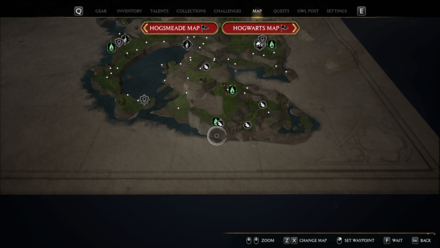 Location: By the South Clagmar Coast Floo Flame Trial Type: Broken Statues |
|---|---|
| 2 | 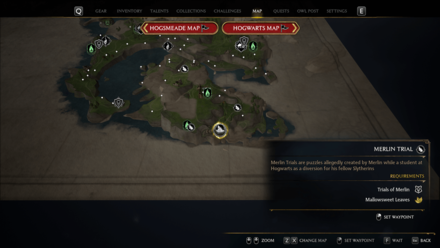 Location: East of South Clagmar Coast Trial Type: Cracked Slabs |
| 3 | 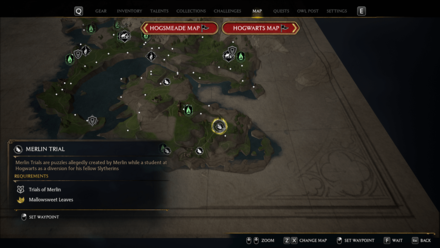 Location: Southeast of Clagmar Castle Trial Type: Balls on Pillars |
| 4 | 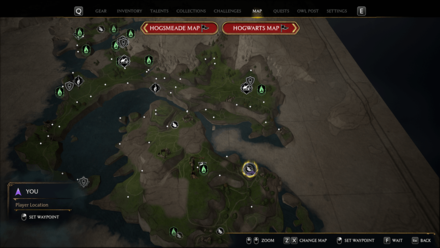 Location: East of Clagmar Castle, by some ruins Trial Type: Cubes with Symbols |
| 5 | 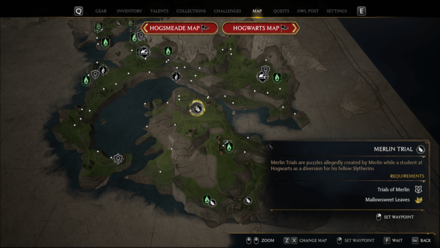 Location: Northwest of Clagmar Castle Trial Type: Butterflies |
How to Solve Merlin Trials
Each of Merlin's Trials has different solutions which you will need to use different Spells to solve.
You'll have to look around to figure out which kind of trial you stumbled into. Check the area surrounding the trial and use Revelio to look for stone structures such as platforms, balls, or pillars, and figure out which spell you will need to solve the trial. You might also need to fly with your mount to sweep the area, since some trial objects are really tricky to find!
Burning Pyres Trial
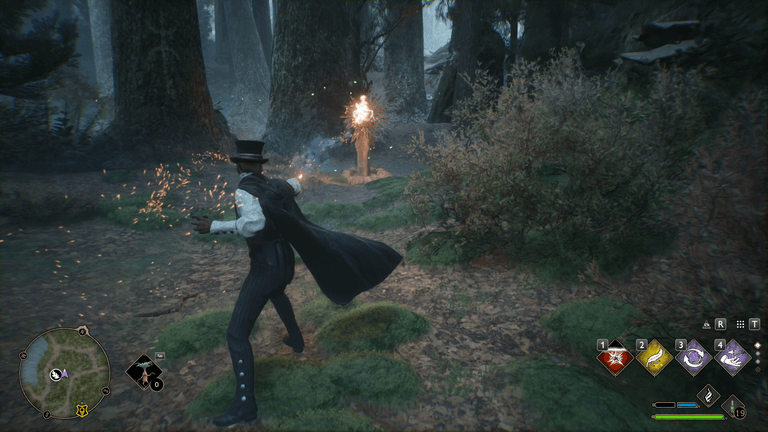
If you see a pyre (pillar with a cauldron on top) around the trial area, this is a trial where you need to set fire to all the pyres before they sink within a few seconds to complete.
While the tutorial trial can be solved with only the short-ranged Incendio, most of the other pyre trials are trickier and will need the long-ranged Confringo to be completed.
Make sure to defeat all nearby enemies before attempting the trials, since spells have a high cooldown when enemies are nearby.
| 1 | Find all three pyres with the help of Revelio. If a pyre is blocked by a removable obstacle, clear those first. If there are enemies nearby you, defeat them first so the spell cooldown doesn't trigger. |
|---|---|
| 2 | Find a spot between the three pyres where you will be able to shoot Confringo in quick succession. |
| 3 | Shoot the three pyres in quick succession, before the pillars sink into the ground within a few seconds. It is recommended to target the taller pillars first, since they sink longer than the shorter ones. |
Giant Ball Trial
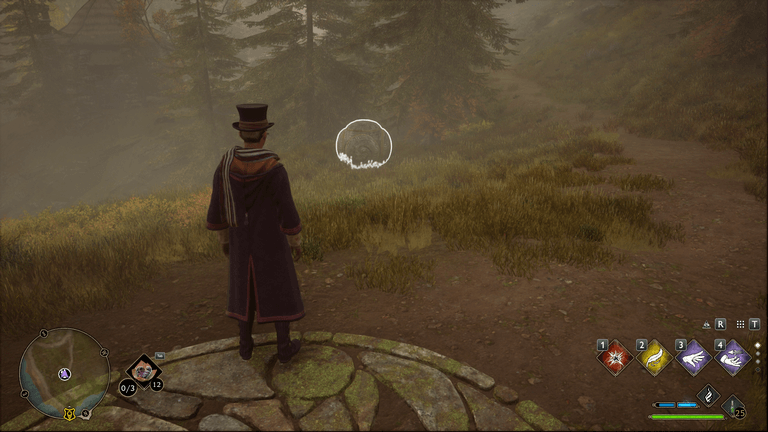
If you stumble upon a giant stone ball or a concave platform around the trial area, this is a trial where you need to use Force Spells to roll the ball towards the concave platform.
Depulso and Wingardium Leviosa are the best spells to use for these trials. However, certain spells can act as acceptable substitutes: The fourth combo of the Basic Cast attack can be used to push the ball, while a combination of Levioso and Accio can be used as substitute for pulling the ball in midair (make sure not to use a force spell on the ball before using Levioso as it would no longer work).
| 1 | Locate the nearby concave stone platform on the ground with the help of Revelio. |
|---|---|
| 2 | Find the stone ball with the help of Revelio, then use either Accio, Depulso, or Wingardium Leviosa to move the giant ball, whichever is appropriate. |
| 3 | Keep moving the ball until it reaches the platform. The way to the platform might be obstructed by obstacles; use the appropriate spell to clear these obstacles. |
Balls on Pillars Trial
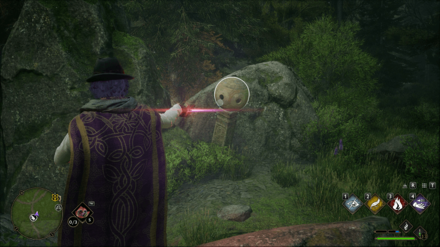
If you see a few pillars with balls on them around the trial area, this is a trial where you need to destroy all the balls to complete. You only need the Basic Cast to destroy the balls. There are nine balls to destroy in total.
| 1 | Use a Basic Cast attack on a ball to destroy it. |
|---|---|
| 2 | Find the other pillars in the area with the help of Revelio and do the same until the trial is complete. With a few exceptions, balls are usually near each other in groups of three. |
Balls in Slots Trial
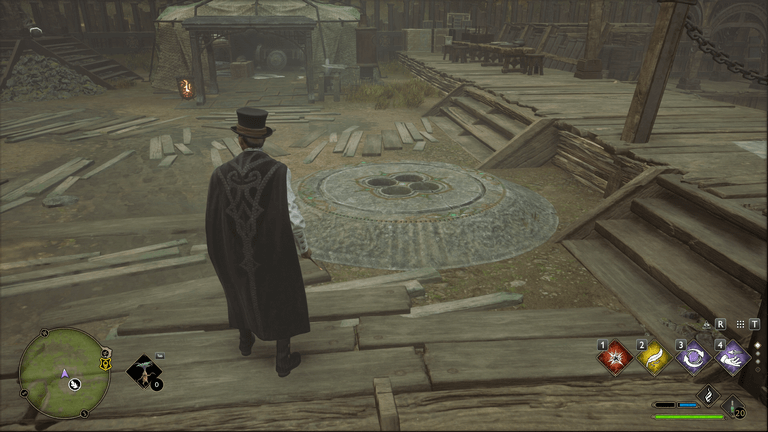
If you see at least one platform with four round slots in the middle, this is a trial where you need to use Accio or Wingardium Leviosa to roll multiple balls towards these slots. There are three pairs of slots and balls to complete.
| 1 | Locate a platform, then find nearby balls to roll into the slots. Use Revelio to find them easier. |
|---|---|
| 2 | Use Accio or Wingardium Leviosa on a ball. The other balls will move with the one you targeted. |
| 3 | Keep moving the balls until you reach the slots. |
| 4 | Find the other platforms and balls in the area with the help of Revelio and do the same until the trial is complete. |
Cracked Slabs Trial
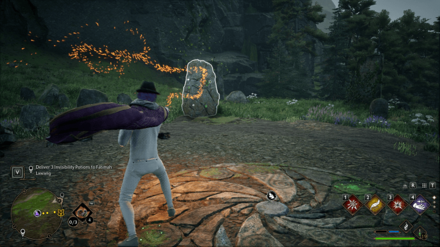
If you see at least one cracked slab around the trial area, this is a trial where you need to destroy all slabs with Confringo to complete. There are five slabs to destroy in total.
| 1 | Use Confringo on a slab to destroy it. |
|---|---|
| 2 | Find the other slabs in the area with the help of Revelio and do the same until the trial is complete. |
| 3 | Some slabs might be hidden behind obstacles; use the appropriate spell to clear these obstacles. |
Butterflies Trial
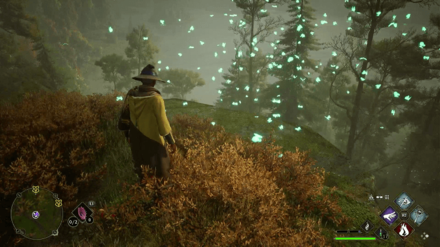
If you see either a bunch of glowing butterflies, or pillars with diamond-shaped holes containing moonstone inside, this is a trial where you need to lead all the groups of butterflies with Lumos to all the pillars to complete. There are three pairs of butterflies and pillars to complete.
| 1 | Go near a group of butterflies and then cast Lumos. |
|---|---|
| 2 | Find a pillar with diamond-shaped holes nearby, and lead the butterflies into them. |
| 3 | Find the other butterflies and pillars in the area and do the same until the trial is complete. The pillars can be found with Revelio, but not the butterflies; you may need to fly around the area with your mount to find them. |
Standing Stones Trial
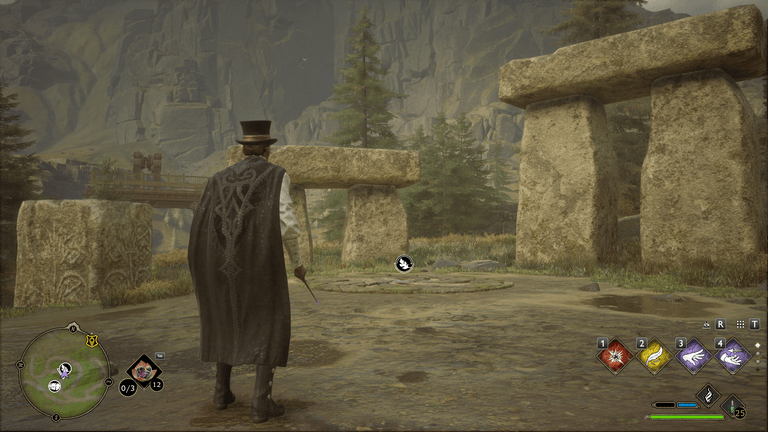
If you see a group of standing rectangular, white stone structures nearby each other (some with stones stacked on top of them), this is a trial where you need to climb the stones and jump on top of all of them to complete.
| 1 | Climb to the top of the stone that you can climb on. |
|---|---|
| 2 | Jump towards the nearest stone. If the distance between stones is too far, you will need to run before jumping to reach the other stone. |
| 3 | Keep jumping from stone to stone until you reach the final one. If you fall off, you need to repeat from the first stone again. |
| 4 | If there are any obstacles such as tiny rocks or barrels on top of the stones, clear those with attacks before jumping on them. |
Cubes with Symbols Trial

If you see a pillar with a cube on top of it, and with both having symbols engraved on them, this is a trial where you use Flipendo to flip around the cubes on top to match symbols with the pillars below them. There are three cubes needed to be flipped to complete.
| 1 | Choose a side of a pillar, then flip the cube with Flipendo until you see the matching symbol. |
|---|---|
| 2 | If it doesn't show up after three flips, then the symbol is at the sides; go to the side to the left or right and flip it once. Then go back to the original side and do the step above again. |
| 3 | Once you have matched the symbol on one side, it's likely that it's not rotated correctly yet. Go to the side to the left or right and use Flipendo until you correct this side and complete the puzzle. |
| 4 | Find the other cubes with symbols in the area with the help of Revelio and do the steps above until the trial is complete. |
Broken Statues Trial
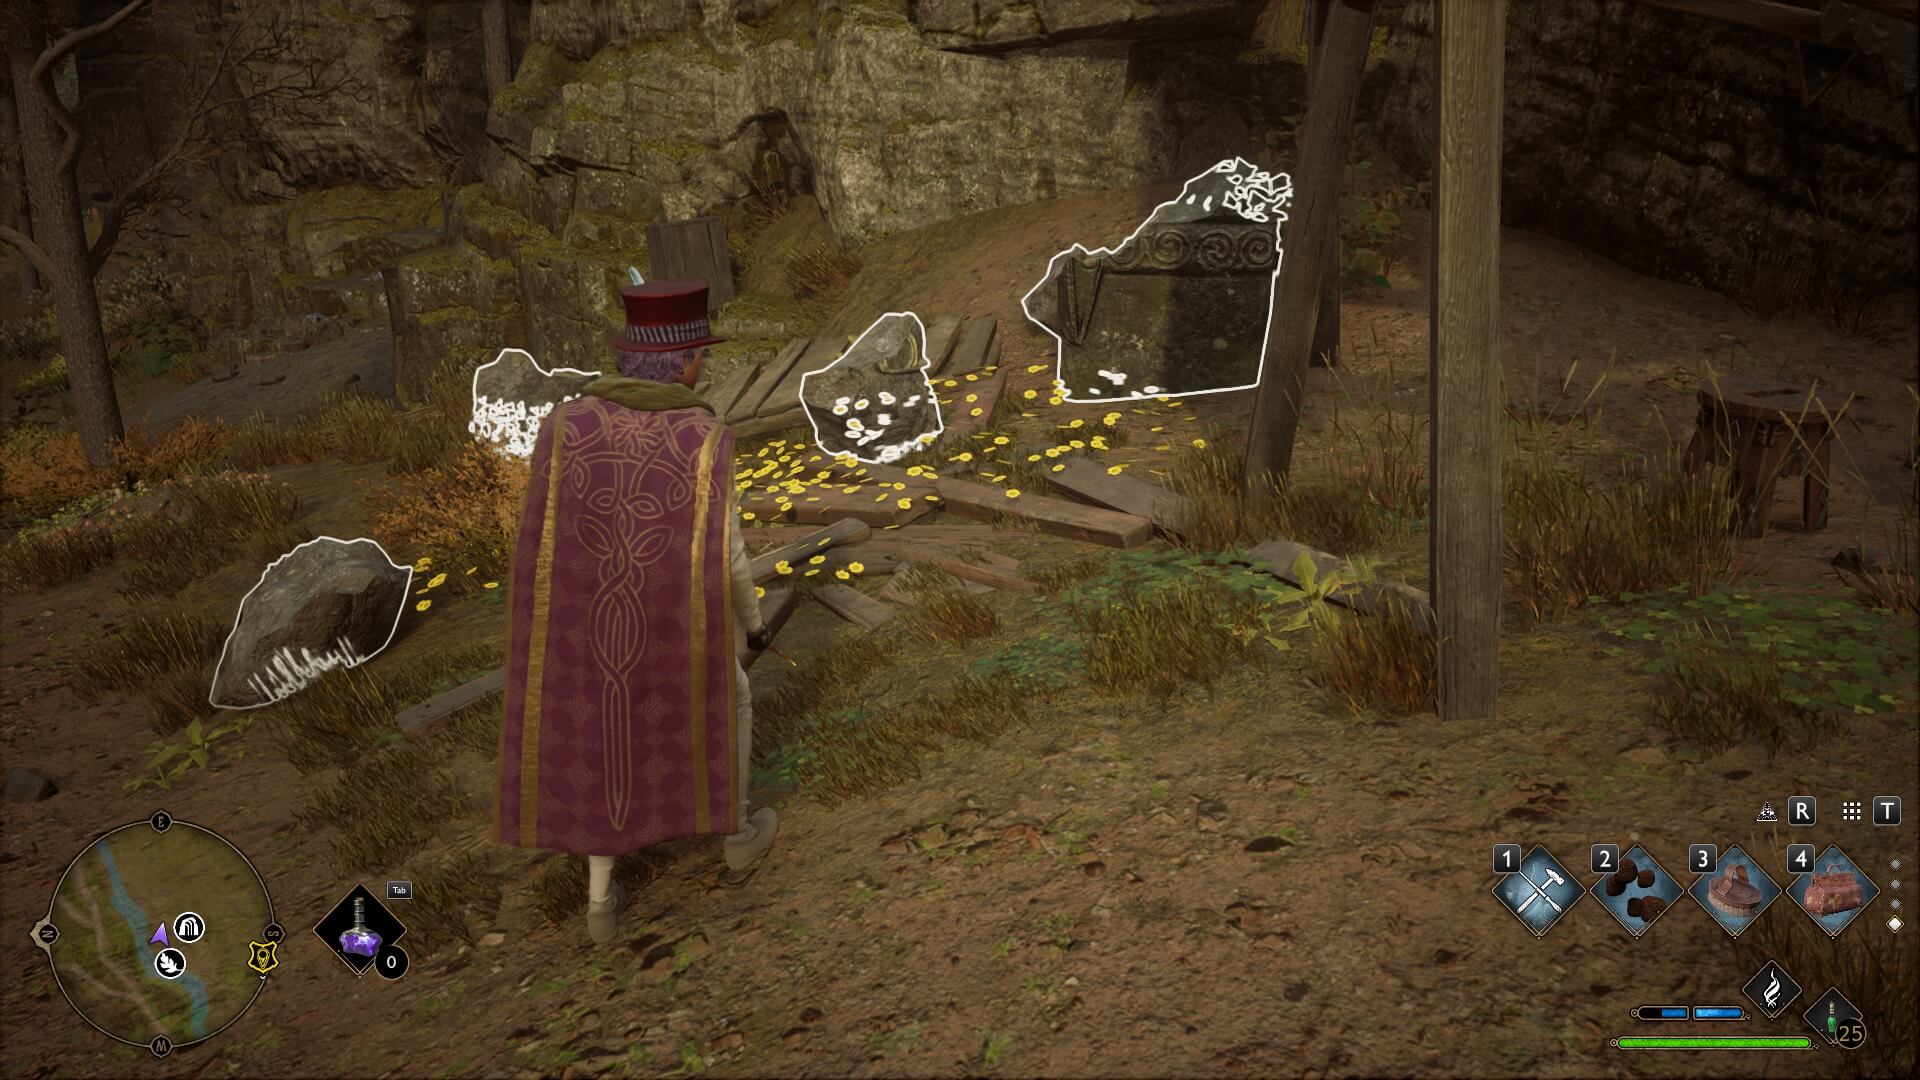
If you see a bunch of rocks near each other that look like they used to be a structure, this is a trial where you use Reparo to repair these rocks into their original state as a statue. There are 3-4 statues to repair to complete.
| 1 | Use Reparo on a pile of rocks to restore them into a statue. |
|---|---|
| 2 | Find the other broken statues in the area with the help of Revelio and do the same until the trial is complete. |
Merlin Trials Rewards
Additional Inventory Space
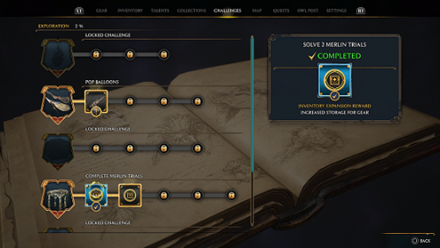
Completing Merlin Trials also unlocks challenge rewards in your Field Guide, which increases your inventory capacity. Extra storage spaces are valuable, especially in the early game, so we recommend completing every Merlin Trial you come across!
You can find the challenge and its rewards under Challenges > Exploration in your Field Guide.
| Merlin Trials Solved | Reward |
|---|---|
| 2 | 4 Additional Gear Storage Slots |
| 8 | 4 Additional Gear Storage Slots |
| 18 | 4 Additional Gear Storage Slots |
| 32 | 4 Additional Gear Storage Slots |
| 52 | 4 Additional Gear Storage Slots |
Merlin's Beard! Trophy
 |
Merlin’s Beard! Objective: Complete all Merlin Trials Points: 30 XP |
Completing all Merlin Trials will also unlock the Merlin's Beard! trophy achievement!
How to Unlock Merlin Trials
Complete the Trial of Merlin Quest
Before you can start solving the Merlin Trials, you must complete the Trials of Merlin main quest first, which is unlocked shortly after Tomes and Tribulations.
Completing this main quest allows you to use mallowsweets to activate each trial and solve the puzzles.
Trials of Merlin Quest Walkthrough
Finding Merlin Trials
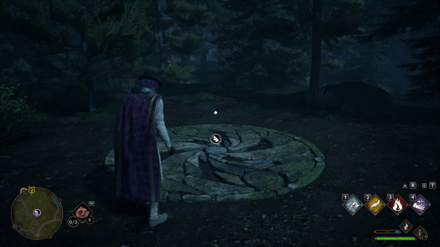
To find Merlin Trials, look for the areas with a feather indicator on the map. You can spot these trials in the overworld as circular rock structures with a swirly pattern on the ground; approaching one will cause your character to react to it.
To start a trial, approach the structure and use a mallowsweet on it when prompted.
What to Do When Merlin Trials Won't Start?
Get More Mallowsweet Leaves
Mallowsweet Leaves are consumable and can run out! Check your inventory if you have Mallowsweet Leaves left.
You can get them from vendors such as The Magic Neep in Hogsmeade or by planting them in the Room of Requirement.
How to Get and Use Mallowsweet
The Trial May Have Already Started
If you're wondering why the Use Mallowsweet prompt is not showing up, it might be because you have already started the trial before, but didn't finish it. Check the surrounding area for the trial structures or objects!
Hogwarts Legacy Related Guides

Early Game Guides
Game Mechanics Guides
Tier Lists
Story Guides
Dueling Feats
Settings Guides
Other Guides
Author
All Merlin Trials Locations and Solutions
improvement survey
03/2026
improving Game8's site?

Your answers will help us to improve our website.
Note: Please be sure not to enter any kind of personal information into your response.

We hope you continue to make use of Game8.
Rankings
- We could not find the message board you were looking for.
Gaming News
Popular Games

Genshin Impact Walkthrough & Guides Wiki

Honkai: Star Rail Walkthrough & Guides Wiki

Umamusume: Pretty Derby Walkthrough & Guides Wiki

Pokemon Pokopia Walkthrough & Guides Wiki

Resident Evil Requiem (RE9) Walkthrough & Guides Wiki

Monster Hunter Wilds Walkthrough & Guides Wiki

Wuthering Waves Walkthrough & Guides Wiki

Arknights: Endfield Walkthrough & Guides Wiki

Pokemon FireRed and LeafGreen (FRLG) Walkthrough & Guides Wiki

Pokemon TCG Pocket (PTCGP) Strategies & Guides Wiki
Recommended Games

Diablo 4: Vessel of Hatred Walkthrough & Guides Wiki

Fire Emblem Heroes (FEH) Walkthrough & Guides Wiki

Yu-Gi-Oh! Master Duel Walkthrough & Guides Wiki

Super Smash Bros. Ultimate Walkthrough & Guides Wiki

Pokemon Brilliant Diamond and Shining Pearl (BDSP) Walkthrough & Guides Wiki

Elden Ring Shadow of the Erdtree Walkthrough & Guides Wiki

Monster Hunter World Walkthrough & Guides Wiki

The Legend of Zelda: Tears of the Kingdom Walkthrough & Guides Wiki

Persona 3 Reload Walkthrough & Guides Wiki

Cyberpunk 2077: Ultimate Edition Walkthrough & Guides Wiki
All rights reserved
HOGWARTS LEGACY software © 2022 Warner Bros. Entertainment Inc. Developed by Avalanche Software. WIZARDING WORLD and HARRY POTTER Publishing Rights © J.K. Rowling. PORTKEY GAMES, HOGWARTS LEGACY, WIZARDING WORLD AND HARRY POTTER characters, names and related indicia © and ™ Warner Bros. Entertainment Inc.
The copyrights of videos of games used in our content and other intellectual property rights belong to the provider of the game.
The contents we provide on this site were created personally by members of the Game8 editorial department.
We refuse the right to reuse or repost content taken without our permission such as data or images to other sites.





![Everwind Review [Early Access] | The Shaky First Step to A Very Long Journey](https://img.game8.co/4440226/ab079b1153298a042633dd1ef51e878e.png/thumb)

![Monster Hunter Stories 3 Review [First Impressions] | Simply Rejuvenating](https://img.game8.co/4438641/2a31b7702bd70e78ec8efd24661dacda.jpeg/thumb)


