Charles Rookwood's Trial Quest Walkthrough
Charles Rookwood's Trial is one of the main quests in Hogwarts Legacy. Read on for a detailed walkthrough, list of rewards, and tips on how to complete Charles Rookwood's Trial!
| ◄ Previous Quest | Next Quest ▶ |
|---|---|
| Back on the Path | Fire and Vice |
List of Contents
Charles Rookwood's Trial Overview
How to Unlock
Charles Rookwood's Trial unlocks after completing Back on the Path.
Quest Information
| Charles Rookwood's Trial | |
|---|---|
| Quest Type | Main Quest |
| Requirement(s) | Complete Back on the Path |
| Description | I met Professor Fig at Rookwood Castle. It was crawling with Victor Rookwood's lot and Ranrok's Loyalists. Once Fig and I made our way inside, we discovered that the Loyalists had broken into some sort of repository and let something out. This was alarming to Charles Rookwood. Ultimately, I completed the trial and viewed Charles Rookwood's Pensieve memory. |
Charles Rookwood's Trial Walkthrough
Quest Objectives
| Objectives | |
|---|---|
| 1 | 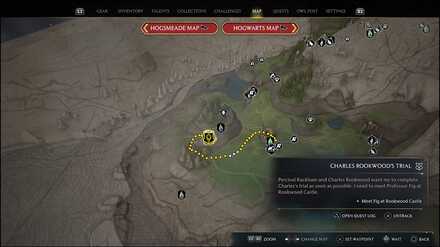 Meet Fig at Rookwood Castle Rookwood Castle is found near the center of Feldcroft Region. If you unlocked the Floo Flame in Feldcroft during In the Shadow of the Estate, fast travel there and head west to reach the castle. Professor Fig will be waiting for you near the entrance. |
| 2 | Speak with Professor Fig Speak with Professor Fig to start the quest. |
| 3 | 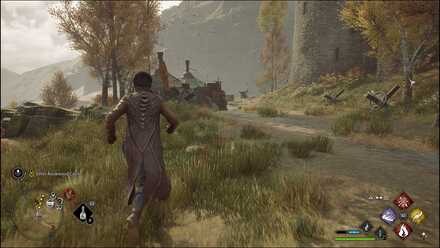 Enter Rookwood Castle Follow the trail up and turn left once you're at the castle walls. You can sneak past the first line of guards, but an unavoidable fight will initiate once the Ranger appears so best take the enemies out on your way. |
| 3.1 | 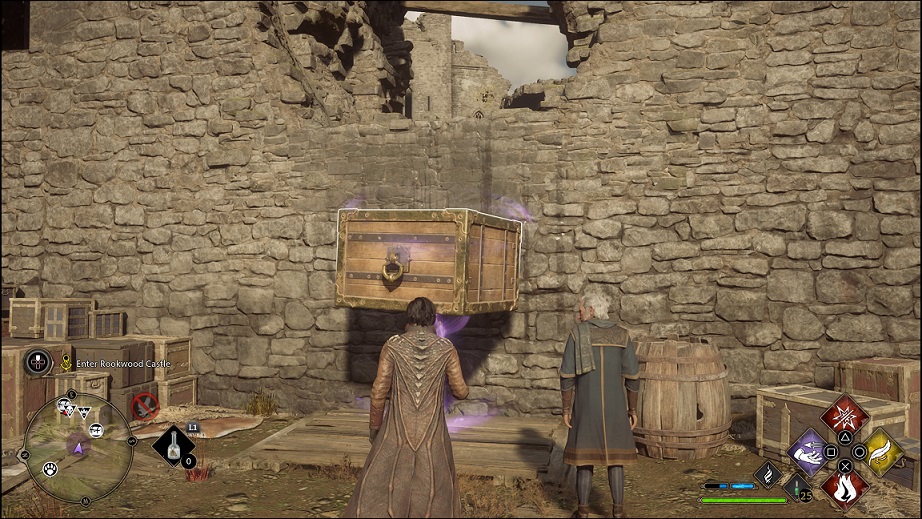 Once the guards are dealt with, use Wingardium Leviosa on the box and use it to reach the large opening on the wall. |
| 3.2 | 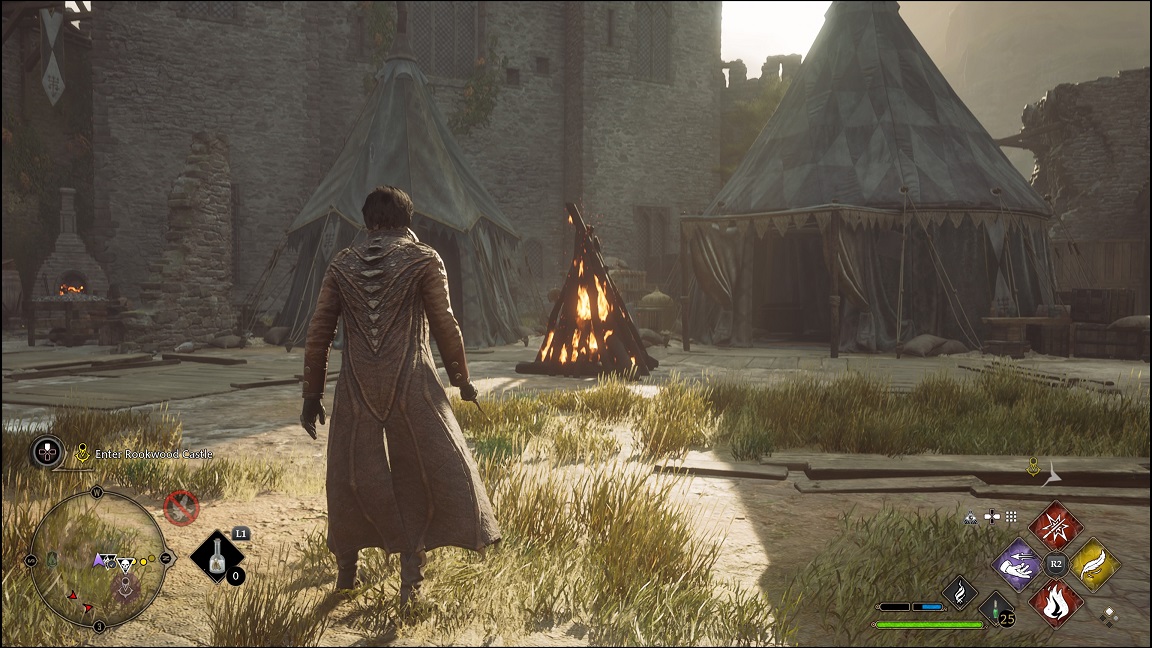 You will get into another fight as you step foot on the castle grounds. Try to use the throwable objects around to finish the fight quickly. Open the chests—one containing the Ambush I trait—inside the tents on the west side and another inside the tent on the northeast, which contains the Fangs I trait. |
| 3.3 | 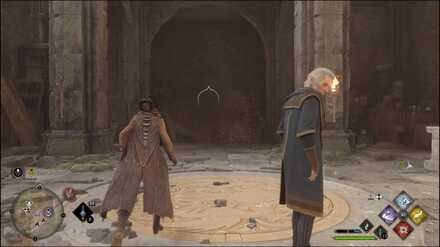 Go up the stairs and turn right at the top. Follow the rampart to get inside the castle. Drop down the lower floor and hit all three locks to open the door to the cellar. The third lock is hidden behind a wooden cover on the north wall. |
| 4 | 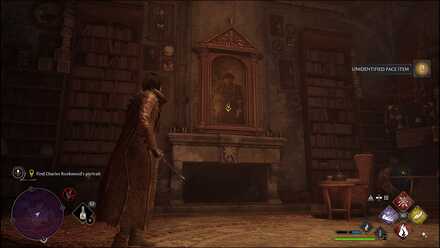 Find Charles Rookwood's portrait Turn left and follow the path until you reach one of the repositories taken over by Ranrok. Continue to your right and you will find the room with Charles Rookwood's portrait. Open the chest on the northeast corner of the room first then talk to Rookwood. |
| 5 | 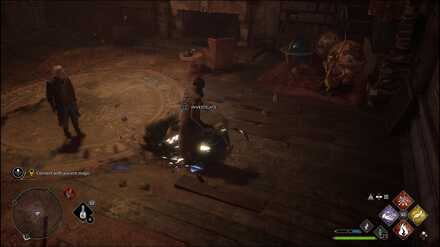 Connect with ancient magic Investigate the pool of magic near the wall adjacent to the portrait. |
| 6 | Enter Charles Rookwood's trial Pass through the revealed pathway and enter the Second Trial. |
| 7 | 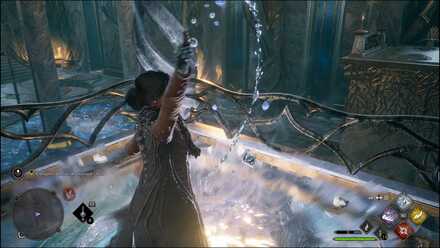 Complete Charles Rookwood's trial Enter the first room and climb the stairs on your right where you will find another pool. Investigate it to activate the archway at the center. |
| 7.1 | 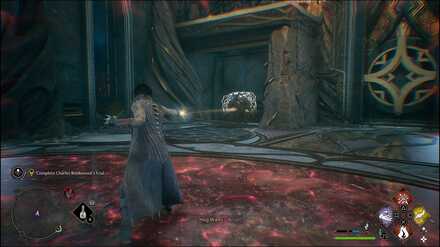 Go back down and check the southwest corner of the room to find a cube. Pull it out with Accio then pass through the archway to turn it into a small chest. |
| 7.2 | 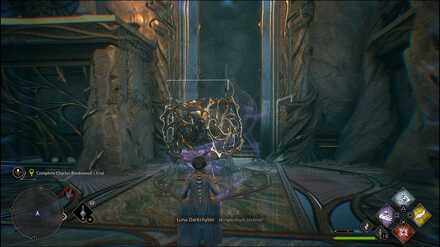 Now grab the pillar-turned-cube on your right and place it next to the stone wall. Pass through the gateway again and climb the pillar you just moved to reach the next area. |
| 7.3 | 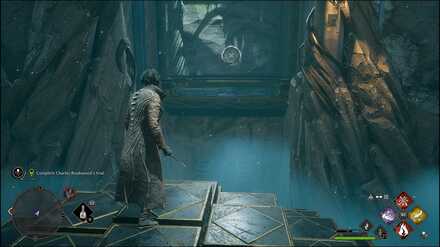 Once you reach the bridge in the next room, stop at the middle and look to your left. You will spot a switch that will raise another bridge when hit. Cross this bridge and grab the chest on the other side. |
| 7.4 | 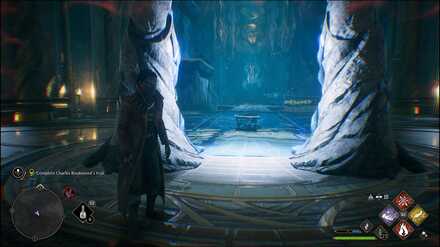 Now proceed to the main platform and interact with the pool. Go behind the newly created archway and you will see a chest on the other side. Pass through the archway and grab the chest's content. |
| 7.5 | 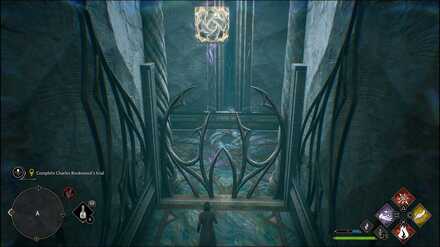 East of the room is a fence with a cube behind. Use Wingardium Leviosa to pull the cube above the fence then pass through the archway to change it into another chest. |
| 7.6 | 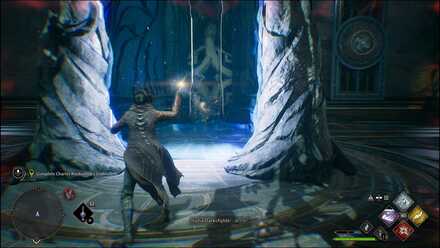 Make sure you're in the red version of the room first, then hit the switch on the southwest corner. This will rotate the archway and change the pillar in front of you into a cube. Without crossing the archway, pull the pillar through with Accio to unblock the path then flip the switch again. |
| 7.7 | 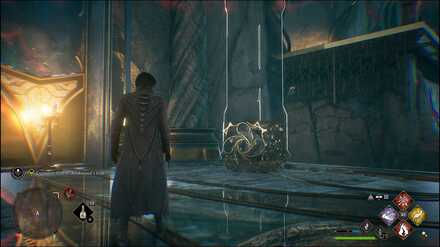 Before you proceed, place the cube you just pulled near the ledge behind you. Place it as close to the edge as possible to make it easier to jump over. Pass through the archway to switch back to the blue version of the room. |
| 7.8 | 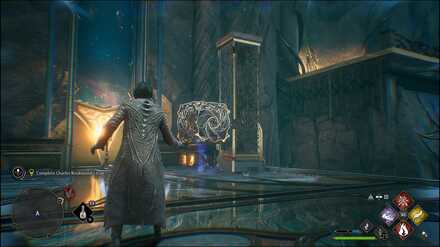 Grab the cube from earlier (the one that turned into a chest) and place it next to the pillar. Cast Levioso on the cube and use it to reach the top of the pillar and finally, the ledge and the chest on it. Pass through the archway and move to the next area where you will fight Sentries and a Sentinel on a platform. |
| 7.9 | 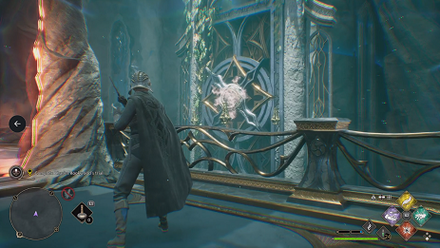 After the fight, continue to the next room and interact with another pool. Hit the switch across to make the archway move to your right. Pass through the archway and from there, hit the switch again so the archway moves out of your way. |
| 7.10 | Run to the next room and interact with the pool. As you approach the archway, two Sentinels will awaken, with one on the other version of the room. Except for its weapon, the Sentinel on the other version will be invisible, but can attack and damage you. Pass through the archway after dealing with the first Sentinel so you can attack the other. |
| 7.11 | 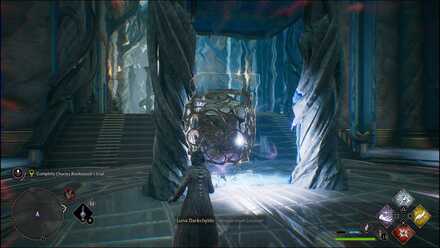 When the room's safe, pass through the archway until you switch to the red version of the room. Now hit the switch south of the room to move the archway closer to the cube. Move closer to the archway, and without crossing over, pull the cube through. The cube should not change into a pillar just yet. |
| 7.12 | 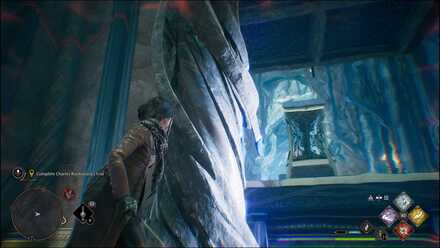 Take the cube around the archway (don't let it pass through again) and place it to where it was originally. Pass through the archway to switch to the blue version of the room. The cube should now turn into a pillar and a platform above the archway should be close to it. |
| 7.13 | 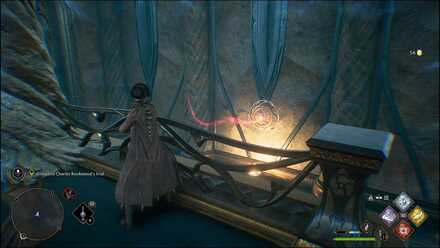 Get to the platform using the small pillar and grab the chest at the top. Hit the switch again to move closer to the ledge on the other side. |
| 7.14 | 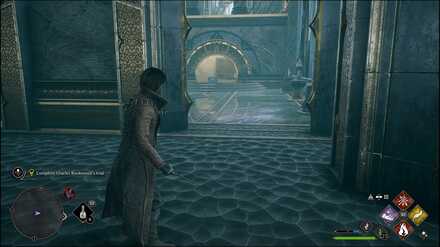 Move to the next room with the moving stairs and turn left. Before you proceed further, turn left again to find a small Chest. Run into the next room and defeat the two Sentries. Then, go west to a small room with another pool and archway. Interacting with the pool makes a chest and a switch pop up on the other side as well as a metal fence in the middle. |
| 7.15 | 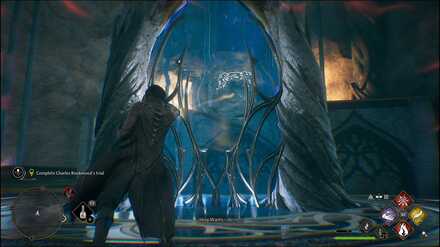 You'll have to be a bit quick on this one. Once you hit the switch, wait for the archway to rotate until it shows you its other side then immediately pull the chest with Accio once it changes into a cube. Open the chest and proceed to the final room, where you will face another Pensieve Guardian. |
| 8 | Continue exploring Charles Rookwood's trial Cross the bridge and enter the next room where you will find Rookwood's Pensieve. Be sure to check the chest behind the Pensieve before you leave. |
| 9 | Exit Charles Rookwood's trial Return to the Map Chamber through the crystallized passageway. |
| 10 | Speak to Percival Speak to Percival Rackham's portrait. |
| 11 | Speak with Professor Fig Speak to Professor Fig to complete the quest. |
Previous and Next Quests
| ◄ Previous Quest | Next Quest ▶ |
|---|---|
| Back on the Path | Fire and Vice |
Hogwarts Legacy Related Guides

List of All Main Quests
List of Assignments
Author
Charles Rookwood's Trial Quest Walkthrough
improvement survey
03/2026
improving Game8's site?

Your answers will help us to improve our website.
Note: Please be sure not to enter any kind of personal information into your response.

We hope you continue to make use of Game8.
Rankings
Gaming News
Popular Games

Genshin Impact Walkthrough & Guides Wiki

Honkai: Star Rail Walkthrough & Guides Wiki

Umamusume: Pretty Derby Walkthrough & Guides Wiki

Pokemon Pokopia Walkthrough & Guides Wiki

Resident Evil Requiem (RE9) Walkthrough & Guides Wiki

Monster Hunter Wilds Walkthrough & Guides Wiki

Wuthering Waves Walkthrough & Guides Wiki

Arknights: Endfield Walkthrough & Guides Wiki

Pokemon FireRed and LeafGreen (FRLG) Walkthrough & Guides Wiki

Pokemon TCG Pocket (PTCGP) Strategies & Guides Wiki
Recommended Games

Fire Emblem Heroes (FEH) Walkthrough & Guides Wiki

Diablo 4: Vessel of Hatred Walkthrough & Guides Wiki

Yu-Gi-Oh! Master Duel Walkthrough & Guides Wiki

Super Smash Bros. Ultimate Walkthrough & Guides Wiki

Pokemon Brilliant Diamond and Shining Pearl (BDSP) Walkthrough & Guides Wiki

Elden Ring Shadow of the Erdtree Walkthrough & Guides Wiki

Monster Hunter World Walkthrough & Guides Wiki

The Legend of Zelda: Tears of the Kingdom Walkthrough & Guides Wiki

Persona 3 Reload Walkthrough & Guides Wiki

Cyberpunk 2077: Ultimate Edition Walkthrough & Guides Wiki
All rights reserved
HOGWARTS LEGACY software © 2022 Warner Bros. Entertainment Inc. Developed by Avalanche Software. WIZARDING WORLD and HARRY POTTER Publishing Rights © J.K. Rowling. PORTKEY GAMES, HOGWARTS LEGACY, WIZARDING WORLD AND HARRY POTTER characters, names and related indicia © and ™ Warner Bros. Entertainment Inc.
The copyrights of videos of games used in our content and other intellectual property rights belong to the provider of the game.
The contents we provide on this site were created personally by members of the Game8 editorial department.
We refuse the right to reuse or repost content taken without our permission such as data or images to other sites.





![Slay the Spire 2 Review [Early Access] | Still the Deckbuilder to Beat](https://img.game8.co/4433115/44e19e1fb0b4755466b9e516ec7ffb1e.png/thumb)

![Resident Evil Village Review [Switch 2] | Almost Flawless Port](https://img.game8.co/4432790/e1859f64830960ce4248d898f8cd38d9.jpeg/thumb)


