How to Solve the Door Puzzle
A Door Puzzle found around Hogwarts involves adding numbers and animal symbols corresponding to the numbers 0-9 in Hogwarts Legacy. Learn how to solve and unlock Door Puzzles, with a list of all Door Puzzle locations and solutions!
List of Contents
- How to Solve the Door Puzzle
- All Astronomy Wing Door Puzzle Locations and Answers
- All Grand Staircase Door Puzzle Locations and Answers
- All Great Hall Door Puzzle Locations and Answers
- All Library Annex Door Puzzle Locations and Answers
- All South Wing Door Puzzle Locations and Answers
- All Bell Tower Wing Door Puzzle Locations and Answers
- Hogwarts Legacy Related Guides
How to Solve the Door Puzzle
Each Animal Symbol Represents a Number from Zero to Nine
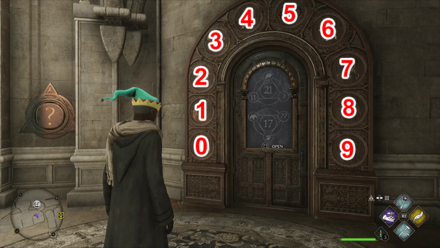
Each animal symbol at the door frame represents a number starting from zero to nine in a clockwise position. Use this as a clue to figure out each number shown in the middle of the door.
Animal symbols and corresponding number
| All Animal Symbols and Corresponding Number | ||
|---|---|---|
 0 - Demiguise 0 - Demiguise |
 1 - Unicorn 1 - Unicorn |
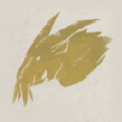 2 - Graphorn 2 - Graphorn |
 3 - Runespoor 3 - Runespoor |
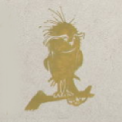 4 - Fwooper 4 - Fwooper |
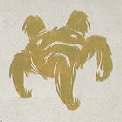 5 - Quintaped 5 - Quintaped |
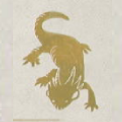 6 - Salamander 6 - Salamander |
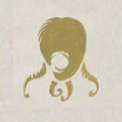 7 - Possibly A Marmite 7 - Possibly A Marmite |
 8 - Giant Spider 8 - Giant Spider |
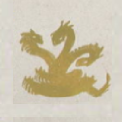
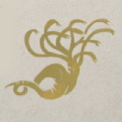 9 - Hydra 9 - Hydra |
||
Add Up the Numbers to Match the Large Number in the Middle
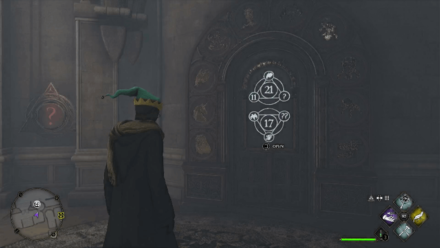
The large number written in the middle of the door is the sum of the three numbers on the diagram.
Use the animal symbol to match its corresponding number on the diagram and figure out the number that corresponds to the question mark.
As shown in the above image, the number in the center is 21. You are given the number 11 and the animal symbol that corresponds to the number 2. The question mark represents the last number and you will need to roll the wall dice near the Math Puzzle Door.
Roll the Wall Dice to Solve the Puzzle
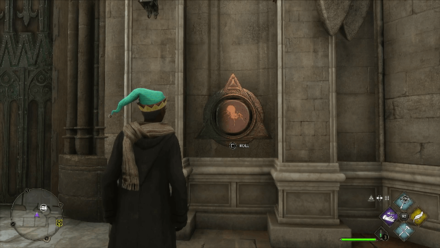
Roll the large wall dices with a question mark so that the correct animal symbol appears. Interact with the Animal Puzzle Door to confirm if the symbol is correct and to solve the puzzle.
All Astronomy Wing Door Puzzle Locations and Answers
Astronomy Wing: Charms Classroom (5 - 12)
| Astronomy Wing (5 - 12) Location and Puzzle Answer | |
|---|---|
 |
 |
| Puzzle Answer | Top: 2 Bottom: 7 |
| Reward | ・Collection chest |
Puzzle Location
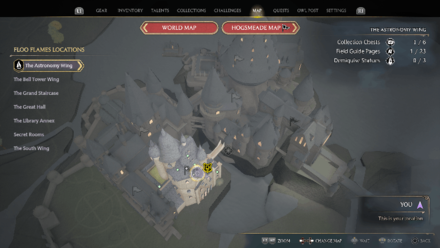
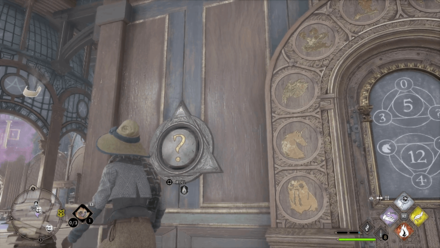
To reach this door puzzle, fast travel to the Astronomy Wing Charms Classroom Floo Flame. The door puzzle is found behind the Floo Flame spot.
Puzzle Solution
The top diagram shows the numbers 3 and 0, with the sum totaling to 5. You need to put number 2 on the question mark symbol (?), which represents the Graphorn symbol.
The bottom diagram shows the Unicorn symbol (number 1) and the number 5. Put number 7 (Marmite symbol) on the two question mark symbols (??), so that the sum matches the number 12 shown in the center of the diagram.
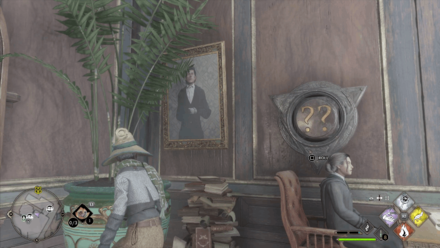
Astronomy Wing (5 - 12) Wall Dice Locations
| Astronomy Wing (5 - 12) Wall Dice Locations | |
|---|---|
 |
 |
All Grand Staircase Door Puzzle Locations and Answers
Grand Staircase (6 - 11)
| Grand Staircase (6 - 11) Location and Puzzle Answer | |
|---|---|
 |
 |
| Puzzle Answer | Top: 0 Bottom: 5 |
| Reward | ・Collection chest ・Gear |
Puzzle Location
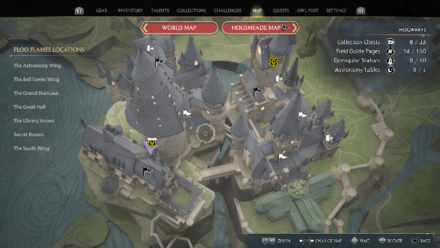
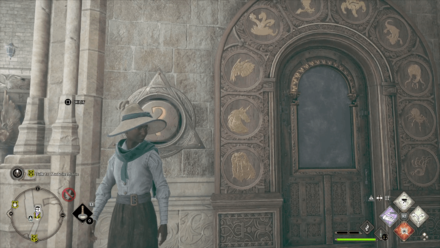
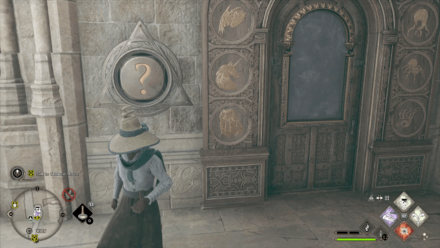
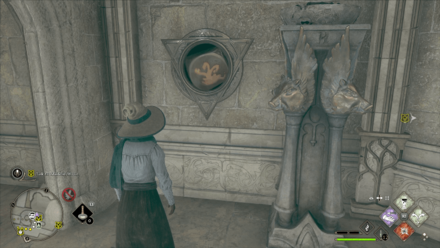
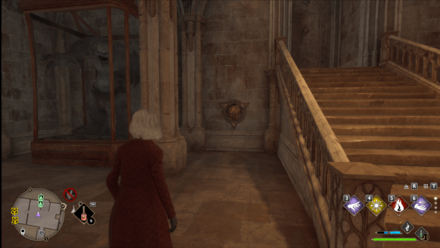
To reach this door puzzle, fast travel to the Grand Staircase Floo Flame. If you look right, you will be able to locate the two question mark (??) wall dice for this puzzle.
Head right and ascend the stairs, then take the stairs on the right. Walk forward and look left before you reach the Grand Staircase, and you will see the puzzle door.
Puzzle Solution
Put the number 0 (Demiguise symbol) on the question mark symbol (?) for the top diagram solution.
For the bottom diagram, put the number 5 (Quintaped symbol) on the two question mark (??) symbols to solve the puzzle. This wall dice is located near the Grand Staircase Floo Flame.
Grand Staircase (6 - 11) Wall Dice Locations
| Grand Staircase (6 - 11) Wall Dice Locations | |
|---|---|
 |
 |
Grand Staircase: Ravenclaw Tower (13 - 21)
| Ravenclaw Tower (13 - 21) Location and Puzzle Answer | |
|---|---|
 |
 |
| Puzzle Answer | Top: 4 Bottom: 5 |
| Reward | ・Collection chest ・Gear |
Puzzle Location
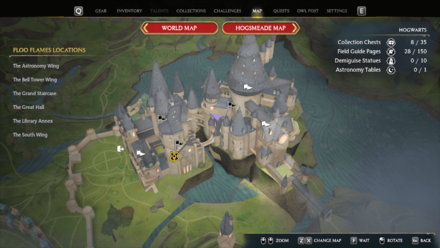
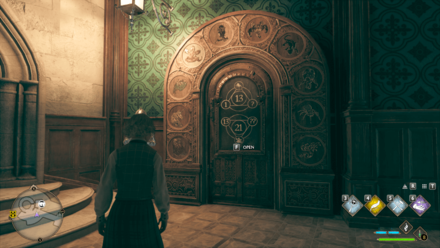
To reach this door puzzle, fast travel to the Grand Staircase Ravenclaw Tower Floo Flame. The door puzzle is across the corridor, before the staircase leading to the Ravenclaw Common Room.
Puzzle Solution
The top diagram shows the numbers 1 and 8 (represented by the Spider symbol), with the sum being 13. Put the number 4 (Fwooper symbol) on the question mark (?) wall dice.
The bottom diagram shows the numbers 13 and 3 (represented by the Runespoor symbol), with the sum being 21. Put the number 5 (Quintaped symbol) on the two question mark (??) wall dice.
Ravenclaw Tower (13 - 21) Wall Dice Locations
| Ravenclaw Tower (13 - 21) Wall Dice Locations | |
|---|---|
 |
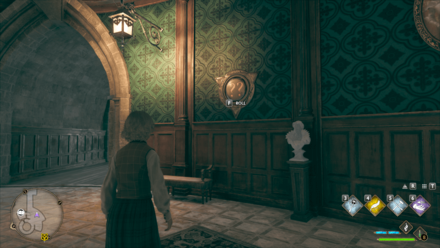 |
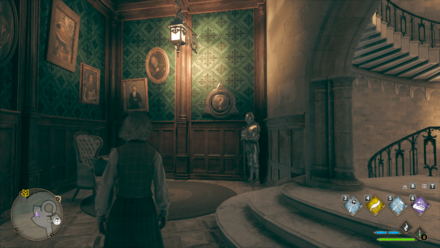
Both wall dice are found within the same room where the door puzzle is located.
Grand Staircase: Grand Staircase Tower (23 - 19)
| Grand Staircase Tower (23 - 19) Location and Puzzle Answer |
|
|---|---|
 |
 |
| Puzzle Answer | Top: 6 Bottom: 7 |
| Reward | ・Collection chest ・Gear |
Puzzle Location
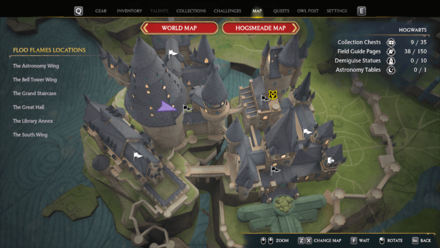
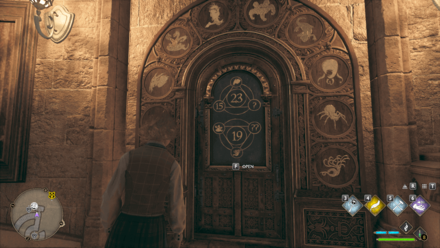
Fast travel to Grand Staircase Tower Floo Flame, then head down the stairs. You will encounter the door puzzle on the way down.
Puzzle Solution
The top diagram shows the numbers 15 and 2 (represented by the Graphorn symbol), with the sum being 23. Put the number six (Salamander symbol) on the question mark (?) wall dice.
The bottom diagram shows the numbers 3 and 9 (represented by the Runespoor and Hydra respectively), with the sum being 19. Put the number 7 (Marmite symbol) on the two question mark (??) wall dice.
Grand Staircase Tower (23 - 19) Wall Dice Locations
| Grand Staircase Tower (23 - 19) Wall Dice Locations | |
|---|---|
 |
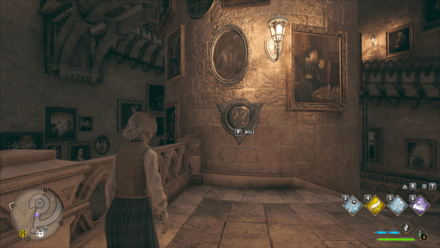 |
The wall dice are located near the door puzzle, with one placed on the central beam of the staircase, and the other on the wall to the left of the door.
All Great Hall Door Puzzle Locations and Answers
Great Hall (24 - 14)
| Great Hall (24 - 14) Location and Puzzle Answer | |
|---|---|
 |
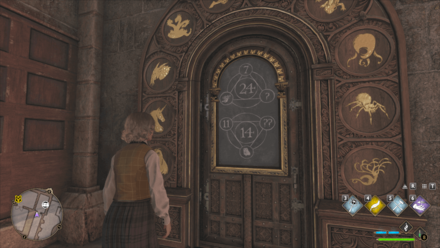 |
| Puzzle Answer | Top: 8 Bottom: 3 |
| Reward | ・Collection chest ・Gear |
Puzzle Location
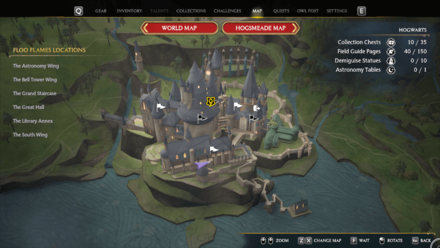
Fast travel to the Great Hall Floo Flame. While facing the tables, head to the left side of the room and you'll come across a narrow corridor leading to the door puzzle.
Puzzle Solution
The top diagram shows the numbers 7 and 9 (represented by the Hydra symbol), with the sum being 24. Put the number 8 (Spider symbol) on the question mark (?) wall dice.
The bottom diagram shows the numbers 11 and 0 (represented by the Demiguise symbol), with the sum being 14. Put the number 3 (Runespoor symbol) on the two question mark (??) wall dice.
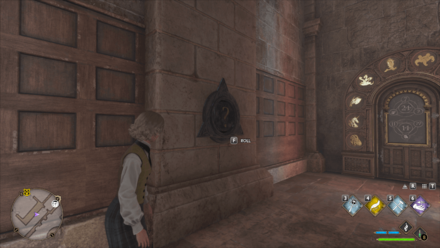
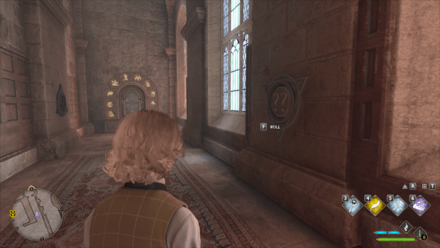
Great Hall (24 - 14) Wall Dice Locations
| Great Hall (24 - 14) Wall Dice Locations | |
|---|---|
 |
 |
All Library Annex Door Puzzle Locations and Answers
Library Annex: Potions Classroom (21 - 17)
| Central Hall (21 - 17) Location and Puzzle Answer | |
|---|---|
 |
 |
| Puzzle Answer | Top: 8 Bottom: 3 |
| Reward | ・Collection chest ・Gear |
Puzzle Location
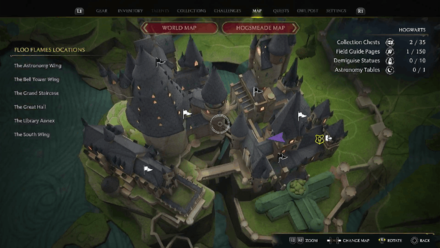
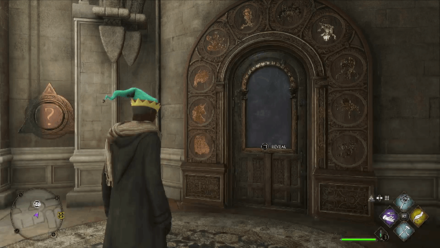
To reach this door puzzle, fast travel to the Library Annex Potions Classroom Floo Flame. If you look behind you, you will be able to locate the door puzzle right next to the large wooden door.
Puzzle Solution
The top diagram shows the number 11, the Graphorn symbol (2), and the number 21 as the sum of the three numbers. You need to put number 8 on the question mark symbol (?), which represents the Spider symbol.
The bottom diagram shows the Quintaped symbol (5), Hydra symbol (9), and the number 17 as the sum. You need to put number 3 on the two question mark (??) symbols, which represents the Runespoor symbol. This wall dice is located at the staircase above the door puzzle.
Central Hall (21 - 17) Wall Dice Locations
| Central Hall (21 - 17) Wall Dice Locations | |
|---|---|
 |
 |
Library Annex: Divination Classroom (9 - 4)
| Library Annex (9 - 4) Location and Puzzle Answer | |
|---|---|
 |
 |
| Puzzle Answer | Top: 4 Bottom: 3 |
| Reward | ・Collection chest ・Gear ・Field Guide Page |
Puzzle Location
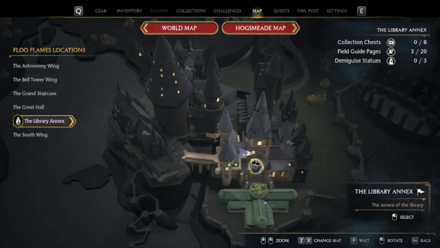
Fast travel to the Library Annex Divination Classroom Floo Flame. Walk along the wooden catwalk until you see a path leading to a hidden area to your right.
Puzzle Solution
The top diagram shows the numbers 2 and 3 (represented by Runespoor symbol), with the sum being 9. Put the number 4 (Fwooper symbol) on the question mark (?) symbol.
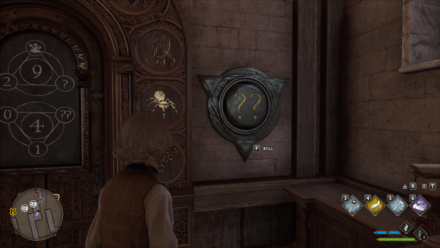
The bottom diagram shows the numbers 0 and 1, with the sum being 4. Put the number 3 (Runespoor symbol) on the two question mark symbols (??).
Library Annex (9 - 4) Wall Dice Locations
| Library Annex (9 - 4) Wall Dice Locations | |
|---|---|
 |
 |
Library Annex: Arithmancy Classroom Door Puzzle 1 (15 - 18)
| Library Annex Door 1 (15 - 18) Location and Puzzle Answer | |
|---|---|
 |
 |
| Puzzle Answer | Top: 4 Bottom: 5 |
| Reward | ・Collection chest ・Gear |
Puzzle Location
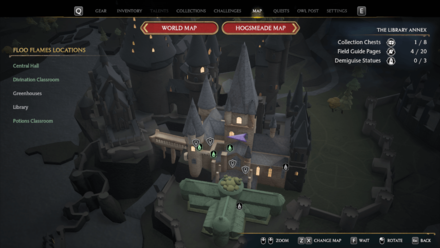
After solving the door puzzle near the Divination Classroom, you will be able to access a secret Arithmancy Classroom. If you look around, you will see not one, but two door puzzles!
Puzzle Solution
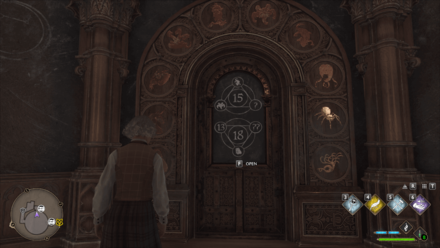
This solution will unlock the door puzzle to the left of the Arithmancy Classroom entrance.
The top diagram shows the Quintaped and Salamander symbols which represents the numbers 5 and 6 respectively. The sum of the equation is 15. Put the number 4 (Fwooper symbol) on the question mark (?) wall dice.
The bottom diagram shows the number 13 and 0 (represented by the Demiguise symbol), with the sum being 18. Put the number 5 (Quintaped symbol) on the two question mark (??) wall dice.
Library Annex Door 1 (15 - 18) Wall Dice Locations
| Library Annex Door 1 (15 - 18) Wall Dice Locations | |
|---|---|
 |
 |
Library Annex: Arithmancy Classroom Door Puzzle 2 (17 - 8)
| Library Annex Door 2 (17 - 8) Location and Puzzle Answer | |
|---|---|
 |
 |
| Puzzle Answer | Top: 6 Bottom: 1 |
| Reward | ・Collection chest ・Gear |
Puzzle Location
After solving the door puzzle near the Divination Classroom, you will be able to access a secret Arithmancy Classroom. If you look around, you will see not one, but two door puzzles!
Puzzle Solution
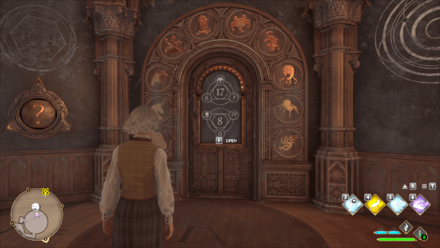
This solution will unlock the door puzzle directly in front of the Arithmancy Classroom entrance.
The top diagram shows the numbers 6 and 5 (represented by the Quintaped symbol), with the sum being 17. Put the number 6 (Salamander symbol) on the question mark (?) wall dice.
The bottom diagram shows the numbers 0 and 7 (represented by the Marmite symbol), with the sum being 8. Put the number 1 (Unicorn symbol) on the two question mark (??) wall dice.
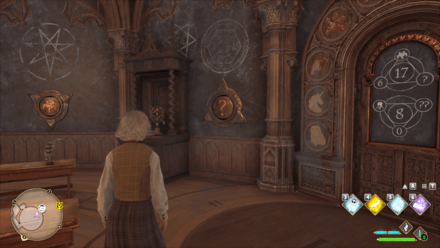
Library Annex Door 2 (17 - 8) Wall Dice Locations
| Library Annex Door 2 (17 - 8) Wall Dice Locations | |
|---|---|
 |
 |
All South Wing Door Puzzle Locations and Answers
South Wing: Hospital Wing (13 - 14)
| Hospital Wing (13 - 14) Location and Puzzle Answer | |
|---|---|
 |
 |
| Puzzle Answer | Top: 0 Bottom: 9 |
| Reward | ・Collection chest ・Gear |
Puzzle Location
To reach this door puzzle, fast travel to the South Wing's Hospital Wing Floo Flame. Head down four floors until you locate the door puzzle. You will come across this door during The Caretaker's Lunar Lament quest.
Puzzle Solution
The top diagram shows the numbers 5 and 8 (represented by the Spider symbol). You need to put number 0 (Demiguise symbol) on the question mark (?) wall dice.
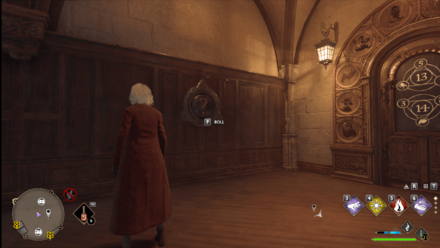
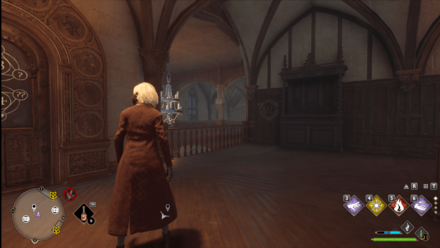
The bottom diagram shows the numbers 3 and 2 (Graphorn symbol). You need to put number 9 (Hydra sumbol) on the two question mark (??) wall dice.
Hospital Wing (13 - 14) Wall Dice Locations
| Hospital Wing (13 - 14) Wall Dice Locations | |
|---|---|
 |
 |
All Bell Tower Wing Door Puzzle Locations and Answers
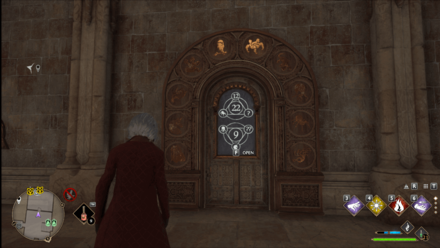
Bell Tower Wing: Bell Tower Courtyard (22 - 9)
| Bell Tower Courtyard (22 - 9) Location and Puzzle Answer | |
|---|---|
 |
 |
| Puzzle Answer | Top: 2 Bottom: 1 |
| Reward | ・Collection chest ・Gear ・Field Guide Page |
Puzzle Location
To reach this door puzzle, fast travel to the Bell Tower Wing's Bell Tower Courtyard Floo Flame. Open the door with Alohomora I and you will see the door puzzle.
Puzzle Solution
The top diagram shows the numbers 12 and 8 (represented by the Spider symbol). You need to put number 2 (Graphorn symbol) on the question mark (?) wall dice.
The bottom diagram shows the numbers 7 (Marmite symbol) and 1 (Unicorn symbol). You need to put number 1 (Unicorn sumbol) on the two question mark (??) wall dice.
Bell Tower Courtyard (22 - 9) Wall Dice Locations
| Bell Tower Courtyard (22 - 9) Wall Dice Locations | |
|---|---|
 |
 |
Hogwarts Legacy Related Guides

Hogwarts Puzzle Guides
Other Puzzle Guides
Author
How to Solve the Door Puzzle
Rankings
- We could not find the message board you were looking for.
Gaming News
Popular Games

Genshin Impact Walkthrough & Guides Wiki

Umamusume: Pretty Derby Walkthrough & Guides Wiki

Crimson Desert Walkthrough & Guides Wiki

Monster Hunter Stories 3: Twisted Reflection Walkthrough & Guides Wiki

Honkai: Star Rail Walkthrough & Guides Wiki

Pokemon Pokopia Walkthrough & Guides Wiki

The Seven Deadly Sins: Origin Walkthrough & Guides Wiki

Wuthering Waves Walkthrough & Guides Wiki

Zenless Zone Zero Walkthrough & Guides Wiki

Arknights: Endfield Walkthrough & Guides Wiki
Recommended Games

Fire Emblem Heroes (FEH) Walkthrough & Guides Wiki

Diablo 4: Vessel of Hatred Walkthrough & Guides Wiki

Cyberpunk 2077: Ultimate Edition Walkthrough & Guides Wiki

Yu-Gi-Oh! Master Duel Walkthrough & Guides Wiki

Super Smash Bros. Ultimate Walkthrough & Guides Wiki

Pokemon Brilliant Diamond and Shining Pearl (BDSP) Walkthrough & Guides Wiki

Elden Ring Shadow of the Erdtree Walkthrough & Guides Wiki

Monster Hunter World Walkthrough & Guides Wiki

The Legend of Zelda: Tears of the Kingdom Walkthrough & Guides Wiki

Persona 3 Reload Walkthrough & Guides Wiki
All rights reserved
HOGWARTS LEGACY software © 2022 Warner Bros. Entertainment Inc. Developed by Avalanche Software. WIZARDING WORLD and HARRY POTTER Publishing Rights © J.K. Rowling. PORTKEY GAMES, HOGWARTS LEGACY, WIZARDING WORLD AND HARRY POTTER characters, names and related indicia © and ™ Warner Bros. Entertainment Inc.
The copyrights of videos of games used in our content and other intellectual property rights belong to the provider of the game.
The contents we provide on this site were created personally by members of the Game8 editorial department.
We refuse the right to reuse or repost content taken without our permission such as data or images to other sites.


