All Demiguise Statue Locations and Map

Collecting all 30 Demiguise Moon Statues is needed to upgrade the Alohamora spell in Hogwarts Legacy, allowing you to open Level 2 and Level 3 Locks. Read on to learn all Demiguise Statue map locations, and rewards for returning all Demiguise Moons!
List of Contents
Demiguise Statue Interactive Map
World Map Demiguise Statue Locations
Hogwarts Demiguise Statue Locations
| Directions | Total Statues |
|---|---|
| Astronomy Wing | 3 |
| Great Hall | 1 |
| Library Annex | 3 |
| Bell Tower Wing | 2 |
| South Wing | 1 |
Astronomy Wing
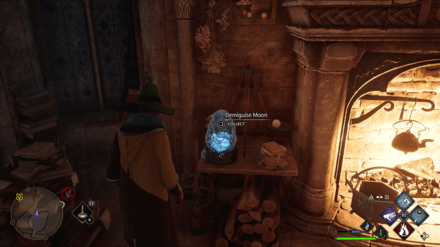
Professor Fig's Office Demiguise Statue
| World View | Map Location |
|---|---|
 |
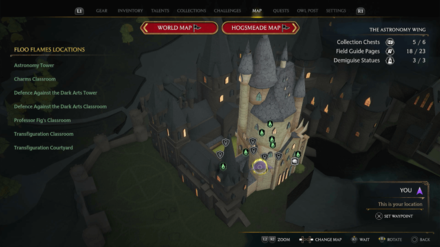 |
| Directions: Go to Professor Fig's Office, which is located at the back of Professor Fig's Classroom. The statue is located on a desk beside the fireplace. | |
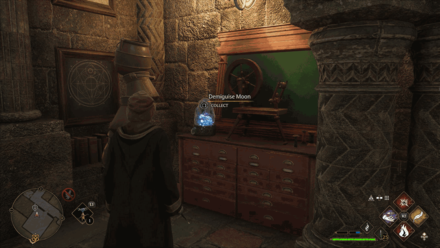
Muggle Studies Classroom Demiguise Statue
| World View | Map Location |
|---|---|
 |
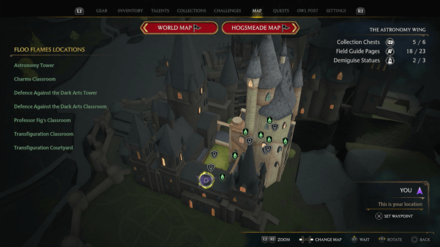 |
| Directions: Starting from the Bell Tower Courtyard Floo Flame (in the Bell Tower Wing area), climb up the stairs left or southwest of the Floo Flame. Then, enter the door and climb down the stairs. Keep going downstairs until you reach the sleeping dragon statue. From the dragon statue, go left to the Level 1 Locked Door, into the Muggle Studies Classroom. The statue is on a desk to the right upon entering the room. |
|
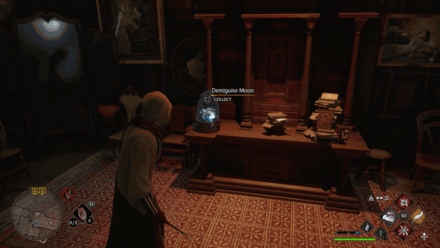
Defense Against the Dark Arts Tower Demiguise Statue
| World View | Map Location |
|---|---|
 |
 |
| Directions: Go into the Defence against the Dark Arts Tower through the entrance beside the Transfiguration Courtyard Floo Flame. To the west of the entrance, enter the Level 2 Locked Door with two talking gargoyles beside it. The statue is on a desk to the left upon entering the room. |
|
Great Hall
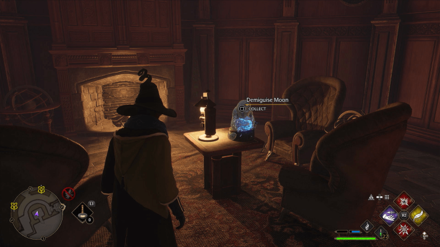
The Great Hall Demiguise Statue
| World View | Map Location |
|---|---|
 |
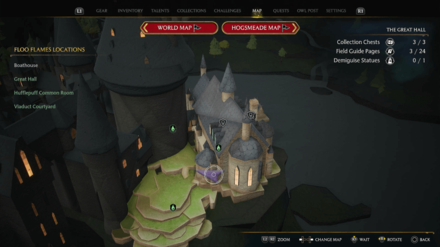 |
| Directions: From the Great Hall Floo Flame, go southwest to a Level 1 Locked Room. It will be to the left of the The Great Hall's door. The statue is located on a desk in the middle of the room. | |
Library Annex
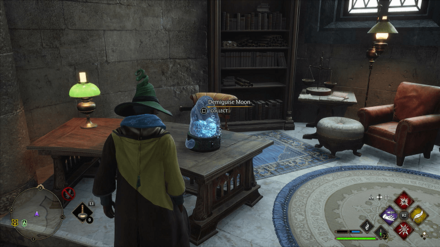
Divination Classroom Demiguise Statue
| World View | Map Location |
|---|---|
 |
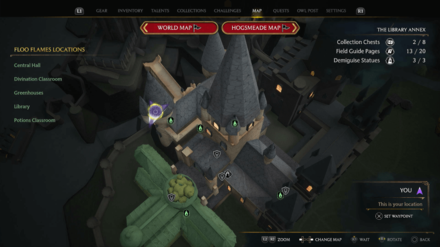 |
| Directions: From the Divination Classroom Floo Flame, go up the stairs and then up the hidden ladder towards the Divination Classroom. The statue is on Professor Onai's desk. | |
Library Restricted Section Demiguise Statue
| World View | Map Location |
|---|---|
 |
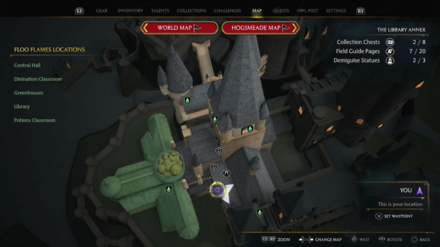 |
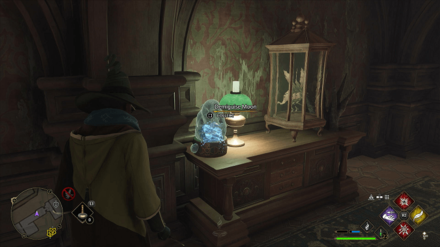
| Directions: Go to the Restricted Section of the Library, located east when standing next to the Library Floo Flame. Keep going downstairs; the statue is located at the bottom of the Restricted Section, on a desk just before the entrance of the secret chamber. |
|
Long Gallery Demiguise Statue
| World View | Map Location |
|---|---|
 |
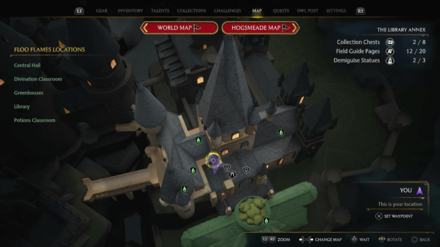 |
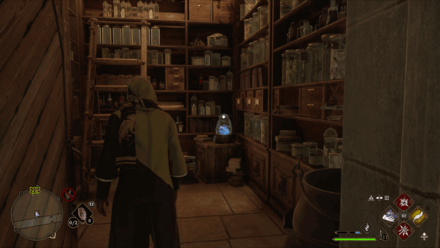
| Directions: From the Potions Classroom Floo Flame, go to the door on the right, then go down the spiral stairs and through a Level 1 Locked Door. Upon entry, go through the hall until you reach the Level 2 Locked Door to the left. The statue is in this tiny room. |
|
Bell Tower Wing
Bell Tower Courtyard Demiguise Statue
 |
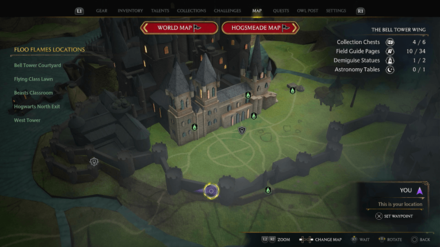 |
| Directions: From the Hogwarts North Exit Floo Flame, go back toward the castle and go east until you reach some stairs. At the side of the stairs, there is a door with a Level 1 Locked Door; the statue is just to the right on a crate. |
|
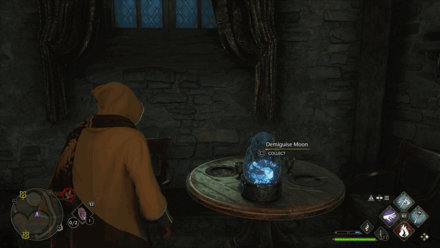
Professor Howin's Office Demiguise Statue
| World View | Map Location |
|---|---|
 |
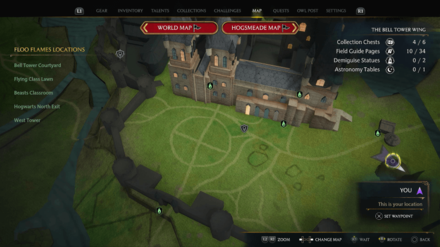 |
| Directions: Go to Professor Howin's Office located behind a Level 2 Locked Door behind the Beasts Classroom Floo Flame. The statue is on a desk in a bedroom beside the office. | |
South Wing
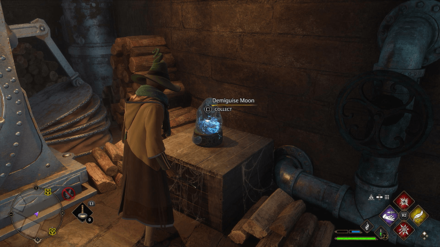
Locked Bathroom Demiguise Statue
| World View | Map Location |
|---|---|
 |
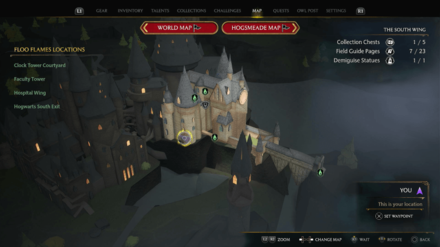 |
| Directions: Go through the door beside the Clock Tower Courtyard Floo Flame, then enter the door across the bridge into the Gryffindor Tower. Go straight down some stairs, then turn left. The second door to the left is a haunted bathroom with a Level 1 Lock; the statue is in the secret room behind the middle stall. |
|
Hogsmeade Demiguise Statue Locations
| Directions | Total Statues |
|---|---|
| Hogsmeade | 9 |
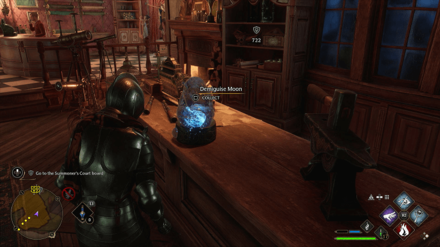
Dervish and Branges Demiguise Statue
| World View | Map Location |
|---|---|
 |
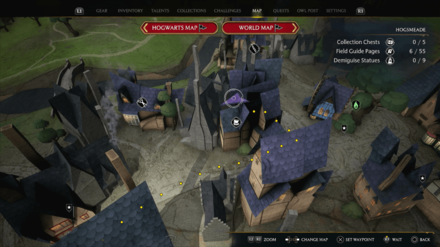 |
| Directions: The statue is on the counter in Dervish and Branges, located beside the Gladrags Wizardwear store. | |
Tomes and Scrolls Demiguise Statue
| World View | Map Location |
|---|---|
 |
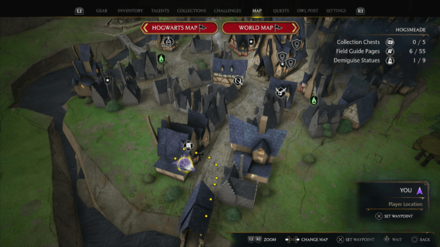 |
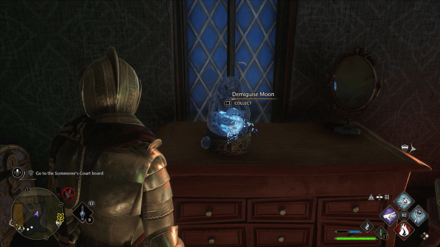
| Directions: In Tomes and Scrolls, go behind the counter into the bedroom. The statue is on a desk beside the eye chest. | |
House Behind Honeydukes Demiguise Statue
| World View | Map Location |
|---|---|
 |
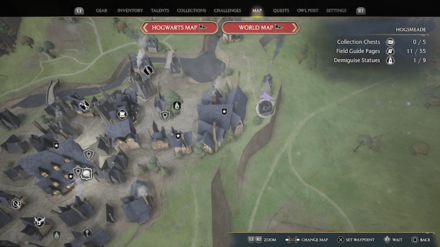 |
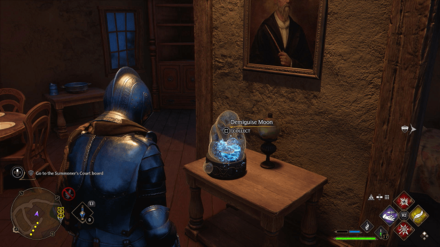
| Directions: From the North Hogsmeade Floo Flame, make your way east to the house with a Level 1 Lock behind the Honeydukes store. The statue is on a desk in the middle of the house. | |
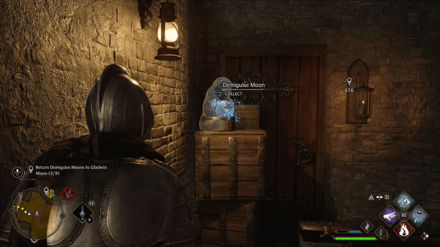
Hog's Head Demiguise Statue
| World View | Map Location |
|---|---|
 |
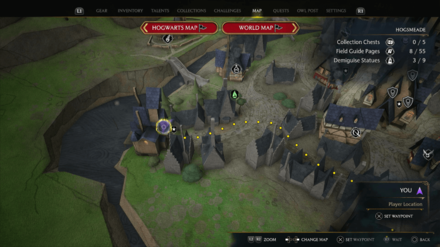 |
| Directions: The statue is on some crates in the backroom of Hog's Head. | |
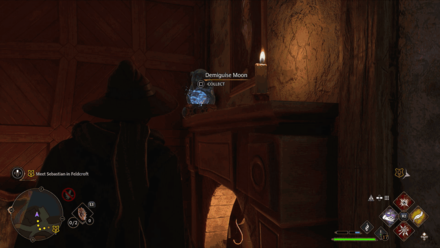
House Across Brood and Peck Demiguise Statue
| World View | Map Location |
|---|---|
 |
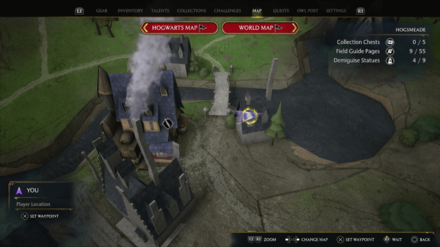 |
| Directions: The statue is by a chimney in the house with a Level 1 Lock across Brood and Peck. | |
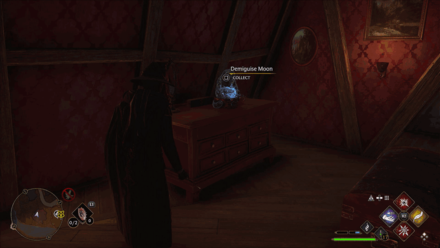
House Beside J. Pippin's Potions Demiguise Statue
| World View | Map Location |
|---|---|
 |
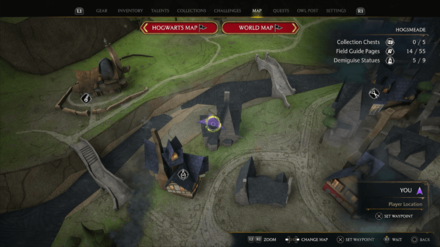 |
| Directions: The statue is in the second floor of the house with a Level 2 Lock beside J. Pippin's Potions, due north. | |
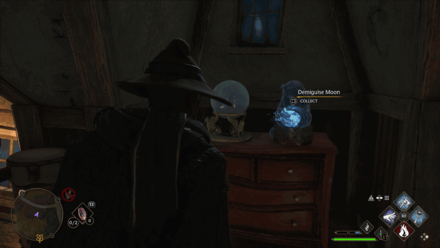
House Near Ollivanders Demiguise Statue
| World View | Map Location |
|---|---|
 |
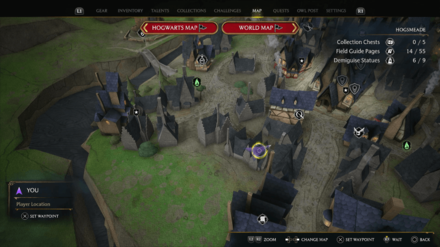 |
| Directions: From Ollivanders, go south until the nearby intersection. Turn right into the alley, then enter the second house to the left, which has a Level 2 Lock. The statue is on a dresser in the second floor of the house. |
|
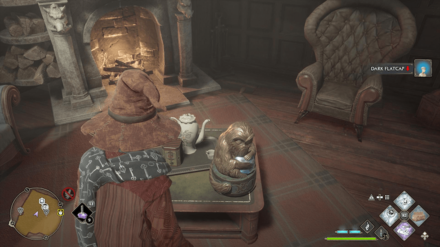
The Three Broomsticks Demiguise Statue
| World View | Map Location |
|---|---|
 |
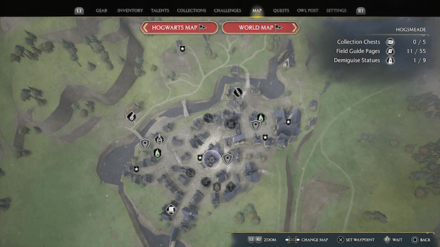 |
| Directions: The statue is in the private room with a Level 1 Locked Door at the topmost floor of The Three Broomsticks. | |
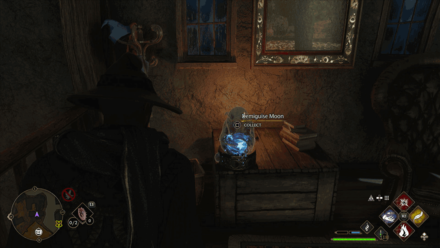
House Beside The Three Broomsticks Demiguise Statue
| World View | Map Location |
|---|---|
 |
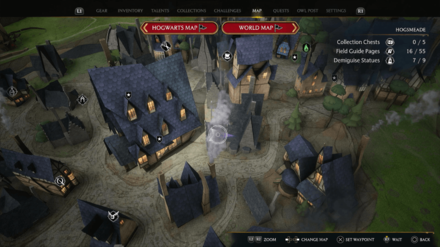 |
| Directions: The statue is in the second floor of the house with the Level 1 Locked Door beside The Three Broomsticks, along Spire Alley. | |
The Highlands Demiguise Statue Locations
| Directions | Total Statues |
|---|---|
| South Hogwarts Region | 2 |
| North Ford Bog | 1 |
| Hogsmeade Valley | 1 |
| Hogwarts Valley | 2 |
| Feldcroft Region | 2 |
| Marunweem Lake | 1 |
| Manor Cape | 1 |
| Cragcroftshire | 1 |
South Hogwarts Region
Aranshire Demiguise Statue
| World View | Map Location |
|---|---|
 |
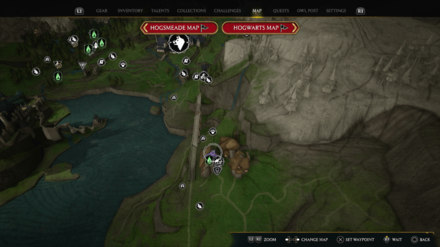 |
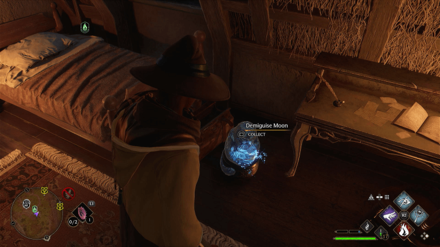
| Directions: The statue is in the second floor of the house with a Level 1 Lock beside the Aranshire Floo Flame, due north. | |
Lower Hogsfield Demiguise Statue
| World View | Map Directions |
|---|---|
 |
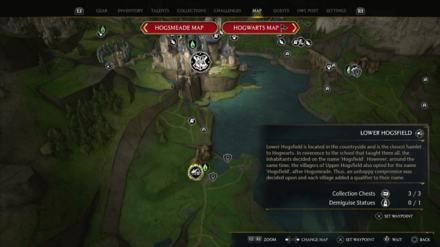 |
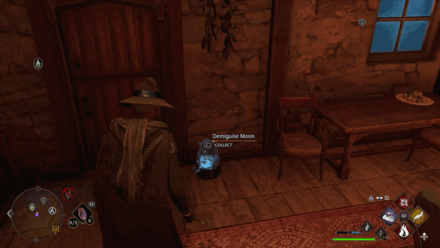
| Directions: From the Lower Hogsfield Floo Flame, go into the nearest house, due southwest. Open the Level 1 Locked Door; the statue is on the floor beside the door. | |
North Ford Bog
Pitt-Upon-Ford Demiguise Statue
| World View | Map Location |
|---|---|
 |
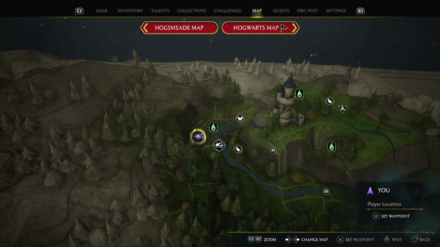 |
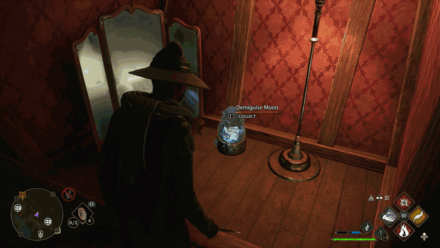
| Directions: From the Pitt-Upon-Ford Floo Flame, walk the path southwest until you reach the three-story house to the right (the second one from the flame). The statue is on the floor in the topmost floor. | |
Hogsmeade Valley
Upper Hogsfield Demiguise Statue
| World View | Map Location |
|---|---|
 |
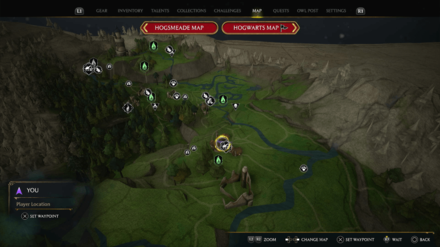 |
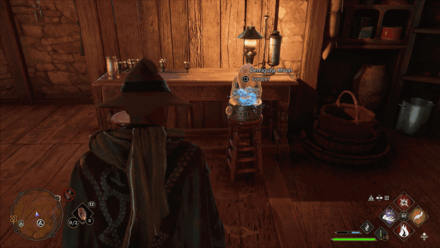
| Directions: From the Upper Hogsfield Floo Flame, walk the path north until you reach a vegetable stall. This stall is facing the house with a Level 1 Lock; the statue is on a chair in this house. |
|
Hogwarts Valley
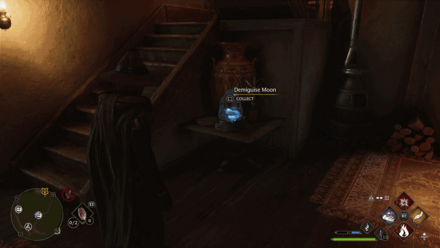
Keenbridge Demiguise Statue
| World View | Map Location |
|---|---|
 |
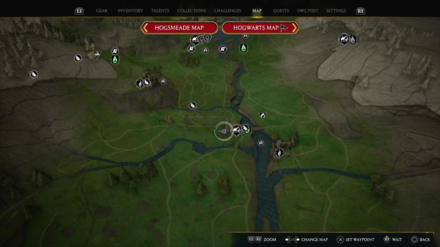 |
| Directions: From the Keenbridge Floo Flame, keep going west, passing by the vendor's stall, through a fence, until you reach the house with a Level 1 Lock. The statue is on a desk beside the stairs in this house. |
|
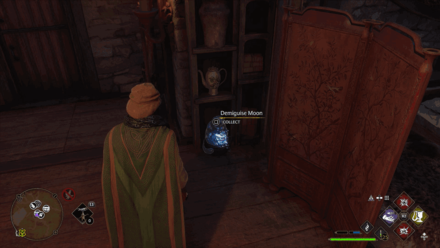
Brocburrow Demiguise Statue
| World View | Map Directions |
|---|---|
 |
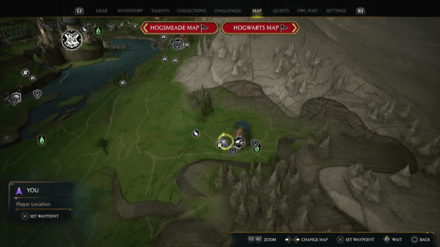 |
| Directions: From the Brocburrow Floo Flame, go west until you reach the Merlin Trial platform. From the platform, go northwest and open the Level 1 Locked Door to the house. The statue is on the floor by a cabinet. |
|
Feldcroft Region
Irondale Demiguise Statue
| World View | Map Location |
|---|---|
 |
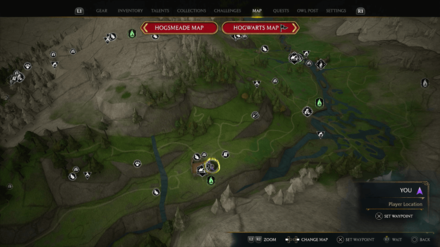 |
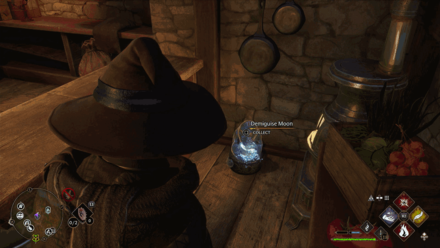
| Directions: Go to the nearest house to the Irondale Floo Flame (due north), with Althea Twiddle outside. The statue is on the floor behind the kitchen counter. | |
Feldcroft Demiguise Statue
| World View | Map Directions |
|---|---|
 |
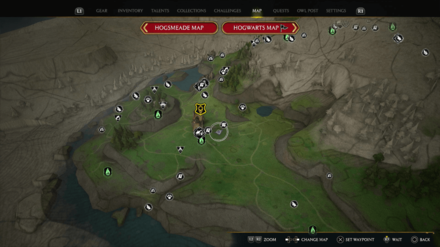 |
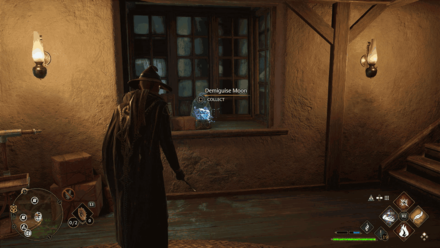
| Directions: From the Feldcroft Floo Flame, go southeast until you reach the well. From the well, go east to the house with a Level 2 Lock. The statue is on a windowsill inside the house. |
|
Marunweem Lake
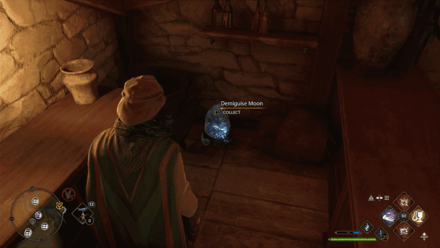
Marunweem Demiguise Statue
| World View | Map Location |
|---|---|
 |
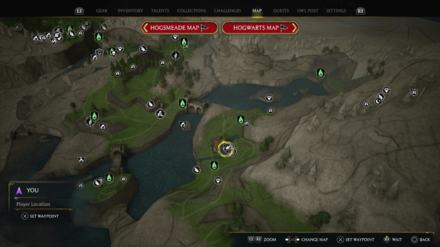 |
| Directions: From the Marunweem Floo Flame, go northeast until you reach the house with a drunk man and some pots outside. The statue is in this house, on the floor behind the kitchen counter. |
|
Manor Cape
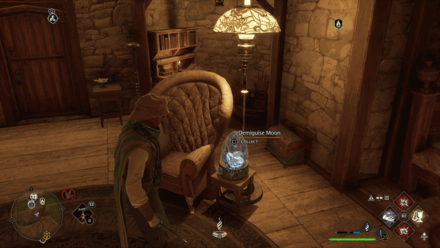
Bainburgh Demiguise Statue
| World View | Map Location |
|---|---|
 |
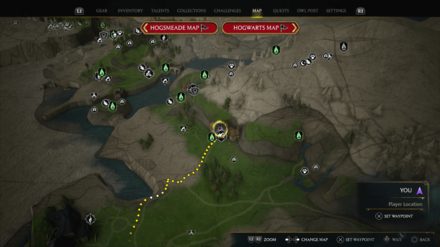 |
| Directions: The statue is on a desk inside the house with a Level 2 Locked Door northeast of the Bainburgh Floo Flame. | |
Cragcroftshire
Cragcroft Demiguise Statue
| World View | Map Location |
|---|---|
 |
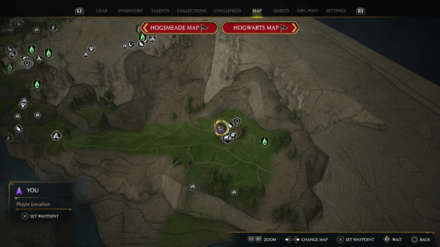 |
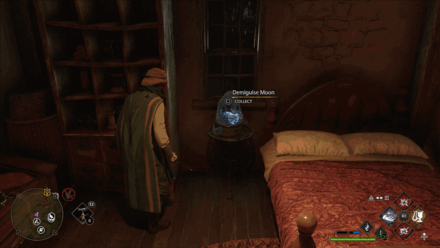
| Directions: In the hamlet of Cragcroft, go to the only vendor stall (far northwest from the Cragcroft Floo Flame). The statue is on a desk in the second floor of the house beside the stall. |
|
Demiguise Statue Rewards
Used to Upgrade Alohomora Spell
Collecting Demiguise Statues increases the level of your Alohomora spell. Remember that these Demiguise Moon Statues can be found only at night!
After collecting enough Demiguise Statues, bring them to Mr. Moon, and he will upgrade your Alohomora spell in exchange of the statues.
| Number of Demiguise Statues | Reward |
|---|---|
| 9 Statues | Alohomora Level 2 |
| 13 Statues | Alohomora Level 3 |
| All 30 Statues | Demiguise Dread Trophy |
You need a total of 22 Demiguise Statues to reach Alohomora Level 3
Hogwarts Legacy Related Guides

Collections and List of All Collectibles
List of Collections
| All Collections | ||
|---|---|---|
 Enemies Enemies |
 Appearances Appearances |
 Revelio Pages Revelio Pages |
 Beasts Beasts |
 Traits Traits |
 Wand Handles Wand Handles |
 Conjurations Conjurations |
 Ingredients Ingredients |
 Brooms Brooms |
 Tools Tools |
Additional Content Appearances | |
Other Collectibles
| Other Collectibles | ||
|---|---|---|
 Floo Flames Floo Flames |
 Collection Chests Collection Chests |
 Merlin Trials Merlin Trials |
 Ancient Magic Hotspots Ancient Magic Hotspots |
 Balloons Balloons |
 Demiguise Statues Demiguise Statues |
 Astronomy Tables Astronomy Tables |
 Cairn Dungeons Cairn Dungeons |
 Landing Platforms Landing Platforms |
 Butterfly Chests Butterfly Chests |
 Hedge Mazes Hedge Mazes |
 Moth Puzzles Moth Puzzles |
 Field Guide Pages Field Guide Pages |
||
Author
All Demiguise Statue Locations and Map
improvement survey
03/2026
improving Game8's site?

Your answers will help us to improve our website.
Note: Please be sure not to enter any kind of personal information into your response.

We hope you continue to make use of Game8.
Rankings
- We could not find the message board you were looking for.
Gaming News
Popular Games

Genshin Impact Walkthrough & Guides Wiki

Honkai: Star Rail Walkthrough & Guides Wiki

Umamusume: Pretty Derby Walkthrough & Guides Wiki

Pokemon Pokopia Walkthrough & Guides Wiki

Resident Evil Requiem (RE9) Walkthrough & Guides Wiki

Monster Hunter Wilds Walkthrough & Guides Wiki

Wuthering Waves Walkthrough & Guides Wiki

Arknights: Endfield Walkthrough & Guides Wiki

Pokemon FireRed and LeafGreen (FRLG) Walkthrough & Guides Wiki

Pokemon TCG Pocket (PTCGP) Strategies & Guides Wiki
Recommended Games

Fire Emblem Heroes (FEH) Walkthrough & Guides Wiki

Diablo 4: Vessel of Hatred Walkthrough & Guides Wiki

Yu-Gi-Oh! Master Duel Walkthrough & Guides Wiki

Super Smash Bros. Ultimate Walkthrough & Guides Wiki

Pokemon Brilliant Diamond and Shining Pearl (BDSP) Walkthrough & Guides Wiki

Elden Ring Shadow of the Erdtree Walkthrough & Guides Wiki

Monster Hunter World Walkthrough & Guides Wiki

The Legend of Zelda: Tears of the Kingdom Walkthrough & Guides Wiki

Persona 3 Reload Walkthrough & Guides Wiki

Cyberpunk 2077: Ultimate Edition Walkthrough & Guides Wiki
All rights reserved
HOGWARTS LEGACY software © 2022 Warner Bros. Entertainment Inc. Developed by Avalanche Software. WIZARDING WORLD and HARRY POTTER Publishing Rights © J.K. Rowling. PORTKEY GAMES, HOGWARTS LEGACY, WIZARDING WORLD AND HARRY POTTER characters, names and related indicia © and ™ Warner Bros. Entertainment Inc.
The copyrights of videos of games used in our content and other intellectual property rights belong to the provider of the game.
The contents we provide on this site were created personally by members of the Game8 editorial department.
We refuse the right to reuse or repost content taken without our permission such as data or images to other sites.





![Slay the Spire 2 Review [Early Access] | Still the Deckbuilder to Beat](https://img.game8.co/4433115/44e19e1fb0b4755466b9e516ec7ffb1e.png/thumb)

![Resident Evil Village Review [Switch 2] | Almost Flawless Port](https://img.game8.co/4432790/e1859f64830960ce4248d898f8cd38d9.jpeg/thumb)


