This survey will take about 1 minute.
Your answers will help us to improve our website.
Hogwarts Legacy
Jackdaw's Rest Quest Walkthrough
Jackdaw's Rest is one of the main quests in Hogwarts Legacy. Read on for a detailed walkthrough, list of rewards, and tips on how to complete Jackdaw's Rest!
| ◄ Previous Quest | Next Quest ▶ |
|---|---|
| Professor Hecat's Assignment 2 | Flying Class |
List of Contents
Jackdaw's Rest Overview
How to Unlock
Jackdaw's Rest unlocks after completing one of the House-exclusive quests and learning Expelliarmus during Professor Hecat's Assignment 2.
Quest Information
| Jackdaw's Rest | |
|---|---|
| Quest Type | Main Quest |
| Requirement(s) | Learn Expelliarmus |
| Description | The search for the missing pages led me to an ornate room where I met the portrait of Percival Rackham. Professor Fig will be excited to hear about all I've learned. |
Jackdaw's Rest Walkthrough
Quest Objectives
| Objectives | |
|---|---|
| 1 | Meet Richard Jackdaw at the Forbidden Forest The quest is only available at night. You can instantly transition to night when you arrive at the rendezvous point and start the quest. |
| 2 | Follow Jackdaw through the Forbidden Forest |
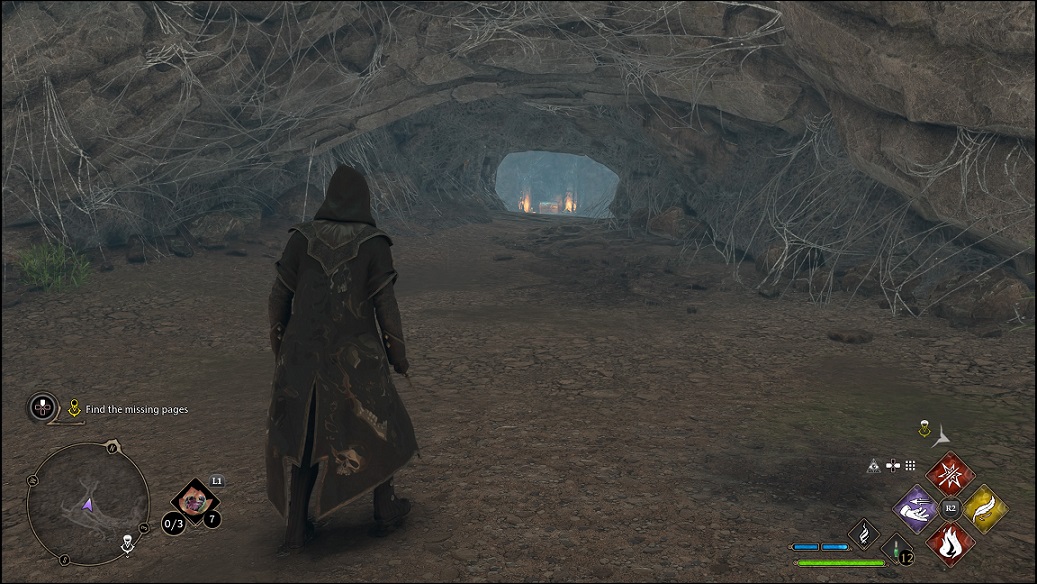
| 3 | Find the cave where Richard Jackdaw died Proceed to the left path and defeat the spiders along the way. There will be lv20 Matriarchs here so be careful! Incendio can deal heavy damage to spiders. Make them explode by hitting when they're burning! 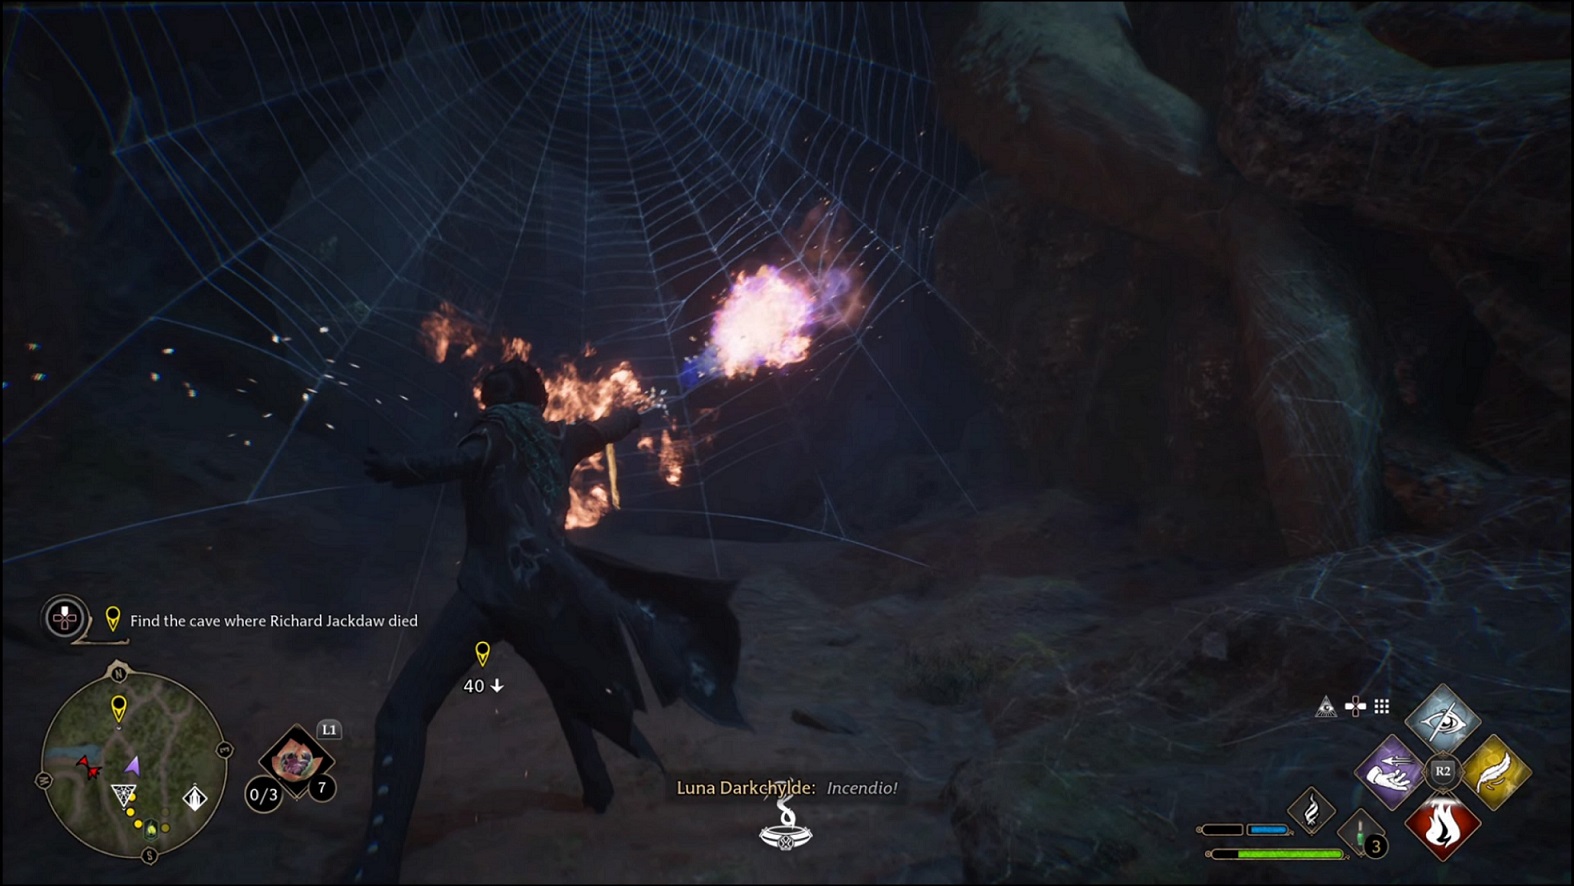
Follow the path after dealing with the spiders and remove the web out of the way with Incendio. There will be more web blocks in the upcoming dungeon so have this Spell ready. Continue making your way to the objective marker to reach the birdbath Jackdaw mentioned. |
| 4 | 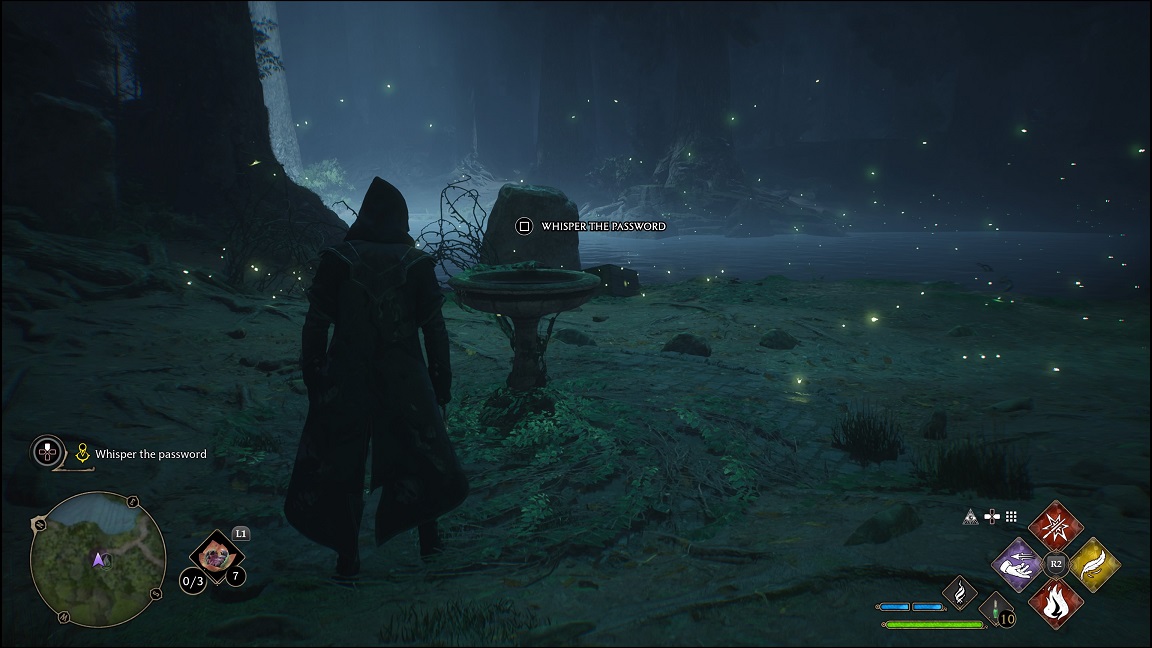 Whisper the password Interact with the birdbath to whisper the password. |
| 5 | Defeat Ranrok's loyalists Defeat the three goblins that appear. Remember that enemy shields can only be broken using a Spell type that matches their color or Stupefy. |
| 6 | 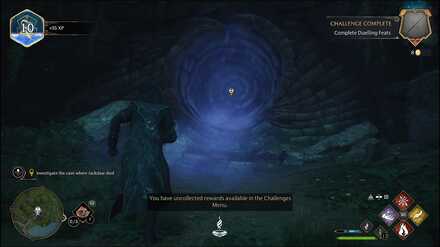 Investigate the Cave Where Jackdaw Died Enter Jackdaw's Tomb. |
| 7 | 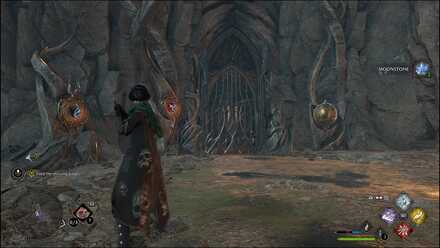 Find the missing pages Walk down until you reach a door with three circular locks. To open it, strike the locks with Basic Cast in quick succession. These locks slowly return to their initial state upon getting hit, so you must act fast and keep all three open at the same time to open the door and proceed. Solving these lock puzzles also slowly rebuild the bridge that leads to the final room. |
| * |
 Shortly past the door is another web you can burn and a spider ambush. Once it's clear, crawl through the hole on your right to find a cave filled with Shooters and Scurriors. Take them out and open the Legendary Chest on the other side before returning to the main path. 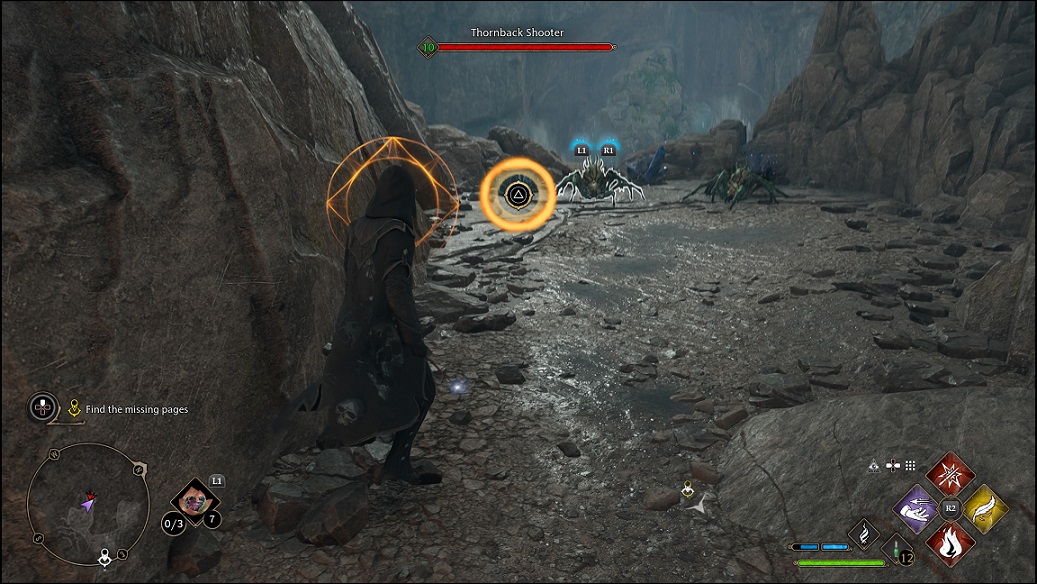
Follow the path down and turn right after the ledges for a detour. Make your way to the room with a floating platform and go up the slope on the right. Further to the right is a small Chest guarded by spider |
| 9 |  Go back to the floating platform and pull it with Accio. Hop on and use the same spell to move the platform to the other side and find a Chest next to some artifacts. |
| 10 |
Return to the area where we started the detour. Proceed through the narrow path where you will be ambushed by spiders. At the end of the path is another simple lock puzzle. |
| 11 | Follow the new path until you reach another split. Take a right first to find a small area with a Chest then drop down the ledge to the left to return to the main path. |
| 12 | At the end of the path is a chasm with a floating platform in the middle and three more ledges that lead to different areas. Pull yourself towards the left ledge first to open a small Chest. |
| 13 | Now, move to the west ledge for more areas to explore. As you follow the tunnel, you'll spot a small Chest on your right covered with spider webs. Use Incendio and grab its content. |
| 14 |
Next, you'll run into a narrow path full of spider eggs. Approach these carefully and quickly use Basic Casts on the spiderlings that pop out. Past these eggs is another spider ambush, a slightly bigger Chest, and a dead end. Return to the floating platform and move to the last unexplored path. |
| 15 |
You will be welcomed by a spider ambush as soon as you step off the platform. Deal with these spiders and move onward until you find a small Chest right before the turn. Further down the path is another split. Take the closest path to your right first. |
| 16 |
Hop on the floating platform ahead and use the handles to move through the path east. Turn right as soon as you reach the second handle to find an alcove with a small Chest. Pull the platform towards the next handle, but release Accio right before you reach it so you can jump on a small area on your right with two Chests. |
| 17 | Go back to the platform and reach the other side for another Chest. Follow the path west to return to the room where you came from earlier. Take the last path and prepare for a battle against a bunch of spiders and two Matriarchs. |
| 18 |
 After the battle, head north and open the small Chest beneath a switch to your right. Now take a few steps back and prepare to run to fully repair the bridge. Use Basic Cast on the switch above the Chest then run to the top and quickly hit the other two switches. You can also go to the lock below the bridge, then walk back until you can see the two other switches. With some aiming and movement , you can easily hit all three locks. |
| 19 | Defend yourself against the Ancient Defenders Cross the bridge and loot the two chests on both sides of the chamber entrance. Search Jackdaw's corpse next for the missing pages, which will awaken the Defenders in the room. The last three Defenders are significantly tougher than the rest, so you might want to save your Ancient Magic on them. |
| 20 | 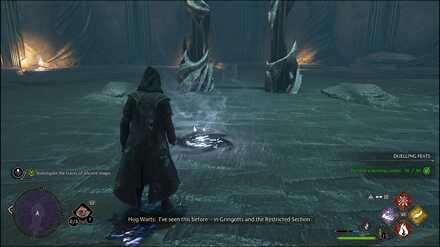 Investigate the Traces of Ancient Magic Interact with the swirl and pass through the gateway. Follow the path until you reach the Map Chamber. |
| 21 | 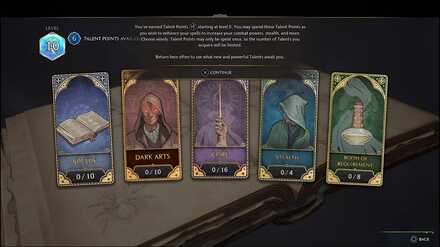 Speak to the Portrait Speak to the portrait of Percival Rackham, one of the Keepers, to learn about the Pensieves and the Ancient Magic. The Talent system will be unlocked after the conversation. |
| 22 | Exit the Map Cham Exit the Map Chamber through the marked door and continue moving up until you reach the dungeons beneath Hogwarts and complete the quest.. |
Previous and Next Quests
| ◄ Previous Quest | Next Quest ▶ |
|---|---|
| Professor Hecat's Assignment 2 | Flying Class |
Hogwarts Legacy Related Guides

List of All Main Quests
List of Assignments
Author

Jackdaw's Rest Quest Walkthrough
Please participate in our site
improvement survey
03/2026
improvement survey
03/2026
Would you assist in
improving Game8's site?
improving Game8's site?

×
We are listening to our users' valuable opinions and discussing how to act on them.
The information collected through this survey will be used for the purpose of improving our services. In addition, the information will only be disclosed a part of a statistic in a format that will not allow identification of personal information.
Begin Survey
Not Now
×
Please rate each item regarding Game8.co's Advertisements.
Amount of Ads
Very Dissatisfied
Somewhat Dissatisfied
Fine
Somewhat Satisfied
Highly Satisfied
Placement of Ads
Timing of Ad Display
Ad Loading Speed
Safeness of Ads
Content of Ads
×
Please rate each item regarding Game8.co's Quality of Articles.
Amount of information
Very Dissatisfied
Somewhat Dissatisfied
Fine
Somewhat Satisfied
Highly Satisfied
Frequency of updates
Speed of new information
Accuracy of articles
Understandibility of articles
Readability of sentences
×
Please rate each item regarding Game8.co's Usability of the Site.
Ease of finding information
Very Dissatisfied
Somewhat Dissatisfied
Fine
Somewhat Satisfied
Highly Satisfied
Loading Speed
Use of Color
Font Size
Visibility of Images
Easy to Understand Layout
×
Please rate each item regarding Game8.co's Message Boards, Comments.
Ease of Writing
Very Dissatisfied
Somewhat Dissatisfied
Fine
Somewhat Satisfied
Highly Satisfied
Readability
Ease in Finding Information
Comment Quality
Comment Quantity
Admin Response
×
Please rate each item regarding Game8.co's Site's new design.
Please rate our site's new design
Very Dissatisfied
Somewhat Dissatisfied
Fine
Somewhat Satisfied
Highly Satisfied
Do you think that the website's design change makes the site easier to use?
Has the new design made it easier for you to find information on the site?
Has the new design improved the overall visual appeal of the site?
How would you rate your overall satisfaction with the new design of the site?
×
How likely are you to recommend Game8 to someone you know?
Very Unlikely
0
1
2
3
4
5
6
7
8
9
10
Very Likely
If you have other opinions regarding potential improvement to the website, please share them with us. We would appreciate your honest opinion.
Note: This is a free response section, so you can proceed without entering anything.
Note: Please be sure not to enter any kind of personal information into your response.
Note: Please be sure not to enter any kind of personal information into your response.
×
Thank You
×
Thank you for participating in our survey! Your answers will help us to improve the quality of our website and services.
We hope you continue to make use of Game8.
We hope you continue to make use of Game8.
Close
Rankings
- We could not find the message board you were looking for.
Gaming News


![Everwind Review [Early Access] | The Shaky First Step to A Very Long Journey](https://img.game8.co/4440226/ab079b1153298a042633dd1ef51e878e.png/thumb)

![Monster Hunter Stories 3 Review [First Impressions] | Simply Rejuvenating](https://img.game8.co/4438641/2a31b7702bd70e78ec8efd24661dacda.jpeg/thumb)
Popular Games

Genshin Impact Walkthrough & Guides Wiki
Honkai: Star Rail Walkthrough & Guides Wiki
Umamusume: Pretty Derby Walkthrough & Guides Wiki
Pokemon Pokopia Walkthrough & Guides Wiki
Resident Evil Requiem (RE9) Walkthrough & Guides Wiki
Monster Hunter Wilds Walkthrough & Guides Wiki
Wuthering Waves Walkthrough & Guides Wiki
Arknights: Endfield Walkthrough & Guides Wiki
Pokemon FireRed and LeafGreen (FRLG) Walkthrough & Guides Wiki
Pokemon TCG Pocket (PTCGP) Strategies & Guides Wiki


Recommended Games
Diablo 4: Vessel of Hatred Walkthrough & Guides Wiki
Fire Emblem Heroes (FEH) Walkthrough & Guides Wiki
Yu-Gi-Oh! Master Duel Walkthrough & Guides Wiki
Super Smash Bros. Ultimate Walkthrough & Guides Wiki
Pokemon Brilliant Diamond and Shining Pearl (BDSP) Walkthrough & Guides Wiki
Elden Ring Shadow of the Erdtree Walkthrough & Guides Wiki
Monster Hunter World Walkthrough & Guides Wiki
The Legend of Zelda: Tears of the Kingdom Walkthrough & Guides Wiki
Persona 3 Reload Walkthrough & Guides Wiki
Cyberpunk 2077: Ultimate Edition Walkthrough & Guides Wiki


All rights reserved
HOGWARTS LEGACY software © 2022 Warner Bros. Entertainment Inc. Developed by Avalanche Software. WIZARDING WORLD and HARRY POTTER Publishing Rights © J.K. Rowling. PORTKEY GAMES, HOGWARTS LEGACY, WIZARDING WORLD AND HARRY POTTER characters, names and related indicia © and ™ Warner Bros. Entertainment Inc.
The copyrights of videos of games used in our content and other intellectual property rights belong to the provider of the game.
The contents we provide on this site were created personally by members of the Game8 editorial department.
We refuse the right to reuse or repost content taken without our permission such as data or images to other sites.