 Vessel of Hatred
 Seasons and Season 12
 Builds
 Classes
 Bosses
 Unique Items
 Aspects
 Runewords
 Items
Items Tips and Tricks
 Transmog
 Interactive Map
 Main Quests
 Priority Quests
 Side Quests
 World Bosses
 Dungeons
 Strongholds
 Tempering Manuals
 Gems
Gems Affixes
 Skills
 Paragon Boards & Glyphs
 Glossary
 NPCs
NPCs Mounts
 Altars of Lilith
 Cow Level
 PVP
PVP World Events
 Rare Spawns
 Shop Bundles
 News and Events
 Bugs and Errors
 The Pit Guide
 Infernal Horde Guide
 Masterworking Guide
 Helltide Event Guide
 Legion Event Guide
 Nightmare Dungeon Guide
 How to Complete Tree of Whispers
 Nightmare Dungeon Tier List
 Best Tree of Whispers Rewards
 The Tower Guide
This survey will take about 1 minute.
Your answers will help us to improve our website.
Diablo 4: Vessel of Hatred (D4)
Horadric Strongrooms Guide
★ NEW: Season 12 Guide and New Features
┗ Seasonal Content: New Uniques | Bloodied Sigils | Slaughterhouses
┗ Seasonal Mechanic: Killstreaks and Bloodied Items
★ NEW: Lord of Hatred Expansion Release Date
★ Check out our Vessel of Hatred expansion guide
Horadric Strongrooms are seasonal micro dungeons introduced in Diablo 4 (D4). Read on to learn how to enter Horadric Strongrooms, what they are, and what rewards they offer.
List of Contents
How to Find and Enter Horadric Strongrooms
Use the Horadric Wayfinder in Nightmare Dungeons
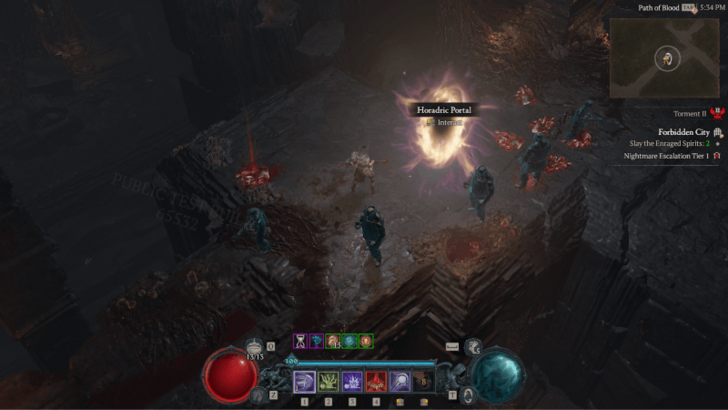
The Horadric Wayfinder in Nightmare Dungeons will guide you to a Horadric Gateway. Activating the gateway will spawn waves of enemies that you must defeat. A portal leading to the Strongroom will appear once all enemies are cleared.
Do note that these portals are not guaranteed, some Nightmare Dungeons may not have portals to access the Strongrooms.
You get the Horadric Wayfinder by completing Briona's first task to clear Eldhaime Keep.
Check for Dungeon Affixes
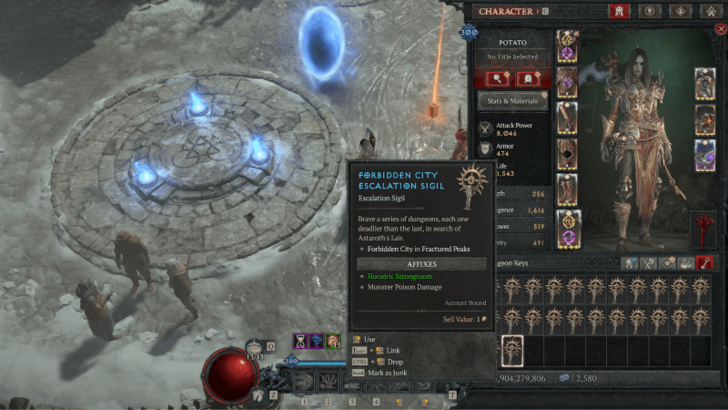
Certain Nightmare Dungeon Sigils can have the Horadric Strongroom Affix, which guarantees a portal will spawn. These affixes are commonly found on Escalation Sigils, which can also be obtained from within Strongrooms.
One Strongroom per Dungeon
Each Nightmare Dungeon can contain only one Horadric Strongroom. While you may encounter multiple Horadric Gateways within a dungeon, they all lead to the same Strongroom instance tied to that dungeon.
In an Escalating Nightmare run, however, you can access multiple Strongrooms as long as each one is found in a different tier or dungeon within the escalation sequence.
Horadric Strongroom Guide and Mechanics
|
|
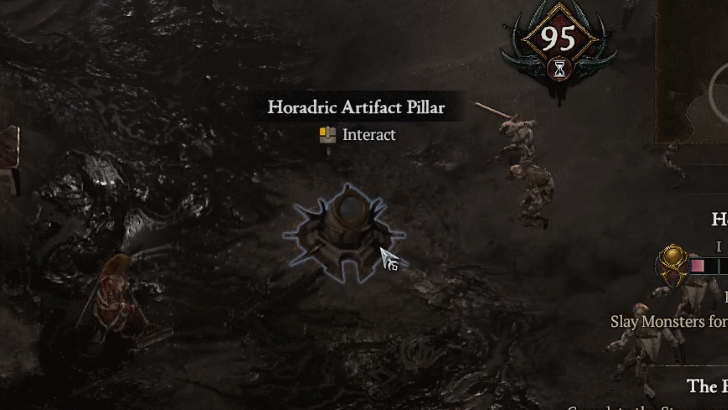
Complete the Initial Ritual
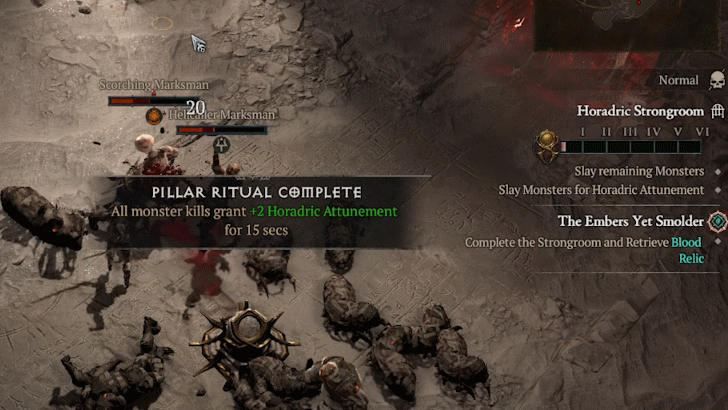
Upon entering a Horadric Strongroom, interact with the Horadric Artifact Pillar to begin a ritual that spawns waves of enemies. Defeating these enemies grants Horadric Attunement, which boosts your final rewards. Completing the ritual grants you a bonus to the Attunement you obtain.
Choose Horadric Statue Tests
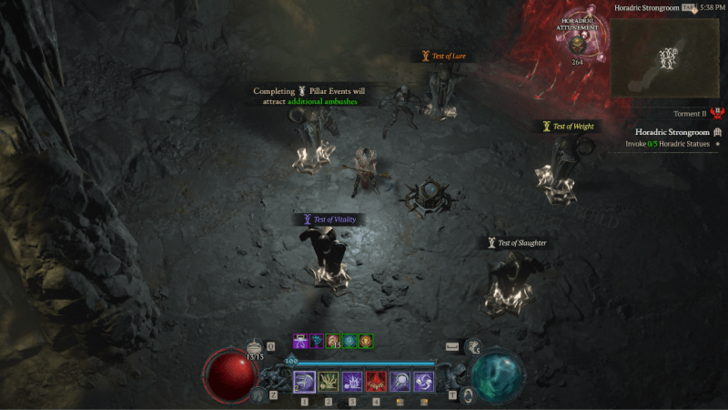
After the initial ritual, you’ll encounter Horadric Statues that present challenges that affects the Strongroom's main chamber. Activating these statues apply modifiers that affect both your character and the enemies within. These modifiers can significantly impact the difficulty and rewards of the fight.
List of Horadric Statues
| Statue | Effect |
|---|---|
| Test of Restlessness | Approaching Pillars will attract additional ambushes. |
| Test of Doom | Grants an Idol of +25% Horadric Attunement while held. Idol drops on potion use. |
| Test of Chains | Pillar Ritual Mutation: Kill tethered monsters to complete the ritual. |
| Test of Resistance | For each Shrine interacted, Reduce all resist -20%. Get +5 Swiftness Motes. |
| Test of Might | Getting 2000 Horadric Attunement will summon a special demon. |
| Test of Vitality | For each Shrine interacted, Health potion cooldown +5s On monster kill: +25% Horadric Attunement for 10 secs. |
| Test of Movement | Every other interacted shrine will grant 3 Swiftness Motes. |
| Test of Ferocity | For each Shrine interacted, All Monsters +50% damage. Pillar Ritual +25% speed. |
| Test of the Unsettled | Completing Pillar Events will attract additional ambushes. |
| Test of the Speed | Approaching Pillars will grant 2 Swiftness Motes. |
| Test of Mentality | All monsters have +50% health Pillar Ritual +25% Speed |
| Test of Frenzy | Activating Shrines will attract additional ambushes. |
| Test of Efficiency | +25% Speed Pillar Ritual, take damage when near Pillars. |
| Test of Lunatics | Pillars will tether nearby Lunatics, killing them grants +8 Horadric Attunement. |
| Test of Slaughter | Pillar Ritual Mutation: Kill nearby monsters to complete the ritual. |
| Test of Agility | For each shrine interacted, Evade cooldown +5s. On Monster Kill: +25% Horadric Attunement for 10 seconds. |
| Test of Weight | Grants an Idol of 25% Horadric Attunement. Idol drops on evade. |
| Test of Doom | Grants an Idol of 25% Horadric Attunement. Idol drops on potion use. |
| Test of Celerity | Staying near pillars will grand 3 Swiftness Motes. |
| Test of Tethering | Pillar Ritual Mutation: Kill tethered monsters to complete the ritual. |
| Test of Wandering | Catch Wisp of Energy for +25 Horadric Attunement. |
| Test of Lure | Lure Mummies to Pillars for +40 Horadric Attunement. |
Collect Attunent Before Time Runs Out
In the Strongroom’s main chamber, your goal is to get as much Horadric Attunement as possible before time expires. The more you collect, the better the rewards are from the final cache.
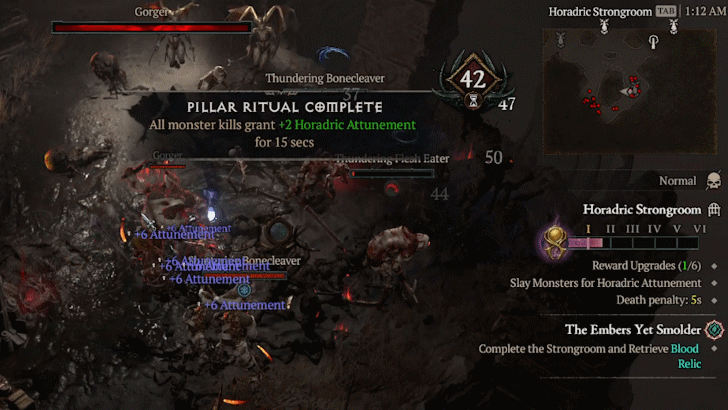
Complete Pillar Rituals for an Attunement Buff
Interact with Horadric Artifact Pillars scattered throughout the main chamber. Stay near them to complete the ritual and gain a buff that increases Attunement earned from defeating enemies.
Activate Sacrifice Shrines
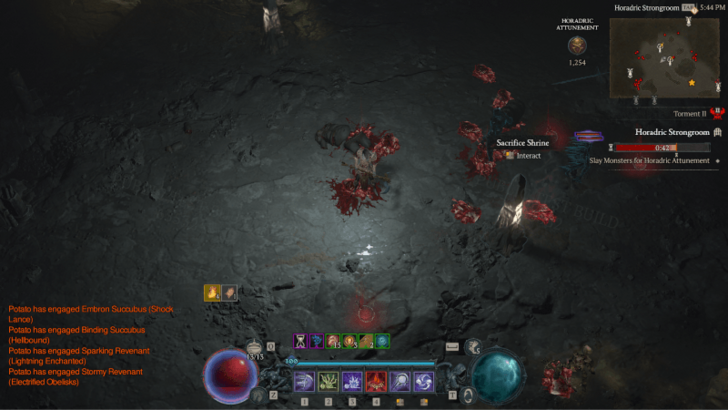
You’ll also find Sacrifice Shrines, which spawn additional enemies when activated. Note: These shrines do not grant Attunement directly but can help you spawn more enemies to farm it.
Defeat the Strongroom Boss
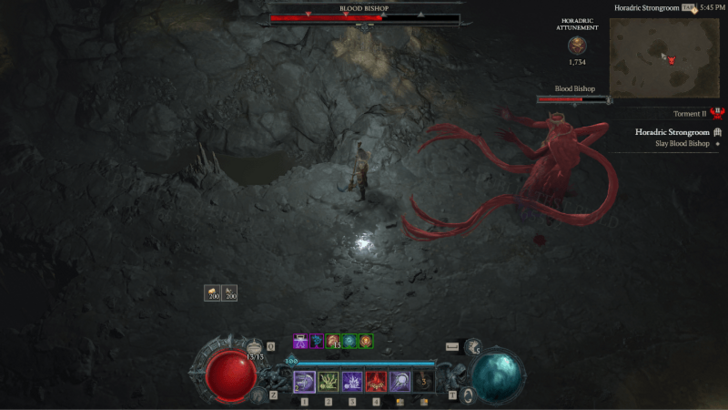
When time runs out, a Strongroom Boss will appear. Defeating this boss completes the Strongroom and spawns the Horadric Cache.
The contents of the cache are determined by the total Horadric Attunement you collected during the run with more Attunement giving more and better rewards.
Horadric Strongroom Rewards
Grand Horadric Cache Reward

Once you defeat the Strongroom mini-boss, a Grand Horadric Cache will spawn, containing various items and materials as a reward for completing the micro-dungeon.
Diablo 4 (D4) Related Guides

Game Mechanics and Activities
Upcoming Lord of Hatred Content
 Horadric Cube Horadric Cube |
 Talisman Explained Talisman Explained |
 War Plans Explained War Plans Explained |
 Echoing Hatred Guide Echoing Hatred Guide |
Recommended Activity Guides
 Mystery Chest Locations and Map Mystery Chest Locations and Map |
- |
Comment
Author

Horadric Strongrooms Guide
Please participate in our site
improvement survey
03/2026
improvement survey
03/2026
Would you assist in
improving Game8's site?
improving Game8's site?

×
We are listening to our users' valuable opinions and discussing how to act on them.
The information collected through this survey will be used for the purpose of improving our services. In addition, the information will only be disclosed a part of a statistic in a format that will not allow identification of personal information.
Begin Survey
Not Now
×
Please rate each item regarding Game8.co's Advertisements.
Amount of Ads
Very Dissatisfied
Somewhat Dissatisfied
Fine
Somewhat Satisfied
Highly Satisfied
Placement of Ads
Timing of Ad Display
Ad Loading Speed
Safeness of Ads
Content of Ads
×
Please rate each item regarding Game8.co's Quality of Articles.
Amount of information
Very Dissatisfied
Somewhat Dissatisfied
Fine
Somewhat Satisfied
Highly Satisfied
Frequency of updates
Speed of new information
Accuracy of articles
Understandibility of articles
Readability of sentences
×
Please rate each item regarding Game8.co's Usability of the Site.
Ease of finding information
Very Dissatisfied
Somewhat Dissatisfied
Fine
Somewhat Satisfied
Highly Satisfied
Loading Speed
Use of Color
Font Size
Visibility of Images
Easy to Understand Layout
×
Please rate each item regarding Game8.co's Message Boards, Comments.
Ease of Writing
Very Dissatisfied
Somewhat Dissatisfied
Fine
Somewhat Satisfied
Highly Satisfied
Readability
Ease in Finding Information
Comment Quality
Comment Quantity
Admin Response
×
Please rate each item regarding Game8.co's Site's new design.
Please rate our site's new design
Very Dissatisfied
Somewhat Dissatisfied
Fine
Somewhat Satisfied
Highly Satisfied
Do you think that the website's design change makes the site easier to use?
Has the new design made it easier for you to find information on the site?
Has the new design improved the overall visual appeal of the site?
How would you rate your overall satisfaction with the new design of the site?
×
How likely are you to recommend Game8 to someone you know?
Very Unlikely
0
1
2
3
4
5
6
7
8
9
10
Very Likely
If you have other opinions regarding potential improvement to the website, please share them with us. We would appreciate your honest opinion.
Note: This is a free response section, so you can proceed without entering anything.
Note: Please be sure not to enter any kind of personal information into your response.
Note: Please be sure not to enter any kind of personal information into your response.
×
Thank You
×
Thank you for participating in our survey! Your answers will help us to improve the quality of our website and services.
We hope you continue to make use of Game8.
We hope you continue to make use of Game8.
Close
Rankings
- We could not find the message board you were looking for.

Gaming News


![Everwind Review [Early Access] | The Shaky First Step to A Very Long Journey](https://img.game8.co/4440226/ab079b1153298a042633dd1ef51e878e.png/thumb)

![Monster Hunter Stories 3 Review [First Impressions] | Simply Rejuvenating](https://img.game8.co/4438641/2a31b7702bd70e78ec8efd24661dacda.jpeg/thumb)
Popular Games

Genshin Impact Walkthrough & Guides Wiki
Honkai: Star Rail Walkthrough & Guides Wiki
Umamusume: Pretty Derby Walkthrough & Guides Wiki
Pokemon Pokopia Walkthrough & Guides Wiki
Resident Evil Requiem (RE9) Walkthrough & Guides Wiki
Monster Hunter Wilds Walkthrough & Guides Wiki
Wuthering Waves Walkthrough & Guides Wiki
Arknights: Endfield Walkthrough & Guides Wiki
Pokemon FireRed and LeafGreen (FRLG) Walkthrough & Guides Wiki
Pokemon TCG Pocket (PTCGP) Strategies & Guides Wiki


Recommended Games
Diablo 4: Vessel of Hatred Walkthrough & Guides Wiki
Fire Emblem Heroes (FEH) Walkthrough & Guides Wiki
Yu-Gi-Oh! Master Duel Walkthrough & Guides Wiki
Super Smash Bros. Ultimate Walkthrough & Guides Wiki
Pokemon Brilliant Diamond and Shining Pearl (BDSP) Walkthrough & Guides Wiki
Elden Ring Shadow of the Erdtree Walkthrough & Guides Wiki
Monster Hunter World Walkthrough & Guides Wiki
The Legend of Zelda: Tears of the Kingdom Walkthrough & Guides Wiki
Persona 3 Reload Walkthrough & Guides Wiki
Cyberpunk 2077: Ultimate Edition Walkthrough & Guides Wiki


All rights reserved
©2022 BLIZZARD ENTERTAINMENT, INC. ALL RIGHTS RESERVED.
All trademarks referenced herein are the properties of their respective owners.
The copyrights of videos of games used in our content and other intellectual property rights belong to the provider of the game.
The contents we provide on this site were created personally by members of the Game8 editorial department.
We refuse the right to reuse or repost content taken without our permission such as data or images to other sites.