True Treasure Walkthrough and How to Unlock
▲ Get Pristine Weapons from the depths!
△ All 1000 Koroks | All 4 Great Fairies
▲ 81 Addison Signs | 147 Caves | 58 Wells
△ Tips: Farm Rupees | Starting Armor
▲ Best Weapons | Best Armor | Best Food
True Treasure is a Side Quest in The Legend of Zelda: Tears of the Kingdom (TotK) that can be found in Zora's Domain. Read on to learn how to unlock True Treasure, its location and rewards, walkthrough, as well as how to complete it.
List of Contents
How to Unlock True Treasure
Finish Sidon of the Zora and Talk to Kodah
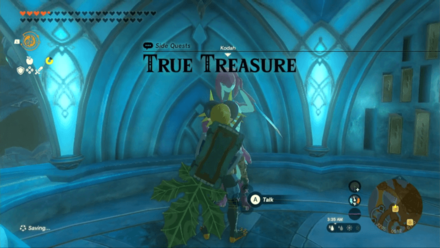
You can unlock the True Treasure Side Quest by resolving the crisis in Zora's Domain during the Sidon of the Zora Main Quest. You can start the quest by talking to Kodah inside the Inn.
True Treasure Location and Rewards
Lanayru Great Spring - Zora's Domain
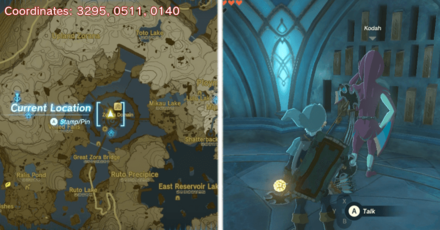
You can find and start the True Treasure Side Quest in Zora's Domain. You can get there by traveling east of Upland Zorana Skyview Tower in Lanayru Great Spring Region.
The exact coordinates for this quest on the map are 3295, 0511, 0140.
Lanayru Great Spring Region Map
Rewards
| Rewards |
|---|
|
・Opal x2
・Access to Yomizuk Shrine |
True Treasure Walkthrough Guide
| How to Complete True Treasure |
|---|
| 1.Go to Tarm Point Cave 2. Talk to Sasan 3. Put the Raft on the Water 4. Talk to Sasan and Ride the Raft 5. Get Your Rewards 6. Activate and Enter Yomizuk Shrine |
Go to Tarm Point Cave
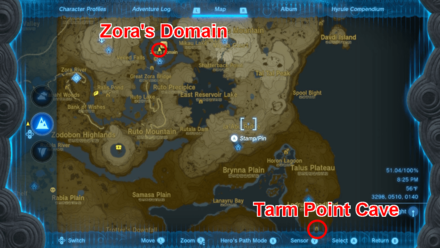
Head to Tarm Point and enter the cave. Luckily, the location of the cave is marked on the map if you track the quest from the menu.
Coordinates: 4469, -0834, 0053
Talk to Sasan
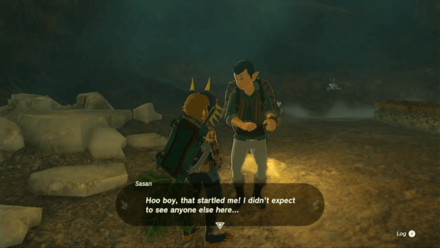
You will see a troubled Sasan inside the cave. Talk to him and help him get to Finley on the other side.
Put the Raft on the Water
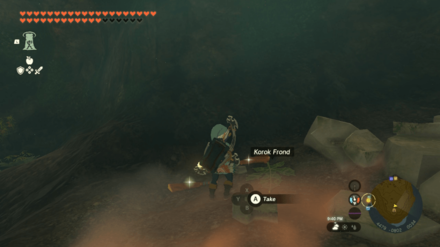
Put the raft nearby on the water. After that, infuse the Korok Frond to a weapon. You will need it to control the raft later on.
Talk to Sasan and Ride the Raft
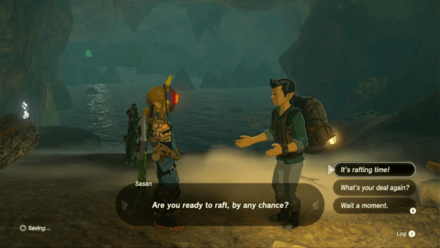
Talk to Sasan once everything is set and ask him to ride the raft. Pass through the rocks once the water is above them.
Sail patiently and try not to make any other moves, like grabbing the raft using Ultrahand, or Sasan will panic, and it will force you to restart!
Get Your Rewards
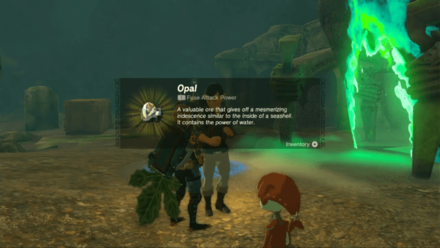
You will automatically get off the boat once you reach the other side. Finish the dialogue and get an Opal from Finley and Sasan.
Activate and Enter Yomizuk Shrine
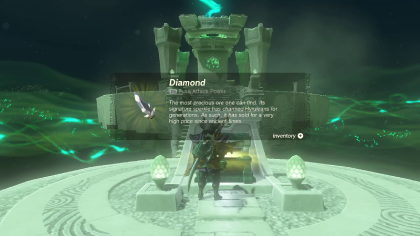
You can also enter the Yomizuk Shrine once you're done with the quest. You can get a Diamond from a treasure chest inside, and a Light of Blessing from activating the terminal at the end!
Yomizuk Shrine Puzzle Solution
The Legend of Zelda: Tears of the Kingdom Related Guides

List of All Walkthroughs
| All Quest Types | ||
|---|---|---|
 Main Quests Main Quests |
 Side Quests Side Quests |
 Side Adventures Side Adventures |
List of All Side Quests
Author
The Legend of Zelda: Tears of the Kingdom Walkthrough & Guides Wiki
True Treasure Walkthrough and How to Unlock
improvement survey
03/2026
improving Game8's site?

Your answers will help us to improve our website.
Note: Please be sure not to enter any kind of personal information into your response.

We hope you continue to make use of Game8.
Rankings
- We could not find the message board you were looking for.
Gaming News
Popular Games

Genshin Impact Walkthrough & Guides Wiki

Honkai: Star Rail Walkthrough & Guides Wiki

Umamusume: Pretty Derby Walkthrough & Guides Wiki

Pokemon Pokopia Walkthrough & Guides Wiki

Resident Evil Requiem (RE9) Walkthrough & Guides Wiki

Monster Hunter Wilds Walkthrough & Guides Wiki

Wuthering Waves Walkthrough & Guides Wiki

Arknights: Endfield Walkthrough & Guides Wiki

Pokemon FireRed and LeafGreen (FRLG) Walkthrough & Guides Wiki

Pokemon TCG Pocket (PTCGP) Strategies & Guides Wiki
Recommended Games

Diablo 4: Vessel of Hatred Walkthrough & Guides Wiki

Fire Emblem Heroes (FEH) Walkthrough & Guides Wiki

Yu-Gi-Oh! Master Duel Walkthrough & Guides Wiki

Super Smash Bros. Ultimate Walkthrough & Guides Wiki

Pokemon Brilliant Diamond and Shining Pearl (BDSP) Walkthrough & Guides Wiki

Elden Ring Shadow of the Erdtree Walkthrough & Guides Wiki

Monster Hunter World Walkthrough & Guides Wiki

The Legend of Zelda: Tears of the Kingdom Walkthrough & Guides Wiki

Persona 3 Reload Walkthrough & Guides Wiki

Cyberpunk 2077: Ultimate Edition Walkthrough & Guides Wiki
All rights reserved
© Nintendo. The Legend of Zelda and Nintendo Switch are trademarks of Nintendo.
The copyrights of videos of games used in our content and other intellectual property rights belong to the provider of the game.
The contents we provide on this site were created personally by members of the Game8 editorial department.
We refuse the right to reuse or repost content taken without our permission such as data or images to other sites.


I did this shrine before completing zora’s domain ^^,