This survey will take about 1 minute.
Your answers will help us to improve our website.
Zelda: Tears of the Kingdom (TotK)
Lanayru Great Spring Region Map: Korok Seed Locations, Shrines, and Quests
▲ Get Pristine Weapons from the depths!
△ All 1000 Koroks | All 4 Great Fairies
▲ 81 Addison Signs | 147 Caves | 58 Wells
△ Tips: Farm Rupees | Starting Armor
▲ Best Weapons | Best Armor | Best Food
Lanayru Great Spring is a region found in the Surface of Hyrule in The Legend of Zelda: Tears of the Kingdom (TotK). Read on to see the full Lanayru Great Spring region map, as well as locations for Korok Seeds, Shrines, Quests, and other points of interest found within the Lanayru Great Spring!
List of Contents
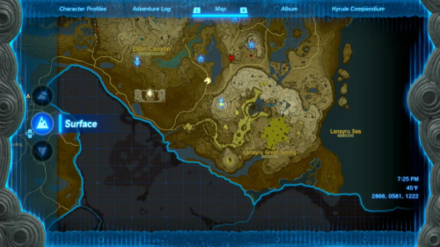
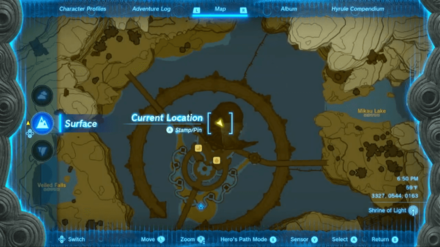
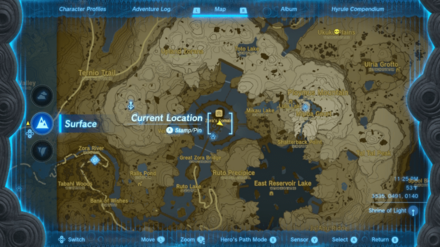
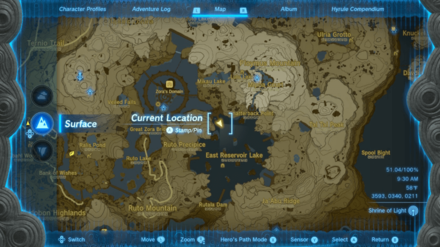
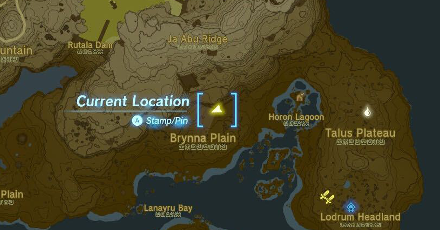
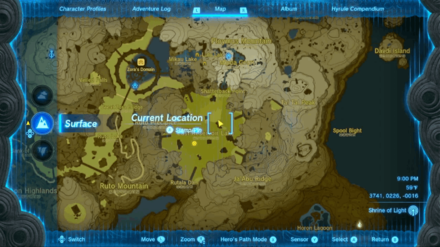
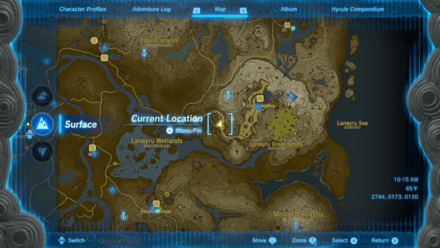
Lanayru Great Spring Region Map
Lanayru Great Spring Full Map
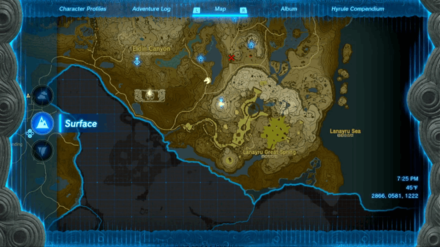 Enlarge EnlargeView Full Image |
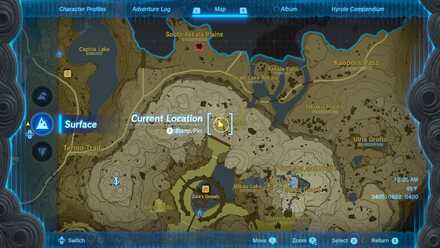
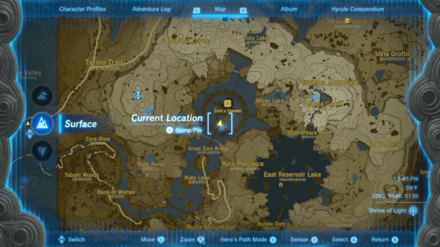
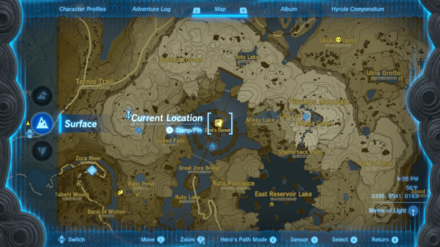
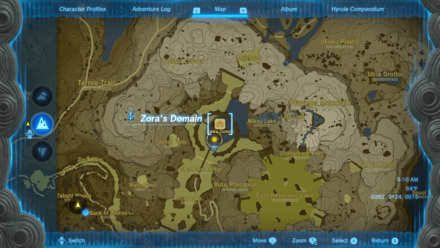
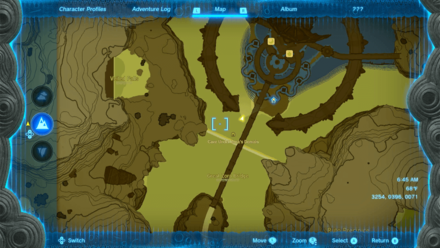
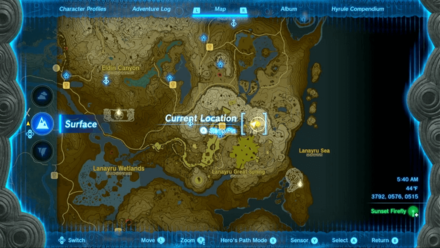
Lanayru Great Spring Tower Map Location
Map and Coordinates
| Overworld Location | Coordinates |
|---|---|
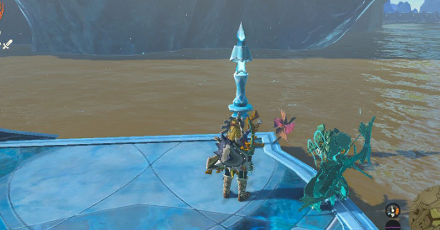
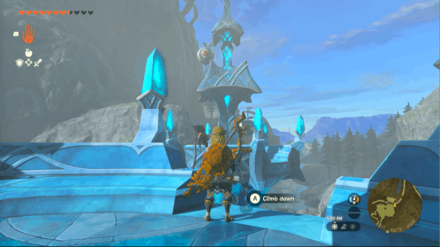
 Enlarge EnlargeUpland Zorana Skyview Tower |
2865, 0580, 0379 |
Skyview Tower Guide: All Tower Locations
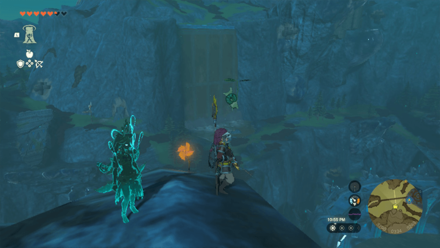
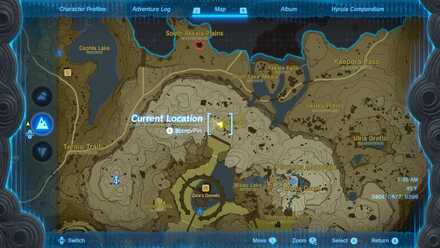
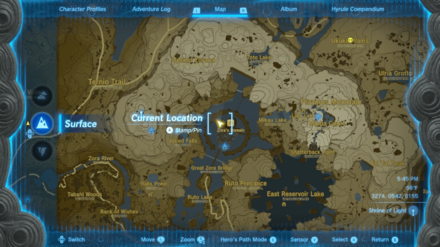
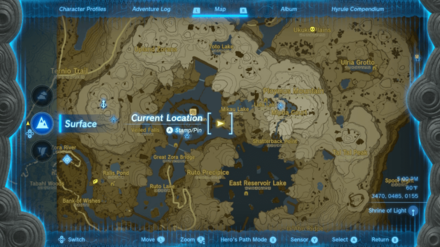
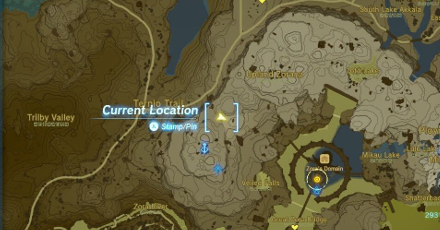
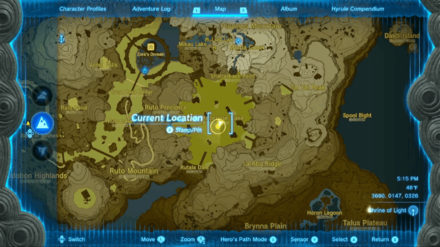
Lanayru Great Spring Shrine Locations
Shrine Map Locations and Coordinates
| Location | Coordinates |
|---|---|
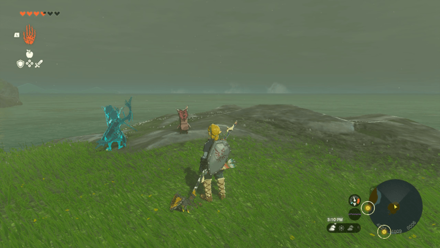
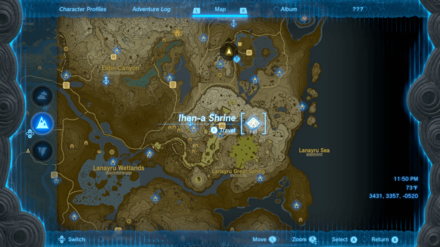 Enlarge EnlargeIhen-a Shrine (Midair Perch) |
3787, 0577, 0486 |
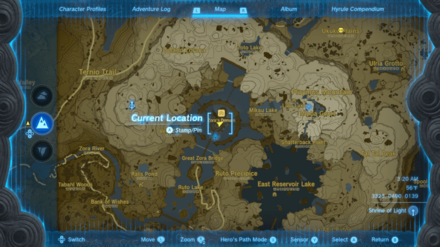
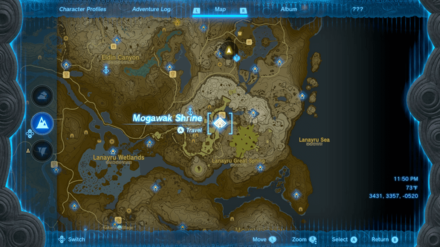 Enlarge EnlargeMogawak Shrine (The Power of Water) |
Video Guide 3298, 0424, 0112 |
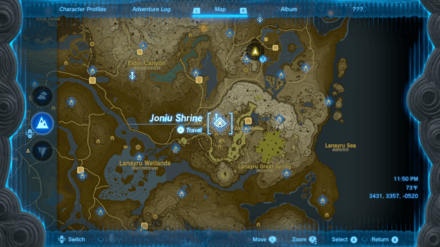 Enlarge EnlargeJoniu Shrine (Rauru's Blessing) |
2918, 0509, 0155 |
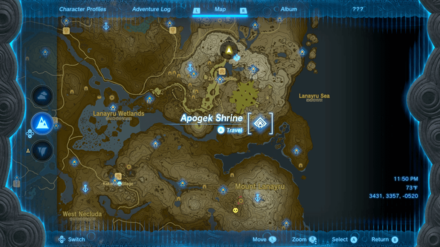 Enlarge EnlargeApogek Shrine (Wings on the Wind) |
Video Guide 3887, -0217, 0164 |
 Enlarge EnlargeYomizuk Shrine (Rauru's Blessing) |
Video Guide 4413, -0614, 0034 |
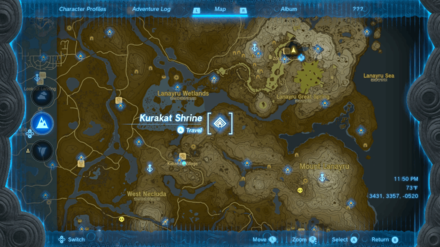 Enlarge EnlargeKurakat Shrine (Rauru's Blessing) |
2362, -0511, 0156 |
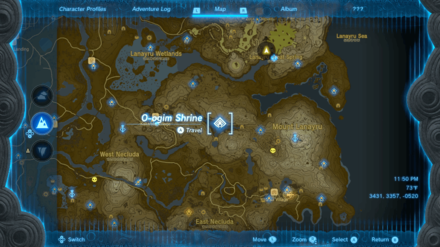 Enlarge EnlargeO-ogim Shrine (Rauru's Blessing) |
2755, -1090, 0100 |
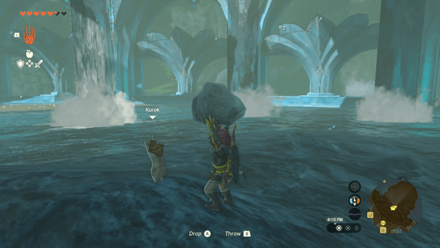
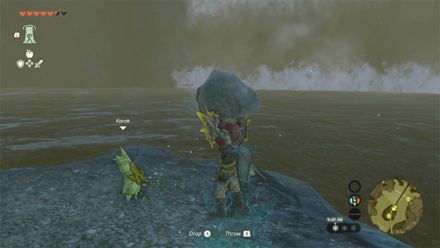
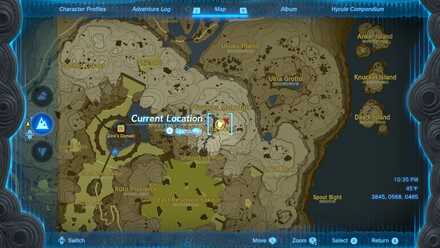
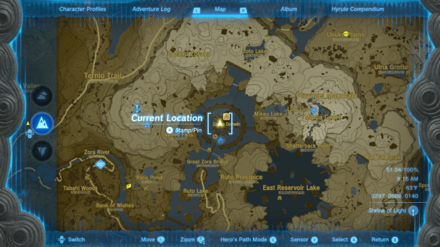
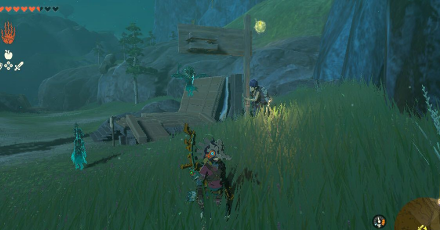
Lanayru Great Spring Korok Seed Locations
Korok Seed Locations and Coordinates
| Overworld | Location Details |
|---|---|
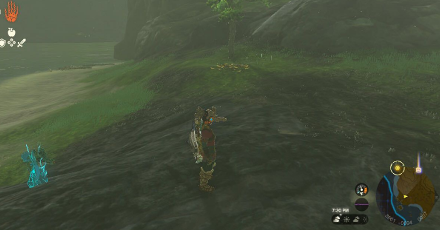
 Enlarge EnlargeKorok Seed |
Start Coordinates 3322, 0515, 0305 Find at the very top of the tower in Zora's Domain |
 Enlarge EnlargeKorok Seed x2 |
Start Coordinates 3788, 0446, 0528 End Coordinates 3919, 0543, 0485 Use a rocket to launch the Korok from one end to the other. |
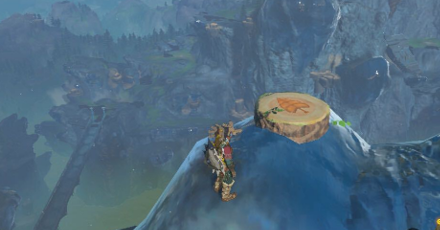
 Enlarge EnlargeKorok Seed |
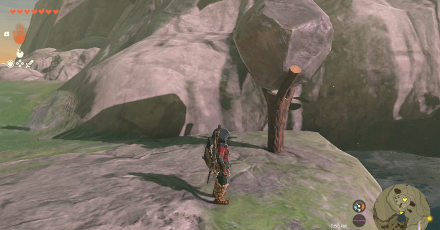
Start Coordinates 4112, 0475, 0374 Use Ultrahand to pick up the rock and put it one the tree. |
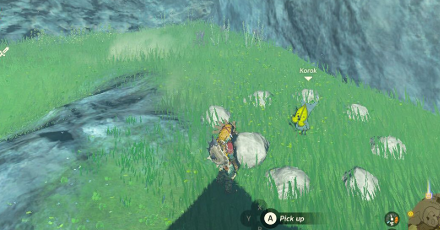
 Enlarge EnlargeKorok Seed |
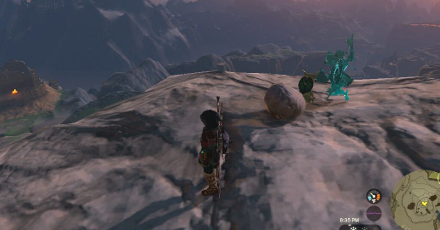
Start Coordinates 4136, 0407, 0416 Pick up the rock on top Tal Tal Peak. |
 Enlarge EnlargeKorok Seed |
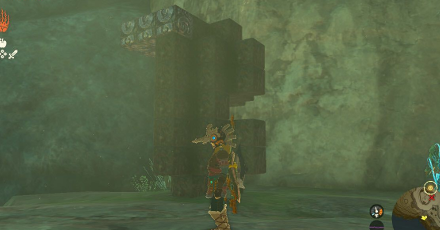
Start Coordinates 4164, 0059, 0348 Pick up the rock at the top of the monster hideout. |
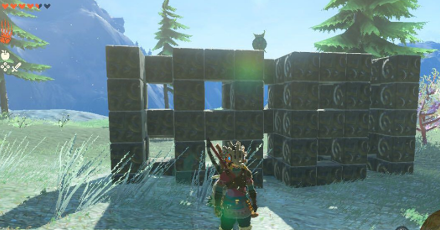
 Enlarge EnlargeKorok Seed |
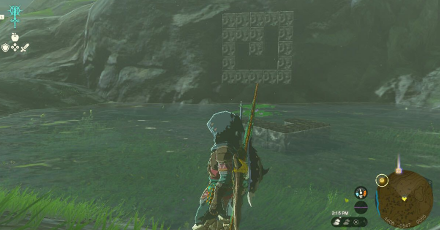
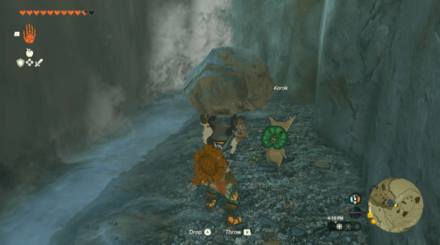
Start Coordinates 4408, -0547, 0055 Complete the metal block set to reveal the Korok. Fit the block in the right position. |
 Enlarge EnlargeKorok Seed |
Start Coordinates 4460, -0762, 0059 Follow the yellow disappearing flowers until you reach the white flower. |
 Enlarge EnlargeKorok Seed |
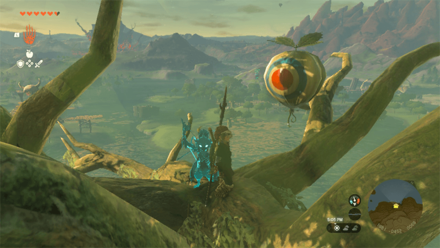
Start Coordinates 3821, 0076, 0211 Shoot the floating balloons near the cliff with an arrow. |
 Enlarge EnlargeKorok Seed |
Start Coordinates 4221, 0167, 0275 Fit in the metal block using Ultrahand. |
 Enlarge EnlargeKorok Seed |
Start Coordinates 4273, 0141, 0100 Fit in the metal block using Ultrahand. |
 Enlarge EnlargeKorok Seed |
Start Coordinates 4323, -0143, 0047 Hit the dandelion at the top of the cliff then quickly catch it before it falls to the ground. |
 Enlarge EnlargeKorok Seed |
Start Coordinates 4184, -0445, 0024 End Coordinates 4232, -0310, 0002 Step on the tree stump and race to the circle. Use the wind draft to propel Link forward. |
 Enlarge EnlargeKorok Seed |
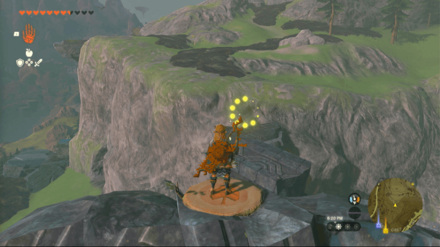
Start Coordinates 4143, -0558, 0004 Interact with the Floating Sparkles to get the Korok Seed. |
 Enlarge EnlargeKorok Seed |
Start Coordinates 4459, -0358, 0056 Pick up the lone rock from the eye of the painting. |
 Enlarge EnlargeKorok Seed |
Start Coordinates 4441, -0482, 0104 Ascend through the tree stump to get the Korok Seed. |
 Enlarge EnlargeKorok Seed |
Start Coordinates 3942, -0414, 0038 Complete the circle by using Ultrahand to pick up the rocks. |
 Enlarge EnlargeKorok Seed |
Start Coordinates 3711, -0621, 0001 End Coordinates 3712, -0623, 0003 Follow the flowers around the small rock island to get the Korok Seed. |
 Enlarge EnlargeKorok Seed x2 |
Start Coordinates 3655, -0605, 0003 End Coordinates 3303, -0774, 0010 Make a boat to cross the river while the Korok is on board. |
 Enlarge EnlargeKorok Seed |
Start Coordinates 3322, -0475, 0021 Climb the tree and pick up the rock on top to get the Korok Seed. |
 Enlarge EnlargeKorok Seed |
Start Coordinates 3529, -0361, 0146 Fill in the Metal Box to get the Korok Seed. |
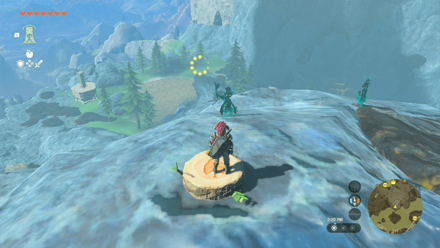
 Enlarge EnlargeKorok Seed |
Start Coordinates 3105, 0461, 0173 End Coordinates 3070, 0458, 0275 Head to the top of the waterfall before the ring expires to get the Korok Seed. |
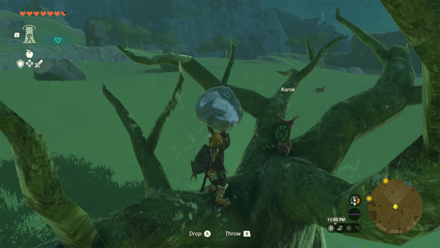
 Enlarge EnlargeKorok Seed |
Start Coordinates 2940, 0209, 0205 Hit the acorn inside the log to get the Korok Seed. |
 Enlarge EnlargeKorok Seed |
Start Coordinates 2951, -0079, 0314 Use a bow to hit the floating balloons.. |
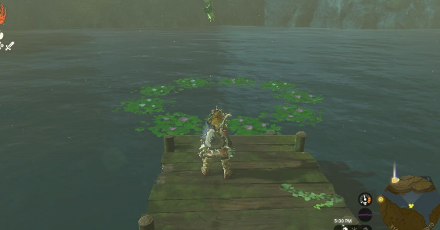 Enlarge EnlargeKorok Seed |
Start Coordinates 3124, -0444, 0010 Dive in the middle of the lilypad ring to get the Korok Seed. |
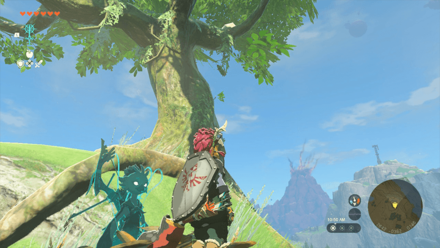
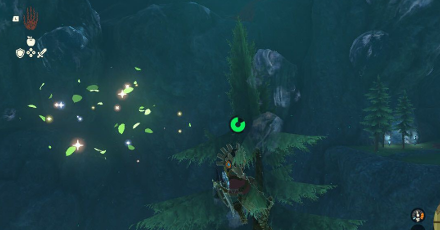 Enlarge EnlargeKorok Seed |
Start Coordinates 3191, 0224, 0150 Climb the tree and examine the floating sparkles to get the Korok Seed. |
 Enlarge EnlargeKorok Seed |
Start Coordinates 3293, -0011, 0293 End Coordinates 3275, -0012, 0276 Get to the ring before the time expires to get the Korok Seed. |
 Enlarge EnlargeKorok Seed |
Start Coordinates 3168, 0582, 0115 Take the rock from the shore and complete the circle to get the Korok Seed. |
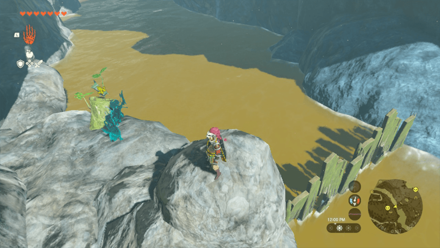
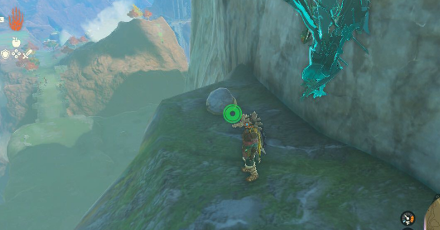 Enlarge EnlargeKorok Seed |
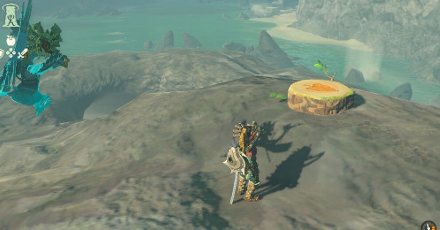
Start Coordinates 3012, 0931, 0379 Lift the lone rock near the edge of the cliff to get the Korok Seed. |
 Enlarge EnlargeKorok Seed |
Start Coordinates 3547, 0963, 0394 Take the rock from the cliff and bring it down to the incomplete circle to get the Korok Seed. |
 Enlarge EnlargeKorok Seed |
Start Coordinates 3905, 0800, 0380 Fill in the puzzle using Ultrahand to get the Korok Seed. |
 Enlarge EnlargeKorok Seed x2 |
Start Coordinates 1875, -0806, 0239 End Coordinates 2175, -0567, 0211 Take the Korok to its friend located on top of a hill at Quatta's Shelf. |
 Enlarge EnlargeKorok Seed |
Start Coordinates 4528, -1007, 0007 Chase the sparkles circling around Wintre Island. |
 Enlarge EnlargeKorok Seed |
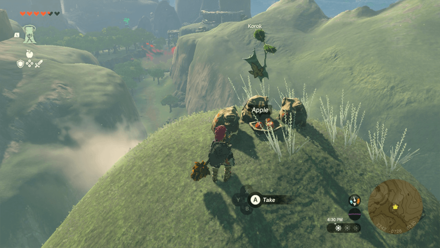
Start Coordinates 2241, -0726, 0231 Place three apples on the empty bowl in front of the prayer statues. |
 Enlarge EnlargeKorok Seed |
Start Coordinates 2496, -0892, 0196 Place the nearby boulder on top of the wooden pedestal to reveal the Korok. |
 Enlarge EnlargeKorok Seed |
Start Coordinates 3010, -0785, 0145 Pick up the nearby rock and place it in the gap of the rock formation. |
 Enlarge EnlargeKorok Seed |
Start Coordinates 2637, -0366, 0151 Shoot the acorn hanging on the tree branch to reveal the Korok. |
 Enlarge EnlargeKorok Seed |
Start Coordinates 3204, -0660, 0000 Gather Porgy from Lanayru Bay. Drop it near the lit campfire to roast it. Use Ultrahand after it becomes Roasted Porgy and place it on the bowl in front of the statue. |
 Enlarge EnlargeKorok Seed |
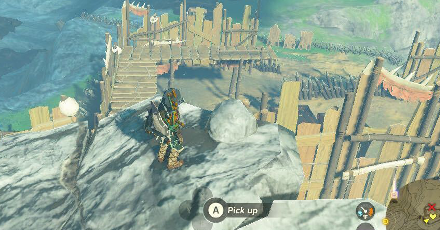
Start Coordinates 2834, -1119, 0102 Pick up the lone rock below the stairs. |
 Enlarge EnlargeKorok Seed |
Start Coordinates 2767, -1217, 0166 End Coordinates 2705, -1164, 0098 Follow the disappearing yellow flowers until you reach the white flower at the fountain. |
 Enlarge EnlargeKorok Seed |
Start Coordinates 2542, -1078, 0113 Shoot the acorn hanging on the tree branch. |
 Enlarge EnlargeKorok Seed |
Start Coordinates 1980, -0451, 0068 Shoot the floating balloon on top of the tree with an arrow. |
 Enlarge EnlargeKorok Seed |
Start Coordinates 4099, 0474, 0263 Pick up the rock at the base of and behind the waterfall coming from Tal Tal Peak. |
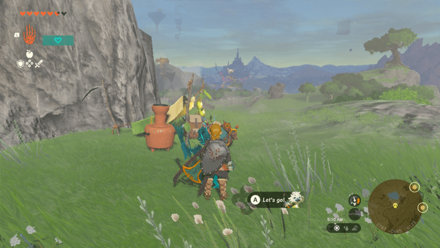
 Enlarge EnlargeKorok Seed x2 |
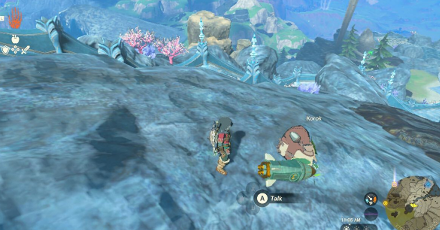
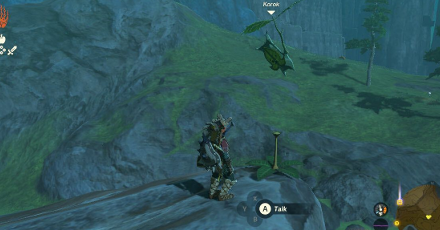
Start Coordinates 2544, 0638, 0128 End Coordinates 2642, 0634, 0177 Reunite the Korok by the road to its friend. |
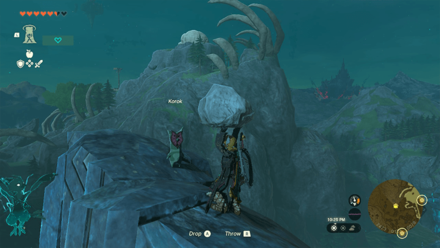
 Enlarge EnlargeKorok Seed |
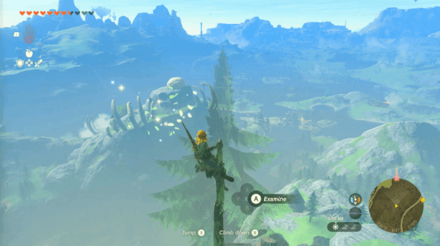
Start Coordinates 2425, 0412, 0195 Climb the lone pine tree and examine the sparkles at the top of the tree. |
 Enlarge EnlargeKorok Seed |
Start Coordinates 2565, 0467, 0184 End Coordinates 2579, 0488, 0180 Step on the stump on top of some broken ruins north of Zora River and get to the ring before time runs out. |
 Enlarge EnlargeKorok Seed |
Start Coordinates 2337, 0273, 0026 Stand by the pinwheel on top of the Zora pillar and shoot the three balloons that appear. |
 Enlarge EnlargeKorok Seed |
Start Coordinates 2545, -0584, 0119 Pick up the lone rock on top of the tree. |
 Enlarge EnlargeKorok Seed x2 |
Start Coordinates 2690, -0544, 0111 End Coordinates 2759, -0582, 0133 Reunite the Korok to its friend located on top of a ridge in Lanayru Heights. |
 Enlarge EnlargeKorok Seed |
Start Coordinates 2460, -0040, 0079 Pick up the nearby rock and place it in the gap to the complete the rock circle pattern. |
 Enlarge EnlargeKorok Seed |
Start Coordinates 2470, 0149, 0079 Climb up the highest point of the stone structure and lift the lone rock sitting atop of it. |
 Enlarge EnlargeKorok Seed |
Start Coordinates 3330, 0531, 0112 Pick up the lone rock at the bottom of Zora Domain. |
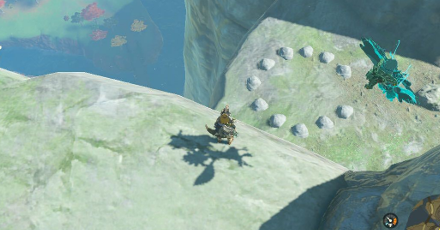
 Enlarge EnlargeKorok Seed |
Start Coordinates 3286, 0335, 0248 Stand by the pinwheel at the edge of the cliff and shoot the five floating balloons nearby. |
 Enlarge EnlargeKorok Seed |
Start Coordinates 3220, 0281, 0078 Pick up the lone rock under the Great Zora Bridge. |
 Enlarge EnlargeKorok Seed |
Start Coordinates 3386, 0744, 0175 Dive into the middle of the ring of water lilies by the waterfall. |
 Enlarge EnlargeKorok Seed x2 |
Start Coordinates 3526, -0062, 0211 End Coordinates 3879, 0265, 0211 Build a boat using the materials nearby and sail across the lake until you reach the Korok's friend on the other side. |
 Enlarge EnlargeKorok Seed |
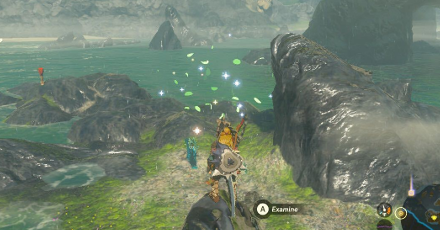
Start Coordinates 2961, -0053, 0142 Examine the fairy lights on top of a rock near the red arrow sign and a small pond. |
 Enlarge EnlargeKorok Seed |
Start Coordinates 2851, -0027, 0080 Pick up the lone rock on a small island near Oren Bridge. |
 Enlarge EnlargeKorok Seed |
Start Coordinates 2674, -0013, 0123 Chop down a tree and use its trunk to float on the water. Use ascend on the korok target hanging on the ceiling of the small cavern. |
 Enlarge EnlargeKorok Seed |
Start Coordinates 2751, 0251, 0110 End Coordinates 2745, 0201, 0137 Follow the yellow flowers starting from the rock arch down the hill until you reach the white flower near the cliff. |
 Enlarge EnlargeKorok Seed |
Start Coordinates 2782, 0196, 0079 Using Ultrahand, plunge the cork deep into the water and then let go to pull the other cork out. |
 Enlarge EnlargeKorok Seed |
Start Coordinates 3069, 0177, 0262 End Coordinates 2954, 0256, 0220 Step on the tree stump and race towards the ring down the hill before time runs out. |
 Enlarge EnlargeKorok Seed x2 |
Start Coordinates 2809, 0184, 0145 End Coordinates 2619, 0056, 0119 Attach the fan to the wing and use it to glide towards the other side of the mountain. |
 Enlarge EnlargeKorok Seed |
Start Coordinates 3589, 0415, 0210 Shoot the balloon floating under the staircase. |
 Enlarge EnlargeKorok Seed |
Start Coordinates 3664, 0450, 0246 End Coordinates 3679, 0450, 0257 Follow the disappearing yellow flowers until you reach the white flower underneath the rock formation. |
|
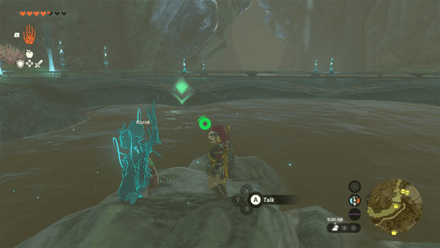
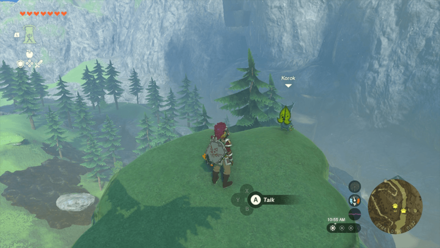
Enlarge Korok Seed |
Start Coordinates 2942, -0346, 0180 End Coordinates 3010, -0371, 0193 Follow the disappearing yellow flowers until you reach the white flower on the other side of the cliff. |
 Enlarge EnlargeKorok Seed x2 |
Start Coordinates 3998, -0187, 0176 End Coordinates 4499, -0648, 0075 Attach the nearby fan to the wing and use it to glide towards Lodrum Headland. |
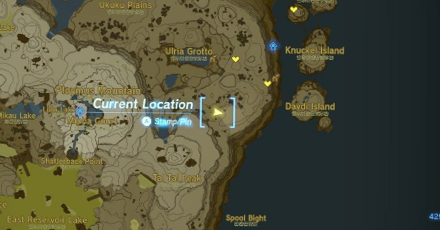
Korok Seed Map: All Korok Seed Locations
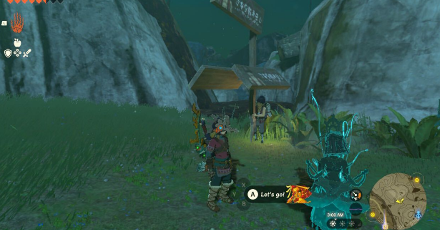
Lanayru Great Spring Quests
Main Quests
| Quest | Coordinates |
|---|---|
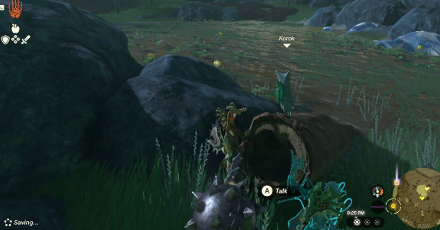
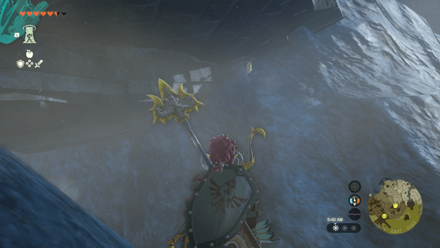
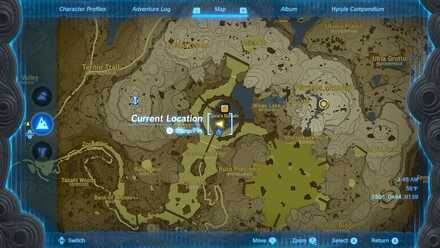
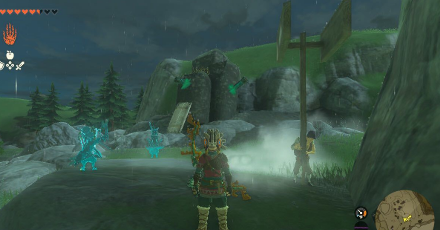
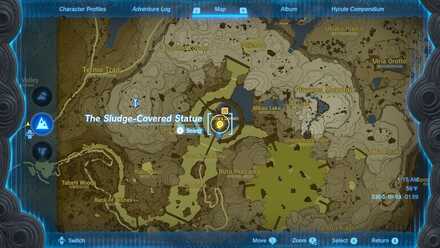 Enlarge EnlargeThe Sludge-Covered Statue |
3302, 0463, 0139 |
 Enlarge EnlargeSidon of the Zora |
3306, 0464, 0139 |
 Enlarge EnlargeThe Broken Slate |
3405, 0884, 0400 |
 Enlarge EnlargeClues to the Sky |
3404, 0877, 0399 |
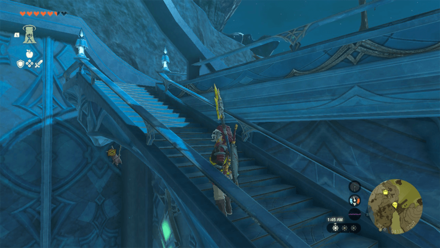
 Enlarge EnlargeRestoring the Zora Armor |
3845, 0568, 0485 |
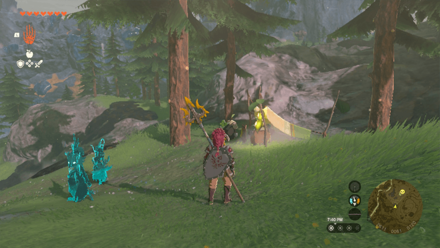
Side Quests
| Quest | Coordinates |
|---|---|
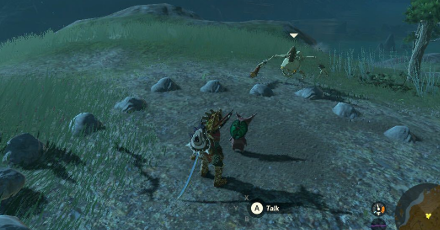
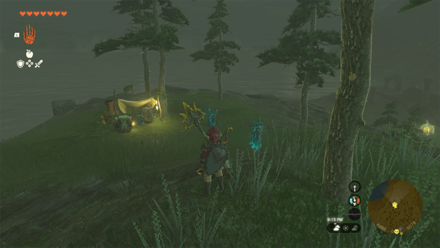
 Enlarge EnlargeMired in Muck |
2846, 0585, 0375 |
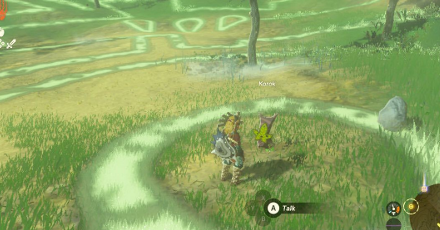
 Enlarge EnlargeA Token of Friendship |
3307, 0488, 0150 |
 Enlarge EnlargeThe Never-Ending Lecture |
3322, 0548, 0163 |
 Enlarge EnlargeA Wife Wafted Away |
3290, 0440, 0139 |
 Enlarge EnlargeThe Moonlit Princess |
3273, 0542, 0155 |
 Enlarge EnlargeA Crabulous Deal |
3323, 0490, 0139 |
 Enlarge EnlargeGlory of the Zora |
3335, 0491, 0140 |
 Enlarge EnlargeSecret Treasure under the Great Fish |
3340, 0542, 0163 |
 Enlarge EnlargeThe Fort at Ja'Abu Ridge |
3470, 0485, 0155 |
 Enlarge EnlargeTrue Treasure |
3295, 0511, 0140 |
 Enlarge EnlargeThe Blue Stone |
3596, 0338, 0211 |
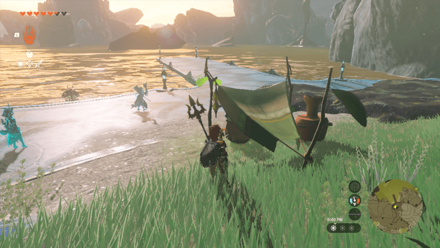
Lanayru Great Spring Settlements
All Towns and Settlement Locations
| Overworld Location | Coordinates |
|---|---|
 Enlarge EnlargeZora's Domain |
3297, 0461, 0139 |
Lanayru Great Spring Hudson Signs
Addison Sign Locations
| Location | Solution |
|---|---|
 Enlarge Enlarge |
 Enlarge Enlarge |
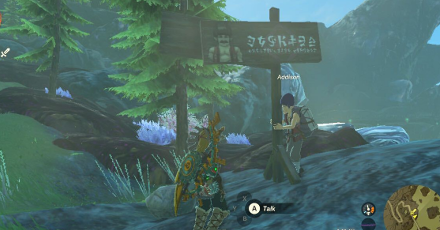
| Coordinates: 2930, 0706, 0353 Solution: Put a board in the middle of the two signs. Consider putting legs on a horizontal position to act as a stopper. |
|
 Enlarge Enlarge |
 Enlarge Enlarge |
| Coordinates: 3208, 0129, 0136 Solution: Use one of the logs as a stopper for the sign. Attach a plank to the back of your pedestal to push against the weight of the sign. |
|
 Enlarge Enlarge |
 Enlarge Enlarge |
| Coordinates: 3973, -0295, 0031 Solution: Use the hole on the side of the sign as way to attach a stand on both the front and back. Make sure both the front and back side of the sign has a stopper. |
|
 Enlarge Enlarge |
 Enlarge Enlarge |
| Coordinates: 4294, 0578, 0275 Solution: Use the two Zonai Stakes to make the sign stand. Attach one end of the stake to the Mountain and make a stopper. |
|
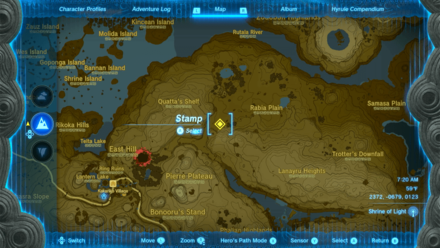 Enlarge Enlarge |
 Enlarge Enlarge |
| Coordinates: 2372, -0679, 0123 Solution: Build a makeshift crane to hold the Hudson sign upright. Attach the hook behind the sign to keep the post standing once Addison lets it go. |
|
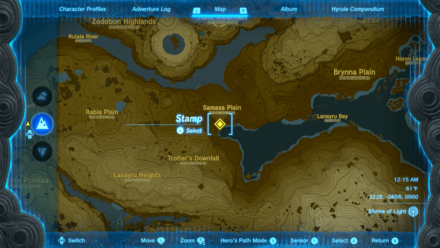 Enlarge Enlarge |
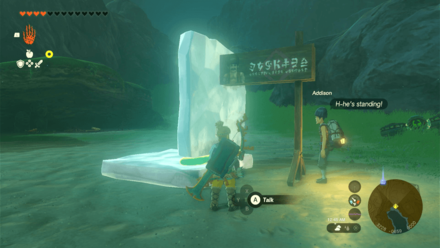 Enlarge Enlarge |
| Coordinates: 3228, -0656, 0000 Solution: Use the Zonai Frost Emitter to make ice plates from the water. Use the ice to create a stand for the Hudson board to lean on. |
|
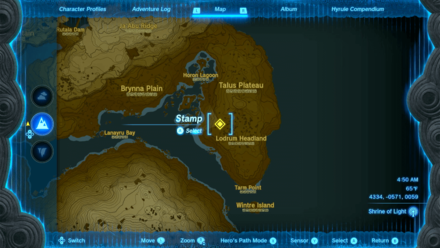 Enlarge Enlarge |
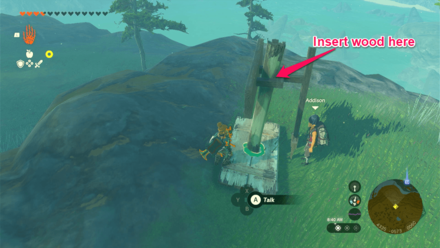 Enlarge Enlarge |
| Coordinates: 4334, -0571, 0059 Solution: Use the wooden board and pole nearby and make a pedestal. Insert the pole at the hole behind the Hudson sign to keep it upright. |
|
All Hudson Sign Locations: How to Help Addison's Signs Stand
Lanayru Great Spring Points of Interest
Cave Locations and Coordinates
| Overworld Location | Coordinates |
|---|---|
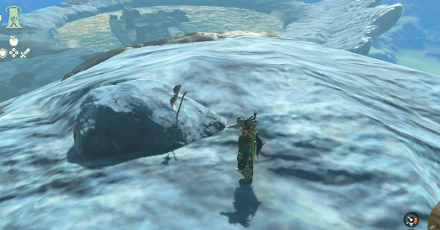
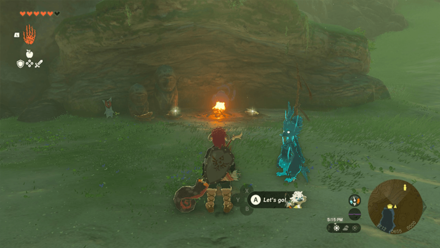
 Enlarge EnlargePloymus Mountain Cave |
3661, 0539, 0272 |
 Enlarge EnlargePristine Sanctum |
3628, 0587, 0172 |
 Enlarge EnlargeAncient Zora Waterworks |
3741, 0226, -0016 |
 Enlarge EnlargeCave Under Zora's Domain |
3254, 0396, 0071 |
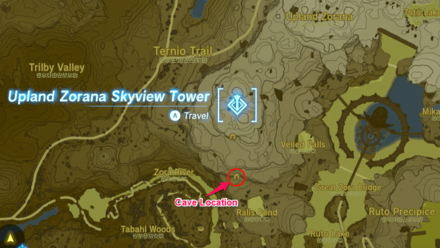 Enlarge EnlargeUpland Zorana Byroad |
2859, 0357, 0226 |
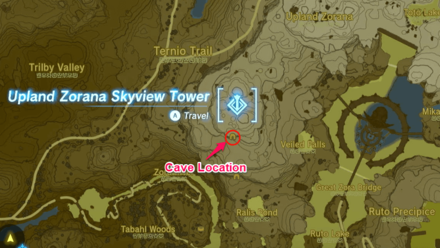 Enlarge EnlargeUpland Zorana Summit Cave |
2851, 0477, 0329 |
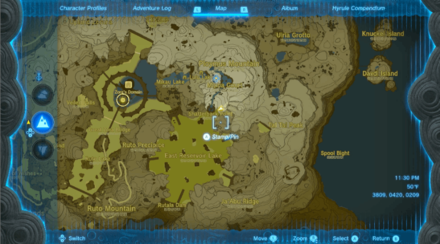 Enlarge EnlargeReservoir Lakefront Cavern |
3809, 0420, 0209 |
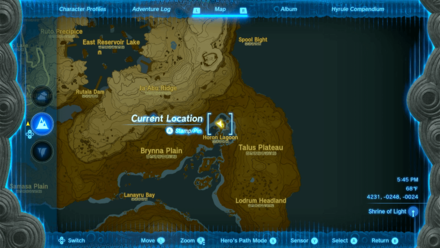 Enlarge EnlargeHoron Lagoon Cave |
4231, -0248, -0024 |
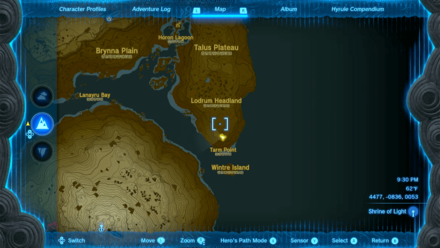 Enlarge EnlargeTarm Point Cave |
4473, -0832, 0049 |
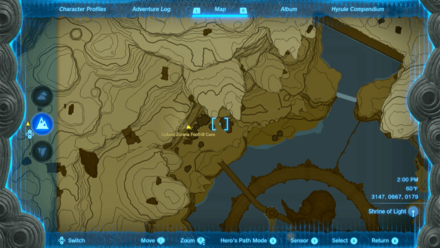 Enlarge EnlargeUpland Zorana Foothill Cave |
3147, 0667, 0179 |
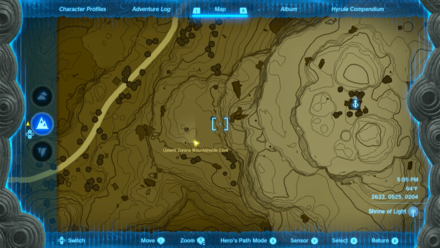 Enlarge EnlargeUpland Zorana Mountainside Cave |
2633, 0525, 0204 |
 Enlarge EnlargeTabahl Woods Cave |
2690, 0213, 0104 |
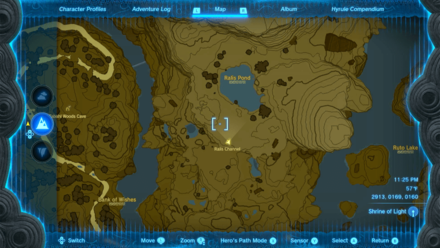 Enlarge EnlargeRalis Channel |
2913, 0169, 0160 |
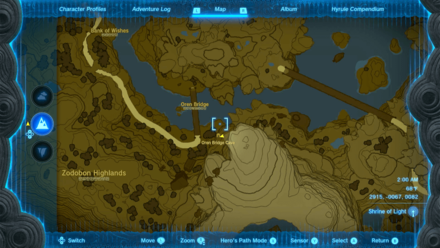 Enlarge EnlargeOren Bridge Cave |
2915, -0067, 0082 |
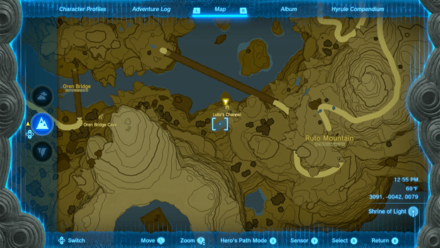 Enlarge EnlargeLuto's Channel |
3091, -0042, 0079 |
Well Locations and Coordinates
| Overworld Location | Coordinates |
|---|---|
 Enlarge EnlargeTabahl Woods Well |
2744, 0173, 0130 |
Notable Map Locations
| Overworld Location | Coordinates |
|---|---|
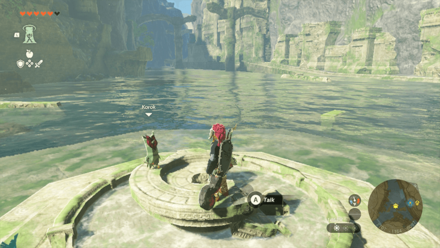
 Enlarge EnlargeMipha Court |
3796, 0576, 0486 |
 Enlarge EnlargeEast Reservoir Lake |
3680, 0132, 0236 |
The Legend of Zelda: Tears of the Kingdom Related Guides

Interactive Map of Hyrule:
All Locations and Map Icons
All Area Maps and Locations
| Hyrule Map Locations | |||||
|---|---|---|---|---|---|
Other Maps
List of Surface Regions
Comment
Author

The Legend of Zelda: Tears of the Kingdom Walkthrough & Guides Wiki
Lanayru Great Spring Region Map: Korok Seed Locations, Shrines, and Quests
Please participate in our site
improvement survey
03/2026
improvement survey
03/2026
Would you assist in
improving Game8's site?
improving Game8's site?

×
We are listening to our users' valuable opinions and discussing how to act on them.
The information collected through this survey will be used for the purpose of improving our services. In addition, the information will only be disclosed a part of a statistic in a format that will not allow identification of personal information.
Begin Survey
Not Now
×
Please rate each item regarding Game8.co's Advertisements.
Amount of Ads
Very Dissatisfied
Somewhat Dissatisfied
Fine
Somewhat Satisfied
Highly Satisfied
Placement of Ads
Timing of Ad Display
Ad Loading Speed
Safeness of Ads
Content of Ads
×
Please rate each item regarding Game8.co's Quality of Articles.
Amount of information
Very Dissatisfied
Somewhat Dissatisfied
Fine
Somewhat Satisfied
Highly Satisfied
Frequency of updates
Speed of new information
Accuracy of articles
Understandibility of articles
Readability of sentences
×
Please rate each item regarding Game8.co's Usability of the Site.
Ease of finding information
Very Dissatisfied
Somewhat Dissatisfied
Fine
Somewhat Satisfied
Highly Satisfied
Loading Speed
Use of Color
Font Size
Visibility of Images
Easy to Understand Layout
×
Please rate each item regarding Game8.co's Message Boards, Comments.
Ease of Writing
Very Dissatisfied
Somewhat Dissatisfied
Fine
Somewhat Satisfied
Highly Satisfied
Readability
Ease in Finding Information
Comment Quality
Comment Quantity
Admin Response
×
Please rate each item regarding Game8.co's Site's new design.
Please rate our site's new design
Very Dissatisfied
Somewhat Dissatisfied
Fine
Somewhat Satisfied
Highly Satisfied
Do you think that the website's design change makes the site easier to use?
Has the new design made it easier for you to find information on the site?
Has the new design improved the overall visual appeal of the site?
How would you rate your overall satisfaction with the new design of the site?
×
How likely are you to recommend Game8 to someone you know?
Very Unlikely
0
1
2
3
4
5
6
7
8
9
10
Very Likely
If you have other opinions regarding potential improvement to the website, please share them with us. We would appreciate your honest opinion.
Note: This is a free response section, so you can proceed without entering anything.
Note: Please be sure not to enter any kind of personal information into your response.
Note: Please be sure not to enter any kind of personal information into your response.
×
Thank You
×
Thank you for participating in our survey! Your answers will help us to improve the quality of our website and services.
We hope you continue to make use of Game8.
We hope you continue to make use of Game8.
Close
Rankings
- We could not find the message board you were looking for.
Gaming News


![Everwind Review [Early Access] | The Shaky First Step to A Very Long Journey](https://img.game8.co/4440226/ab079b1153298a042633dd1ef51e878e.png/thumb)

![Monster Hunter Stories 3 Review [First Impressions] | Simply Rejuvenating](https://img.game8.co/4438641/2a31b7702bd70e78ec8efd24661dacda.jpeg/thumb)
Popular Games

Genshin Impact Walkthrough & Guides Wiki
Honkai: Star Rail Walkthrough & Guides Wiki
Umamusume: Pretty Derby Walkthrough & Guides Wiki
Pokemon Pokopia Walkthrough & Guides Wiki
Resident Evil Requiem (RE9) Walkthrough & Guides Wiki
Monster Hunter Wilds Walkthrough & Guides Wiki
Wuthering Waves Walkthrough & Guides Wiki
Arknights: Endfield Walkthrough & Guides Wiki
Pokemon FireRed and LeafGreen (FRLG) Walkthrough & Guides Wiki
Pokemon TCG Pocket (PTCGP) Strategies & Guides Wiki


Recommended Games
Diablo 4: Vessel of Hatred Walkthrough & Guides Wiki
Cyberpunk 2077: Ultimate Edition Walkthrough & Guides Wiki
Fire Emblem Heroes (FEH) Walkthrough & Guides Wiki
Yu-Gi-Oh! Master Duel Walkthrough & Guides Wiki
Super Smash Bros. Ultimate Walkthrough & Guides Wiki
Pokemon Brilliant Diamond and Shining Pearl (BDSP) Walkthrough & Guides Wiki
Elden Ring Shadow of the Erdtree Walkthrough & Guides Wiki
Monster Hunter World Walkthrough & Guides Wiki
The Legend of Zelda: Tears of the Kingdom Walkthrough & Guides Wiki
Persona 3 Reload Walkthrough & Guides Wiki


All rights reserved
© Nintendo. The Legend of Zelda and Nintendo Switch are trademarks of Nintendo.
The copyrights of videos of games used in our content and other intellectual property rights belong to the provider of the game.
The contents we provide on this site were created personally by members of the Game8 editorial department.
We refuse the right to reuse or repost content taken without our permission such as data or images to other sites.