The Abandoned Laborer Walkthrough and How to Unlock
▲ Get Pristine Weapons from the depths!
△ All 1000 Koroks | All 4 Great Fairies
▲ 81 Addison Signs | 147 Caves | 58 Wells
△ Tips: Farm Rupees | Starting Armor
▲ Best Weapons | Best Armor | Best Food
The Abandoned Laborer is a Side Quest in The Legend of Zelda: Tears of the Kingdom (TotK) that can be found in Death Mountain West Tunnel. Read on to learn how to unlock The Abandoned Laborer, its location and rewards, walkthrough, as well as how to complete it.
List of Contents
How to Unlock The Abandoned Laborer
Talk to Mota After Finishing Yunobo of Goron City
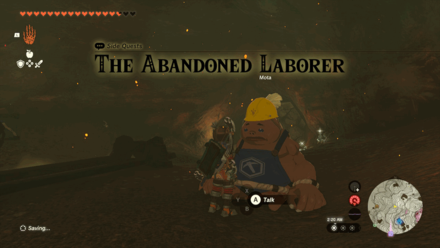
Head inside the tunnel and talk to a troubled Mota. The quest will start after talking to him.
The Abandoned Laborer Location and Rewards
Eldin Canyon - Death Mountain West Tunnel
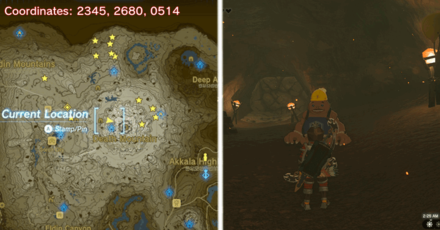
The Death Mountain West Tunnel is found at the foot west of Death Mountain. Death Mountain is to the east of Goron City.
The exact coordinates for this quest on the map are 2345, 2680, 0514.
Rewards
| Rewards |
|---|
| ・Large Zonai Charge |
The Abandoned Laborer Walkthrough Guide
Go to Death Mountain West Tunnel

The Death Mountain West Tunnel can be found at the foot west of Death Mountain at coordinates (2239, 2684, 0522). You can fast travel to the Sitsum Shrine, glide down from there.
Make Yourself Fireproof
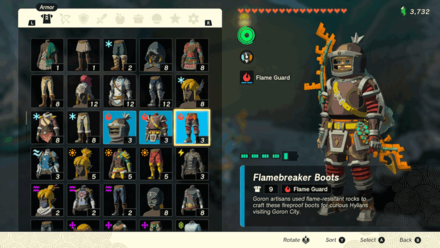
Before heading inside the cave, make yourself fireproof by creating an elixir or wearing fireproof armor.
How to Get the Flamebreaker Set
Talk to Moka
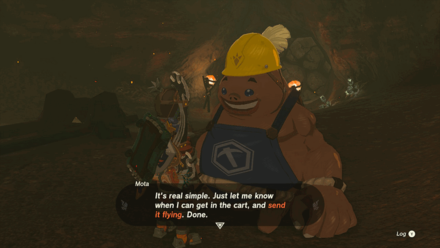
Upon entering the tunnel, you'll notice that the railing is broken. You can see Moka on the other side. Simply glide down to reach and talk to him.
You need to free him, helping him go outside to finish this quest.
Destroy the Stone Rubble
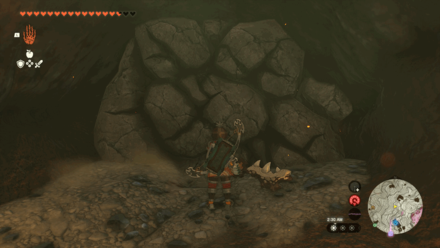
The Stone Rubble can be seen behind Moka, that blocks a path towards some Rockets you'll be needing later.
Don't use Bomb Flowers since they'll explode the moment they're exposed to the extreme heat in Eldin.
Attach Rockets to the Minecart
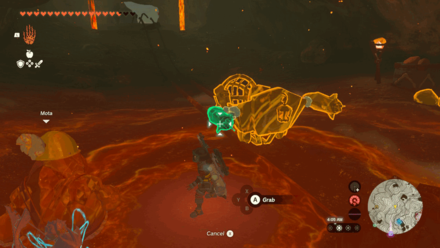
Use your Ultrahand to attach the rockets to the minecart. Attaching two rockets on each side is ideally the best approach to this.
Tell Moka to Ride the Minecart

Speak with Moka and tell him to ride the minecart. This will let him hop on the minecart you've set up.
Activate the Minecart

Once Moka hops in, hit the minecart to activate it, and you'll see Moka blast off to the other side. Follow him outside by climbing on the right side since there is a path there in which Link can pass through.
Go Outside the Cave
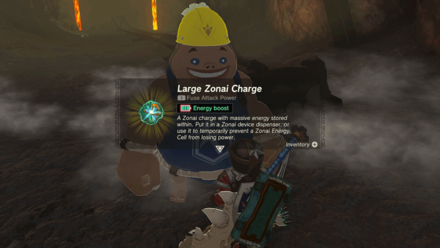
Once you head out, a cutscene will appear, and Moka will give you a Large Zonai Charge as thanks for freeing him!
The Legend of Zelda: Tears of the Kingdom Related Guides

List of All Walkthroughs
| All Quest Types | ||
|---|---|---|
 Main Quests Main Quests |
 Side Quests Side Quests |
 Side Adventures Side Adventures |
List of All Side Quests
Comment
Author
The Legend of Zelda: Tears of the Kingdom Walkthrough & Guides Wiki
The Abandoned Laborer Walkthrough and How to Unlock
improvement survey
03/2026
improving Game8's site?

Your answers will help us to improve our website.
Note: Please be sure not to enter any kind of personal information into your response.

We hope you continue to make use of Game8.
Rankings
- We could not find the message board you were looking for.
Gaming News
Popular Games

Genshin Impact Walkthrough & Guides Wiki

Honkai: Star Rail Walkthrough & Guides Wiki

Umamusume: Pretty Derby Walkthrough & Guides Wiki

Pokemon Pokopia Walkthrough & Guides Wiki

Resident Evil Requiem (RE9) Walkthrough & Guides Wiki

Monster Hunter Wilds Walkthrough & Guides Wiki

Wuthering Waves Walkthrough & Guides Wiki

Arknights: Endfield Walkthrough & Guides Wiki

Pokemon FireRed and LeafGreen (FRLG) Walkthrough & Guides Wiki

Pokemon TCG Pocket (PTCGP) Strategies & Guides Wiki
Recommended Games

Fire Emblem Heroes (FEH) Walkthrough & Guides Wiki

Diablo 4: Vessel of Hatred Walkthrough & Guides Wiki

Yu-Gi-Oh! Master Duel Walkthrough & Guides Wiki

Super Smash Bros. Ultimate Walkthrough & Guides Wiki

Pokemon Brilliant Diamond and Shining Pearl (BDSP) Walkthrough & Guides Wiki

Elden Ring Shadow of the Erdtree Walkthrough & Guides Wiki

Monster Hunter World Walkthrough & Guides Wiki

The Legend of Zelda: Tears of the Kingdom Walkthrough & Guides Wiki

Persona 3 Reload Walkthrough & Guides Wiki

Cyberpunk 2077: Ultimate Edition Walkthrough & Guides Wiki
All rights reserved
© Nintendo. The Legend of Zelda and Nintendo Switch are trademarks of Nintendo.
The copyrights of videos of games used in our content and other intellectual property rights belong to the provider of the game.
The contents we provide on this site were created personally by members of the Game8 editorial department.
We refuse the right to reuse or repost content taken without our permission such as data or images to other sites.


![Slay the Spire 2 Review [Early Access] | Still the Deckbuilder to Beat](https://img.game8.co/4433115/44e19e1fb0b4755466b9e516ec7ffb1e.png/thumb)

![Resident Evil Village Review [Switch 2] | Almost Flawless Port](https://img.game8.co/4432790/e1859f64830960ce4248d898f8cd38d9.jpeg/thumb)


