 Robbie Side Adventures
 Hateno Side Adventures
 Lurelin Side Adventures
 Lucky Clover Gazette Side Adventures
 Great Fairy Side Adventures
 Monster-Control Crew Side Adventures
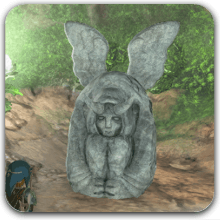 Lookout Landing Side Adventures
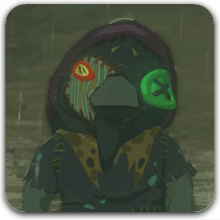 Koltin Side Adventures
 Tarrey Town Side Adventures
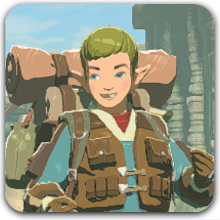 Thyphlo Ruins Side Adventures
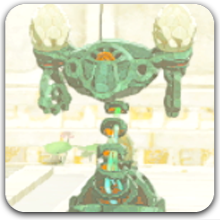 Sky and Depths Side Adventures
 Yiga Side Adventures
This survey will take about 1 minute.
Your answers will help us to improve our website.
Zelda: Tears of the Kingdom (TotK)
A Monstrous Collection Complete Walkthrough
▲ Get Pristine Weapons from the depths!
△ All 1000 Koroks | All 4 Great Fairies
▲ 81 Addison Signs | 147 Caves | 58 Wells
△ Tips: Farm Rupees | Starting Armor
▲ Best Weapons | Best Armor | Best Food
A Monstrous Collection consists of five Side Adventures in The Legend of Zelda: Tears of the Kingdom (TotK), found in Tarrey Town. Read on to learn how to unlock A Monstrous Collection Side Adventures, their location, and rewards, as well as how to complete all of them!
List of Contents
How to Unlock A Monstrous Collection
Finish Mattison's Independence to Unlock

You can unlock A Monstrous Collection questline by finishing Mattison's Independence Side Adventure first, as Hudson is busy with that quest. Talk to Kilton at the north side of Tarrey Town to officially start this quest.
Mattison's Independence Walkthrough
Part of Tarrey Town Side Adventure Arc
| Tarrey Town Side Adventures | ||
|---|---|---|
| Mattison's Independence | A Monstrous Collection | |
A Monstrous Collection consists of five Side Adventures in Tarrey Town. Completing the first two Side Adventures in this questline will unlock the monster-sculpture-making feature!
Tarrey Town Side Adventures
A Monstrous Collection Location and Rewards
Akkala Highlands - Tarrey Town

The exact coordinates for this quest on the map are 3961, 1642, 0128.
Rewards
| Rewards |
|---|
|
・Monster Extract x5
・Sneaky Monster Soup ・Monster Bridle ・Monster Saddle ・Diamond |
You can get all of these rewards one by one as you complete each Side Adventure for this questline.
How to Complete A Monstrous Collection
A Monstrous Collection I
| A Monstrous Collection All Side Adventures | ||||
|---|---|---|---|---|
| Part 1 | Part 2 | Part 3 | Part 4 | Part 5 |
Look for a Bokoblin
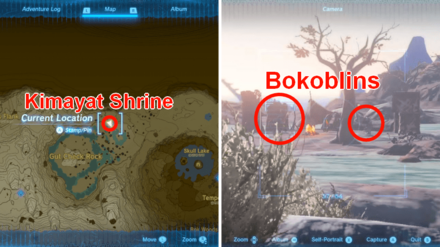
Kilton is looking for a Bokoblin's picture so Hudson can use it as a reference to make a sculpture. Bokoblins are very common on the surface, so try to roam around outside settlements to look for one!
The image above is taken from a monster camp in Gut Check Rock near Kimayat Shrine at coordinates 2862, 3634, 0241.
Note: You can skip this step and immediately show the picture of a Bokoblin to Kilton and Hudson if you have it on your album already!
Take a Picture of a Bokoblin
Hold the L button to select your Camera. Aim it at a Bokoblin and press the A button to capture. Make sure to save it to your album or it will be for nothing!
Any variant of Bokoblin will do! You can also add it to your Compendium if you haven't done it yet.
Camera Guide: How to Take Pictures
Show a Picture to Kilton and Hudson
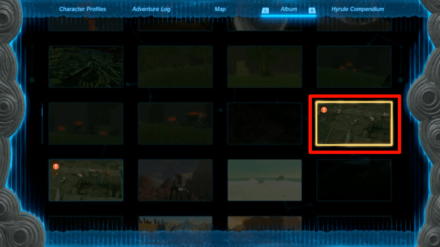
Go back to Tarrey Town and show the picture you just took to Kilton and Hudson.
The picture will be marked with "!" when scrolling through the album. Show that picture to them so that Hudson can start making the sculpture.
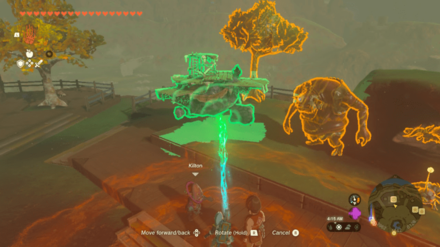
Place the Sculpture on the Stage
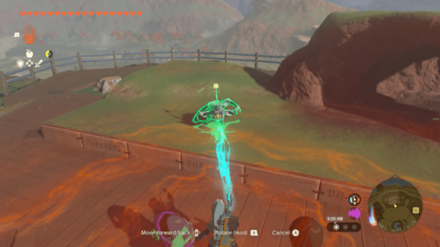
Kilton also wants to put the Bokoblin Sculpture on the stage. Using Ultrahand, move it and place it anywhere on the stage. You can be creative!
Get Your Reward and Start the Next Quest
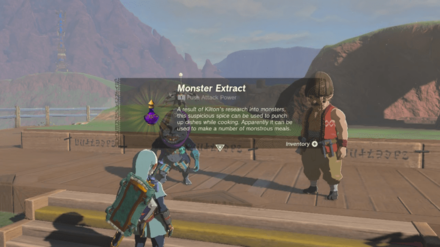
Watch through the show Kilton set up. You will receive a Monster Extract from Kilton as a reward for helping him after that!
It will also start A Monstrous Collection II quest after getting the reward.
A Monstrous Collection II
| A Monstrous Collection All Side Adventures | ||||
|---|---|---|---|---|
| Part 1 | Part 2 | Part 3 | Part 4 | Part 5 |
Look for a Horriblin
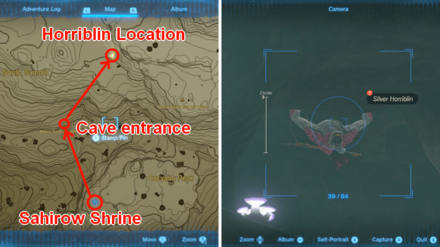
Kilton wants a Horriblin next. You can easily find one inside a cave!
The image above is taken inside Hebra South Summit Cave near Sahirow Shrine at coordinates -3354, 2387, 0361 in Hebra Mountains Region. You should be able to pass through here during the Tulin of Rito Village Main Quest.
Note: If you have a picture already, you can skip finding one and show the picture immediately to Kilton and Hudson.
Take a Picture of a Horriblin
Take a picture of the Horriblin you've found. You can do that by selecting the camera by holding the L button and pressing the A button to capture. Make sure to save it to your album, so you can show it to Kilton and Hudson!
You can take a photo of any Horriblin variant in the game!
Camera Guide: How to Take Pictures
Show the Picture to Kilton and Hudson
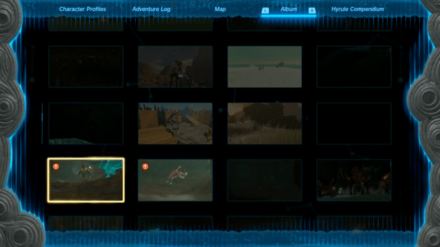
Return to Kilton and Hudson in Tarrey Town and show them the picture. The correct image is marked with "!".
Place the Sculpture on the Stage
Put the Horriblin Sculpture on the stage after it gets done. You can use Ultrahand to move the sculpture!
Get Your Rewards
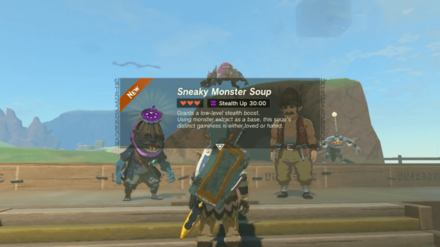
Kilton will do another show, featuring the Horriblin Sculpture. Watch it and receive a Sneaky Monster Soup and a Monster Extract after that.
You can immediately get and start A Monstrous Collection III after that!
A Monstrous Collection III
| A Monstrous Collection All Side Adventures | ||||
|---|---|---|---|---|
| Part 1 | Part 2 | Part 3 | Part 4 | Part 5 |
Talk to Kilton to Start the Third Quest
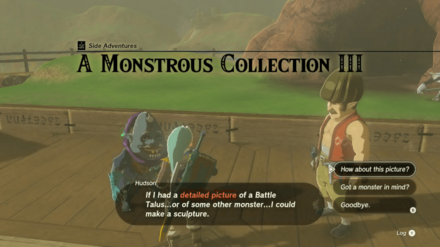
When you're ready, you can talk to Kilton and Hudson in Tarrey Town anytime after completing the second quest in this questline and start getting a picture and sculpture of the third monster. He will tell you afterward that he prefers to see a Battle Talus next!
Note: You can submit any monster and make a sculpture for them, but that won't let you progress through the quest.
Look for a Battle Talus
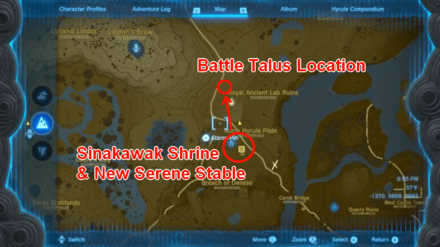
You can easily find a Battle Talus north of New Serene Stable and Sinakawak Shrine, near a Dragon's Tear.
The exact coordinates of the Battle Talus are -1446, 1014, 0137, though it's patrolling an area so it may move out of the spot.
Note: You can show Kilton and Hudson a picture of a Battle Talus if you have it already and skip the monster-hunting!
Take a Picture of the Battle Talus
Using the camera, take a photo of the Battle Talus you found. You can do that by holding the L button to select the camera and pressing the A button to capture. Save it to your album after taking a shot and show it to Kilton and Hudson.
Camera Guide: How to Take Pictures
Shhow the Picture to Kilton and Hudson

Return to Tarrey Town and show them the picture from your album. All valid images are marked with "!".
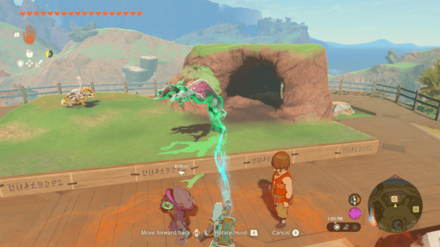
Place the Sculpture on the Stage
Once the sculpture is done, it's now time to put it on the stage. Use Ultrahand to grab and place it anywhere on the stage!
Get Your Rewards
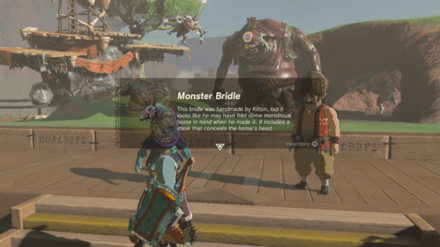
Watch as Kilton showcase the finished Battle Talus Sculpture and get your rewards after that. You will receive a Monster Bridle and another Monster Extract.
A Monstrous Collection IV will unlock after this!
A Monstrous Collection IV
| A Monstrous Collection All Side Adventures | ||||
|---|---|---|---|---|
| Part 1 | Part 2 | Part 3 | Part 4 | Part 5 |
Talk to Kilton to Start the Fourth Quest
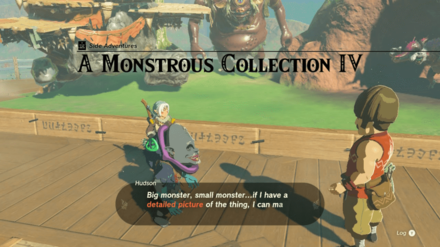
You can talk to Kilton and get the next monster on his list after getting his third sculpture. This time, he wants a Frox!
Note: You can submit any monster and make a sculpture for them, but that won't let you progress through the quest.
Look for a Frox
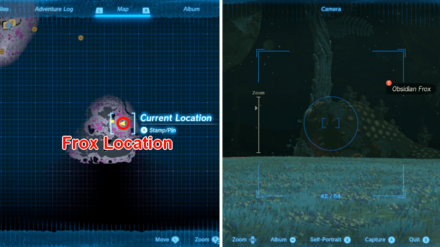
Finding a Frox might be a little difficult task as there are only several of them, and you can only find them in the Depths. You will also want to bring some Brightbloom Seeds and Gloom Resistance Elixirs or Food, as they can help you explore the Depths efficiently!
The image above is captured in the Faron Grasslands Depths, near Kohsustu Lightroot and at the coordinates 0831, -3368, -0475.
Note: You can skip this part if you've a picture of a Frox in your album!
Take a Picture of the Frox
Take out your camera and take a picture of the Frox. Hold L to select the camera and press A to take a shot. Save it to your album after you get a nice picture!
Camera Guide: How to Take Pictures
Show the Picture to Kilton and Hudson

Go back to Kilton and Hudson in Tarrey Town and show them the picture from your album. All valid images are marked with "!".
Place the Sculpture on the Stage
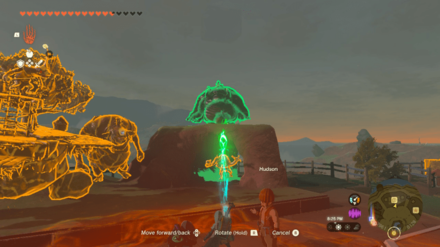
Let the newly made Frox Sculpture join the rest of the sculptures on the stage. Grab it with your Ultrahand and put it somewhere on the stage!
Get Your Rewards
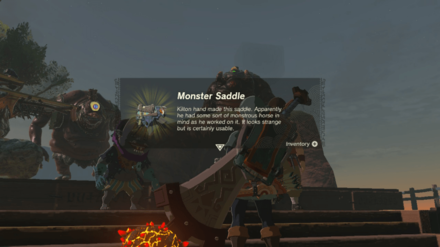
Watch again as Kilton introduces the new monster, Frox, to the townsfolk. You will get your rewards, which are the Monster Saddle and Monster Extract, after the show!
You can start the A Monstrous Collection V after this!
A Monstrous Collection V
| A Monstrous Collection All Side Adventures | ||||
|---|---|---|---|---|
| Part 1 | Part 2 | Part 3 | Part 4 | Part 5 |
Talk to Kilton to Start the Fifth Quest
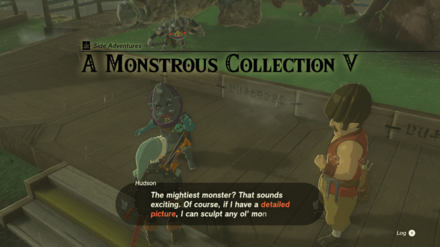
Talk to Kilton to start the final quest on this questline. His final request is a King Gleeok!
Note: You can submit any monster and make a sculpture for them, but that won't let you progress through the quest.
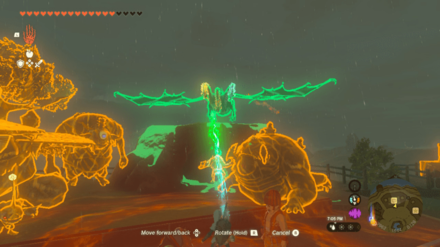
Look for a King Gleeok
There are only three King Gleeoks in Hyrule, and all of them rest at the Sky Islands. The image is taken from the King Gleeok near the Wind Temple, located in the West Hebra Sky Archipelago.
You can get there by teleporting to Kahatanaum Shrine, making a plane on a nearby platform, and flying through the Sky Island where the King Gleeok lies.
Note: Skip this part if you already have a picture of King Gleeok in your album!
Take a Picture of the King Gleeok
Take a shot on the King Gleeok with your camera. You can access the camera by holding the L button and pressing the A button to capture. Save the picture to your album so you can show it to Kilton and Hudson!
Camera Guide: How to Take Pictures
Show the Picture to Kilton and Hudson

Show the image to Kilton and Hudson back in Tarrey Town so they can start making the King Gleeok Sculpture. All valid images are marked with "!" in your album.
Place the Sculpture on the Stage
Put the King Gleeok Sculpture on the stage with Ultrahand and let it join all the sculptures made from the past quests.
Get Your Rewards
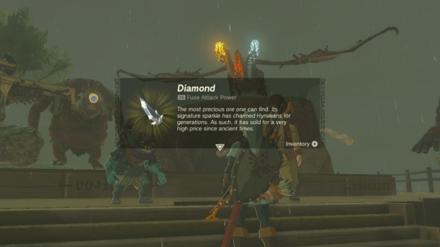
Watch Kilton's final monster introduction and get your rewards after that. You will get a Diamond and a Monster Extract as rewards for helping him out.
You can still submit monster pictures to Kilton and Hudson for more sculptures and continue decorating the stage after this quest!
The Legend of Zelda: Tears of the Kingdom Related Guides
List of All Walkthroughs
| All Quest Types | ||
|---|---|---|
 Main Quests Main Quests |
 Side Quests Side Quests |
 Side Adventures Side Adventures |
List of All Side Adventures
Comment
1  Anonymous almost 3 years
For Collection V you will need a picture of a King Gleeok.
Author

The Legend of Zelda: Tears of the Kingdom Walkthrough & Guides Wiki
A Monstrous Collection Complete Walkthrough
Please participate in our site
improvement survey
03/2026
improvement survey
03/2026
Would you assist in
improving Game8's site?
improving Game8's site?

×
We are listening to our users' valuable opinions and discussing how to act on them.
The information collected through this survey will be used for the purpose of improving our services. In addition, the information will only be disclosed a part of a statistic in a format that will not allow identification of personal information.
Begin Survey
Not Now
×
Please rate each item regarding Game8.co's Advertisements.
Amount of Ads
Very Dissatisfied
Somewhat Dissatisfied
Fine
Somewhat Satisfied
Highly Satisfied
Placement of Ads
Timing of Ad Display
Ad Loading Speed
Safeness of Ads
Content of Ads
×
Please rate each item regarding Game8.co's Quality of Articles.
Amount of information
Very Dissatisfied
Somewhat Dissatisfied
Fine
Somewhat Satisfied
Highly Satisfied
Frequency of updates
Speed of new information
Accuracy of articles
Understandibility of articles
Readability of sentences
×
Please rate each item regarding Game8.co's Usability of the Site.
Ease of finding information
Very Dissatisfied
Somewhat Dissatisfied
Fine
Somewhat Satisfied
Highly Satisfied
Loading Speed
Use of Color
Font Size
Visibility of Images
Easy to Understand Layout
×
Please rate each item regarding Game8.co's Message Boards, Comments.
Ease of Writing
Very Dissatisfied
Somewhat Dissatisfied
Fine
Somewhat Satisfied
Highly Satisfied
Readability
Ease in Finding Information
Comment Quality
Comment Quantity
Admin Response
×
Please rate each item regarding Game8.co's Site's new design.
Please rate our site's new design
Very Dissatisfied
Somewhat Dissatisfied
Fine
Somewhat Satisfied
Highly Satisfied
Do you think that the website's design change makes the site easier to use?
Has the new design made it easier for you to find information on the site?
Has the new design improved the overall visual appeal of the site?
How would you rate your overall satisfaction with the new design of the site?
×
How likely are you to recommend Game8 to someone you know?
Very Unlikely
0
1
2
3
4
5
6
7
8
9
10
Very Likely
If you have other opinions regarding potential improvement to the website, please share them with us. We would appreciate your honest opinion.
Note: This is a free response section, so you can proceed without entering anything.
Note: Please be sure not to enter any kind of personal information into your response.
Note: Please be sure not to enter any kind of personal information into your response.
×
Thank You
×
Thank you for participating in our survey! Your answers will help us to improve the quality of our website and services.
We hope you continue to make use of Game8.
We hope you continue to make use of Game8.
Close
Rankings
- We could not find the message board you were looking for.
Gaming News


Popular Games

Genshin Impact Walkthrough & Guides Wiki
Honkai: Star Rail Walkthrough & Guides Wiki
Umamusume: Pretty Derby Walkthrough & Guides Wiki
Pokemon Pokopia Walkthrough & Guides Wiki
Resident Evil Requiem (RE9) Walkthrough & Guides Wiki
Monster Hunter Wilds Walkthrough & Guides Wiki
Wuthering Waves Walkthrough & Guides Wiki
Arknights: Endfield Walkthrough & Guides Wiki
Pokemon FireRed and LeafGreen (FRLG) Walkthrough & Guides Wiki
Pokemon TCG Pocket (PTCGP) Strategies & Guides Wiki


Recommended Games
Diablo 4: Vessel of Hatred Walkthrough & Guides Wiki
Fire Emblem Heroes (FEH) Walkthrough & Guides Wiki
Yu-Gi-Oh! Master Duel Walkthrough & Guides Wiki
Super Smash Bros. Ultimate Walkthrough & Guides Wiki
Pokemon Brilliant Diamond and Shining Pearl (BDSP) Walkthrough & Guides Wiki
Elden Ring Shadow of the Erdtree Walkthrough & Guides Wiki
Monster Hunter World Walkthrough & Guides Wiki
The Legend of Zelda: Tears of the Kingdom Walkthrough & Guides Wiki
Persona 3 Reload Walkthrough & Guides Wiki
Cyberpunk 2077: Ultimate Edition Walkthrough & Guides Wiki


All rights reserved
© Nintendo. The Legend of Zelda and Nintendo Switch are trademarks of Nintendo.
The copyrights of videos of games used in our content and other intellectual property rights belong to the provider of the game.
The contents we provide on this site were created personally by members of the Game8 editorial department.
We refuse the right to reuse or repost content taken without our permission such as data or images to other sites.
there are more then 3 king gleeoks. 3 in the sky Islands and another in the gleeok den beneath thyphlo ruins.