Hebra's Colossal Fossil Walkthrough and How to Unlock
▲ Get Pristine Weapons from the depths!
△ All 1000 Koroks | All 4 Great Fairies
▲ 81 Addison Signs | 147 Caves | 58 Wells
△ Tips: Farm Rupees | Starting Armor
▲ Best Weapons | Best Armor | Best Food
Hebra's Colossal Fossil is a Side Quest in The Legend of Zelda: Tears of the Kingdom (TotK) that can be found in Eldin Great Skeleton. Read on to learn how to unlock Hebra's Colossal Fossil, the location of Hebra's Great Skeleton, rewards, walkthrough, as well as how to complete it.
| All Colossal Fossils | ||
|---|---|---|
| Eldin Colossal Fossil | Hebra Colossal Fossil | Gerudo Colossal Fossil |
List of Contents
How to Unlock Hebra's Colossal Fossil
Finish Eldin's Colossal Fossil
This quest will automatically unlock after finishing Eldin's Colossal Fossil.
Eldin's Colossal Fossil Walkthrough
Hebra's Colossal Fossil Location and Rewards
Eldin Canyon - Eldin Great Skeleton
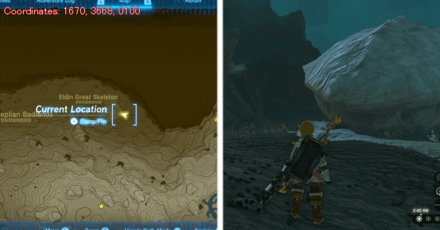
The exact coordinates for this quest on the map are 1670, 3668, 0100.
Rewards
| Rewards |
|---|
| ・Purple Rupee |
Hebra's Colossal Fossil Walkthrough Guide
| How to Complete Hebra's Colossal Fossil |
|---|
Go to Hebra's Great Skeleton
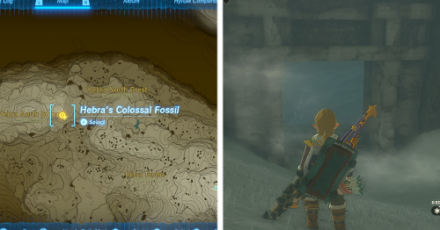
The great skeleton is found inside a huge stone gate with coordinates (-3812, 3592, 0257).
Talk to Loone

Talk to Loone beside the campfire. She will mention that the great skeleton is missing its fin bone and spine.
Find the Fin Bon
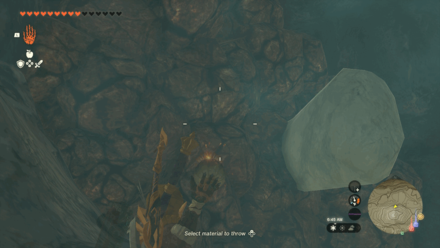
The fin bone can be seen in between the stone rubble with coordinates (-4010, 3664, 0184). Destroy the stone rubble to free the fin bone.
Carry the Fin Bone
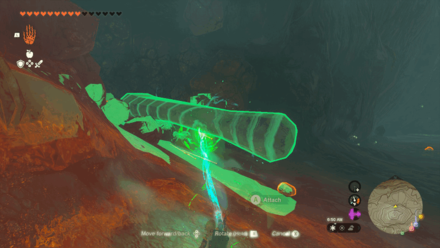
Use Ultrahand to carry the fin bone right back to where it's supposed to be.
Place the Fin Bone Correctly
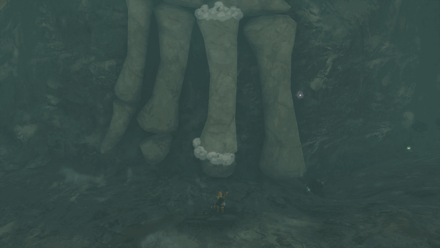
Place the fin bone in the spot together with the other fin bones located just across the stone rubble you just destroyed, and place it in the correct placement.
If done correctly, you will hear an audio cue and the bone will stick to its place.
Find the Spine
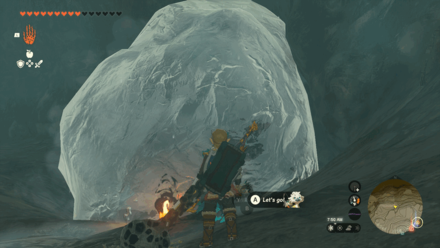
The spine is covered in ice with coordinates (-4052, 3763, 0181). This is very hard to miss since it's the only chunk of ice found inside the cave.
Thaw out the ice to free the spine.
Carry the Spine
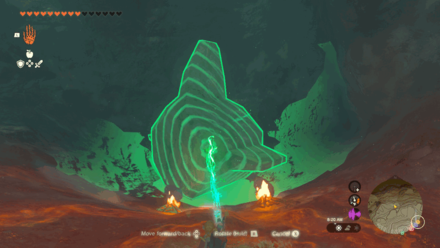
Use Ultrahand to carry the spine towards the spot missing a piece of spine.
Place the Spine Correctly

This is a bit tricky at first, but you should match the fin-like attachments on the spine with the other spine parts for it to be placed correctly.
If done correctly, you will hear an audio cue and the spine will stick to its place, just like what happened to the fin bone earlier.
Return to Loone
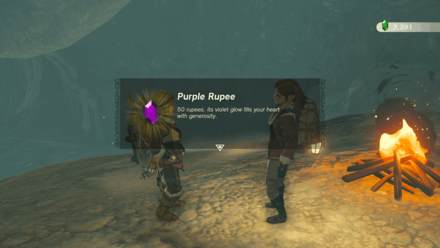
For your efforts in restoring the Giant Skeleton, Loone will reward you with a Purple Rupee.
Loone will mention that she's headed to the Gerudo Region to search for the last colossal fossil!
The Legend of Zelda: Tears of the Kingdom Related Guides
List of All Walkthroughs
| All Quest Types | ||
|---|---|---|
 Main Quests Main Quests |
 Side Quests Side Quests |
 Side Adventures Side Adventures |
List of All Side Quests
Comment
Author

The Legend of Zelda: Tears of the Kingdom Walkthrough & Guides Wiki
Hebra's Colossal Fossil Walkthrough and How to Unlock
Rankings
- We could not find the message board you were looking for.
Gaming News


Popular Games

Genshin Impact Walkthrough & Guides Wiki
Honkai: Star Rail Walkthrough & Guides Wiki
Arknights: Endfield Walkthrough & Guides Wiki
Umamusume: Pretty Derby Walkthrough & Guides Wiki
Wuthering Waves Walkthrough & Guides Wiki
Pokemon TCG Pocket (PTCGP) Strategies & Guides Wiki
Abyss Walkthrough & Guides Wiki
Zenless Zone Zero Walkthrough & Guides Wiki
Digimon Story: Time Stranger Walkthrough & Guides Wiki
Clair Obscur: Expedition 33 Walkthrough & Guides Wiki


Recommended Games
Fire Emblem Heroes (FEH) Walkthrough & Guides Wiki
Pokemon Brilliant Diamond and Shining Pearl (BDSP) Walkthrough & Guides Wiki
Diablo 4: Vessel of Hatred Walkthrough & Guides Wiki
Super Smash Bros. Ultimate Walkthrough & Guides Wiki
Yu-Gi-Oh! Master Duel Walkthrough & Guides Wiki
Elden Ring Shadow of the Erdtree Walkthrough & Guides Wiki
Monster Hunter World Walkthrough & Guides Wiki
The Legend of Zelda: Tears of the Kingdom Walkthrough & Guides Wiki
Persona 3 Reload Walkthrough & Guides Wiki
Cyberpunk 2077: Ultimate Edition Walkthrough & Guides Wiki


All rights reserved
© Nintendo. The Legend of Zelda and Nintendo Switch are trademarks of Nintendo.
The copyrights of videos of games used in our content and other intellectual property rights belong to the provider of the game.
The contents we provide on this site were created personally by members of the Game8 editorial department.
We refuse the right to reuse or repost content taken without our permission such as data or images to other sites.