This survey will take about 1 minute.
Your answers will help us to improve our website.
Zelda: Tears of the Kingdom (TotK)
All Molduga Locations and How to Beat
▲ Get Pristine Weapons from the depths!
△ All 1000 Koroks | All 4 Great Fairies
▲ 81 Addison Signs | 147 Caves | 58 Wells
△ Tips: Farm Rupees | Starting Armor
▲ Best Weapons | Best Armor | Best Food
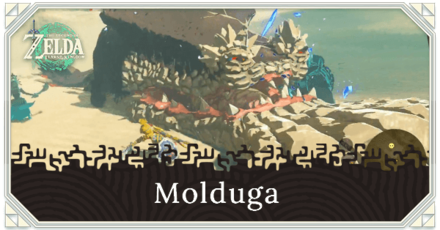
The Molduga is a Miniboss enemy in The Legend of Zelda: Tears of the Kingdom (ToTK). See all Molduga locations and where to find it, a boss strategy guide to learn how to beat the Molduga, as well as its drops and possible variants.
All Molduga Locations and Where to Find
Molduga Interactive Map Locations
How to Beat the Molduga
|
|
Find Safe High Ground

Find a high place you can escape to, as being on the sand is dangerous.
Attract Molduga with an Item or Arrow Shot
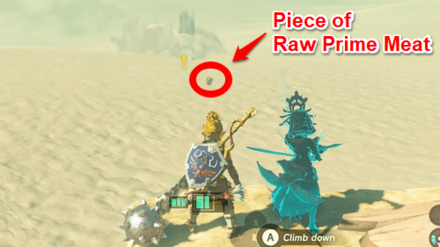
Throw down items or shoot an arrow in the sand in order to attract Molduga. When it notices the meat, it will eat it, jumping up from the sand and exposing its body.
Note: Molduga will ignore items and arrow shots when it is above the sand. Simply hit it with an arrow to let it re-enter the sand.
Hit Molduga While It's Mid-Air
Hit Molduga with arrows to stun it, letting it crash to the ground. Better if you fuse explosive materials like Bomb Flowers to your arrows, to stun Molduga instantly.
Melee Molduga While It's Stunned
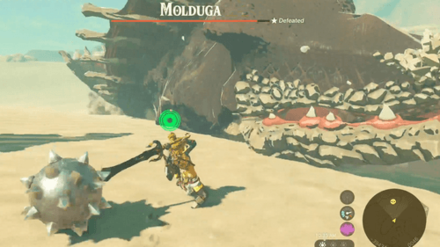
Run up to Molduga and hit it as many times as you can with melee attacks. When it is recovering, step back, as it may perform a tail swipe. Then, retreat back to high ground and repeat the above steps until Molduga is defeated.
Molduga Overview and Drops
Molduga Basic Info
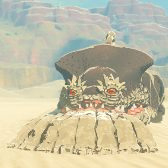 This massive monster swims beneath the desert's sand. It spends most of its time submerged, but if it senses sound, it will breach the surface to feast on whatever it can grab. Running around carelessly can be dangerous if you suspect there may be one in the area. |
|
| HP | 1,500 |
|---|---|
| Species | Molduga |
| Compendium No. | 179 |
All Possible Drops
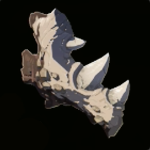 Molduga Jaw Molduga Jaw
|
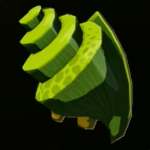 Molduga Guts Molduga Guts
|
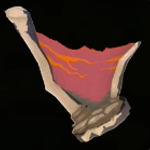 Molduga Fin Molduga Fin
|
The Legend of Zelda: Tears of the Kingdom Related Guides

List of Minibosses
List of Bosses
| Master Kohga | Colgera | Moragia |
| Marbled Gohma | Sludge Like | Mucktorok |
| Queen Gibdo | Seized Construct | Phantom Ganon |
| Demon King Ganondorf | Demon King Ganondorf (2nd Form) | Demon Dragon |
Comment
1  Anonymous almost 3 years
The Hinox between Squabble River and Popla Foothills next to Dueling peaks is actually a Stalnox with coordinates 0780, -1952, 0013. The image in place on the incorrect Hinox, is actually the Mable Ridge Hinox slightly North East from it... Hope you get to fixing this before it confuses more people :P
Author

The Legend of Zelda: Tears of the Kingdom Walkthrough & Guides Wiki
All Molduga Locations and How to Beat
Please participate in our site
improvement survey
03/2026
improvement survey
03/2026
Would you assist in
improving Game8's site?
improving Game8's site?

×
We are listening to our users' valuable opinions and discussing how to act on them.
The information collected through this survey will be used for the purpose of improving our services. In addition, the information will only be disclosed a part of a statistic in a format that will not allow identification of personal information.
Begin Survey
Not Now
×
Please rate each item regarding Game8.co's Advertisements.
Amount of Ads
Very Dissatisfied
Somewhat Dissatisfied
Fine
Somewhat Satisfied
Highly Satisfied
Placement of Ads
Timing of Ad Display
Ad Loading Speed
Safeness of Ads
Content of Ads
×
Please rate each item regarding Game8.co's Quality of Articles.
Amount of information
Very Dissatisfied
Somewhat Dissatisfied
Fine
Somewhat Satisfied
Highly Satisfied
Frequency of updates
Speed of new information
Accuracy of articles
Understandibility of articles
Readability of sentences
×
Please rate each item regarding Game8.co's Usability of the Site.
Ease of finding information
Very Dissatisfied
Somewhat Dissatisfied
Fine
Somewhat Satisfied
Highly Satisfied
Loading Speed
Use of Color
Font Size
Visibility of Images
Easy to Understand Layout
×
Please rate each item regarding Game8.co's Message Boards, Comments.
Ease of Writing
Very Dissatisfied
Somewhat Dissatisfied
Fine
Somewhat Satisfied
Highly Satisfied
Readability
Ease in Finding Information
Comment Quality
Comment Quantity
Admin Response
×
Please rate each item regarding Game8.co's Site's new design.
Please rate our site's new design
Very Dissatisfied
Somewhat Dissatisfied
Fine
Somewhat Satisfied
Highly Satisfied
Do you think that the website's design change makes the site easier to use?
Has the new design made it easier for you to find information on the site?
Has the new design improved the overall visual appeal of the site?
How would you rate your overall satisfaction with the new design of the site?
×
How likely are you to recommend Game8 to someone you know?
Very Unlikely
0
1
2
3
4
5
6
7
8
9
10
Very Likely
If you have other opinions regarding potential improvement to the website, please share them with us. We would appreciate your honest opinion.
Note: This is a free response section, so you can proceed without entering anything.
Note: Please be sure not to enter any kind of personal information into your response.
Note: Please be sure not to enter any kind of personal information into your response.
×
Thank You
×
Thank you for participating in our survey! Your answers will help us to improve the quality of our website and services.
We hope you continue to make use of Game8.
We hope you continue to make use of Game8.
Close
Rankings
- We could not find the message board you were looking for.
Gaming News


Popular Games

Genshin Impact Walkthrough & Guides Wiki
Honkai: Star Rail Walkthrough & Guides Wiki
Umamusume: Pretty Derby Walkthrough & Guides Wiki
Pokemon Pokopia Walkthrough & Guides Wiki
Resident Evil Requiem (RE9) Walkthrough & Guides Wiki
Monster Hunter Wilds Walkthrough & Guides Wiki
Wuthering Waves Walkthrough & Guides Wiki
Arknights: Endfield Walkthrough & Guides Wiki
Pokemon FireRed and LeafGreen (FRLG) Walkthrough & Guides Wiki
Pokemon TCG Pocket (PTCGP) Strategies & Guides Wiki


Recommended Games
Diablo 4: Vessel of Hatred Walkthrough & Guides Wiki
Fire Emblem Heroes (FEH) Walkthrough & Guides Wiki
Yu-Gi-Oh! Master Duel Walkthrough & Guides Wiki
Super Smash Bros. Ultimate Walkthrough & Guides Wiki
Pokemon Brilliant Diamond and Shining Pearl (BDSP) Walkthrough & Guides Wiki
Elden Ring Shadow of the Erdtree Walkthrough & Guides Wiki
Monster Hunter World Walkthrough & Guides Wiki
The Legend of Zelda: Tears of the Kingdom Walkthrough & Guides Wiki
Persona 3 Reload Walkthrough & Guides Wiki
Cyberpunk 2077: Ultimate Edition Walkthrough & Guides Wiki


All rights reserved
© Nintendo. The Legend of Zelda and Nintendo Switch are trademarks of Nintendo.
The copyrights of videos of games used in our content and other intellectual property rights belong to the provider of the game.
The contents we provide on this site were created personally by members of the Game8 editorial department.
We refuse the right to reuse or repost content taken without our permission such as data or images to other sites.
Forgot to mention, it's a mistake in the interactive map...