This survey will take about 1 minute.
Your answers will help us to improve our website.
Zelda: Tears of the Kingdom (TotK)
Hyrule Field Region Map: Korok Seed Locations, Shrines, and Quests
▲ Get Pristine Weapons from the depths!
△ All 1000 Koroks | All 4 Great Fairies
▲ 81 Addison Signs | 147 Caves | 58 Wells
△ Tips: Farm Rupees | Starting Armor
▲ Best Weapons | Best Armor | Best Food
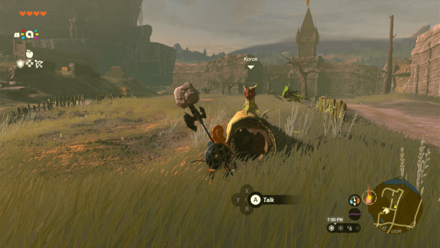
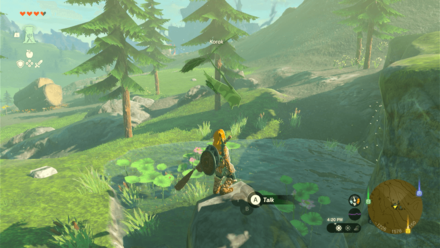
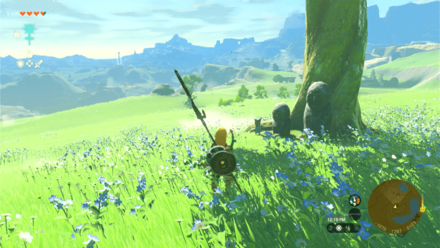
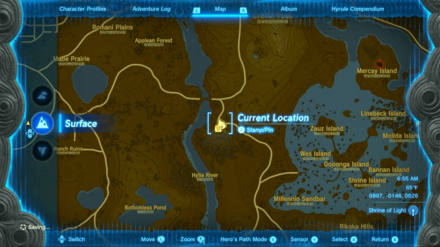
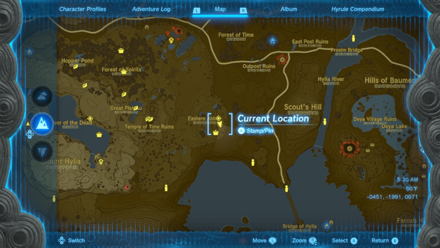
Hyrule Field is a region found in the Surface of Hyrule in The Legend of Zelda: Tears of the Kingdom (TotK). Read on to see the full Hyrule Field region map, as well as locations for Korok Seeds, Shrines, Quests, and other points of interest found within the Hyrule Field!
List of Contents
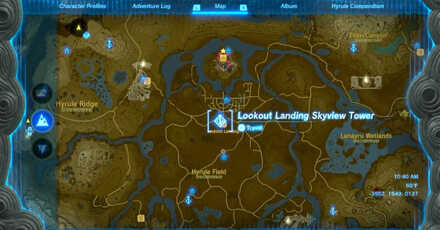
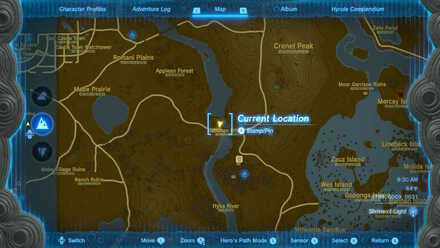
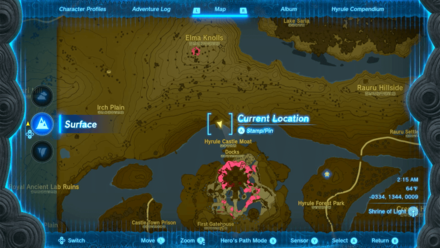
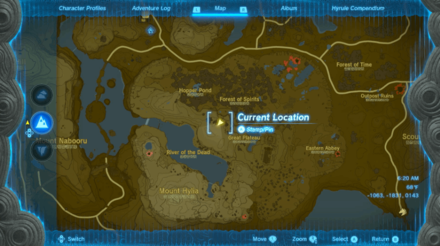
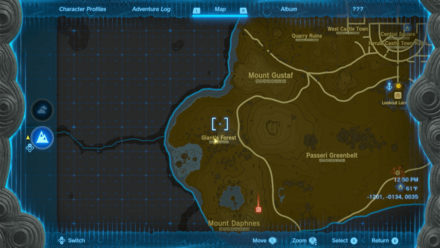
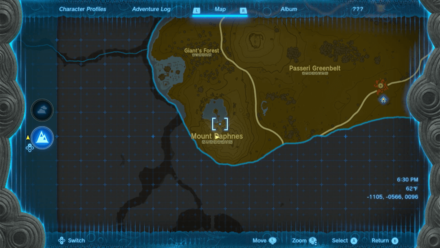
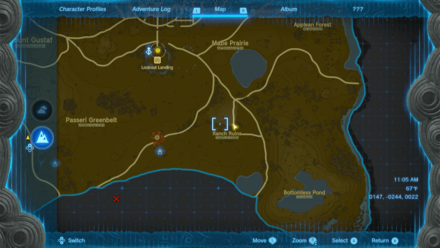
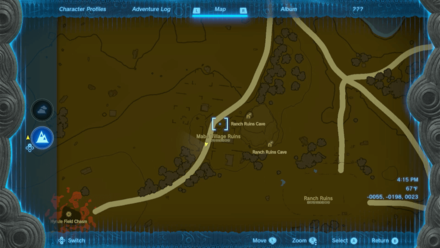
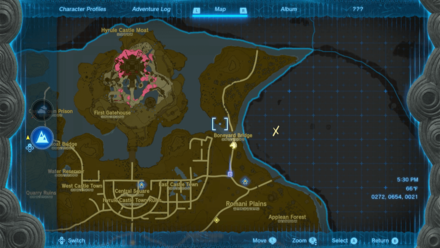
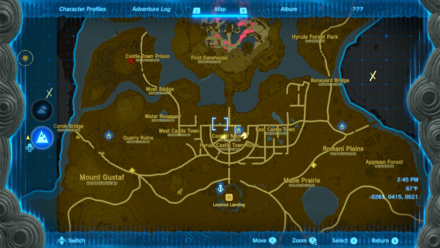
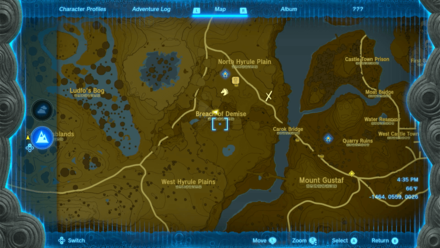
Hyrule Field Region Map
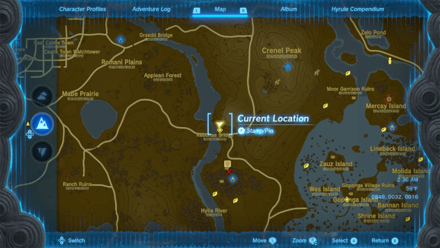
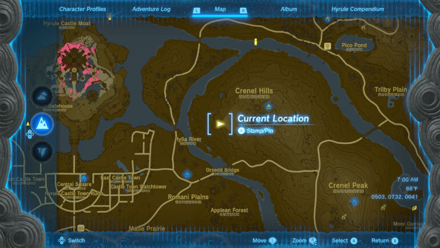
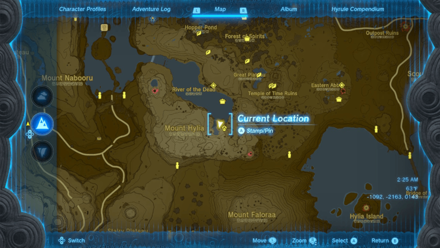
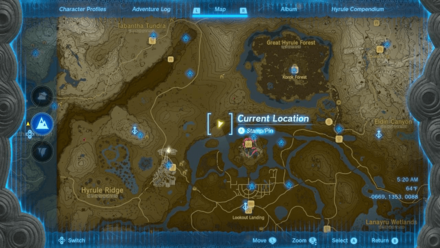
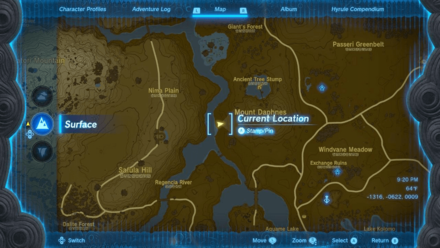
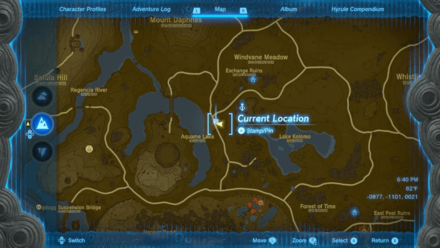
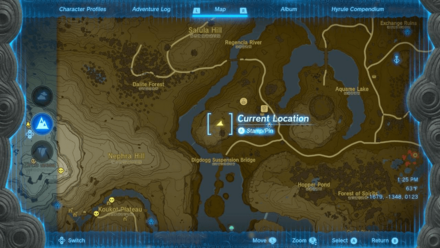
Hyrule Field Full Map
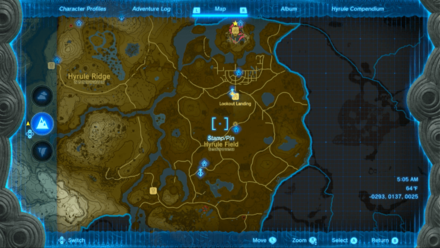 Enlarge EnlargeView Full Image |
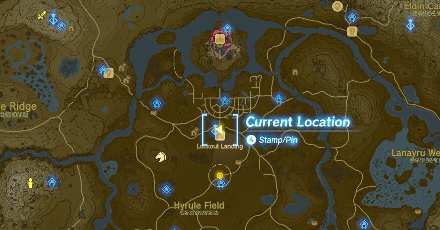
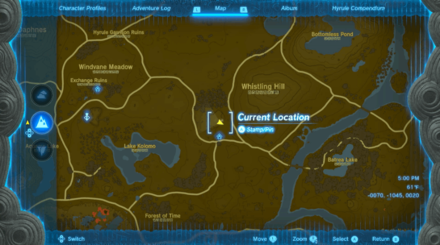
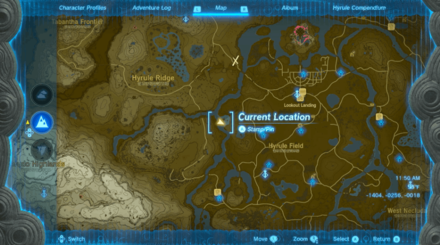
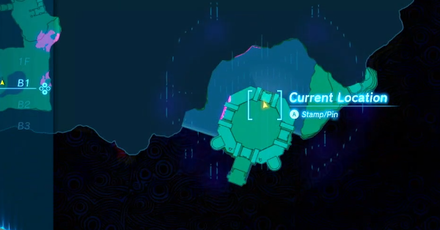
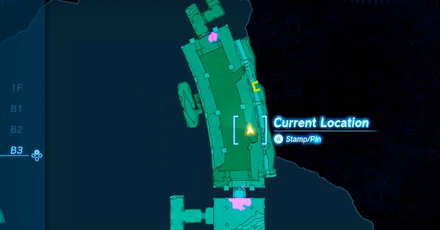
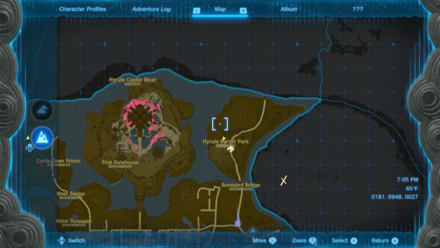
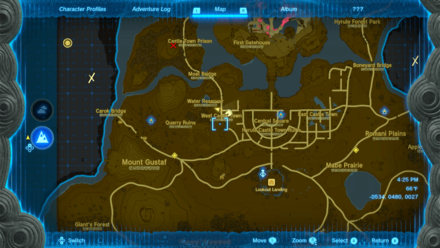
Hyrule Field Tower Map Location
Map and Coordinates
| Overworld Location | Coordinates |
|---|---|
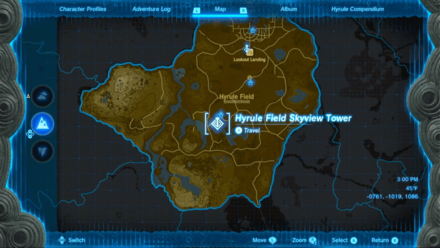 Enlarge EnlargeHyrule Field Skyview Tower |
-0761, -1019, 0064 |
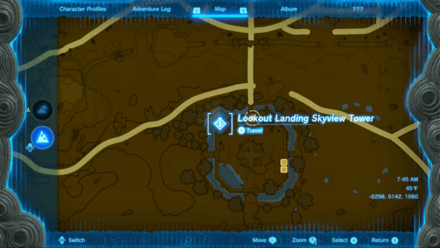 Enlarge EnlargeLookout Landing Skyview Tower |
-0298, 0142, 0025 |
Skyview Tower Guide: All Tower Locations
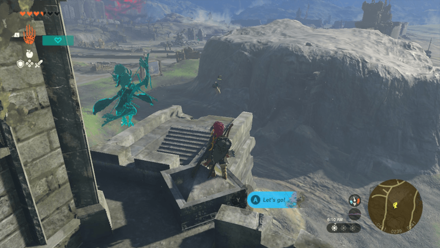
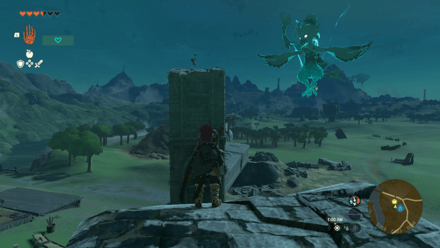
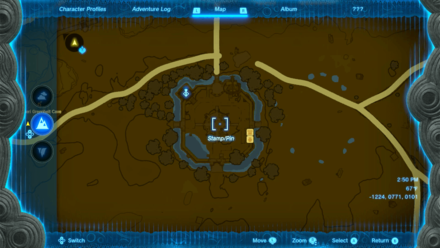
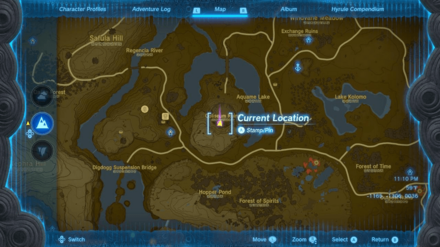
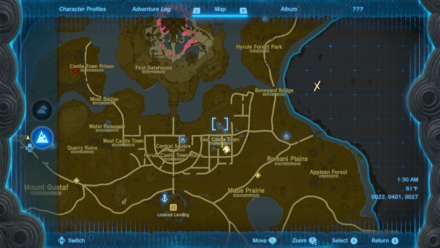
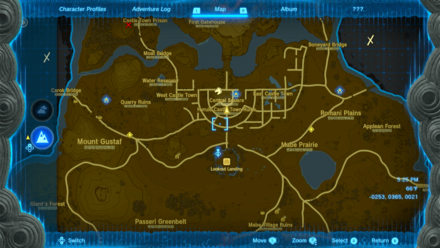
Hyrule Field Great Fairy Fountain Location
Map and Coordinates
| Overworld Location | Coordinates |
|---|---|
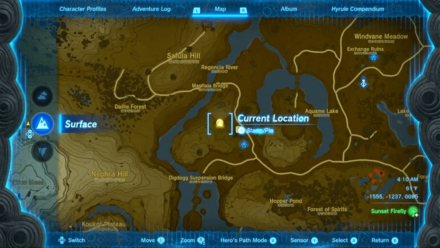 Enlarge EnlargeKaysa's Great Fairy Fountain |
-1555, -1237, 0085 |
Great Fairy Locations and How to Upgrade Armor
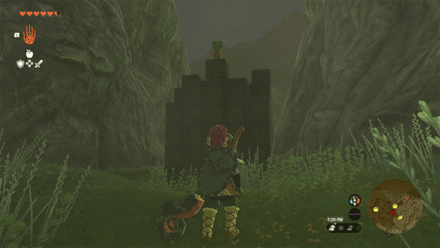
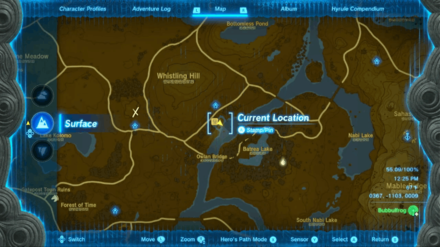
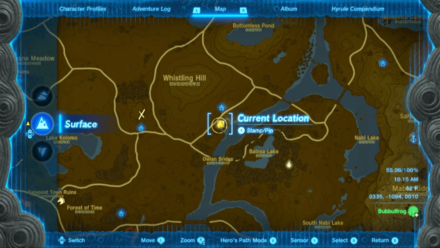
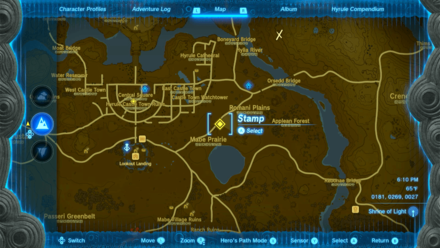
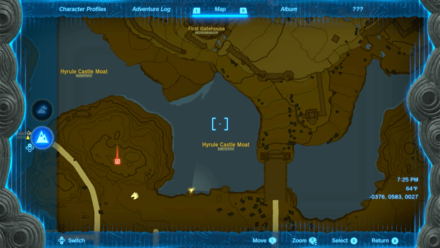
Hyrule Field Shrine Locations
Shrine Map Locations and Coordinates
| Location | Coordinates |
|---|---|
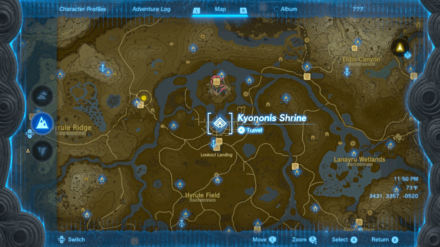 Enlarge EnlargeKyononis Shrine (Combat Training) |
Video Guide -0204, 0451, 0020 |
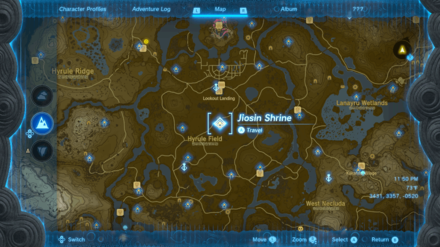 Enlarge EnlargeJiosin Shrine (Shape Rotation) |
Video Guide -0240, -0371, 0027 |
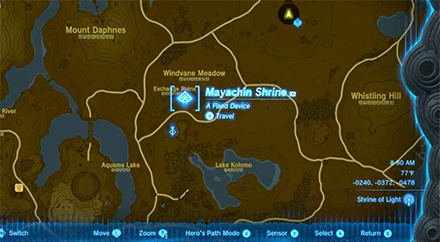
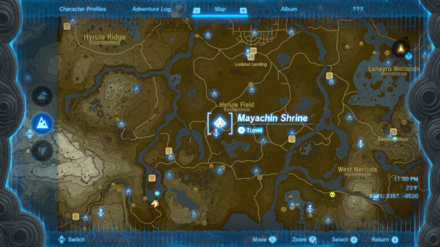 Enlarge EnlargeMayachin Shrine (A Fixed Device) |
Video Guide -0705, -0869, 0031 |
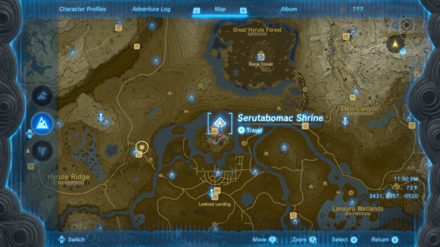 Enlarge EnlargeSerutabomac Shrine (The Way Up) |
Video Guide -0178, 1169, 0280 |
 Enlarge EnlargeSinakawak Shrine (An Uplifting Device) |
-1413, 0757, 0089 |
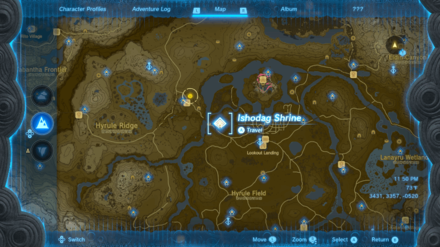 Enlarge EnlargeIshodag Shrine (A Windy Device) |
Video Guide -0878, 0423, 0049 |
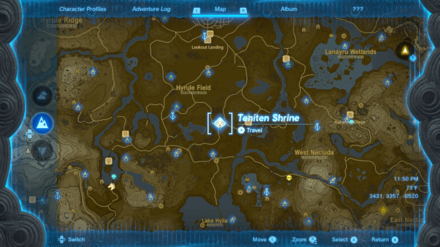 Enlarge EnlargeTeniten Shrine (Combat Training: Throwing) |
Video Guide -0072, -1115, 0021 |
 Enlarge EnlargeTajikats Shrine (Building With Logs) |
Video Guide 0344, -1010, 0016 |
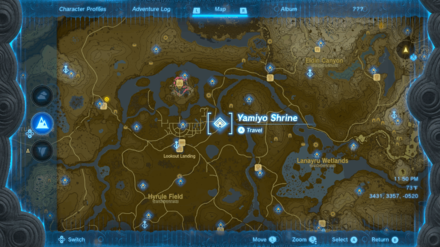 Enlarge EnlargeYamiyo Shrine (Combat Training: Throwing) |
Video Guide 0332, 0467, 0029 |
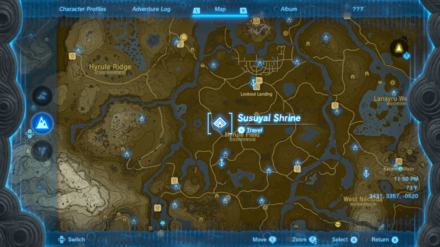 Enlarge EnlargeSusuyai Shrine (A Spinning Device) |
-0784, -0433, 0018 |
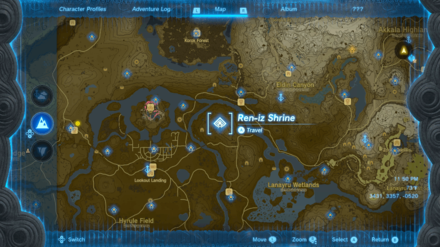 Enlarge EnlargeRen-Iz Shrine (Jump the Gaps) |
Video Guide 0753, 0820, 0081 |
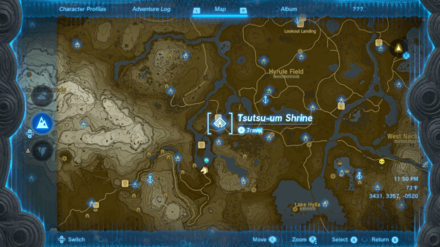 Enlarge EnlargeTsutsu-um Shrine (The Stakes Guide You) |
Video Guide -1423, -1349, 0068 |
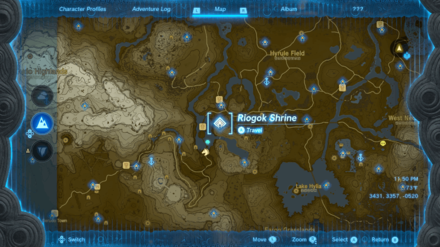 Enlarge EnlargeRiogok Shrine (Force Transfer) |
-1440, -1616, 0089 |
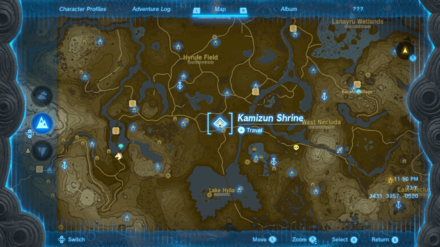 Enlarge EnlargeKamizun Shrine (Proving Grounds: Beginner) |
Video Guide -0177, -1557, 0023 |
 Enlarge EnlargeSepapa Shrine (Backtrack) |
0219, 1082, 0028 |
 Enlarge EnlargeTenmaten Shrine (Rauru's Blessing) |
Video Guide -0593, 1551, -0014 |
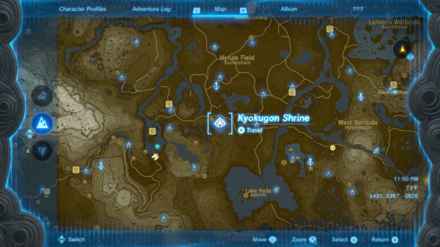 Enlarge EnlargeKyokugon Shrine (Alignment of the Circles) |
-0710, -1550, 0006 |
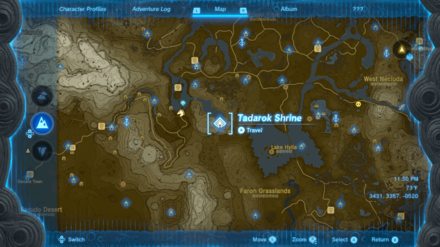 Enlarge EnlargeTadarok Shrine (Fire and Water) |
-1082, -2187, 0129 |
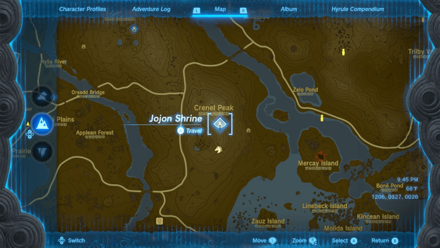 Enlarge EnlargeJojon Shrine (Proving Grounds: Rotation) |
1202, 0329, 0027 |
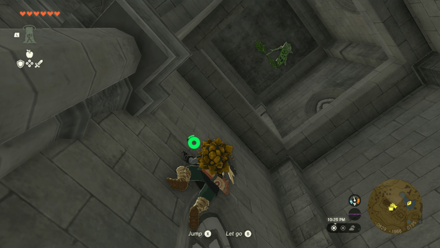
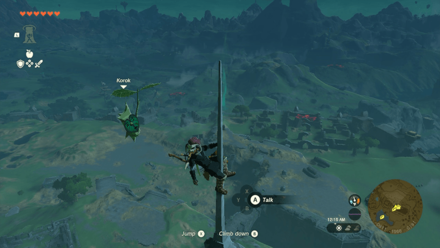
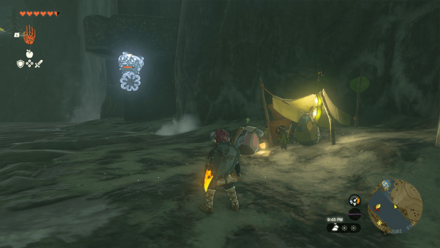
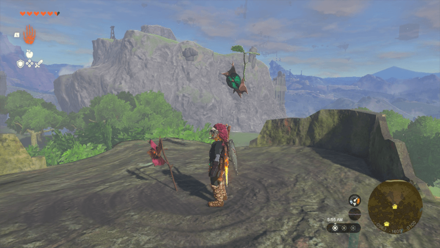
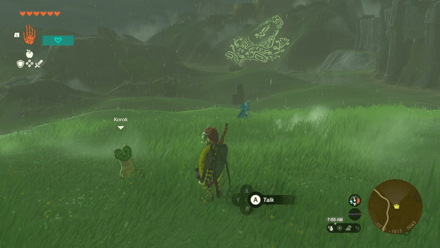
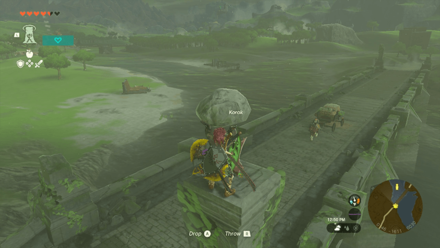
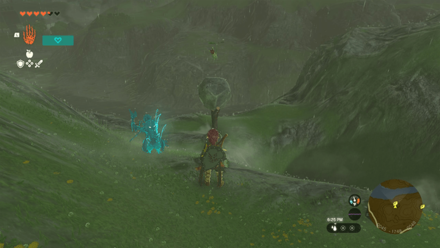
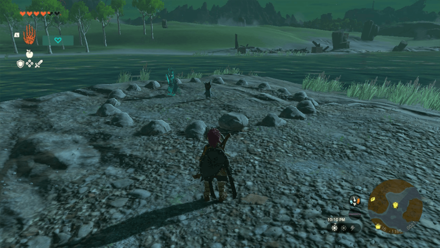
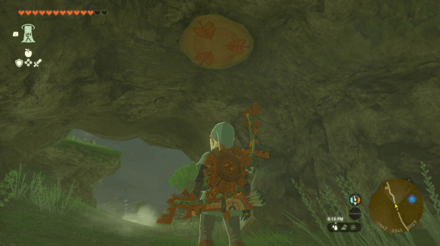
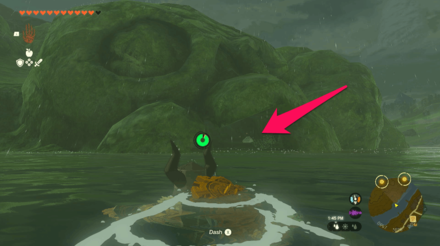
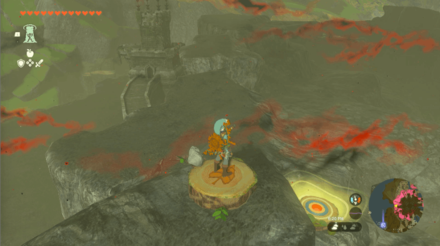
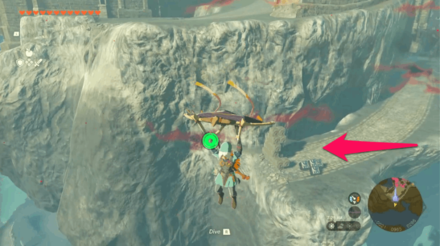
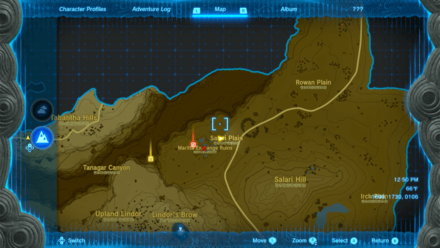
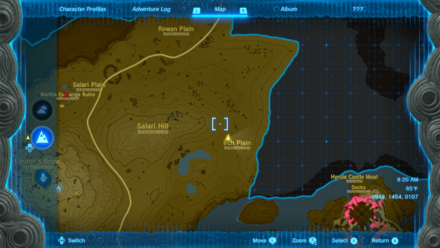
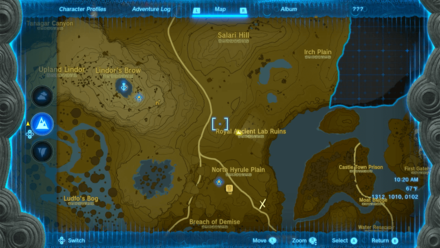
Hyrule Field Korok Seed Locations
Korok Seed Locations and Coordinates
| Overworld | Location Details |
|---|---|
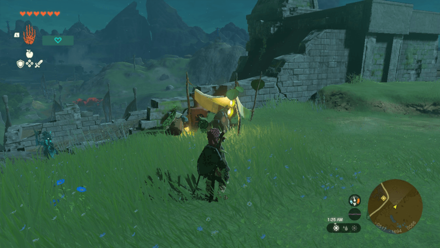
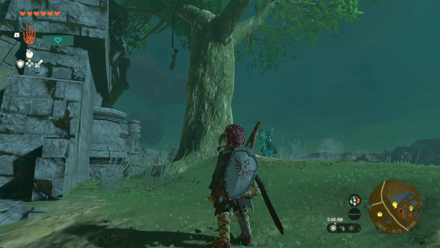
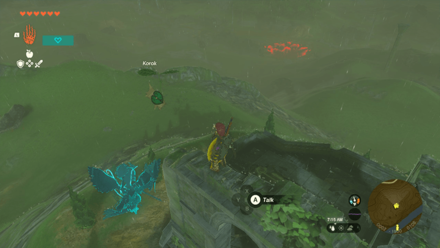
 Enlarge EnlargeKorok Seed |
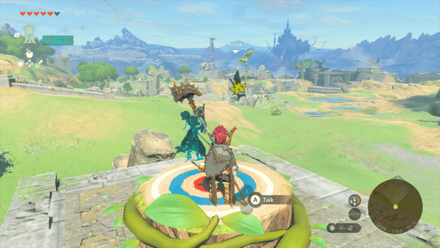
Start Coordinates -0390, 0996, 0320 Shoot the floating balloon outside the window of Pincess Zelda's Study in the 1F level of Hyrule Castle. |
 Enlarge EnlargeKorok Seed |
Start Coordinates -0383, 0995, 0391 Interact with the sparkling leaves on top of the spire of Princess Zelda's Study tower. |
 Enlarge EnlargeKorok Seed |
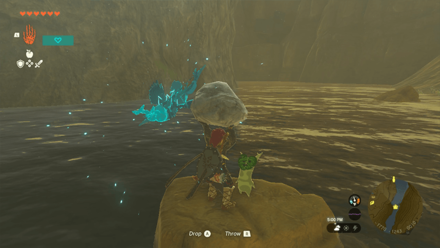
Start Coordinates -1093, -0197, 0041 Interact with the dandelion and catch it. |
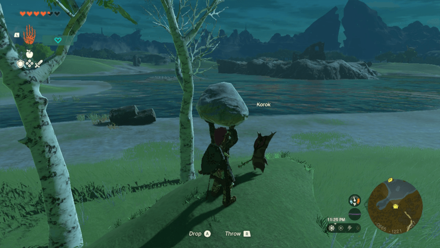
 Enlarge EnlargeKorok Seed |
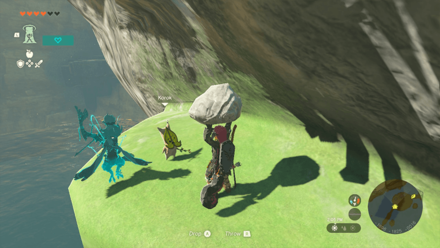
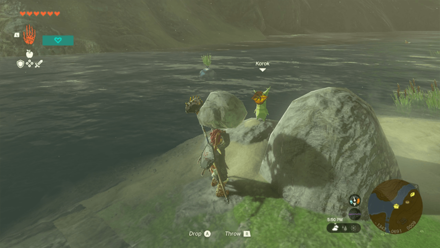
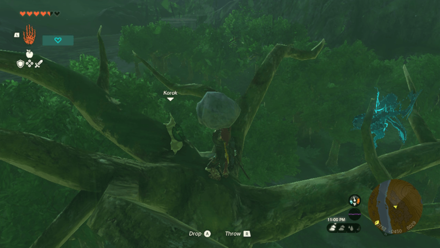
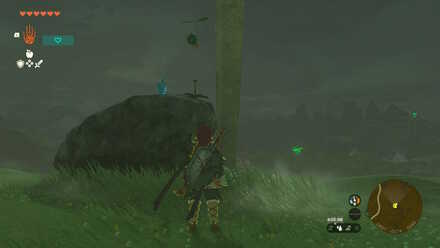
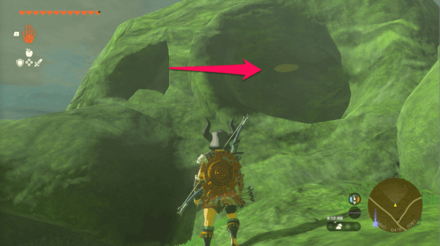
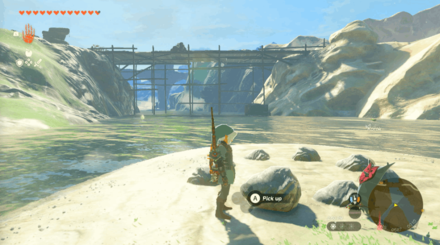
Start Coordinates 0499, -0471, 0062 Pick up the lone rock on the cliff to reveal the Korok. |
 Enlarge EnlargeKorok Seed |
Start Coordinates 0623, -0751, 0021 Pick up the lone rock near the water to reveal the Korok. |
 Enlarge EnlargeKorok Seed |
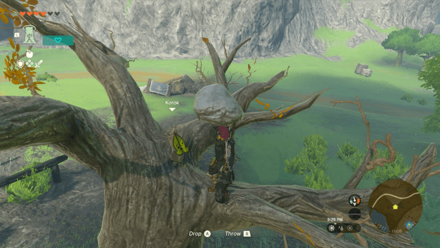
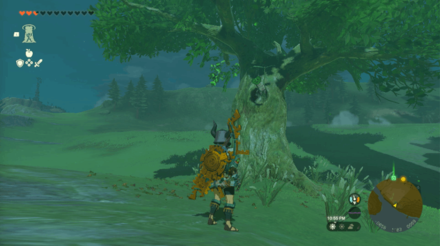
Start Coordinates -0756, 0197, 0030 Shoot the acorn inside the tree trunk with an arrow. |
 Enlarge EnlargeKorok Seed |
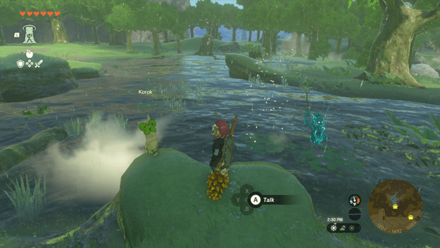
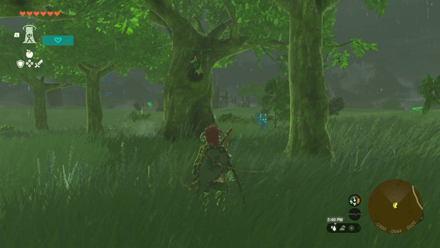
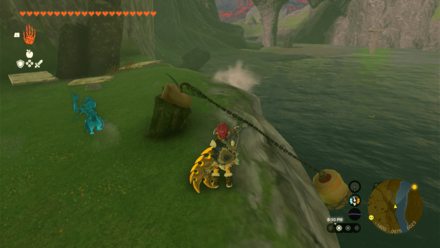
Start Coordinates -0786, 0553, 0081 Chase the moving sparkles and interact with it to reveal the Korok. |
 Enlarge EnlargeKorok Seed |
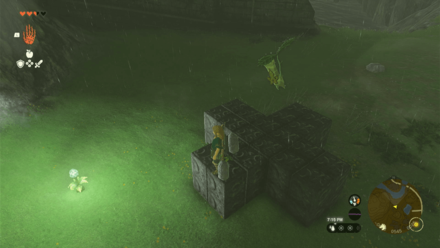
Start Coordinates -0666, 0545, 0025 Complete the cross pattern of the metal block to reveal the Korok. |
 Enlarge EnlargeKorok Seed |
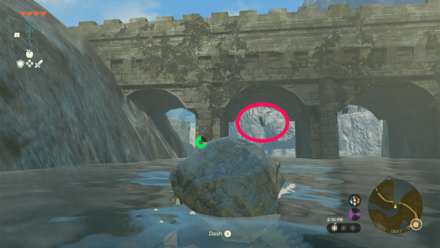
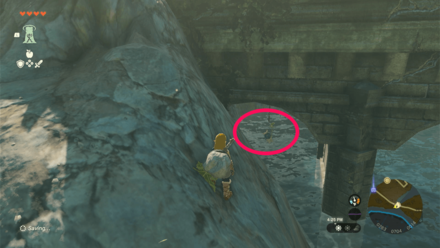
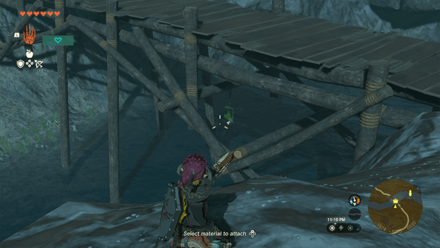
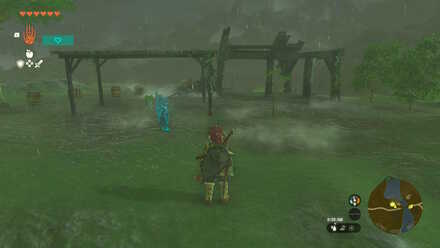
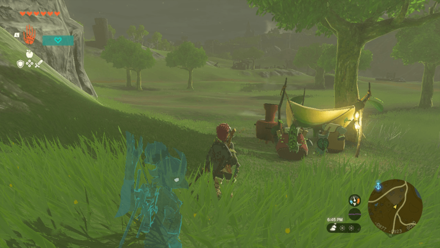
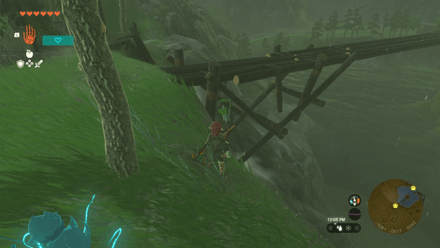
Start Coordinates -0617, 0663, 0008 Shoot the balloon underneath Moat Bridge to reveal the Korok. |
 Enlarge EnlargeKorok Seed |
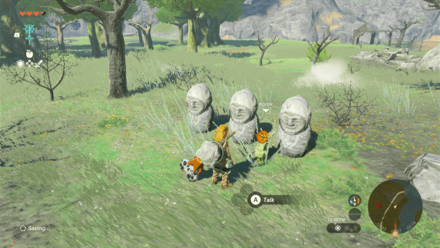
Start Coordinates -0680, 0857, 0014 Chase the moving sparkles circling around the three statues and interact with it to reveal the Korok. |
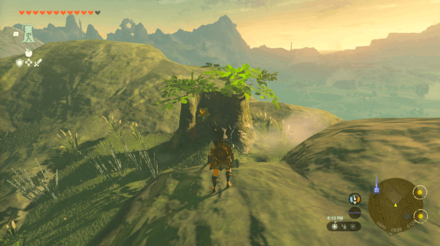
 Enlarge EnlargeKorok Seed |
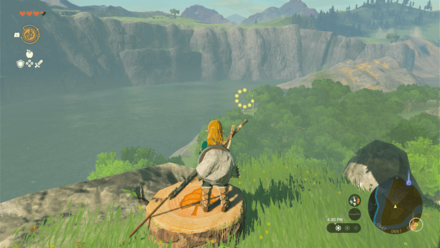
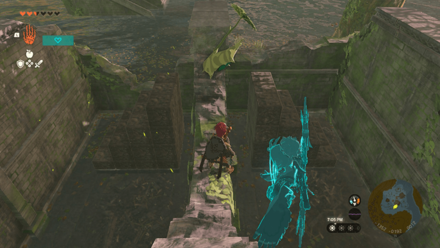
Start Coordinates -0947, 0681, 0055 End Coordinates -0942, 0819, 0027 Step on the tree stump and race towards the ring before time runs out. |
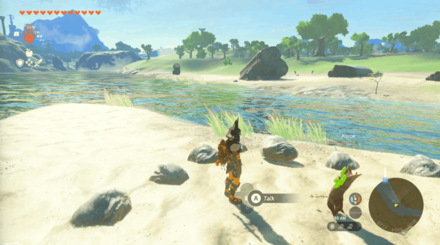
 Enlarge EnlargeKorok Seed x2 |
Start Coordinates -0777, 0936, 0017 End Coordinates -0751, 1068, 0045 Reunite the Korok with his friend across the river. Use the nearby raft to cross it. |
 Enlarge EnlargeKorok Seed |
Start Coordinates 0271, 0699, 0012 Shoot the acorn hanging below the bridge to reveal the Korok. |
 Enlarge EnlargeKorok Seed |
Start Coordinates 0188, 0896, 0026 Chase the moving sparkles circling around the fountain and interact with it to reveal the Korok. |
 Enlarge EnlargeKorok Seed |
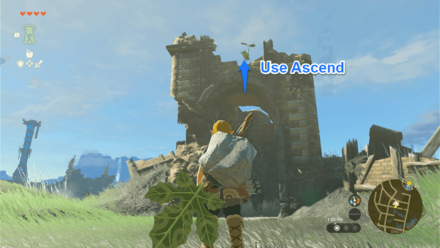
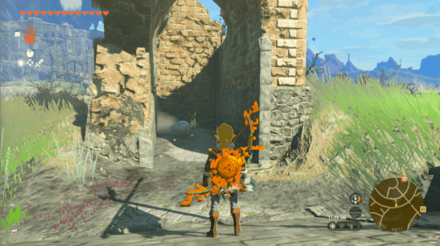
Start Coordinates -0086, 0401, 0036 Locate the Korok sign at the ruined building and use Ascend to pass through it. |
 Enlarge EnlargeKorok Seed |
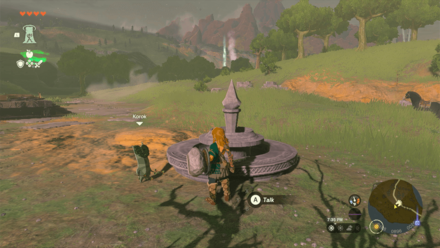
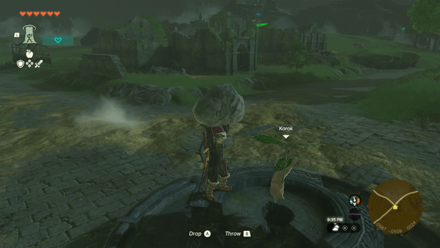
Video Guide Start Coordinates -0255, 0426, 0029 Pick up the lone rock on top of the ruined fountain in Central Square of Hyrule Castle Town Ruins. |
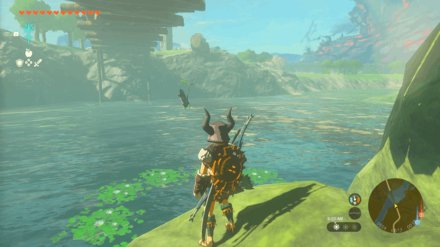
 Enlarge EnlargeKorok Seed |
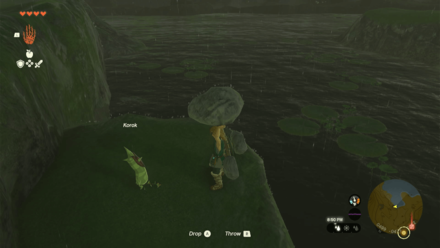
Start Coordinates -0280, 0607, 0007 Jump into the middle of the ring of water lilies near the bridge. |
 Enlarge EnlargeKorok Seed |
Start Coordinates -0435, 1114, 0024 Shoot the floating balloons by the hole in the prison cell. |
 Enlarge EnlargeKorok Seed |
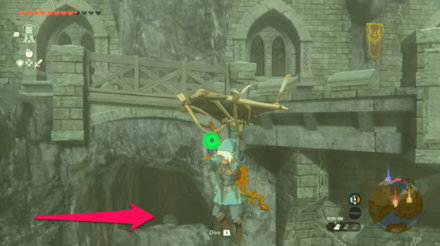
Start Coordinates -0296, 1121, 0007 Jump into the middle of the ring of water lilies by the entrance to the Docks of Hyrule Castle. Use Ascend on the cave ceiling, glide down, and dive into the ring. |
 Enlarge EnlargeKorok Seed |
Start Coordinates -0420, 0847, 0086 Chase the moving sparkles circling around the patch of grass and interact with it to reveal the Korok. |
 Enlarge EnlargeKorok Seed |
Start Coordinates -0272, 0751, 0130 Shoot the floating balloons around the statue with an arrow. |
 Enlarge EnlargeKorok Seed |
Start Coordinates 0132, 0596, 0027 Shoot the acorn at the end of the log to reveal the Korok. |
 Enlarge EnlargeKorok Seed |
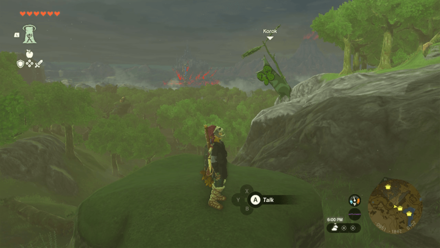
Start Coordinates -1334, 0536, 0085 Shoot the acorn hanging below the cliff to reveal the Korok. |
 Enlarge EnlargeKorok Seed |
Start Coordinates -1589, 0239, 0104 Use Ultrahand and Recall to make the wooden boards float in the air to reach the sparkle. |
 Enlarge EnlargeKorok Seed |
Video Guide Start Coordinates -0236, 0632, 0079 Pick up the lone rock hidden at the top of the broken tower of Hyrule Castle gate. |
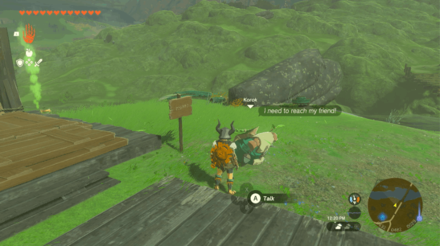
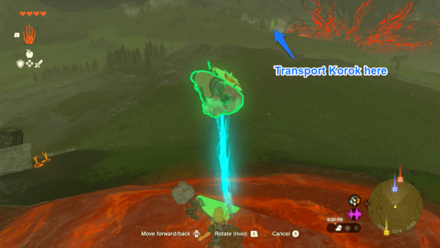 Enlarge EnlargeKorok Seed x2 |
Start Coordinates -1435, 1476, 0193 End Coordinates -0768, 1414, 0136 Reunite the Korok with his friend across the hill. |
 Enlarge EnlargeKorok Seed |
Start Coordinates -1226, 1578, 0150 Examine the sparkles at the top of the boulder near the small pond. |
 Enlarge EnlargeKorok Seed |
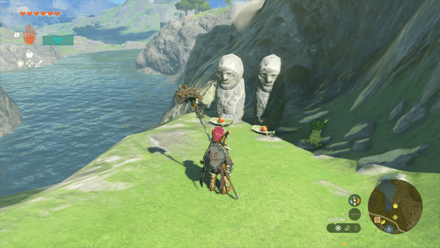
Start Coordinates -1073, 1280, 0122 Place an apple on the empty bowl in front of the prayer statue. |
 Enlarge EnlargeKorok Seed |
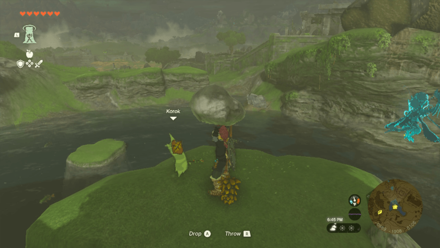
Start Coordinates -1162, 0658, 0062 Place the nearby boulder ontop of the wooden pedestal to reveal the Korok. |
 Enlarge EnlargeKorok Seed |
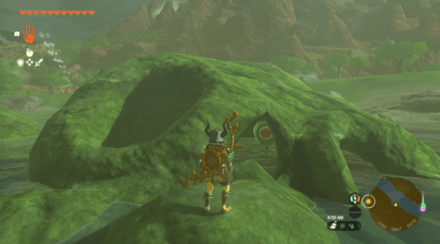
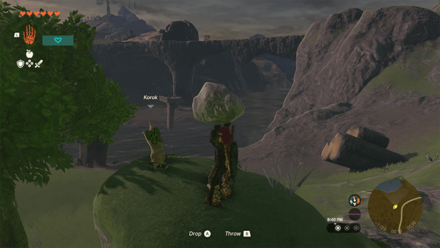
Start Coordinates -1288, 0898, 0099 Pick up the lone rock in the middle of the geoglyph to reveal the Korok. |
 Enlarge EnlargeKorok Seed |
Start Coordinates 0808, -0027, 0011 End Coordinates 0838, -0030, 0013 Step on the stump west of the river, then swim towards the ring on the other side before the timer ends. |
 Enlarge EnlargeKorok Seed |
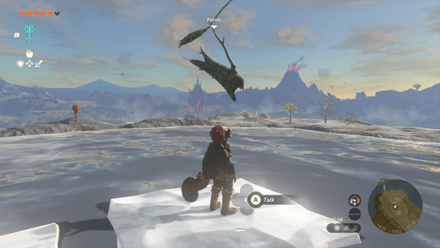
Start Coordinates -1173, 1654, 0082 End Coordinates -1201, -1691, 0083 Follow the disappearing yellow flowers around Hopper Pond until you reach the white flower. |
 Enlarge EnlargeKorok Seed |
Start Coordinates -1152, -1789, 0155 Chase the moving sparkles circling around the tree and interact with it to reveal the Korok. |
 Enlarge EnlargeKorok Seed |
Start Coordinates -0950, -1841, 0102 Enter the small cave below and ascend through the target to reveal the korok. |
 Enlarge EnlargeKorok Seed |
Start Coordinates -0889, -1908, 0106 Lift the lone rock on top of the hill in the middle of the lake. |
 Enlarge EnlargeKorok Seed |
Start Coordinates -0830, -1962, 0131 Ascend through the wooden platform to get up the tower, then shoot the balloon floating above with an arrow to reveal the korok. |
 Enlarge EnlargeKorok Seed |
Start Coordinates -0811, -1966, 0191 Examine the sparkles near the central tower's spire. |
 Enlarge EnlargeKorok Seed |
Start Coordinates -0472, -2038, 0072 Rotate the L-shaped block 90 degrees counterclockwise, then insert it in the middle layer. |
 Enlarge EnlargeKorok Seed |
Start Coordinates -1085, -2050, 0143 Chop down trees and make a bridge to reach the sparkles in the middle of the river. |
 Enlarge EnlargeKorok Seed x2 |
Start Coordinates -1128, -1970, 0144 End Coordinates -1178, -2087, 0144 Take the Korok to its friend on the other side of the river. Attach two fans on the nearby wooden planks and use it to cross the river. |
 Enlarge EnlargeKorok Seed |
Start Coordinates -0964, -1611, 0100 Climb on top of the giant tree bark. Stand near the pinwheel and shoot the three floating balloons circling around. |
 Enlarge EnlargeKorok Seed |
Start Coordinates -0951, -1720, 0095 Attach the log to the cork and throw it off the hill to pull the other cork out. |
 Enlarge EnlargeKorok Seed x2 |
Start Coordinates -0695, -1575, 0066 End Coordinates -1024, -1856, 0142 Take the Korok to its friend on a ridge near the Great Plateau. |
 Enlarge EnlargeKorok Seed |
Start Coordinates -0929, -2207, 0082 Jump down to the base of the cliff. There will be a small rock structure with a Korok target on the ceiling; ascend through it to reveal the Korok. |
 Enlarge EnlargeKorok Seed |
Start Coordinates -0886, -2273, 0014 Complete the metal block set to reveal the Korok. Copy the arrangement of the blocks on the other sides. |
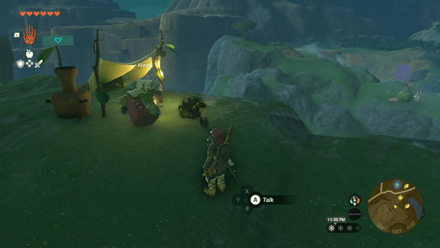
 Enlarge EnlargeKorok Seed |
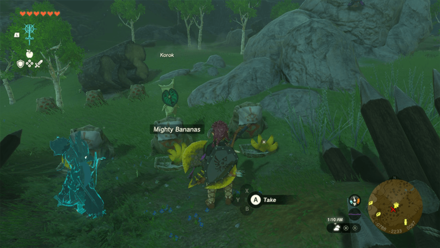
Start Coordinates -0789, -2231, 0087 Place three Mighty Bananas on the bowls in front of the prayer statues. You can get bananas from Yiga Clan members at their cabin nearby. |
 Enlarge EnlargeKorok Seed |
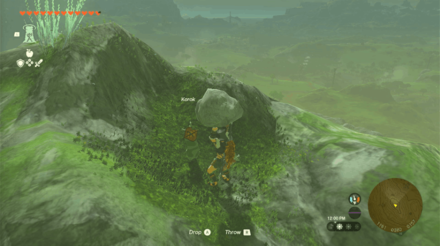
Start Coordinates -1293, -2214, 0311 Lift the lone rock at the highest peak of the mountain. |
 Enlarge EnlargeKorok Seed |
Start Coordinates -1432, -1952, 0218 Examine the sparkles in the middle of the pond. Use the nearby ice fruits to freeze and create ice platforms to reach it. |
 Enlarge EnlargeKorok Seed |
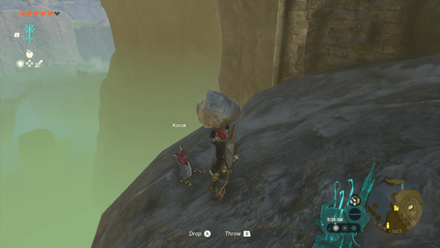
Start Coordinates -1515, -1923, 0133 Lift the lone rock on the edge of the cliff. |
 Enlarge EnlargeKorok Seed |
Start Coordinates -1702, -1706, -0037 Using the Ultrahand ability, plunge the cork deep into the water, then immediately let go to pull the cork out. |
 Enlarge EnlargeKorok Seed |
Start Coordinates -1691, -1602, -0017 Jump off the bridge and while mid-air, shoot the balloon under the bridge with an arrow to reveal the Korok. |
 Enlarge EnlargeKorok Seed |
Start Coordinates -1698, -1825, -0016 Lift the lone rock on a cliff underneath the bridge. |
 Enlarge EnlargeKorok Seed |
Start Coordinates -1517, -1508, 0042 Lift the lone rock on top of the tree. |
 Enlarge EnlargeKorok Seed |
Start Coordinates -1659, -1321, 0108 Place the missing wooden platform on the roof of the small shed. |
 Enlarge EnlargeKorok Seed |
Start Coordinates -1763, -1448, 0090 Insert the block in the top layer. The end result should look like a tower-shaped structure. |
 Enlarge EnlargeKorok Seed |
Start Coordinates -1770, -1243, 0010 Lift the lone rock on the small isle in the middle of the river. |
 Enlarge EnlargeKorok Seed |
Start Coordinates -1428, -1299, 0035 Shoot the acorn hiding inside the log. |
 Enlarge EnlargeKorok Seed |
Start Coordinates -1596, -1017, 0027 Shoot the acorn hanging underneath the bridge. |
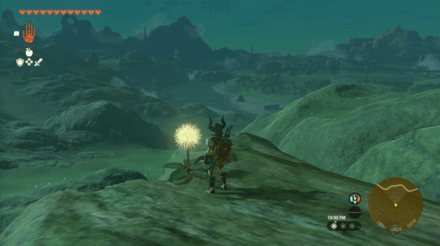
 Enlarge EnlargeKorok Seed |
Start Coordinates -1438, -0848, 0016 Hit the dandelion and interact with it before it lands on the ground. |
 Enlarge EnlargeKorok Seed x2 |
Start Coordinates -1547, -1001, 0028 End Coordinates -1320, -0571, 0011 Take the Korok to its friend over at the river near Mount Daphnes. |
 Enlarge EnlargeKorok Seed |
Start Coordinates -1343, -0690, 0010 Lift the lone rock hiding behind the large stone. |
 Enlarge EnlargeKorok Seed |
Start Coordinates -1318, -1258, 0033 Place an apple on the empty bowl in front of the prayer statue. |
 Enlarge EnlargeKorok Seed x2 |
Start Coordinates -1354, -1310, 0046 End Coordinates -1301, -1330, 0137 Attach a balloon and a flame emitter on the metal platform nearby then use it to ascend to the cliff where the friend of the Korok is camping out. |
 Enlarge EnlargeKorok Seed |
Start Coordinates -1054, -1328, 0066 Hit the dandelion and interact with it before it lands on the ground. |
 Enlarge EnlargeKorok Seed |
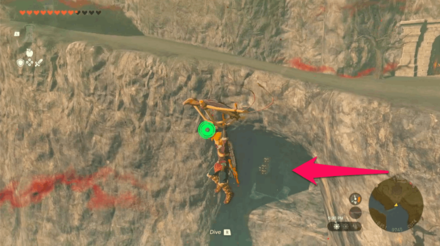
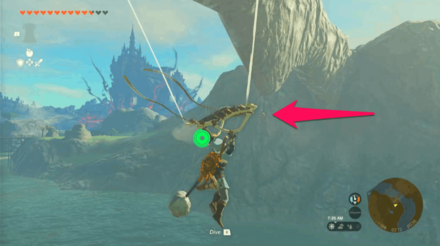
Start Coordinates -1149, -1011, 0011 Dive into the middle of the ring of water lilies in the water. |
 Enlarge EnlargeKorok Seed |
Start Coordinates -0683, -1844, 0094 End Coordinates -0668, -1783, 0076 Jump from the initial platform and glide towards the target platform. |
 Enlarge EnlargeKorok Seed |
Start Coordinates -0281, -1581, 0051 Stand by the pinwheel on top of the destroyed watchtower, and shoot the three floating balloons nearby. |
 Enlarge EnlargeKorok Seed x2 |
Start Coordinates -0456, -1647, 0019 End Coordinates -0510, -1695, 0065 Attach a balloon on one of the wooden platforms nearby. Use any flame source to lift the Korok up to its friend on top of the Great Plateau. |
 Enlarge EnlargeKorok Seed |
Start Coordinates -0612, -1526, 0073 Shoot the acorn hanging on the tree branch. |
 Enlarge EnlargeKorok Seed |
Start Coordinates 0003, -1892, 0101 End Coordinates 0002, -1900, 0108 Follow the disappearing yellow flowers around the ruins until you reach the white flower. |
 Enlarge EnlargeKorok Seed |
Start Coordinates -0230, -1915, 0042 Chase and examine the moving sparkles circling around the hill. |
 Enlarge EnlargeKorok Seed |
Start Coordinates -0206, -2205, 0020 Grab the missing wooden platform on top of the nearby tree and use it to repair the roof of the shelter. |
 Enlarge EnlargeKorok Seed |
Start Coordinates -0103, -2292, 0070 Pick up the lone rock on top of the entrance of the Bridge of Hylia. |
 Enlarge EnlargeKorok Seed |
Start Coordinates 0146, -1611, 0030 Pick up the lone rock on top of the bridge column. |
 Enlarge EnlargeKorok Seed |
Start Coordinates 0063, -1754, 0045 Place the nearby boulder ontop of the wooden pedestal to reveal the Korok. |
 Enlarge EnlargeKorok Seed |
Start Coordinates -0658, -1389, 0052 End Coordinates -0595, -1415, 0037 Jump on the platform on the rocky outcrop, then glide towards the ring before time runs out. |
 Enlarge EnlargeKorok Seed |
Start Coordinates -0598, -1077, 0036 Pick up the lone rock sitting on top of the tree. |
 Enlarge EnlargeKorok Seed |
Start Coordinates -0513, -1179, 0022 Pick up the rock on the shore; bring it to the isle where the pattern is and place it in the gap of the rock circle. |
 Enlarge EnlargeKorok Seed |
Start Coordinates -0665, -1221, 0027 Pick up the lone rock on the west side of the lake. |
 Enlarge EnlargeKorok Seed |
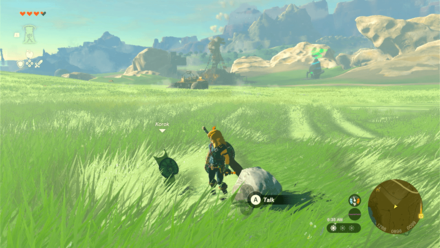
Start Coordinates 0223, -0889, 0065 Chase and examine the moving sparkles circling around the trees. |
 Enlarge EnlargeKorok Seed x2 |
Start Coordinates -0042, -1110, 0022 End Coordinates -0153, -1530, 0020 Reunite the Korok to its friend over at the northern area of the Kamizun Shrine. |
 Enlarge EnlargeKorok Seed |
Start Coordinates -0124, -0938, 0042 Hit the dandelion and interact with it before it lands on the ground. |
 Enlarge EnlargeKorok Seed |
Start Coordinates 0752, -0450, 0029 Pick up the lone rock on top of the tree. |
 Enlarge EnlargeKorok Seed |
Start Coordinates 0075, -0326, 0033 Remove the leaves and lift the rock hiding underneath it. |
 Enlarge EnlargeKorok Seed |
Start Coordinates 0290, -0246, 0027 Shoot the acorn hiding inside the log. |
 Enlarge EnlargeKorok Seed |
Start Coordinates 0616, -0075, 0053 Hit the dandelion and interact with it before it lands on the ground. |
 Enlarge EnlargeKorok Seed |
Start Coordinates 0762, 0010, 0031 There are two sheds here; grab the wooden platform sitting on top of the shed closest to the well, then insert it in the gap of the roof of the other shed. |
 Enlarge EnlargeKorok Seed |
Start Coordinates -0216, -0384, 0053 Pick up the lone rock sitting atop the rocky outcrop just south of the Hyrule Field Chasm. |
 Enlarge EnlargeKorok Seed |
Start Coordinates -0311, -0549, 0021 Shoot the acorn inside the bark of the tree. |
 Enlarge EnlargeKorok Seed |
Start Coordinates -0588, -0559, 0024 Pick up the lone rock sitting atop the fountain in the middle of the Hyrule Garrison Ruins. |
 Enlarge EnlargeKorok Seed |
Start Coordinates -0764, -0672, 0029 Lift the lone rock on top of the giant tree. |
 Enlarge EnlargeKorok Seed x2 |
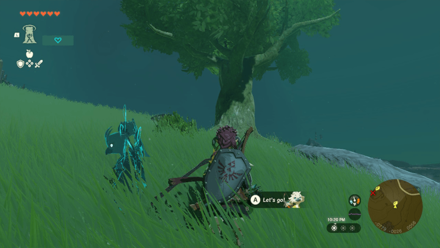
Start Coordinates -0779, -0499, 0017 End Coordinates -0881, -0929, 0019 Reunite the Korok to its friend across the valley. |
 Enlarge EnlargeKorok Seed |
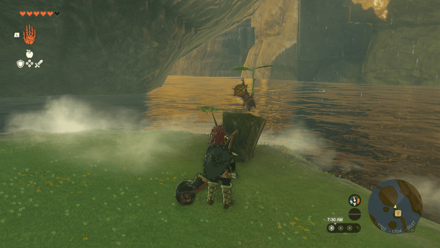
Start Coordinates 1098, 0847, 0010 Shoot the balloon hidden inside a giant, sunken skull by the river south of Woodland Stable. |
 Enlarge EnlargeKorok Seed |
Start Coordinates -1088, -0515, 0063 Shoot the acorn hanging under the bridge. |
 Enlarge EnlargeKorok Seed |
Start Coordinates -1109, -0420, 0062 End Coordinates -1144, -0383, 0037 Jump from the initial platform on top of the Ancient Tree and glide towards the target platform. |
 Enlarge EnlargeKorok Seed |
Start Coordinates -0666, 1190, 0069 Shoot the acorn inside the hollow of a tree by a cliff, southeast of Irch Plain. |
 Enlarge EnlargeKorok Seed |
Start Coordinates -1351, -0191, 0013 Copy the metal block on the right side of the ruins. |
 Enlarge EnlargeKorok Seed |
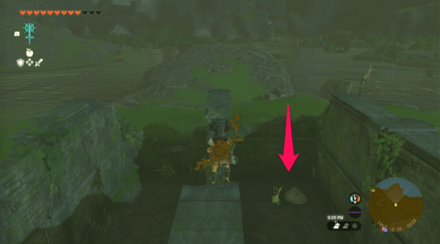
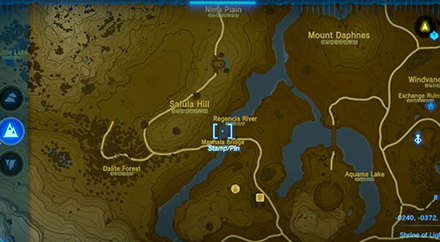
Start Coordinates -1129, 0018, 0038 Pick up the lone rock near the Regencia River. |
 Enlarge EnlargeKorok Seed |
Start Coordinates -0925, -0044, 0106 Fight your way through the encampment. Once you reach the prison cells, use ascend to get on top of the stone structure and lift the lone rock sitting atop of it. |
 Enlarge EnlargeKorok Seed |
Start Coordinates -0795, -0013, 0069 Shoot the target balloon hiding behind the leaves on top of the tree. |
 Enlarge EnlargeKorok Seed |
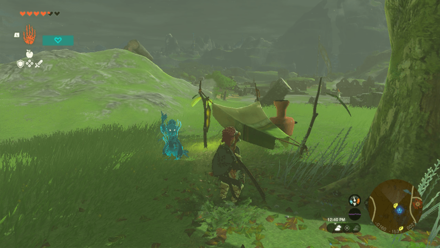
Start Coordinates -0426, -0148, 0029 Stand on the tree stump where the pinwheel is and shoot the five balloons hovering around the forest. |
 Enlarge EnlargeKorok Seed |
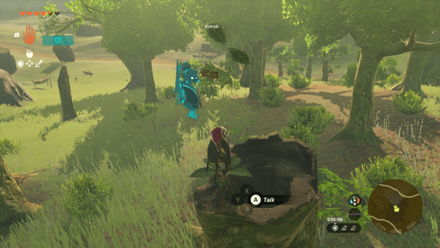
Start Coordinates -0945, 0348, 0035 Enter the small cave; look for the Korok target on the ceiling and ascend through it. |
 Enlarge EnlargeKorok Seed |
Start Coordinates -0526, 0188, 0062 End Coordinates -0430, 0248, 0037 Start on the hill to the west and follow the disappearing yellow flowers until you reach the white flower. |
 Enlarge EnlargeKorok Seed |
Start Coordinates 0347, 0492, 0041 End Coordinates 0381, 0465, 0053 Start on top of the ruins to the northwest and follow the yellow flowers until you reach the white flower to the southeast. |
 Enlarge EnlargeKorok Seed |
Start Coordinates 0967, 1025, 0010 Swim into the mouth of a sunken skull, south of Woodland Stable, and pick up the rock inside. |
 Enlarge EnlargeKorok Seed |
Start Coordinates 0841, 0694, 0128 End Coordinates 0841, 0786, 0117 Follow the yellow flowers southeast of Crenel Hills until you reach the white flower. |
 Enlarge EnlargeKorok Seed |
Start Coordinates 0546, 0511, 0008 Dive into the middle of the lily pads underneath Orsedd Bridge. |
 Enlarge EnlargeKorok Seed |
Start Coordinates 0617, 0752, 0077 Chase and examine the sparkles under a fallen, decayed tree in Crenel Hills. |
 Enlarge EnlargeKorok Seed |
Start Coordinates 0690, 0626, 0059 Hit the dandelion on top of the fallen tree and examine it before it hits the ground. |
 Enlarge EnlargeKorok Seed |
Start Coordinates 0974, 0674, 0083 End Coordinates 0952, 0636, 0091 Follow the yellow flowers along the row of tree stumps between Crenel Hills and Crenel Peak. |
 Enlarge EnlargeKorok Seed |
Start Coordinates 0919, 0410, 0081 Ascend through the stump inside a giant skull to the west of Crenel Peak. |
 Enlarge EnlargeKorok Seed |
Start Coordinates 1181, 0380, 0157 Burn the pile of leaves on top of Crenel Peak and pick up the rock hidden beneath. |
 Enlarge EnlargeKorok Seed |
Start Coordinates 1119, 0229, 0074 Hit the dandelion on the boulder by the western entrance of Crenel Peak Cave and catch it before it hits the ground. |
 Enlarge EnlargeKorok Seed |
Start Coordinates 1395, 0128, 0026 Burn the pile of leaves, southwest of Moor Garrison Ruins, and pick up the rock underneath. |
 Enlarge EnlargeKorok Seed |
Start Coordinates 0715, 0367, 0010 Pick up the nearby rock and place it in the gap to complete the rock square pattern. |
 Enlarge EnlargeKorok Seed x2 |
Start Coordinates 0433, 0484, 0029 End Coordinates 0433, 0594, 0009 Reunite the Korok found to the east of Yamiyo Shrine to its friend. |
 Enlarge EnlargeKorok Seed |
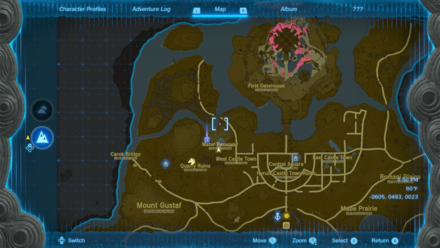
Start Coordinates -0343, 0783, 0052 Use ultrahand to complete the block pattern found below the road, south of the First Gatehouse. |
 Enlarge EnlargeKorok Seed |
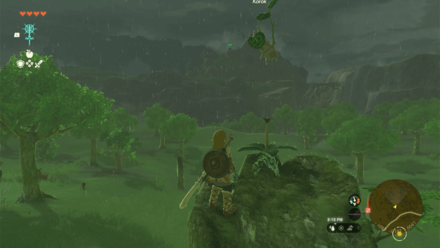
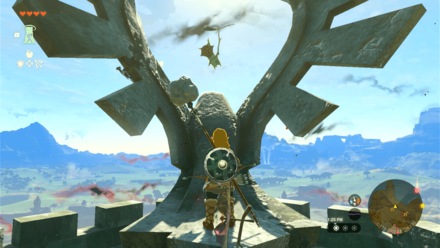
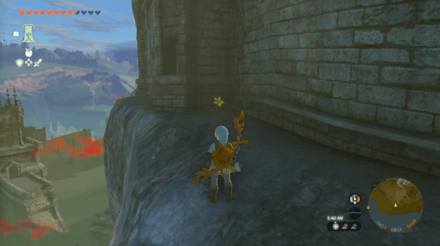
Start Coordinates -0351, 0830, 0180 Climb up the spire on top of the First Gatehouse in Hyrule Castle and examine the sparkles. |
 Enlarge EnlargeKorok Seed |
Start Coordinates -0466, 0851, 0100 End Coordinates -0430, 0888, 0116 Follow the yellow flowers starting from the cliff to the end of the wall, west of the First Gatehouse. |
 Enlarge EnlargeKorok Seed |
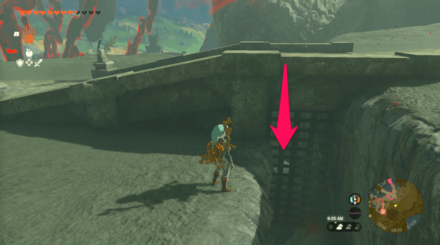
Start Coordinates -0292, 0837, 0105 Use Ultrahand to pick up the rock under the small bridge, east of the First Gatehouse. |
 Enlarge EnlargeKorok Seed |
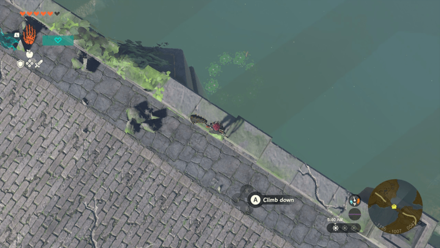
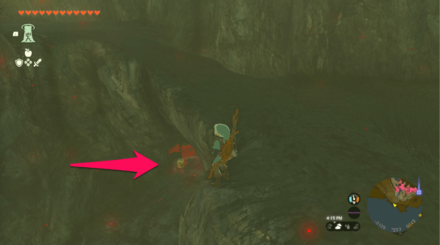
Start Coordinates -0127, 0812, 0096 Pick up the rock beneath a small bridge, outside the Dining Hall of Hyrule Castle. |
 Enlarge EnlargeKorok Seed |
Start Coordinates -0058, 0865, 0168 Pick up and use the nearby rock to complete the triangle pattern on top of the tower in Hyrule Castle. |
 Enlarge EnlargeKorok Seed |
Start Coordinates -0123, 1193, 0033 Shoot the acorn at the bottom of the dried up waterfall, northeast of Hyrule Castle. |
 Enlarge EnlargeKorok Seed |
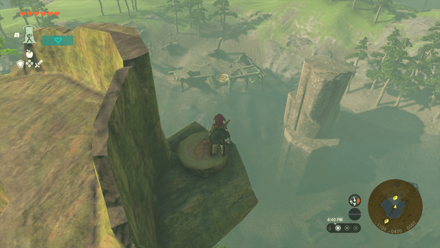
Start Coordinates -0302, 1123, 0090 End Coordinates -0285, 1124, 0075 Step on the stump on a cliff, northwest of Hyrule Castle, and glide down to the target without hitting the ground. |
 Enlarge EnlargeKorok Seed |
Start Coordinates -0255, 0944, 0305 Pick up the rock under the main bridge entering Hyrule Castle on the 1F level. |
 Enlarge EnlargeKorok Seed |
Start Coordinates -0360, 0889, 0277 Stand by the pinwheel on the southwest corner of the B1 level of Hyrule Castle and shoot the balloon. |
 Enlarge EnlargeKorok Seed |
Start Coordinates -0083, 0907, 0317 Shoot the balloon on top of the southeast tower of level 1F of Hyrule Castle. |
 Enlarge EnlargeKorok Seed |
Start Coordinates -0047, 0974, 0271 Use Ultrahand to complete the block pattern on the southeast cliff of level B2 of Hyrule Castle. |
 Enlarge EnlargeKorok Seed |
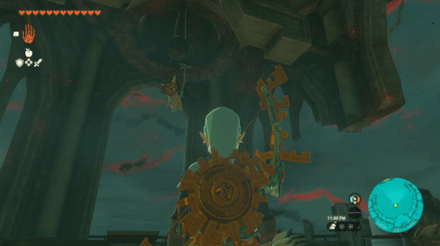
Start Coordinates -0254, 1065, 0465 Use Ultrahand and ring the bell in the tower above the Sanctum in Hyrule Castle. |
 Enlarge EnlargeKorok Seed |
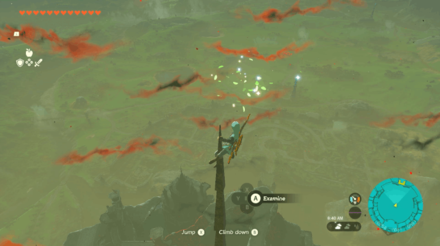
Start Coordinates -0254, 1061, 0561 Climb to the tallest spire in the middle of Hyrule Castle and examine the sparkles at the top. |
 Enlarge EnlargeKorok Seed |
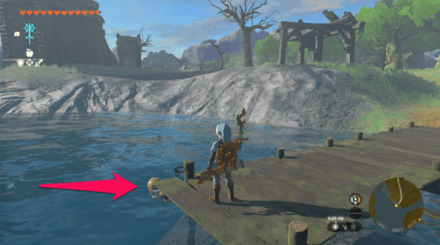
Start Coordinates -0669, 0962, 0010 Shoot the acorn by the small dock in the water, north of Castle Town Prison. |
 Enlarge EnlargeKorok Seed |
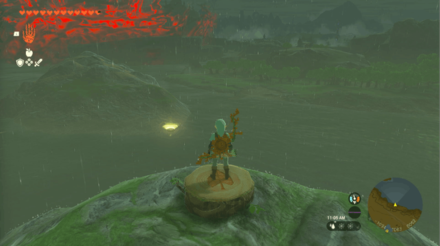
Start Coordinates -1034, 1083, 0062 End Coordinates -0893, 1039, 0010 Step on the stump on a cliff, east of Royal Ancient Lab Ruins, and glide to the target without touching the ground. |
 Enlarge EnlargeKorok Seed |
Start Coordinates -1016, 0567, 0010 Place the nearby rock in the gap to complete the rock circle, north of Carok Bridge. |
 Enlarge EnlargeKorok Seed |
Start Coordinates -0531, 0693, 0034 Pick up the rock on top of a broken section of wall, east of Moat Bridge. |
 Enlarge EnlargeKorok Seed |
Start Coordinates -0254, 0258, 0046 Pick up the rock on top of the gate leading into Hyrule Castle Town Ruins, in front of Lookout Landing. |
 Enlarge EnlargeKorok Seed |
Start Coordinates -0312, 0322, 0024 Burn the pile of leaves and pick up the rock beneath in a small, broken building, southwest of Hyrule Castle Town Ruins. |
 Enlarge EnlargeKorok Seed |
Start Coordinates -1148, 0223, 0010 Shoot the acorn hanging below the land bridge, west of Mount Gustaf. |
 Enlarge EnlargeKorok Seed |
Start Coordinates -1112, -0568, 0094 Place the nearby rock in the gap to complete the rock circle on top of Mount Daphnes. |
 Enlarge EnlargeKorok Seed |
Start Coordinates -1400, 0075, 0023 Pull the cork out to get the Korok Seed. Use the nearby materials as weight to pull it out. |
Korok Seed Map: All Korok Seed Locations
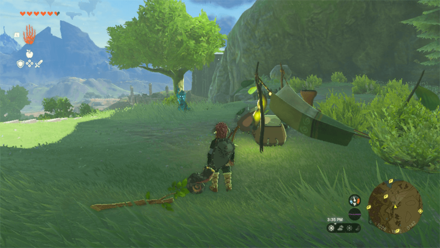
Hyrule Field Stables
All Stable Locations
| Overworld Location | Coordinates |
|---|---|
 Enlarge EnlargeWetland Stable |
0897, -0146, 0026 |
 Enlarge EnlargeOutskirt Stable |
-1434, -1265, 0032 |
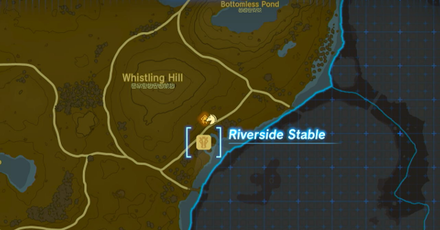 Enlarge EnlargeRiverside Stable |
0329, -1085, 0010 |
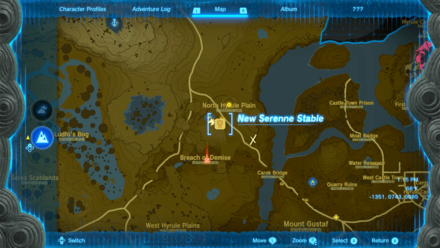 Enlarge EnlargeNew Serenne Stable |
-1351, 0743, 0085 |
All Mini Stable Locations
| Overworld Location | Coordinates |
|---|---|
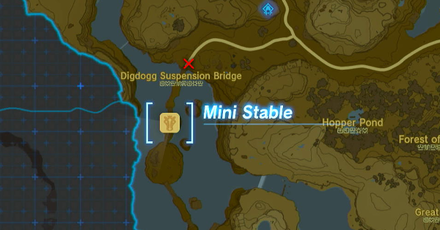 Enlarge EnlargeHyrule Field Mini Stable |
-1689, -1663, 0022 |
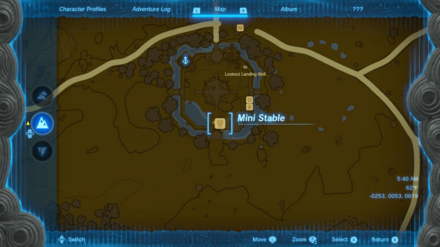 Enlarge EnlargeLookout Landing Mini Stable |
-0253, 0053, 0019 |
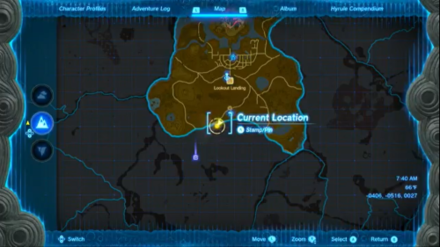
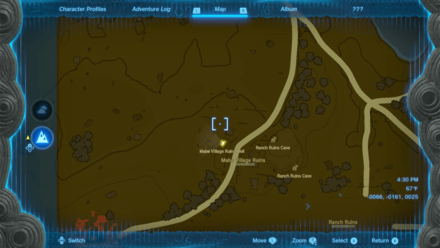
Hyrule Field Chasm Locations
Chasm Map Locations and Coordinates
| Location | Coordinates |
|---|---|
 Enlarge EnlargeHyrule Field Chasm |
-0251, -0292, -0479 |
 Enlarge EnlargeHyrule Castle Chasm |
-0275, 0970, -0065 |
 Enlarge EnlargeGreat Plateau North Chasm |
-0663, -1506, -0518 |
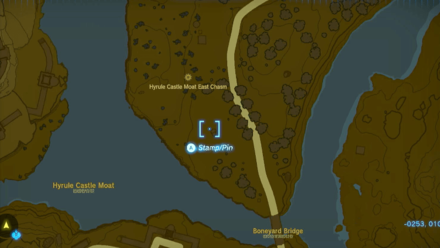 Enlarge EnlargeHyrule Castle Moat East Chasm |
0124, 0858, 0009 |
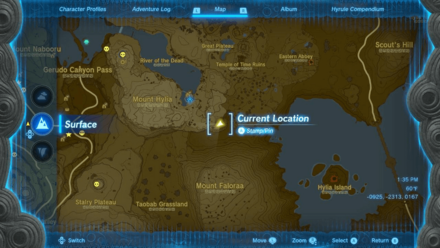 Enlarge EnlargeGreat Plateau South Chasm |
-0925, -2313, 0167 |
 Enlarge EnlargeGreat Plateau West Chasm |
-1441, -1987, 0231 |
 Enlarge EnlargeGreat Plateau East Chasm |
-0451, -1991, 0071 |
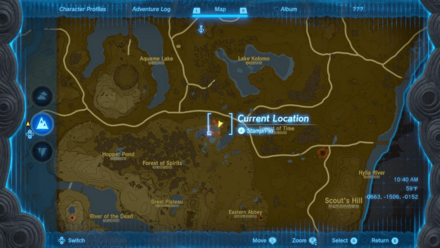
 Enlarge EnlargeForest of Time Chasm |
-0125, -1690, 0010 |
 Enlarge EnlargeMount Daphnes Chasm |
-1310, -0628, 0009 |
 Enlarge EnlargeHyrule Castle Moat West East Chasm |
-0905, 0668, 0015 |
Hyrule Field Quests
Main Quests
| Quest | Coordinates |
|---|---|
 Enlarge EnlargeRegional Phenomena |
-0252, 0153, 0026 |
 Enlarge EnlargeCamera Work in the Depths |
-0252, 0146, 0020 |
 Enlarge EnlargeA Mystery in the Depths |
-0255, 0138, 0019 |
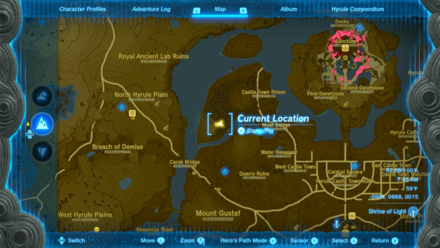
 Enlarge EnlargeFind the Fifth Sage |
-0253, 0153, 0026 |
Side Quests
| Quest | Coordinates |
|---|---|
 Enlarge EnlargeToday's Menu |
-0266, 0098, 0008 |
 Enlarge EnlargeThe Incomplete Stable |
-0245, 0060, 0019 |
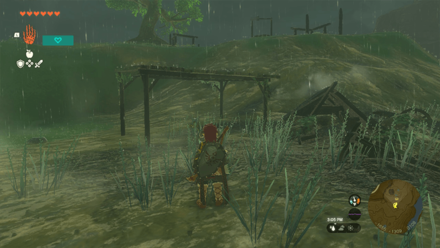
 Enlarge EnlargeFell Into a Well |
0780, 0007, 0016 |
|
Enlarge A Picture for New Serenne Stable |
-1360, 0727, 0086 |
 Enlarge EnlargeThe Treasure Hunters |
0600, 1283, 0047 |
 Enlarge EnlargeFeathered Fugitives |
0367, -1103, 0009 |
 Enlarge EnlargeA Picture for Outskirt Stable |
-1452, -1259, 0032 |
 Enlarge EnlargeA Picture for Riverside Stable |
0329, -1085, 0010 |
Side Adventures
| Quest | Coordinates |
|---|---|
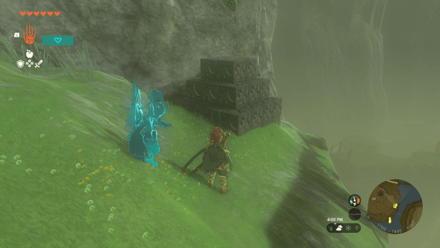
 Enlarge EnlargeBring Peace to Hyrule Field |
-0406, -0516, 0027 |
|
Enlarge Hestu's Concern |
-0226, 0059, 0018 |
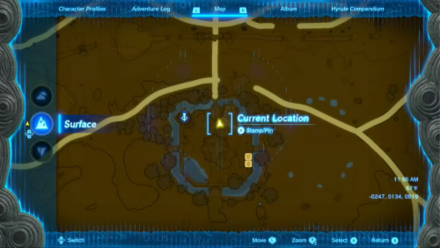 Enlarge EnlargeHateno Village Research Lab |
-0247, 0134, 0019 |
 Enlarge EnlargeWho Goes There? |
-0257, 0107, 0008 |
 Enlarge EnlargeA Deal With the Statue |
-0236, 0157, 0004 |
 Enlarge EnlargeSerenade to Kaysa |
-1406, -1262, 0032 |
 Enlarge EnlargeThe Beckoning Woman |
-1410, -1295, 0032 |
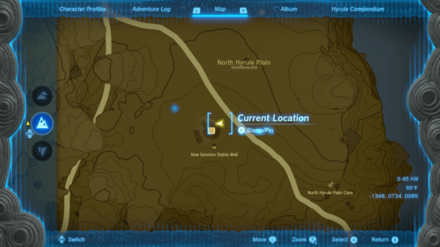 Enlarge EnlargeThe Beast and the Princess |
-1348, 0734, 0085 |
 Enlarge EnlargeGourmets Gone Missing |
0387, -1043, 0016 |
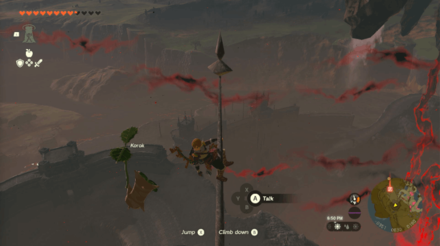
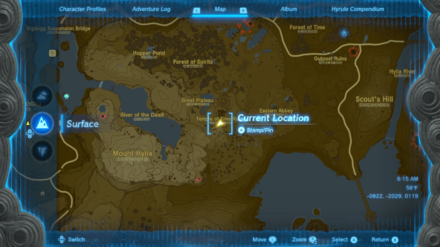 Enlarge EnlargeA Call from the Depths |
-822, -2026, 0119 |
 Enlarge EnlargeMessages from an Ancient Era |
-0273, 0065, 0018 |
Hyrule Field Settlements
All Towns and Settlement Locations
| Overworld Location | Coordinates |
|---|---|
 Enlarge EnlargeEmergency Shelter |
-0255, 0094, 0008 |
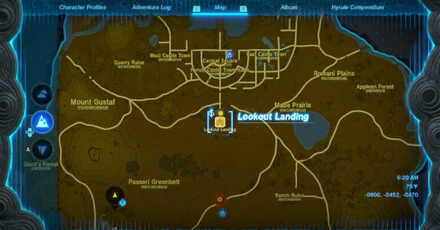
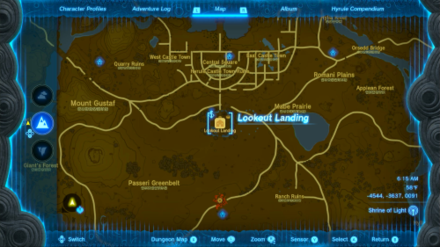
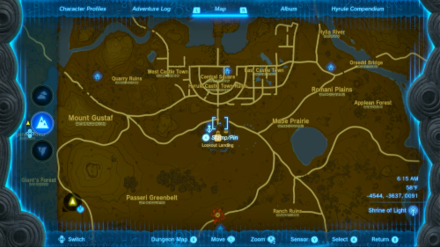
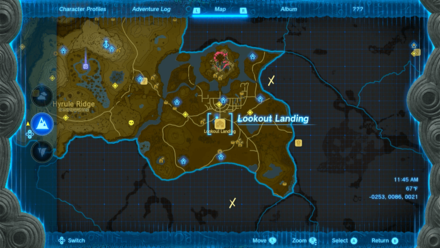 Enlarge EnlargeLookout Landing |
-0253, 0086, 0021 |
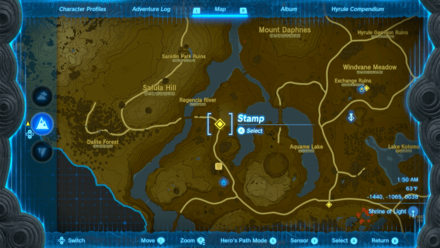
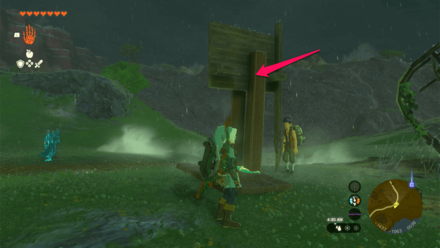
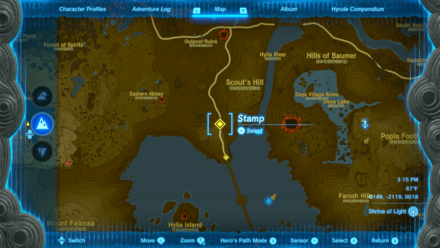
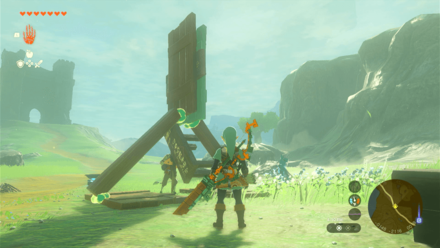
Hyrule Field Hudson Signs
Addison Sign Locations
| Location | Solution |
|---|---|
 Enlarge Enlarge |
 Enlarge Enlarge |
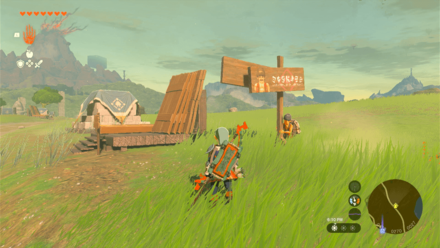
| Coordinates: -0758, 0238, 0018 Solution: Use the nearby wooden boards to make a double-decked wagon for the Hudson sign to lean on. |
|
 Enlarge Enlarge |
 Enlarge Enlarge |
| Coordinates: 0181, 0269, 0027 Solution: Use the nearby wooden board and planks as a makeshift stand. Place the plank between the Hudson sign. |
|
 Enlarge Enlarge |
 Enlarge Enlarge |
| Coordinates: -0681, -0863, 0041 Solution: Cut the trees and use the logs to make a scaffolding for the Hudson sign to lean on. |
|
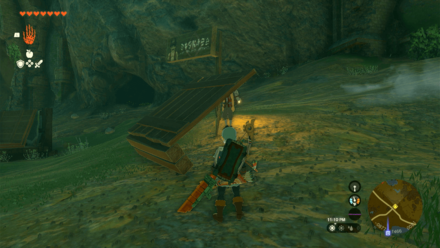
 Enlarge Enlarge |
 Enlarge Enlarge |
| Coordinates: -0875, -1467, 0021 Solution: Use the L-shaped wooden board as a makeshift ramp for the Hudson sign to lean on. |
|
 Enlarge Enlarge |
 Enlarge Enlarge |
| Coordinates: -1440, -1065, 0038 Solution: Use the wooden board and planks and build a makeshift stand for the Hudson sign. Place the planks between the Hudson board; use the wooden frame behind the Hudson board to secure one of the planks. |
|
 Enlarge Enlarge |
 Enlarge Enlarge |
| Coordinates: -0149, -2119, 0018 Solution: Use the wooden boards and planks to build a makeshift support for the Hudson sign. |
|
 Enlarge Enlarge |
 Enlarge Enlarge |
| Coordinates: 0669, 0006, 0005 Solution: Use the wooden beams nearby to make a pedestal and insert it at the chipped part of the Hudson board. |
|
 Enlarge Enlarge |
 Enlarge Enlarge |
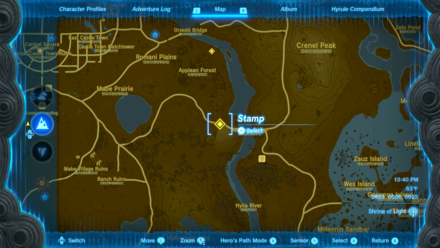
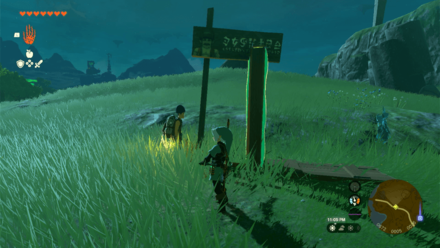
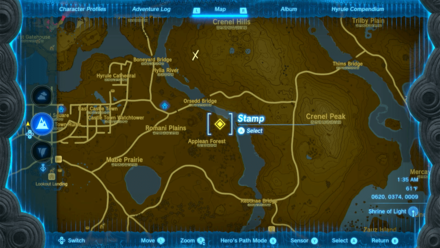
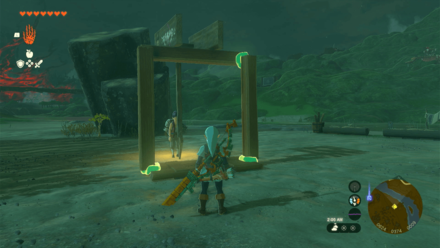
| Coordinates: 0620, 0374, 0009 Solution: Use the wooden beams and boards nearby to make a frame for the Hudson board to lean on. |
|
 Enlarge Enlarge |
 Enlarge Enlarge |
| Coordinates: -0267, 0381, 0021 Solution: Use the nearby wooden beams and planks to make a triangular frame for the Hudson board to lean on. |
|
 Enlarge Enlarge |
 Enlarge Enlarge |
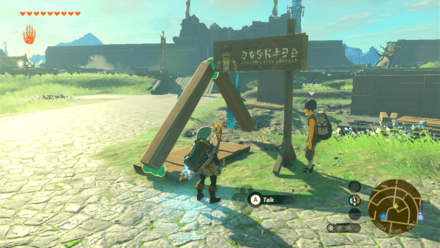
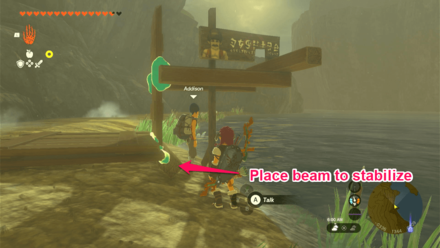
| Coordinates: -0334, 1344, 0009 Solution: Use the wooden boards and planks to make a frame that will hold that Hudson board. Place a beam under the base of the frame to stabilize it. |
|
All Hudson Sign Locations: How to Help Addison's Signs Stand
Hyrule Field Points of Interest
Cave Locations and Coordinates
| Overworld Location | Coordinates |
|---|---|
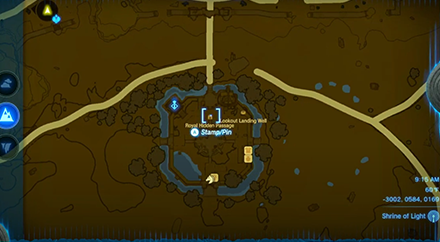 Enlarge EnlargeRoyal Hidden Passage |
-0254, 0137, 0008 |
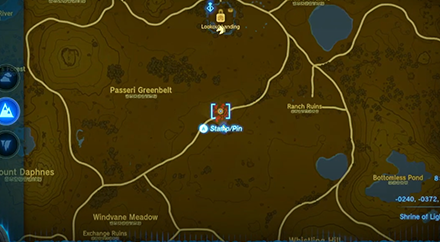
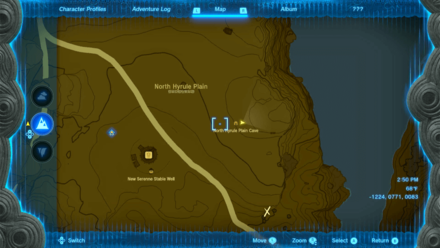 Enlarge EnlargeNorth Hyrule Plain Cave |
-1189, 0645, 0072 |
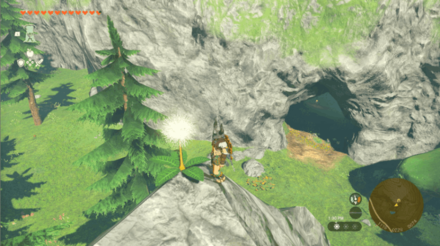
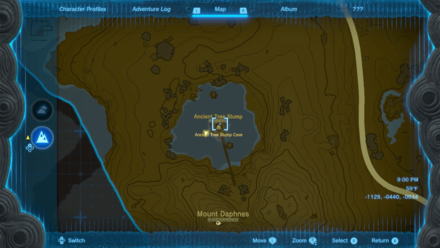 Enlarge EnlargeAncient Tree Stump Cave |
-1129, -0440, -0034 |
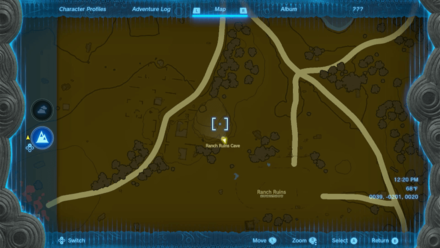 Enlarge EnlargeRanch Ruins Cave |
0039, -0201, 0020 |
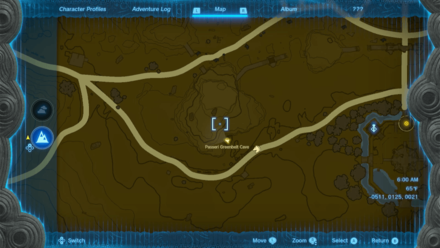 Enlarge EnlargePasseri Greenbelt Cave |
-0511, 0125, 0021 |
 Enlarge EnlargeWhistling Hill Cave |
-0077, -1043, 0019 |
 Enlarge EnlargeCrenel Peak Cave |
1150, 0252, 0058 |
 Enlarge EnlargeRebonae Bridge Cave |
0849, 0032, 0016 |
 Enlarge EnlargeCrenel Hills Cave |
0503, 0732, 0042 |
 Enlarge EnlargeRiver of the Dead Waterfall Cave |
-1092, -2163, 0143 |
 Enlarge EnlargeGreat Plateau Foothill Cave |
-0831, -1493, 0027 |
 Enlarge EnlargeShrine of Resurrection |
-1063, -1831, 0143 |
 Enlarge EnlargeSage Temple Cave |
-1404, -0256, -0018 |
 Enlarge EnlargeColiseum Ruins Cave |
-1164, -1299, 0035 |
Well Locations and Coordinates
| Overworld Location | Coordinates |
|---|---|
 Enlarge EnlargeLookout Landing Well |
-0213, 0133, 0019 |
 Enlarge EnlargeMabe Village Ruins Well |
-0066, -0161, 0025 |
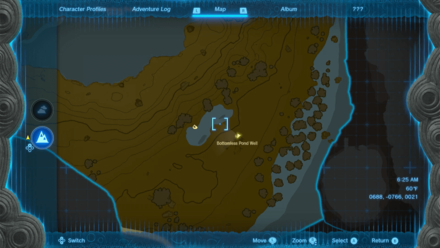 Enlarge EnlargeBottomless Pond Well |
0688, -0766, 0021 |
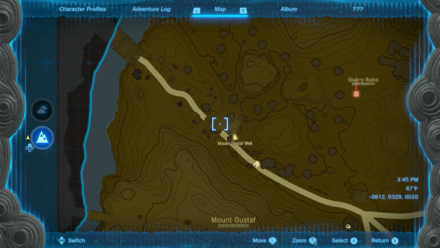 Enlarge EnlargeMount Gustaf Well |
-0912, 0329, 0020 |
 Enlarge EnlargeOutskirt Stable Well |
-1459, -1295, 0033 |
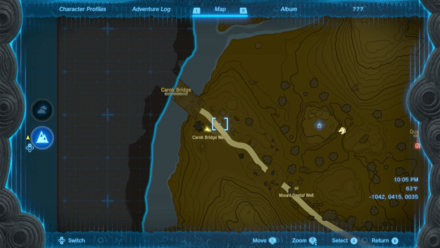 Enlarge EnlargeCarok Bridge Well |
-1042, 0415, 0035 |
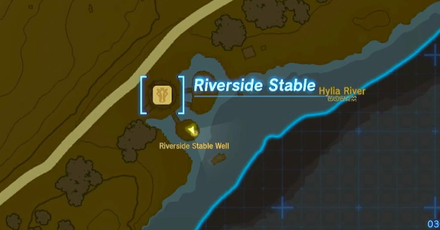 Enlarge EnlargeRiverside Stable Well |
0363, -1124, 0009 |
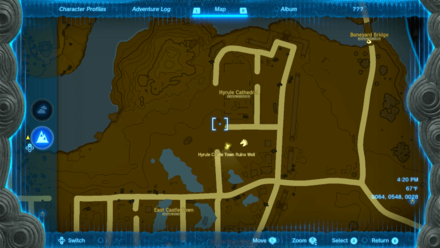 Enlarge EnlargeHyrule Castle Town Ruins Well |
0064, 0548, 0028 |
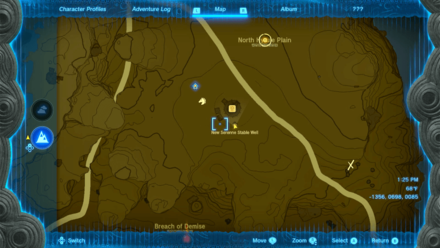 Enlarge EnlargeNew Serenne Stable Well |
-1356, 0698, 0085 |
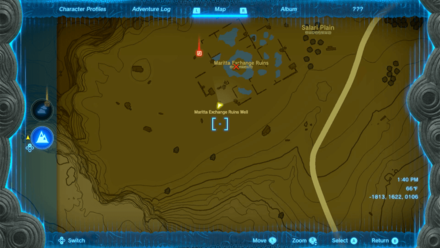 Enlarge EnlargeMaritta Exchange Ruins Well |
-1813, 1622, 0106 |
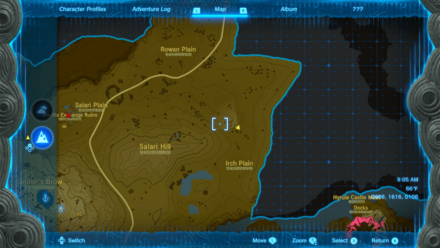 Enlarge EnlargeIrch Plain Well |
-0906, 1616, 0106 |
 Enlarge EnlargeRebonae Bridge Well |
0785, 0009, 0031 |
 Enlarge EnlargeElma Knolls Well |
-0669, 1353, 0088 |
 Enlarge EnlargeMount Daphnes Well |
-1316, -0622, 0009 |
 Enlarge EnlargeAquame Lake Well |
-0877, -1101, 0021 |
 Enlarge EnlargeOutskirt Hill Well |
-1679, -1348, 0123 |
Notable Map Locations
| Overworld Location | Coordinates |
|---|---|
 Enlarge EnlargeExchange Ruins |
-0735, -0899, 0069 |
 Enlarge EnlargeManhala Bridge |
-1579, -1014, 0029 |
 Enlarge EnlargeGreat Plateau |
-0805, -2256, 0087 |
 Enlarge EnlargePrincess Zelda's Study |
-0383, 0996, 0314 |
 Enlarge EnlargeKing's Study |
-0173, 1119, 0214 |
 Enlarge EnlargeSecond Gatehouse |
-0153, 0894, 0283 |
 Enlarge EnlargeLibrary |
-0137, 1052, 0229 |
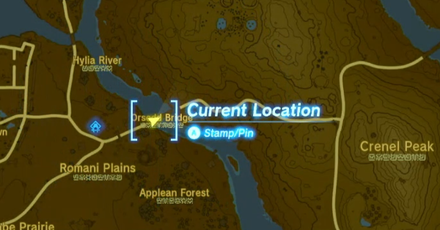 Enlarge EnlargeOrsedd Bridge |
0488, 0482, 0028 |
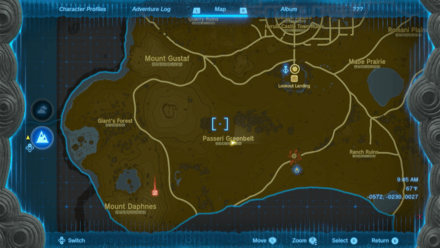 Enlarge EnlargePasseri Greenbelt |
-0572, -0230, 0027 |
 Enlarge EnlargeGiant's Forest |
-1191, -0111, 0033 |
 Enlarge EnlargeMount Daphnes |
-1105, -0566, 0096 |
 Enlarge EnlargeAncient Tree Stump |
-1108, -0440, 0065 |
 Enlarge EnlargeRanch Ruins |
0147, -0244, 0022 |
 Enlarge EnlargeMabe Village Ruins |
-0055, -0198, 0023 |
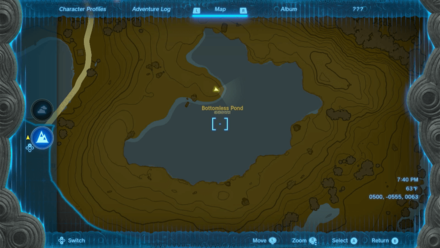 Enlarge EnlargeBottomless Pond |
0500, -0555, 0063 |
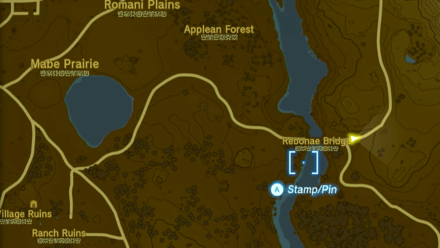 Enlarge EnlargeRebonae Bridge |
0801, -0021, 0024 |
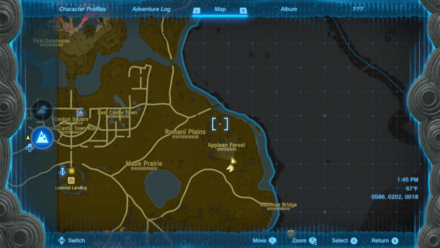 Enlarge EnlargeApplean Forest |
0568, 0249, 0018 |
 Enlarge EnlargeRomani Plains |
0340, 0324, 0028 |
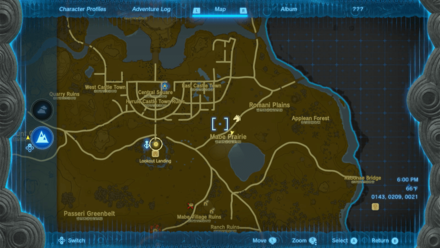 Enlarge EnlargeMabe Prairie |
0143, 0209, 0021 |
 Enlarge EnlargeMount Gustaf |
-0916, 0206, 0094 |
 Enlarge EnlargeCarok Bridge |
-1051, 0443, 0035 |
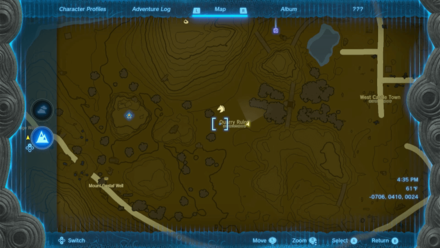 Enlarge EnlargeQuarry Ruins |
-0706, 0410, 0024 |
 Enlarge EnlargeWater Reservoir |
-0605, 0493, 0023 |
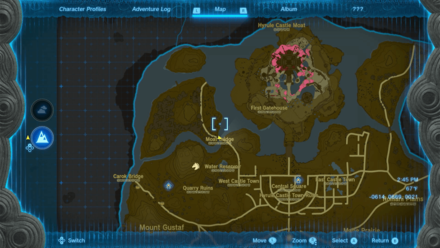 Enlarge EnlargeMoat Bridge |
-0614, 0669, 0021 |
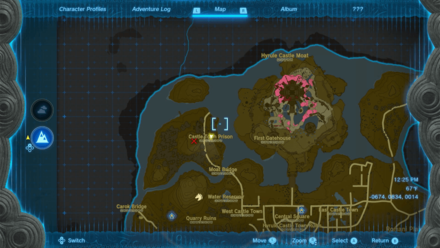 Enlarge EnlargeCastle Town Prison |
-0674, 0834, 0014 |
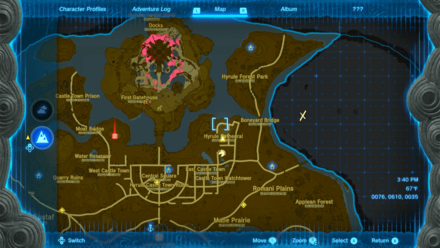
 Enlarge EnlargeBoneyard Bridge |
0268, 0710, 0021 |
 Enlarge EnlargeHyrule Forest Park |
0181, 0948, 0027 |
 Enlarge EnlargeEast Castle Town |
0000, 0449, 0027 |
 Enlarge EnlargeAquame Bridge |
-1127, -0986, 0048 |
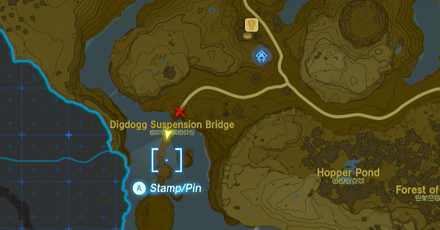 Enlarge EnlargeDigdogg Suspension Bridge |
-1656, -1523, 0031 |
 Enlarge EnlargeCentral Square |
-0263, 0415, 0023 |
 Enlarge EnlargeWest Castle Town |
-0513, 0454, 0027 |
 Enlarge EnlargeHyrule Castle Town Ruins |
-0253, 0365, 0021 |
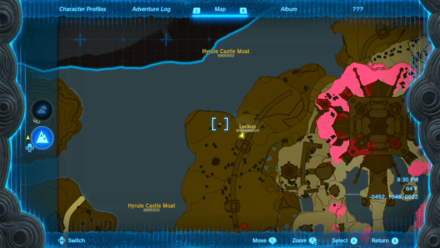
 Enlarge EnlargeHyrule Castle Moat |
-0337, 0634, 0009 |
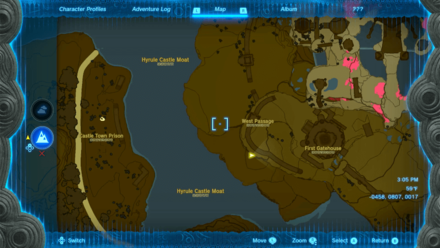 Enlarge EnlargeWest Passage |
-0458, 0807, 0017 |
 Enlarge EnlargeLockup |
-0452, 1048, 0022 |
 Enlarge EnlargeGerudo Canyon Pass |
-1656, -2026, -0014 |
 Enlarge EnlargeDocks |
-0238, 1174, 0012 |
 Enlarge EnlargeDining Hall |
-0119, 0841, 0104 |
 Enlarge EnlargeObservation Room |
-0254, 0780, 0097 |
 Enlarge EnlargeGuard's Chamber |
-0356, 0816, 0074 |
 Enlarge EnlargeCastle Town Watchtower |
0089, 0423, 0033 |
 Enlarge EnlargeHyrule Cathedral |
0076, 0610, 0035 |
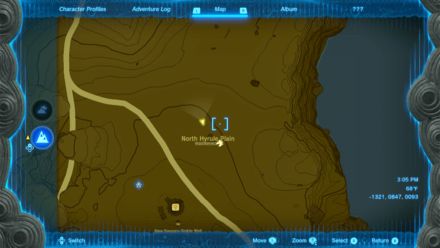 Enlarge EnlargeNorth Hyrule Plain |
-1319, 0821, 0092 |
 Enlarge EnlargeBreach of Demise |
-14664, 0559, 0026 |
 Enlarge EnlargeWest Hyrule Plains |
-1595, 0221, 0105 |
 Enlarge EnlargeHelmhead Bridge |
0395, 1160, 0018 |
 Enlarge EnlargeMaritta Exchange Ruins |
-1777, 1682, 0106 |
 Enlarge EnlargeSalari Plain |
-1699, 1730, 0106 |
 Enlarge EnlargeIrch Plain |
-0948, 1454, 0107 |
 Enlarge EnlargeSalari Hill |
-1226, 1525, 0166 |
 Enlarge EnlargeRoyal Ancient Lab Ruins |
-1312, 1010, 0102 |
The Legend of Zelda: Tears of the Kingdom Related Guides

Interactive Map of Hyrule:
All Locations and Map Icons
All Area Maps and Locations
| Hyrule Map Locations | |||||
|---|---|---|---|---|---|
Other Maps
List of Surface Regions
Comment
Author

The Legend of Zelda: Tears of the Kingdom Walkthrough & Guides Wiki
Hyrule Field Region Map: Korok Seed Locations, Shrines, and Quests
Please participate in our site
improvement survey
03/2026
improvement survey
03/2026
Would you assist in
improving Game8's site?
improving Game8's site?

×
We are listening to our users' valuable opinions and discussing how to act on them.
The information collected through this survey will be used for the purpose of improving our services. In addition, the information will only be disclosed a part of a statistic in a format that will not allow identification of personal information.
Begin Survey
Not Now
×
Please rate each item regarding Game8.co's Advertisements.
Amount of Ads
Very Dissatisfied
Somewhat Dissatisfied
Fine
Somewhat Satisfied
Highly Satisfied
Placement of Ads
Timing of Ad Display
Ad Loading Speed
Safeness of Ads
Content of Ads
×
Please rate each item regarding Game8.co's Quality of Articles.
Amount of information
Very Dissatisfied
Somewhat Dissatisfied
Fine
Somewhat Satisfied
Highly Satisfied
Frequency of updates
Speed of new information
Accuracy of articles
Understandibility of articles
Readability of sentences
×
Please rate each item regarding Game8.co's Usability of the Site.
Ease of finding information
Very Dissatisfied
Somewhat Dissatisfied
Fine
Somewhat Satisfied
Highly Satisfied
Loading Speed
Use of Color
Font Size
Visibility of Images
Easy to Understand Layout
×
Please rate each item regarding Game8.co's Message Boards, Comments.
Ease of Writing
Very Dissatisfied
Somewhat Dissatisfied
Fine
Somewhat Satisfied
Highly Satisfied
Readability
Ease in Finding Information
Comment Quality
Comment Quantity
Admin Response
×
Please rate each item regarding Game8.co's Site's new design.
Please rate our site's new design
Very Dissatisfied
Somewhat Dissatisfied
Fine
Somewhat Satisfied
Highly Satisfied
Do you think that the website's design change makes the site easier to use?
Has the new design made it easier for you to find information on the site?
Has the new design improved the overall visual appeal of the site?
How would you rate your overall satisfaction with the new design of the site?
×
How likely are you to recommend Game8 to someone you know?
Very Unlikely
0
1
2
3
4
5
6
7
8
9
10
Very Likely
If you have other opinions regarding potential improvement to the website, please share them with us. We would appreciate your honest opinion.
Note: This is a free response section, so you can proceed without entering anything.
Note: Please be sure not to enter any kind of personal information into your response.
Note: Please be sure not to enter any kind of personal information into your response.
×
Thank You
×
Thank you for participating in our survey! Your answers will help us to improve the quality of our website and services.
We hope you continue to make use of Game8.
We hope you continue to make use of Game8.
Close
Rankings
- We could not find the message board you were looking for.
Gaming News


Popular Games

Genshin Impact Walkthrough & Guides Wiki
Honkai: Star Rail Walkthrough & Guides Wiki
Umamusume: Pretty Derby Walkthrough & Guides Wiki
Pokemon Pokopia Walkthrough & Guides Wiki
Resident Evil Requiem (RE9) Walkthrough & Guides Wiki
Monster Hunter Wilds Walkthrough & Guides Wiki
Wuthering Waves Walkthrough & Guides Wiki
Arknights: Endfield Walkthrough & Guides Wiki
Pokemon FireRed and LeafGreen (FRLG) Walkthrough & Guides Wiki
Pokemon TCG Pocket (PTCGP) Strategies & Guides Wiki


Recommended Games
Diablo 4: Vessel of Hatred Walkthrough & Guides Wiki
Fire Emblem Heroes (FEH) Walkthrough & Guides Wiki
Yu-Gi-Oh! Master Duel Walkthrough & Guides Wiki
Super Smash Bros. Ultimate Walkthrough & Guides Wiki
Pokemon Brilliant Diamond and Shining Pearl (BDSP) Walkthrough & Guides Wiki
Elden Ring Shadow of the Erdtree Walkthrough & Guides Wiki
Monster Hunter World Walkthrough & Guides Wiki
The Legend of Zelda: Tears of the Kingdom Walkthrough & Guides Wiki
Persona 3 Reload Walkthrough & Guides Wiki
Cyberpunk 2077: Ultimate Edition Walkthrough & Guides Wiki


All rights reserved
© Nintendo. The Legend of Zelda and Nintendo Switch are trademarks of Nintendo.
The copyrights of videos of games used in our content and other intellectual property rights belong to the provider of the game.
The contents we provide on this site were created personally by members of the Game8 editorial department.
We refuse the right to reuse or repost content taken without our permission such as data or images to other sites.