Who Finds the Haven Walkthrough and How to Unlock
▲ Get Pristine Weapons from the depths!
△ All 1000 Koroks | All 4 Great Fairies
▲ 81 Addison Signs | 147 Caves | 58 Wells
△ Tips: Farm Rupees | Starting Armor
▲ Best Weapons | Best Armor | Best Food

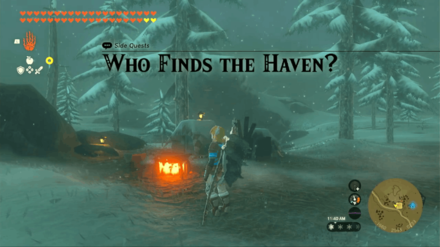
Who Finds the Haven is a Side Quest in The Legend of Zelda: Tears of the Kingdom (TotK) that can be found in Snowfield Stable. Read on to learn how to unlock Who Finds the Haven, its location and rewards, walkthrough, as well as how to complete it.
List of Contents
How to Unlock Who Finds the Haven
Complete The Captured Tent Quest

Who Finds the Haven can only be unlocked after completing The Captured Tent quest. Nat and Meghyn will tell you about a mushroom haven and will need help looking for it around Hebra.
Who Finds the Haven Location and Rewards
Hebra Mountains - Snowfield Stable

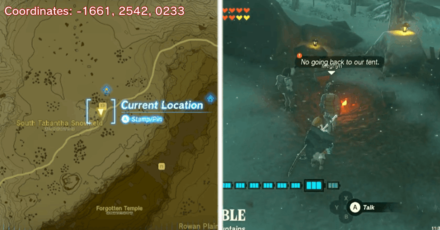
Who Finds the Haven quest can be found by the cooking pot at Snowfield Stable, which is in the Hebra Mountains region.
The exact coordinates for this quest on the map are -1661, 2542, 0233.
Rewards
| Rewards |
|---|
| ・Access to a room filled with Mushrooms |
Who Finds the Haven Walkthrough Guide
Complete The Captured Tent

The quest starts immediately after completing The Captured Tent, where Nat and Meghyn will tell you about a mushroom haven in Hebra that they want to find.
Go to Sturnida Springs Cave

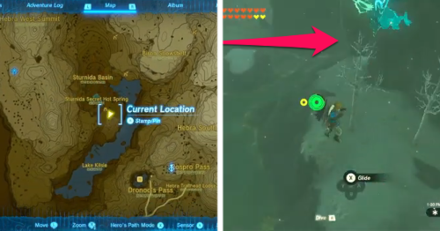
The clue given to you points to a cave in Sturnida Springs. Go there by using the Rospro Pass Skyview Tower and glide to the area. Look for Sturnida Springs Cave that is connected to the east of the springs at -4015, 2644, 0013.
Go Deeper into the Cave

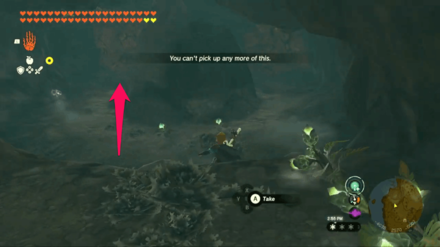
Upon entering the cave, you will see Nat and Meghyn talk about the haven being hidden deeper in the cave. They will split up after this cutscene. Go deeper into the cave through the tunnel behind the large rock in the middle.
Destroy the First Wall of Rocks

Once you enter the tunnel at the end of the first room of the cave, there will be a wall of rocks to the left just before you see Nat. Destroy that wall of rocks and enter the newly opened passageway.
Destroy the Rocks to the Left

At the end of the new passageway, there will be two walls of rocks this time. Destroy the rocks to the left and enter.
Destroy the Rocks Behind the Bubbulfrog

There should be a Bubbulfrog inside the new passageway. Destroy the rocks behind the Bubbulfrog and enter that to go to the next room.
Move the Boulder and Enter the Small Tunnel

In the new room, there will be a large boulder on the left side. Move it using Ultrahand and crouch to enter the small tunnel hidden behind it.
Find the Mushroom Haven

Crawl until the end of the small tunnel and you will find a glowing, hidden room full of mushrooms. Nat and Meghyn will enter right after you. Though you don't get any quest rewards, the two sisters let you keep all the mushrooms inside.
The Legend of Zelda: Tears of the Kingdom Related Guides

List of All Walkthroughs
| All Quest Types | ||
|---|---|---|
 Main Quests Main Quests |
 Side Quests Side Quests |
 Side Adventures Side Adventures |
List of All Side Quests
Comment
Author
The Legend of Zelda: Tears of the Kingdom Walkthrough & Guides Wiki
Who Finds the Haven Walkthrough and How to Unlock
improvement survey
03/2026
improving Game8's site?

Your answers will help us to improve our website.
Note: Please be sure not to enter any kind of personal information into your response.

We hope you continue to make use of Game8.
Rankings
- We could not find the message board you were looking for.
Gaming News
Popular Games

Genshin Impact Walkthrough & Guides Wiki

Honkai: Star Rail Walkthrough & Guides Wiki

Umamusume: Pretty Derby Walkthrough & Guides Wiki

Pokemon Pokopia Walkthrough & Guides Wiki

Resident Evil Requiem (RE9) Walkthrough & Guides Wiki

Monster Hunter Wilds Walkthrough & Guides Wiki

Wuthering Waves Walkthrough & Guides Wiki

Arknights: Endfield Walkthrough & Guides Wiki

Pokemon FireRed and LeafGreen (FRLG) Walkthrough & Guides Wiki

Pokemon TCG Pocket (PTCGP) Strategies & Guides Wiki
Recommended Games

Fire Emblem Heroes (FEH) Walkthrough & Guides Wiki

Diablo 4: Vessel of Hatred Walkthrough & Guides Wiki

Yu-Gi-Oh! Master Duel Walkthrough & Guides Wiki

Super Smash Bros. Ultimate Walkthrough & Guides Wiki

Pokemon Brilliant Diamond and Shining Pearl (BDSP) Walkthrough & Guides Wiki

Elden Ring Shadow of the Erdtree Walkthrough & Guides Wiki

Monster Hunter World Walkthrough & Guides Wiki

The Legend of Zelda: Tears of the Kingdom Walkthrough & Guides Wiki

Persona 3 Reload Walkthrough & Guides Wiki

Cyberpunk 2077: Ultimate Edition Walkthrough & Guides Wiki
All rights reserved
© Nintendo. The Legend of Zelda and Nintendo Switch are trademarks of Nintendo.
The copyrights of videos of games used in our content and other intellectual property rights belong to the provider of the game.
The contents we provide on this site were created personally by members of the Game8 editorial department.
We refuse the right to reuse or repost content taken without our permission such as data or images to other sites.


![Slay the Spire 2 Review [Early Access] | Still the Deckbuilder to Beat](https://img.game8.co/4433115/44e19e1fb0b4755466b9e516ec7ffb1e.png/thumb)

![Resident Evil Village Review [Switch 2] | Almost Flawless Port](https://img.game8.co/4432790/e1859f64830960ce4248d898f8cd38d9.jpeg/thumb)


