Lost in the Dunes Walkthrough and How to Unlock
▲ Get Pristine Weapons from the depths!
△ All 1000 Koroks | All 4 Great Fairies
▲ 81 Addison Signs | 147 Caves | 58 Wells
△ Tips: Farm Rupees | Starting Armor
▲ Best Weapons | Best Armor | Best Food
Lost in the Dunes is a Side Quest in The Legend of Zelda: Tears of the Kingdom (TotK) that can be found in Kara Kara Bazaar. Read on to learn how to unlock Lost in the Dunes, its location and rewards, walkthrough, as well as how to complete it.
List of Contents
How to Unlock Lost in the Dunes
Speak with Banja in Kara Kara Bazaar
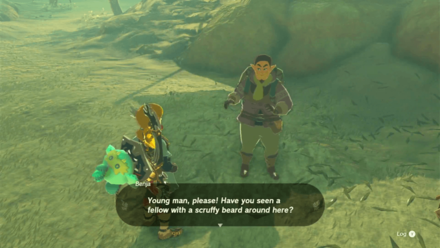
Benja's group seems to be in a bind because a member of their caravan squad, Ponthos, went missing. Interact with them to trigger the side quest.
Lost in the Dunes Location and Rewards
Gerudo Desert - Kara Kara Bazaar
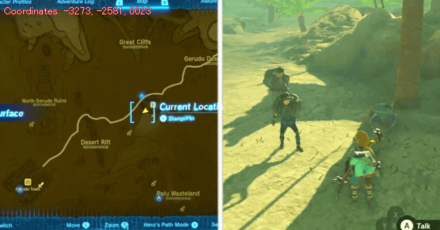
The exact coordinates for this quest on the map are -3273, -2581, 0023.
Rewards
| Rewards |
|---|
| ・An Orb related to The Mysterious Eighth side quest |
Lost in the Dunes Walkthrough Guide
| A Bottled Cry for Help Walkthrough Guide |
|---|
Go to the Location Banja Mentioned

Banja mentioned that they think Ponthos fell into a sinkhole after running out through the west entrance of Kara Kara Bazaar. Head in the same direction until you see a potential location.
XYZ Coordinates: -3356, -2965, 0021
Dive Down the Sinkhole
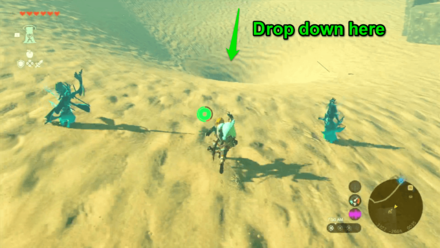
Enter the sinkhole and see where it will lead you.
Talk to Ponthos
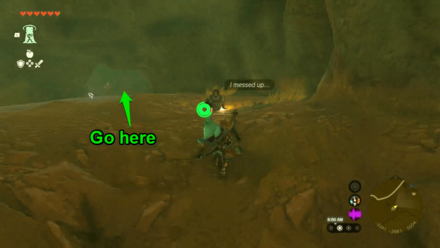
After jumping down the sinkhole, you will discover the Oasis Source and find Ponthos sitting nearby. Head further into the cave after talking with him.
Destroy the Breakable Rocks
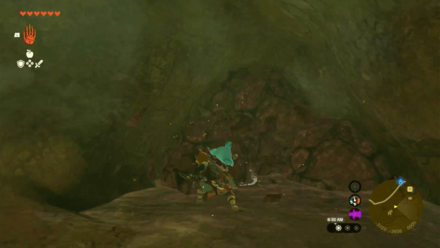
Help Ponthos find a way out by destroying the breakable rocks hindering the path.
XYZ Coordinates: -3320, -2656, 0005
Break More Rocks

After destroying the first set of breakable rocks, you will find two more blocking your path. Break the ones on the left to head deeper into the cave.
XYZ Coordinates: -3329, -2648, 0004
Destroy the Blue Breakable Rocks
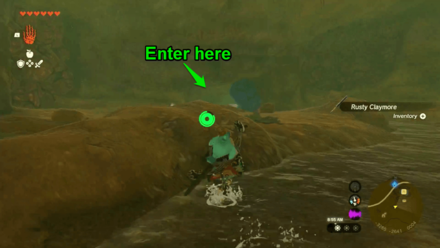
After destroying the second set of breakable rocks, you will find yourself inside a larger tunnel. Aim for the blue breakable rocks infront of you to discover the cave exit.
XYZ Coordinates: -3263, -2631, 0004
Head Towards the Exit
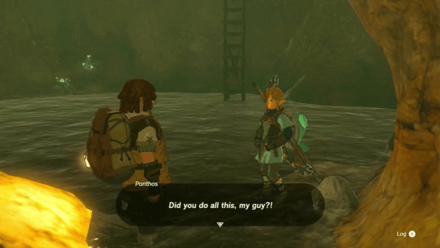
Behind the blue breakable rocks is a ladder leading out of the cave. Head there to prompt a new dialogue with Ponthos.
Return to the Caravan Squad
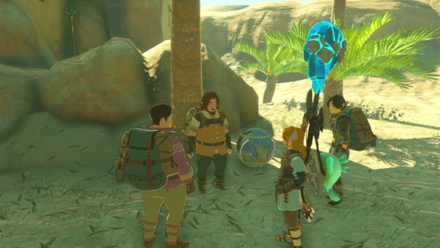
Talk to Banja once again to receive your reward for helping Ponthos get out of the cave. You will receive an orb which is tied to The Mysterious Eighth side quest.
The Legend of Zelda: Tears of the Kingdom Related Guides

List of All Walkthroughs
| All Quest Types | ||
|---|---|---|
 Main Quests Main Quests |
 Side Quests Side Quests |
 Side Adventures Side Adventures |
List of All Side Quests
Comment
Author
The Legend of Zelda: Tears of the Kingdom Walkthrough & Guides Wiki
Lost in the Dunes Walkthrough and How to Unlock
improvement survey
03/2026
improving Game8's site?

Your answers will help us to improve our website.
Note: Please be sure not to enter any kind of personal information into your response.

We hope you continue to make use of Game8.
Rankings
- We could not find the message board you were looking for.
Gaming News
Popular Games

Genshin Impact Walkthrough & Guides Wiki

Honkai: Star Rail Walkthrough & Guides Wiki

Umamusume: Pretty Derby Walkthrough & Guides Wiki

Pokemon Pokopia Walkthrough & Guides Wiki

Resident Evil Requiem (RE9) Walkthrough & Guides Wiki

Monster Hunter Wilds Walkthrough & Guides Wiki

Wuthering Waves Walkthrough & Guides Wiki

Arknights: Endfield Walkthrough & Guides Wiki

Pokemon FireRed and LeafGreen (FRLG) Walkthrough & Guides Wiki

Pokemon TCG Pocket (PTCGP) Strategies & Guides Wiki
Recommended Games

Diablo 4: Vessel of Hatred Walkthrough & Guides Wiki

Fire Emblem Heroes (FEH) Walkthrough & Guides Wiki

Yu-Gi-Oh! Master Duel Walkthrough & Guides Wiki

Super Smash Bros. Ultimate Walkthrough & Guides Wiki

Pokemon Brilliant Diamond and Shining Pearl (BDSP) Walkthrough & Guides Wiki

Elden Ring Shadow of the Erdtree Walkthrough & Guides Wiki

Monster Hunter World Walkthrough & Guides Wiki

The Legend of Zelda: Tears of the Kingdom Walkthrough & Guides Wiki

Persona 3 Reload Walkthrough & Guides Wiki

Cyberpunk 2077: Ultimate Edition Walkthrough & Guides Wiki
All rights reserved
© Nintendo. The Legend of Zelda and Nintendo Switch are trademarks of Nintendo.
The copyrights of videos of games used in our content and other intellectual property rights belong to the provider of the game.
The contents we provide on this site were created personally by members of the Game8 editorial department.
We refuse the right to reuse or repost content taken without our permission such as data or images to other sites.


![Monster Hunter Stories 3 Review [First Impressions] | Simply Rejuvenating](https://img.game8.co/4438641/2a31b7702bd70e78ec8efd24661dacda.jpeg/thumb)


