The Lomei Labyrinth Island Prophecy Walkthrough and How to Unlock
▲ Get Pristine Weapons from the depths!
△ All 1000 Koroks | All 4 Great Fairies
▲ 81 Addison Signs | 147 Caves | 58 Wells
△ Tips: Farm Rupees | Starting Armor
▲ Best Weapons | Best Armor | Best Food
The Lomei Labyrinth Island Prophecy is a Side Quest in The Legend of Zelda: Tears of the Kingdom (TotK) that can be found in Lomei Labyrinth Island. Read on to learn how to unlock The Lomei Labyrinth Island Prophecy, its location and rewards, walkthrough, as well as how to complete it.
| All Lomei Labyrinth Island Guides | ||
|---|---|---|
| Lomei Labyrinth Island Prophecy | Igashuk Shrine | Mogisari Shrine |
List of Contents
How to Unlock The Lomei Labyrinth Island Prophecy
Activate the Lomei Labyrinth Island Terminal
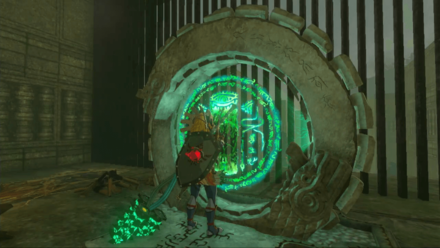
Reach the deepest part of the Lomei Labyrinth Island. There you will find the Igashuk Shrine and the labyrinth terminal. Interact with terminal to start the side quest.
The Lomei Labyrinth Island Prophecy Location and Rewards
Akkala Sea - Lomei Labyrinth Island

The exact coordinates for this quest on the map are 4655, 3682, 0129.
Rewards
| Rewards |
|---|
| ・Evil Spirit Armor |
The Lomei Labyrinth Island Prophecy Walkthrough Guide
| How to Complete The North Lomei Prophecy |
|---|
Lomei Labyrinth Island
| How to Complete The South Lomei Prophecy |
|---|
Go to Ulri Mountain Skyview Tower
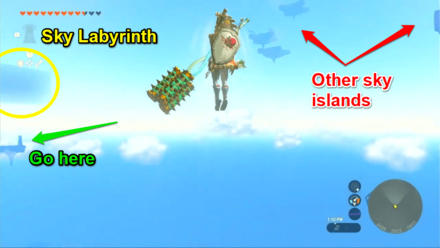
Travel to the Ulri Mountain Skyview Tower and use it to lift yourself into the sky. In front of you, you will see the Lomei Sky Labyrinth in the distance. It is quite far from the skyview tower so you will need to drop down to the nearby sky islands.
Ideally, you would want to directly go to the sky island closest to the sky labyrinth, which is on the North Akkala Sky Archipelago; however, if you haven't increased your Stamina or upgraded your Energy Cell, you will find other sky islands to your right. Proceed there first and make your way towards the sky labyrinth.
XYZ Coordinates: 4257, 3115, 0784
Build an Aircraft
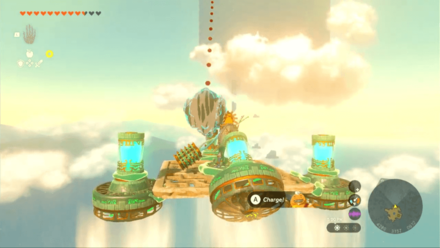
Create an aircraft to reach the Lomei Sky Labyrinth. You can also make use of the premade aircraft on the sky islands. Be sure to attach as many Zonai Batteries as you can for the journey since the sky labyrinth is far away.
Unlock the Mogisari Shrine

You will find the Mogisari Shrine near the entrance of the Lomei Sky Labyrinth. Make sure to activate the shrine since this will be used later on.
XYZ Coordinates: 4656, 3500, 1010
Place a Pin on the Lomei Labyrinth Island
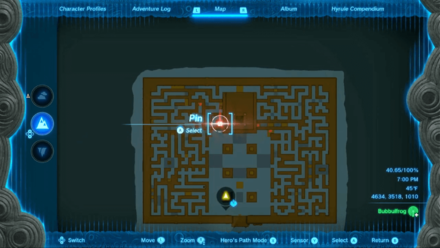
Mark a location on the middle left side of the surface labyrinth. It will serve as your point of entry to easily reach the labyrinth terminal and trigger the side quest.
Dive Down the Lomei Island Labyrinth
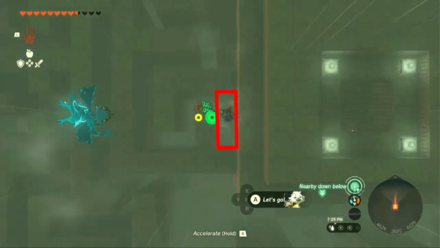
Using the pinned location as a guide, dive down to the surface labyrinth. Enter through a rectangular hole near the middle. Once you're down there, climb the wall on the right to see a staircase leading to the deepest part of the labyrinth.
XYZ Coordinates: 4627, 3690, 0151
Climb the Staircase
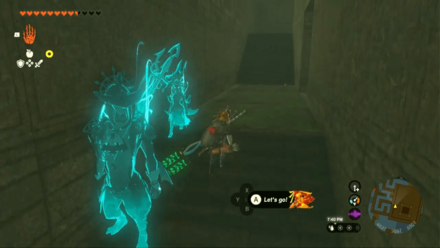
Continue going up the staircase and you will reach the deepest part of the labyrinth.
XYZ Coordinates: 4637, 3688, 0099
Unlock the Igashuk Shrine
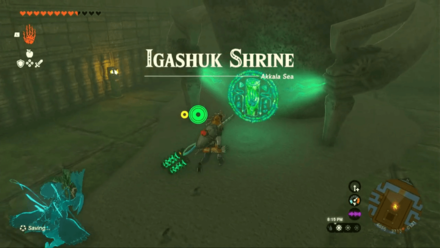
Make sure to activate the Igashuk Shrine and come back to complete it later on.
XYZ Coordinates: 4655, 3714, 0131
Interact with the Lomei Labyrinth Island Terminal
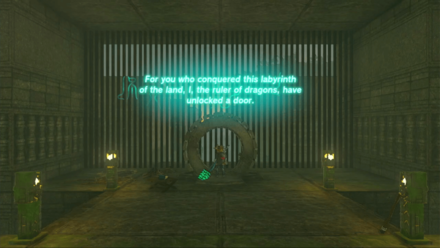
In front of the Igashuk Shrine, you will see the labyrinth terminal. Activate it to begin the side quest.
XYZ Coordinates: 4656, 3684, 0129
Lomei Sky Labyrinth Island
| How to Complete The Lomei Sky Labyrinth Prophecy |
|---|
Return to the Mogisari Shrine
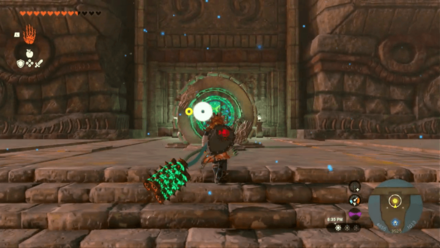
Upon triggering the side quest, the mysterious voice will ask you to reach the Lomei Sky Labyrinth. Simply travel back to the Mogisari Shrine to get there. Interact with the terminal at the entrance to open the door to the sky labyrinth.
You will then be tasked to activate four terminals hidden within. Make sure to set the quest in your Adventure Log in order to locate the four terminals.
XYZ Coordinates: 4654, 3531, 1014
Perform a Back Flip then Glide
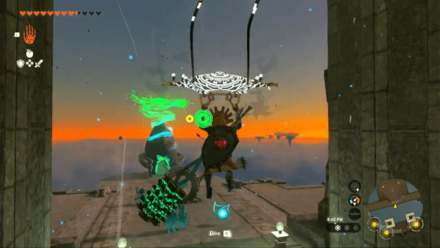
Face towards the Mogisari Shrine, then jump backwards. Immediately eject your glider afterwards to rise up while facing the wall.
Climb Up the Wall
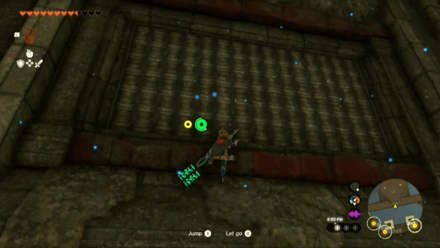
Climb up the wall you're now facing at. You can use the ledges as stopping points when you run out of stamina. Continue climbing up until you reach the top of the sky labyrinth.
XYZ Coordinates: 4656, 3555, 1030
Place a Travel Medallion

Place a Travel Medallion on the top of the sky labyrinth, preferably in the middle. Proceed to activate the four terminals, then use the it to travel back up. If you don't have a Travel Medallion, you would have to travel back to Mogisari Shrine and climb up each time.
XYZ Coordinates: 4654, 3711, 1184
How to Get the Travel Medallion
Activate the Four Hidden Terminals
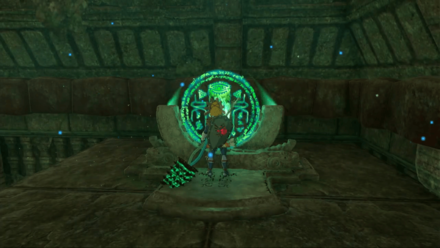
Traverse the top of the sky labyrinth to locate and activate the four terminals.
Interact with the New Terminal
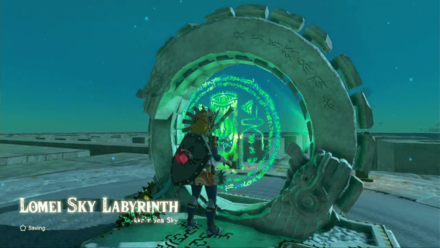
Once you have activated the four terminals, a new one will appear on top of the sky labyrinth. Activate it to proceed with the side quest.
XYZ Coordinates: 4655, 3703, 1184
Lomei Depths Labyrinth Island
| How to Complete The Lomei Sky Labyrinth Prophecy |
|---|
Lomei Depths Labyrinth Island
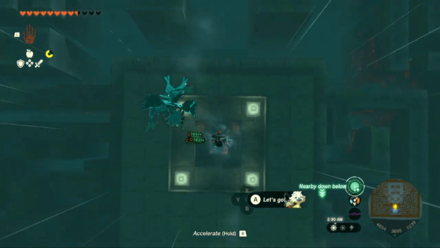
Your next task is to dive down in the middle of the sky labyrinth to reach the Lomei Depths Labyrinth. Maneuver accordingly until you reach the bottom.
Go to the Boss Room
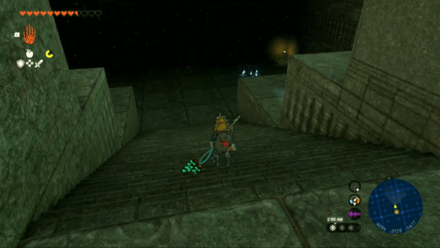
Once you reach the Lomei Depths Labyrinth, walk down the stairs to reach the boss room. Make use of Brightbloom Seeds to light up the area. The boss will not easily detect you, so you can use this time to prepare for the battle ahead.
XYZ Coordinates: 4665, 3731, -0435
Defeat the Flux Construct III
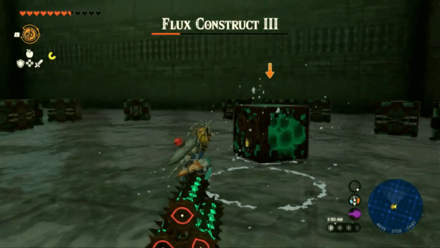
Same to other Flux Constructs, this boss' weakness is the unique glowing cube located in its body. Target it to deal immense damage!
You can also take advantage of the Ultrahand ability to pull out the unique glowing cube and make it drop to the ground.
If it ever hides its weakspot up in the air, use the Recall ability when he throws cubes at you. Hang on to the cubes as they return to the boss' body to get on top!
How to Beat Flux Construct III
Activate the Lomei Depths Labyrinth Terminal
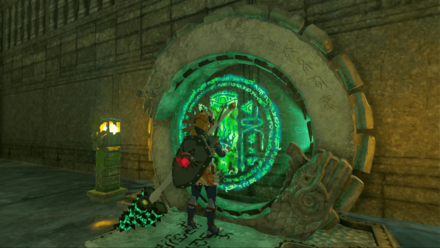
The last terminal to activate will be revealed after defeating the Flux Construct III. Interact with it to get to the hidden treasure chest!
XYZ Coordinates: 4679, 3697, -0445
Obtain the Evil Spirit Armor
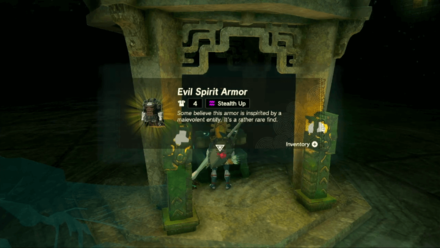
Get the armor wreathed in otherworldly evil, the Evil Spirit Armor!
XYZ Coordinates: 4657, 3696, -0445
The Legend of Zelda: Tears of the Kingdom Related Guides

List of All Walkthroughs
| All Quest Types | ||
|---|---|---|
 Main Quests Main Quests |
 Side Quests Side Quests |
 Side Adventures Side Adventures |
List of All Side Quests
Comment
Author
The Legend of Zelda: Tears of the Kingdom Walkthrough & Guides Wiki
The Lomei Labyrinth Island Prophecy Walkthrough and How to Unlock
improvement survey
03/2026
improving Game8's site?

Your answers will help us to improve our website.
Note: Please be sure not to enter any kind of personal information into your response.

We hope you continue to make use of Game8.
Rankings
- We could not find the message board you were looking for.
Gaming News
Popular Games

Genshin Impact Walkthrough & Guides Wiki

Honkai: Star Rail Walkthrough & Guides Wiki

Umamusume: Pretty Derby Walkthrough & Guides Wiki

Pokemon Pokopia Walkthrough & Guides Wiki

Resident Evil Requiem (RE9) Walkthrough & Guides Wiki

Monster Hunter Wilds Walkthrough & Guides Wiki

Wuthering Waves Walkthrough & Guides Wiki

Arknights: Endfield Walkthrough & Guides Wiki

Pokemon FireRed and LeafGreen (FRLG) Walkthrough & Guides Wiki

Pokemon TCG Pocket (PTCGP) Strategies & Guides Wiki
Recommended Games

Diablo 4: Vessel of Hatred Walkthrough & Guides Wiki

Fire Emblem Heroes (FEH) Walkthrough & Guides Wiki

Yu-Gi-Oh! Master Duel Walkthrough & Guides Wiki

Super Smash Bros. Ultimate Walkthrough & Guides Wiki

Pokemon Brilliant Diamond and Shining Pearl (BDSP) Walkthrough & Guides Wiki

Elden Ring Shadow of the Erdtree Walkthrough & Guides Wiki

Monster Hunter World Walkthrough & Guides Wiki

The Legend of Zelda: Tears of the Kingdom Walkthrough & Guides Wiki

Persona 3 Reload Walkthrough & Guides Wiki

Cyberpunk 2077: Ultimate Edition Walkthrough & Guides Wiki
All rights reserved
© Nintendo. The Legend of Zelda and Nintendo Switch are trademarks of Nintendo.
The copyrights of videos of games used in our content and other intellectual property rights belong to the provider of the game.
The contents we provide on this site were created personally by members of the Game8 editorial department.
We refuse the right to reuse or repost content taken without our permission such as data or images to other sites.


![Monster Hunter Stories 3 Review [First Impressions] | Simply Rejuvenating](https://img.game8.co/4438641/2a31b7702bd70e78ec8efd24661dacda.jpeg/thumb)


