A Trip through History Walkthrough and How to Unlock
▲ Get Pristine Weapons from the depths!
△ All 1000 Koroks | All 4 Great Fairies
▲ 81 Addison Signs | 147 Caves | 58 Wells
△ Tips: Farm Rupees | Starting Armor
▲ Best Weapons | Best Armor | Best Food
A Trip through History is a Side Quest in The Legend of Zelda: Tears of the Kingdom (TotK) that can be found in Kakariko Village. Read on to learn how to unlock A Trip through History, its location and rewards, walkthrough, as well as how to complete it.
List of Contents
How to Unlock A Trip through History
Talk to Bugut in Kakariko Village
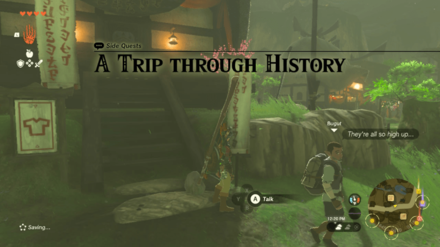
Go to Kakariko Village and check each Shop's front until you see Bugut. He is roaming around in the village, so keep an eye out for him!
A Trip through History Location and Rewards
West Necluda - Kakariko Village
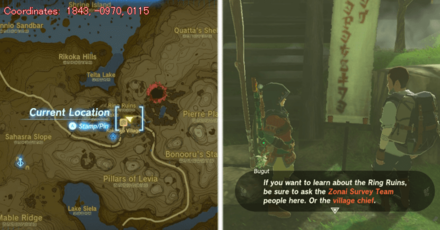
The exact coordinates for this quest on the map are 1843, -0970, 0115.
Rewards
| Rewards |
|---|
| ・Thunderwing Butterfly x3 |
A Trip through History Walkthrough Guide
| A Bottled Cry for Help Walkthrough Guide |
|---|
|
|
All Slab Locations
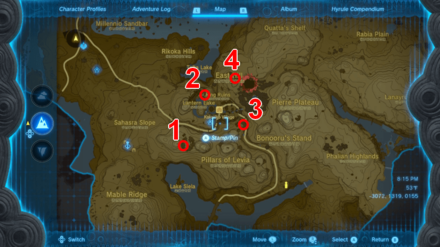
You can find all the Deciphered Slabs in broken Ring Ruins near Kakariko Village.
First Slab Location
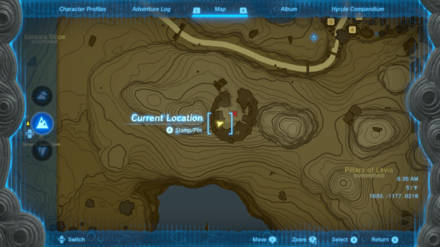
Go southwest from the Kakariko Village and head to the ruins. The exact coordinates are 1634, -1178, 0218.
Defeat Enemies
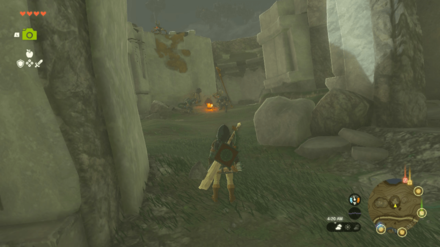
There will be several Bokoblins camping the area. Defeat them first so you can read the slab notes safely.
Read the Deciphered Slabs
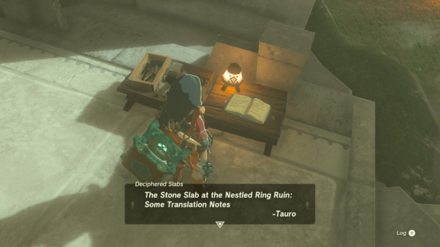
Read through slab notes behind the camp and move on to the next one.
Second Slab Location
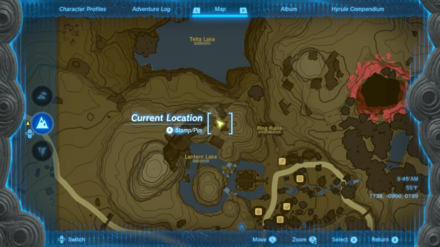
Go to north of Lantern Lake to get to the next Slab. The fastest way to get there is to get to teleport to Makasura Shrine and climb up the mountains. The exact coordinates are: 1738, -0900, 0199
Read the Deciphered Slabs in a Small Camp
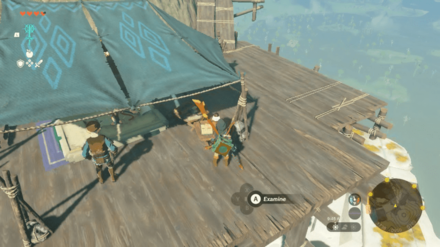
You will see a small camp placed near the ruins. Climb up there using the ladders and read the Deciphered Slabs.
Third Slab Location
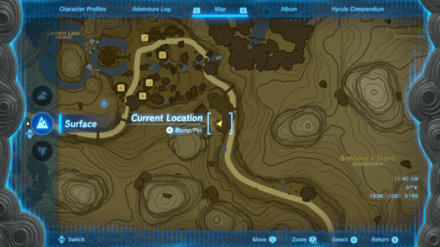
Head to the ruins east of Kakariko Village. You should find its entrance near a Zonai Dispenser. The exact coordinates are 1938, -1081, 0166.
Read the Deciphered Slab
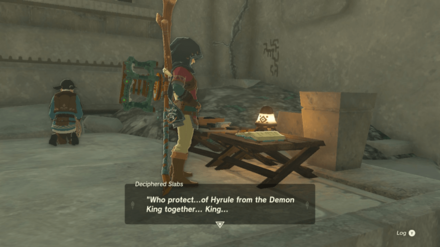
You can find the Deciphered Slab at the back, near a guy looking for an item. Make sure to read it before leaving.
Fourth Slab Location
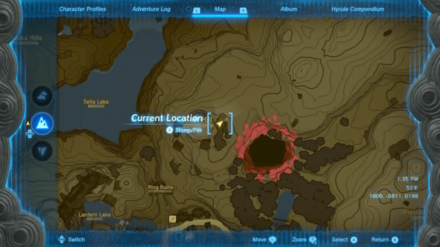
Go to the ruins on East Hill for the last Deciphered Slab. You can find it northeast of Kakariko Village, near the Chasm. The exact coordinates are 1900, -0811, 0199.
Read the Deciphered Slab
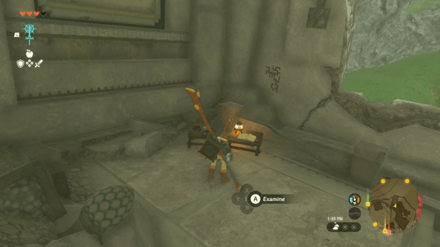
The Deciphered Slab is sitting on top of a table. Read it and go back to Bugut.
Claim Your Reward

Talk to Bugut and tell him everything about the Slabs. He will give you three Thunderwing Butterflies as a reward, and that will be the end of the quest!
Unlock Makasura Shrine
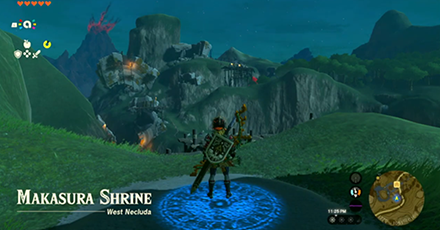
The Makasura Shrine will serve as your waypoint when going through all the Deciphered Slabs. It is placed in a high spot, making it easier to go over the mountains where the Deciphered Slabs are located.
The Legend of Zelda: Tears of the Kingdom Related Guides

List of All Walkthroughs
| All Quest Types | ||
|---|---|---|
 Main Quests Main Quests |
 Side Quests Side Quests |
 Side Adventures Side Adventures |
List of All Side Quests
Comment
Author
The Legend of Zelda: Tears of the Kingdom Walkthrough & Guides Wiki
A Trip through History Walkthrough and How to Unlock
improvement survey
03/2026
improving Game8's site?

Your answers will help us to improve our website.
Note: Please be sure not to enter any kind of personal information into your response.

We hope you continue to make use of Game8.
Rankings
- We could not find the message board you were looking for.
Gaming News
Popular Games

Genshin Impact Walkthrough & Guides Wiki

Honkai: Star Rail Walkthrough & Guides Wiki

Umamusume: Pretty Derby Walkthrough & Guides Wiki

Pokemon Pokopia Walkthrough & Guides Wiki

Resident Evil Requiem (RE9) Walkthrough & Guides Wiki

Monster Hunter Wilds Walkthrough & Guides Wiki

Wuthering Waves Walkthrough & Guides Wiki

Arknights: Endfield Walkthrough & Guides Wiki

Pokemon FireRed and LeafGreen (FRLG) Walkthrough & Guides Wiki

Pokemon TCG Pocket (PTCGP) Strategies & Guides Wiki
Recommended Games

Diablo 4: Vessel of Hatred Walkthrough & Guides Wiki

Fire Emblem Heroes (FEH) Walkthrough & Guides Wiki

Yu-Gi-Oh! Master Duel Walkthrough & Guides Wiki

Super Smash Bros. Ultimate Walkthrough & Guides Wiki

Pokemon Brilliant Diamond and Shining Pearl (BDSP) Walkthrough & Guides Wiki

Elden Ring Shadow of the Erdtree Walkthrough & Guides Wiki

Monster Hunter World Walkthrough & Guides Wiki

The Legend of Zelda: Tears of the Kingdom Walkthrough & Guides Wiki

Persona 3 Reload Walkthrough & Guides Wiki

Cyberpunk 2077: Ultimate Edition Walkthrough & Guides Wiki
All rights reserved
© Nintendo. The Legend of Zelda and Nintendo Switch are trademarks of Nintendo.
The copyrights of videos of games used in our content and other intellectual property rights belong to the provider of the game.
The contents we provide on this site were created personally by members of the Game8 editorial department.
We refuse the right to reuse or repost content taken without our permission such as data or images to other sites.


![Everwind Review [Early Access] | The Shaky First Step to A Very Long Journey](https://img.game8.co/4440226/ab079b1153298a042633dd1ef51e878e.png/thumb)

![Monster Hunter Stories 3 Review [First Impressions] | Simply Rejuvenating](https://img.game8.co/4438641/2a31b7702bd70e78ec8efd24661dacda.jpeg/thumb)


