 Zelda Notes
 Main Quests
 Tips and Tricks
 Side Adventures
 Side Quests
 Maps
Maps Towers
 Shrines
 Temples and Dungeons
 Caves
Caves Wells
Wells Stables
 Armor
Armor Weapons and Equipment
 Items
Items Cooking
 Bosses
 Enemies
 Abilities
 Schematics
 Characters
 News
News Message Boards
This survey will take about 1 minute.
Your answers will help us to improve our website.
Zelda: Tears of the Kingdom (TotK)
List of All Enemies
▲ Get Pristine Weapons from the depths!
△ All 1000 Koroks | All 4 Great Fairies
▲ 81 Addison Signs | 147 Caves | 58 Wells
△ Tips: Farm Rupees | Starting Armor
▲ Best Weapons | Best Armor | Best Food
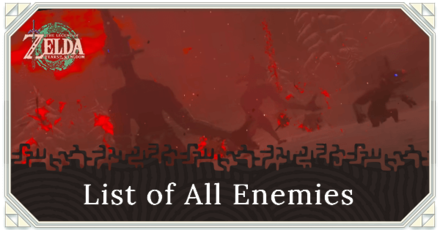
Several returning enemies and new enemies make their appearance in The Legend of Zelda: Tears of the Kingdom (ToTK). Read on for a list of all enemies, their drops, where to find them, as well as how to evolve and respawn them.
List of All Enemies
All Enemies
| Enemy | Location(s) | Drops |
|---|---|---|
 Chuchu Chuchu
|
・Hyrule Field ・East Necluda |
・Chuchu Jelly |
 Fire Chuchu Fire Chuchu
|
・Eldin Canyon ・Eldin Mountains |
・Red Chuchu Jelly |
 Ice Chuchu Ice Chuchu
|
・Hebra Mountains ・Gerudo Highlands |
・White Chuchu Jelly |
 Electric Chuchu Electric Chuchu
|
・West Necluda ・Gerudo Desert |
・Yellow Chuchu Jelly |
 Keese Keese
|
・Hyrule Field ・West Necluda |
・Keese Wing ・Keese Eyeball |
 Fire Keese Fire Keese
|
・Eldin Mountains ・Eldin Mountains Depths |
・Fire Keese Eyeball ・Fire Keese Wing |
 Ice Keese Ice Keese
|
・Hebra Mountains ・Mount Lanayru |
・Ice Keese Eyeball ・Ice Keese Wing |
 Electric Keese Electric Keese
|
・Gerudo Desert ・Gerudo Desert Depths |
・Electric Keese Eyeball ・Electric Keese Wing |
 Water Octorok Water Octorok
|
・Lanayru Great Spring ・West Necluda |
・Octorok Eyeball ・Octorok Tentacle ・Octo Balloon |
 Forest Octorok Forest Octorok
|
・Hyrule Ridge ・Deep Akkala |
・Octorok Eyeball ・Octorok Tentacle ・Octo Balloon |
 Rock Octorok Rock Octorok
|
・Death Mountain ・Eldin Canyon |
・Octorok Eyeball ・Octorok Tentacle ・Octo Balloon |
 Snow Octorok Snow Octorok
|
・Gerudo Highlands ・Hebra Mountains |
・Octorok Eyeball ・Octorok Tentacle ・Octo Balloon |
 Treasure Octorok Treasure Octorok
|
・Faron Grasslands ・Gerudo Highlands |
・Octo Balloon ・Octorok Eyeball ・Green Rupee ・Purple Rupee ・Blue Rupee ・Red Rupee ・Silver Rupee |
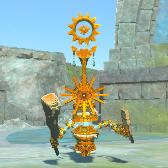
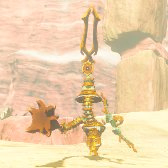
 Fire Wizzrobe Fire Wizzrobe
|
・Hyrule Field ・Eldin Canyon |
・None |
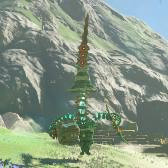
 Ice Wizzrobe Ice Wizzrobe
|
・Tabantha Tundra ・Hebra Mountains |
・None |
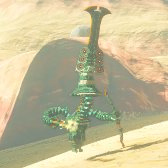
 Electric Wizzrobe Electric Wizzrobe
|
・Lanayru Great Spring ・Tabantha Frontier |
・None |
 Meteo Wizzrobe Meteo Wizzrobe
|
・Gerudo Highlands ・Akkala Highlands |
・None |
 Blizzrobe Blizzrobe
|
・Gerudo Highlands | ・None |
 Thunder Wizzrobe Thunder Wizzrobe
|
・Lanayru Great Spring ・East Necluda |
・None |
 Like Like Like Like
|
・Hyrule Field ・East Necluda |
・Like Like Stone ・Arrow x 5 |
 Fire Like Fire Like
|
・Eldin Mountains ・Eldin Mountains Depths |
・Fire Like Stone ・Fire Fruit ・Arrow x 5 |
 Ice Like Ice Like
|
・Mount Lanayru ・Gerudo Highlands |
・Ice Like Stone ・Ice Fruit ・Arrow x 5 |
 Shock Like Shock Like
|
・Hyrule Field ・East Necluda |
・Shock Like Stone ・Shock Fruit ・Arrow x 5 |
 Rock Like Rock Like
|
・Eldin Mountains ・Lanayru Wetlands |
・Like Like Stone ・Arrow x 5 |
 Evermean Evermean
|
・Great Hyrule Forest ・Hyrule Field |
・Energetic Rhino Beetle ・Bladed Rhino Beetle ・Hightail Lizard ・Rugged Rhino Beetle ・Acorn ・Chickaloo Tree Nut ・Golden Apple ・Monster Extract ・Korok Food ・Sturdy Thick Stick |
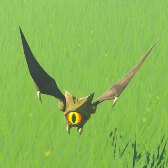
 Aerocuda Aerocuda
|
・Greater Hyrule |
・Aerocuda Wing ・Aerocuda Eyeball |
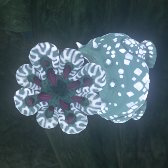
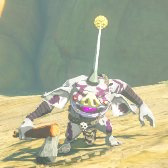
 Gibdo Gibdo
|
・Gerudo Desert ・Gerudo Desert Depths |
・Gidbo Guts ・Gibdo Bone |
 Moth Gibdo Moth Gibdo
|
・Gerudo Desert ・Gerudo Desert Depths |
・Gidbo Wing ・Gibdo Guts ・Gibdo Bone |
 Bokoblin Bokoblin
|
・Hyrule Field ・Central Hyrule Depths |
・Bokoblin Fang ・Bokoblin Horn |
 Blue Bokoblin Blue Bokoblin
|
・Hyrule Field ・Eldin Canyon |
・Bokoblin Guts ・Bokoblin Fang ・Blue Bokoblin Horn |
 Black Bokoblin Black Bokoblin
|
・Gerudo Desert ・Hyrule Ridge Depths |
・Bokoblin Guts ・Bokoblin Fang ・Black Bokoblin Horn |
 Stalkoblin Stalkoblin
|
・Great Hyrule Forest ・Gerudo Desert Depths |
・Bokoblin Fang ・Bokoblin Horn |
 Silver Bokoblin Silver Bokoblin
|
・Gerudo Desert ・Hyrule Ridge Depths |
・Bokoblin Guts ・Bokoblin Fang ・Silver Bokoblin Horn |
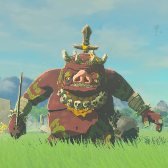 Boss Bokoblin Boss Bokoblin
|
・Hyrule Field ・Hyrule Ridge |
・Boss Bokoblin Fang ・Boss Bokoblin Horn |
 Blue Boss Bokoblin Blue Boss Bokoblin
|
・Hyrule Field ・Lanayru Great Spring |
・Boss Bokoblin Fang ・Blue Boss Bokoblin Horn ・Boss Bokoblin Guts |
 Black Boss Bokoblin Black Boss Bokoblin
|
・Hyrule Field ・East Necluda |
・Boss Bokoblin Fang ・Black Boss Bokoblin Horn ・Boss Bokoblin Guts |
 Silver Boss Bokoblin Silver Boss Bokoblin
|
・Hyrule Field ・East Necluda |
・Boss Bokoblin Fang ・Silver Boss Bokoblin Horn ・Boss Bokoblin Guts |
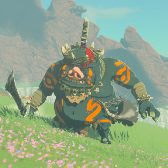
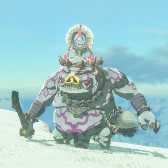
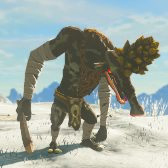
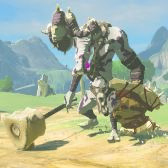
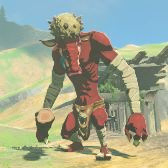 Moblin Moblin
|
・Hyrule Field ・Central Hyrule Depths |
・Moblin Fang ・Moblin Horn |
 Blue Moblin Blue Moblin
|
・Hyrule Field ・Eldin Canyon |
・Moblin Guts ・Moblin Fang ・Blue Moblin Horn |
 Black Moblin Black Moblin
|
・Gerudo Highlands ・Deep Akkala |
・Moblin Guts ・Moblin Fang ・Black Moblin Horn |
 Stalmoblin Stalmoblin
|
・Great Hyrule Forest ・Deep Akkala Depths |
・Moblin Fang ・Moblin Horn |
 Silver Moblin Silver Moblin
|
・Gerudo Highlands ・Deep Akkala |
・Moblin Guts ・Moblin Fang ・Silver Moblin Horn |
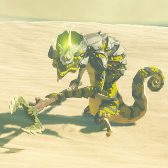
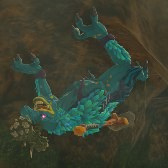
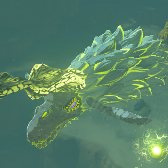
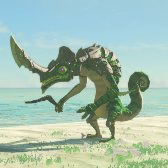 Lizalfos Lizalfos
|
・Lanayru Wetlands ・Lanayru Great Spring |
・Lizalfos Tail ・Lizalfos Talon ・Lizalfos Horn |
 Blue Lizalfos Blue Lizalfos
|
・Mount Lanayru ・Akkala Highlands Depths |
・Blue Lizalfos Horn ・Lizalfos Talon ・Blue Lizalfos Tail |
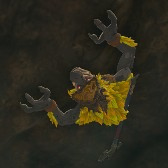
 Black Lizalfos Black Lizalfos
|
・Gerudo Desert ・East Necluda |
・Black Lizalfos Horn ・Lizalfos Talon ・Black Lizalfos Tail |
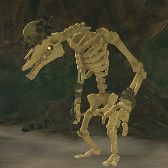
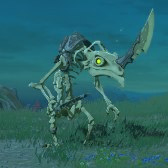 Stalizalfos Stalizalfos
|
・Lanayru Wetlands ・Lanayru Great Spring |
・Lizalfos Talon ・ Lizalfos Horn |
 Fire-Breath Lizalfos Fire-Breath Lizalfos
|
・Eldin Canyon ・Gerudo Highlands |
・Fire-Breath Lizalfos Tail ・Lizalfos Talon ・Fire-Breath Lizalfos Horn |
 Ice-Breath Lizalfos Ice-Breath Lizalfos
|
・Hebra Mountains ・Gerudo Highlands |
・Ice-Breath Lizalfos Tail ・Lizalfos Talon ・Ice-Breath Lizalfos Horn |
 Electric Lizalfos Electric Lizalfos
|
・Gerudo Desert ・Faron |
・Electric Lizalfos Tail ・Lizalfos Talon ・Electric Lizalfos Horn |
 Silver Lizalfos Silver Lizalfos
|
・Gerudo Desert ・East Necluda |
・Silver Lizalfos Horn ・Lizalfos Talon ・Silver Lizalfos Tail |
 Horriblin Horriblin
|
・Hyrule Caves ・Eldin Canyon Depths |
・Horriblin Horn ・Horriblin Claw |
 Blue Horriblin Blue Horriblin
|
・Hyrule Caves ・Death Mountain Depths |
・Horriblin Claw ・Blue Horriblin Horn ・Horriblin Guts |
 Black Horriblin Black Horriblin
|
・Hyrule Caves ・Gerudo Desert Depths |
・Horriblin Claw ・Black Horriblin Horn ・Horriblin Guts |
 Silver Horriblin Silver Horriblin
|
・Hyrule Caves ・Gerudo Desert Depths |
・Horriblin Claw ・Silver Horriblin Horn ・Horriblin Guts |
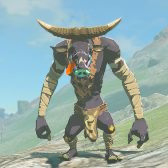
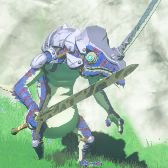
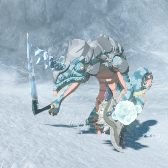
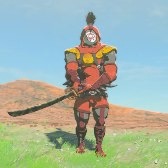
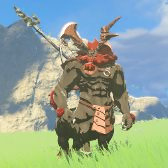 Lynel Lynel
|
・Hyrule Field ・Central Hyrule Depths |
・Lynel Hoof ・Lynel Saber Horn ・Lynel Mace Horn ・Arrow x 10 |
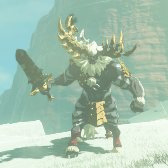
 Blue-Maned Lynel Blue-Maned Lynel
|
・Lanayru Great Spring ・Eldin Canyon Depths |
・Lynel Hoof ・Blue-Maned Lynel Saber Horn ・Blue-Maned Lynel Mace Horn ・Lynel Guts ・Arrow x 10 |
 White-Maned Lynel White-Maned Lynel
|
・Faron Grasslands Depths ・Central Hyrule Depths |
・Lynel Hoof ・White-Maned Lynel Saber Horn ・White-Maned Lynel Mace Horn ・Lynel Guts ・Arrow x 10 |
 Silver Lynel Silver Lynel
|
・Floating Coliseum |
・Lynel Hoof ・Silver Lynel Saber Horn ・Silver Lynel Mace Horn ・Lynel Guts ・Arrow x 10 |
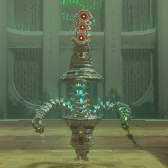
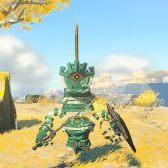 Soldier Construct I Soldier Construct I
|
・Great Sky Island ・North Gerudo Sky Archipelago |
・Zonai Charge ・Soldier Construct Horn |
 Soldier Construct II Soldier Construct II
|
・Hebra Mountains ・Rising Island Chain |
・Zonai Charge ・Soldier Construct II Horn |
 Soldier Construct III Soldier Construct III
|
・Lanayru Sky Archipelago ・Thunderhead Isles |
・Zonai Charge ・Soldier Construct III Horn |
 Soldier Construct IV Soldier Construct IV
|
・Lanayru Sky Archipelago ・Thunderhead Isles |
・Zonai Charge ・Soldier Construct IV Horn |
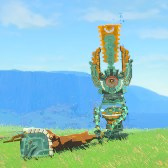
 Captain Construct I Captain Construct I
|
・Great Sky Island ・Rising Island Chain |
・Zonai Charge ・Captain Construct I Horn |
 Captain Construct II Captain Construct II
|
・Lanayru Sky Archipelago ・West Necluda |
・Zonai Charge ・Captain Construct II Horn |
 Captain Construct III Captain Construct III
|
・Thyphlo Ruins ・Lanayru Sky Archipelago |
・Large Zonai Charge ・Zonai Charge ・Captain Construct III Horn |
 Captain Construct IV Captain Construct IV
|
・Thyphlo Ruins ・Lanayru Sky Archipelago |
・Large Zonai Charge ・Zonai Charge ・Captain Construct IV Horn |
 Training Construct Training Construct
|
・Inside Shrines | ・Zonai Charge |
 Yiga Footsoldier Yiga Footsoldier
|
・Yiga Hideouts ・ East Necluda ・ Akkala Highlands |
・Mighty Bananas ・Sundelion ・Green Rupee ・Blue Rupee ・Purple Rupee ・Red Rupee |
 Yiga Blademaster Yiga Blademaster
|
・Yiga Hideouts ・ East Necluda ・ Akkala Highlands |
・Mighty Bananas ・Sundelion ・Green Rupee ・Blue Rupee ・Purple Rupee ・Red Rupee |
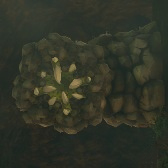
 Stone Pebblit Stone Pebblit
|
・Greater Hyrule |
・Amber ・Opal ・Flint |
 Igneo Pebblit Igneo Pebblit
|
・Eldin Canyon ・Eldin Canyon Depths |
・Amber ・Ruby ・Flint |
 Frost Pebblit Frost Pebblit
|
・Gerudo Highlands ・Hebra Mountains |
・Amber ・Sapphire ・Flint |
 Little Frox Little Frox
|
・The Depths |
・Giant Brightbloom Seed ・Zonaite ・Brightbloom Seed |
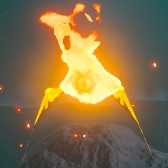
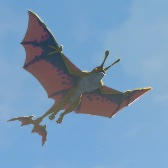
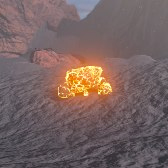
 Dinraal Dinraal
|
・Eldin Mountains ・Deep Akkala |
・Unknown |
 Naydra Naydra
|
・East Necluda ・Mount Lanayru |
・Unknown |
 Farosh Farosh
|
・Lake Hylia ・Gerudo Canyon |
・Unknown |
 Light Dragon Light Dragon
|
・Greater Hyrule | ・Unknown |
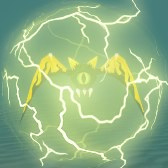
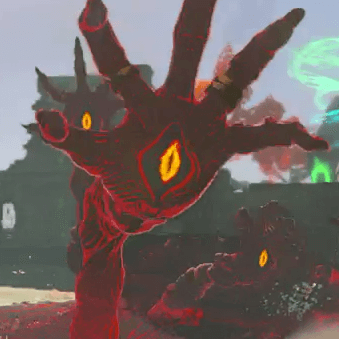 Gloom Hands Gloom Hands
|
・Akkala Citadel Ruins ・Great Hyrule Forest Depths |
・Dark Clump |
How to Evolve Enemies
Defeat Enemies to Evolve Them
You can evolve enemies into their stronger variants by defeating more of them in the wild. Each enemy variety are ranked by color, which are: red, blue, black, and silver, with each color being stronger and tougher than the last one!
The different enemy varieties won't show up instantly, as you'll have to wait for a blood moon to happen in order for them to respawn as tougher variants of themselves.
Constructs Follow Different Rules
Constructs follow a different rule than the rest of the enemies when it comes to their varieties and how they respawn. Construct varieties are not ranked by color, but instead their ranks are indicated by their horns. They also respawn after four in-game days, regardless whether a blood moon appears or not.
How to Respawn Enemies
Wait For a Blood Moon
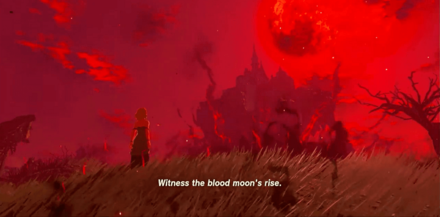
A phenomenon called the Blood Moon causes enemies to respawn as tougher variants of themselves even though you've already defeated them before.
Because of this, it's impossible to rid Hyrule of all enemies. There's no need to worry though! Tougher enemies mean better loot and having better loot means you'll be better equipped in future combats!
Blood Moon Trigger Conditions and Effects
Tears of the Kingdom Related Guides

The Legend of Zelda: Tears of the Kingdom
Walkthrough Top Page
Author

The Legend of Zelda: Tears of the Kingdom Walkthrough & Guides Wiki
List of All Enemies
Please participate in our site
improvement survey
03/2026
improvement survey
03/2026
Would you assist in
improving Game8's site?
improving Game8's site?

×
We are listening to our users' valuable opinions and discussing how to act on them.
The information collected through this survey will be used for the purpose of improving our services. In addition, the information will only be disclosed a part of a statistic in a format that will not allow identification of personal information.
Begin Survey
Not Now
×
Please rate each item regarding Game8.co's Advertisements.
Amount of Ads
Very Dissatisfied
Somewhat Dissatisfied
Fine
Somewhat Satisfied
Highly Satisfied
Placement of Ads
Timing of Ad Display
Ad Loading Speed
Safeness of Ads
Content of Ads
×
Please rate each item regarding Game8.co's Quality of Articles.
Amount of information
Very Dissatisfied
Somewhat Dissatisfied
Fine
Somewhat Satisfied
Highly Satisfied
Frequency of updates
Speed of new information
Accuracy of articles
Understandibility of articles
Readability of sentences
×
Please rate each item regarding Game8.co's Usability of the Site.
Ease of finding information
Very Dissatisfied
Somewhat Dissatisfied
Fine
Somewhat Satisfied
Highly Satisfied
Loading Speed
Use of Color
Font Size
Visibility of Images
Easy to Understand Layout
×
Please rate each item regarding Game8.co's Message Boards, Comments.
Ease of Writing
Very Dissatisfied
Somewhat Dissatisfied
Fine
Somewhat Satisfied
Highly Satisfied
Readability
Ease in Finding Information
Comment Quality
Comment Quantity
Admin Response
×
Please rate each item regarding Game8.co's Site's new design.
Please rate our site's new design
Very Dissatisfied
Somewhat Dissatisfied
Fine
Somewhat Satisfied
Highly Satisfied
Do you think that the website's design change makes the site easier to use?
Has the new design made it easier for you to find information on the site?
Has the new design improved the overall visual appeal of the site?
How would you rate your overall satisfaction with the new design of the site?
×
How likely are you to recommend Game8 to someone you know?
Very Unlikely
0
1
2
3
4
5
6
7
8
9
10
Very Likely
If you have other opinions regarding potential improvement to the website, please share them with us. We would appreciate your honest opinion.
Note: This is a free response section, so you can proceed without entering anything.
Note: Please be sure not to enter any kind of personal information into your response.
Note: Please be sure not to enter any kind of personal information into your response.
×
Thank You
×
Thank you for participating in our survey! Your answers will help us to improve the quality of our website and services.
We hope you continue to make use of Game8.
We hope you continue to make use of Game8.
Close
Rankings
Gaming News


![Monster Hunter Stories 3 Review [First Impressions] | Simply Rejuvenating](https://img.game8.co/4438641/2a31b7702bd70e78ec8efd24661dacda.jpeg/thumb)
Popular Games

Genshin Impact Walkthrough & Guides Wiki
Honkai: Star Rail Walkthrough & Guides Wiki
Umamusume: Pretty Derby Walkthrough & Guides Wiki
Pokemon Pokopia Walkthrough & Guides Wiki
Resident Evil Requiem (RE9) Walkthrough & Guides Wiki
Monster Hunter Wilds Walkthrough & Guides Wiki
Wuthering Waves Walkthrough & Guides Wiki
Arknights: Endfield Walkthrough & Guides Wiki
Pokemon FireRed and LeafGreen (FRLG) Walkthrough & Guides Wiki
Pokemon TCG Pocket (PTCGP) Strategies & Guides Wiki


Recommended Games
Diablo 4: Vessel of Hatred Walkthrough & Guides Wiki
Cyberpunk 2077: Ultimate Edition Walkthrough & Guides Wiki
Fire Emblem Heroes (FEH) Walkthrough & Guides Wiki
Yu-Gi-Oh! Master Duel Walkthrough & Guides Wiki
Super Smash Bros. Ultimate Walkthrough & Guides Wiki
Pokemon Brilliant Diamond and Shining Pearl (BDSP) Walkthrough & Guides Wiki
Elden Ring Shadow of the Erdtree Walkthrough & Guides Wiki
Monster Hunter World Walkthrough & Guides Wiki
The Legend of Zelda: Tears of the Kingdom Walkthrough & Guides Wiki
Persona 3 Reload Walkthrough & Guides Wiki


All rights reserved
© Nintendo. The Legend of Zelda and Nintendo Switch are trademarks of Nintendo.
The copyrights of videos of games used in our content and other intellectual property rights belong to the provider of the game.
The contents we provide on this site were created personally by members of the Game8 editorial department.
We refuse the right to reuse or repost content taken without our permission such as data or images to other sites.
It would be great if the list also included enemies placed in shrines. They tend to be in fixed places, fixed strength and ideal for farming.