This survey will take about 1 minute.
Your answers will help us to improve our website.
Zelda: Tears of the Kingdom (TotK)
The Mysterious Eighth Walkthrough and How to Unlock
▲ Get Pristine Weapons from the depths!
△ All 1000 Koroks | All 4 Great Fairies
▲ 81 Addison Signs | 147 Caves | 58 Wells
△ Tips: Farm Rupees | Starting Armor
▲ Best Weapons | Best Armor | Best Food
The Mysterious Eighth is a Side Quest in The Legend of Zelda: Tears of the Kingdom (TotK) that can be found in Gerudo Shelter. Read on to learn how to unlock The Mysterious Eighth, its location and rewards, walkthrough, as well as how to complete it.
List of Contents
How to Unlock The Mysterious Eighth
Speak with Rotana After Completing The Heroines' Secret
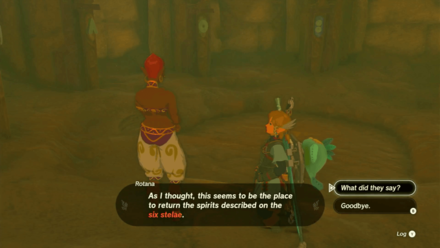
After completing The Heroines' Secret side quest, talk to Rotana again. She is still inside the Gerudo Shelter but has relocated to the area with the statues of the Seven. She will ask you to help her gather the orbs mentioned in the Stelae and solve the truth behind the Eighth Heroine.
The Mysterious Eighth Location and Rewards
Gerudo Desert - Gerudo Shelter
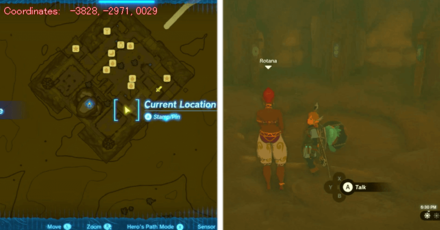
The exact coordinates for this quest on the map are -3828, -2971, 0029.
Rewards
| Rewards |
|---|
| ・Diamond |
The Mysterious Eighth Walkthrough Guide
| How to Complete The Mysterious Eighth |
|---|
The First Orb
The first orb is the easiest one to find. You can get it by finishing The Heroines' Secret side quest. Return in front of the first Stela to grab the orb.
XYZ Coordinates: -3883, -2973, 0033
Return to the Orb to Rotana
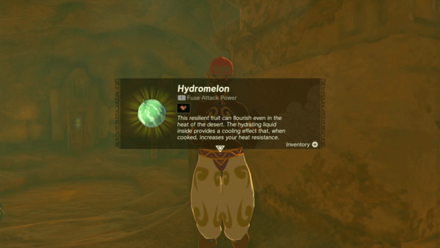
Find Rotana while carrying an orb, and she will reward you with a Hydromelon each time. After going back to her with the first orb, you're off to search for more.
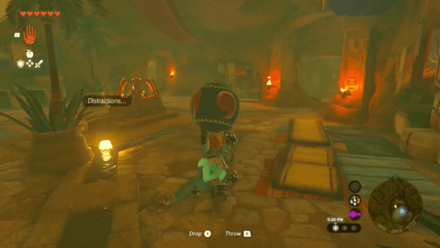
Patricia's Prophecies
| Patricia's Prophecies Location |
|---|
 Coordinates: -3854, -2997, 0043 |
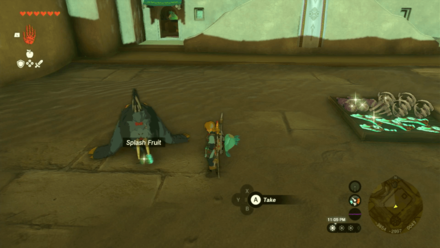
You can also ask Patricia for help in finding the orb locations. Offer her some Splash Fruits, and she will tell you a hint about the location of an orb. You can find her in the palace courtyard .
Note that if you give her anything else aside from Splash Fruits, she will prophesy a different thing unrelated to the orbs.
The Second Orb
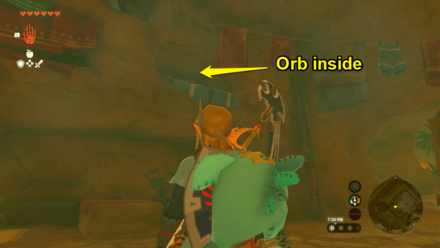
You can find your second orb inside the first upper bunk bed in the Gerudo Shelter dormitory area.
XYZ Coordinates: -3913, -2930, 0037
The Third Orb
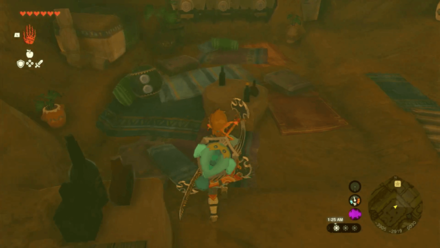
The third orb is located in the room beside the Gerudo Shelter jail. You can find it hidden among the pillows laying around.
XYZ Coordinates: -3904, -2917, 0030
The Fourth Orb
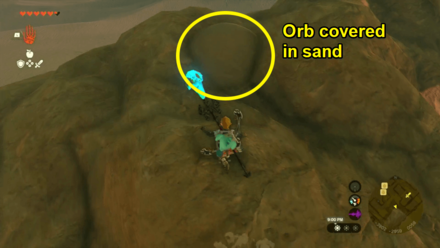
The fourth orb can be found on top of the houses on the southeast side of Gerudo Town. It can be a little tricky as it is covered in sand. Use something that can produce wind like a Zonai Fan to blow away the sand and get the orb.
XYZ Coordinates: -3803, -2963, 0058
The Fifth Orb

You can find the fifth orb near the main entrance of Gerudo Town. It is hidden among the supply boxes found on the right.
XYZ Coordinates: -3784, -2899, 0046
The Sixth Orb

Complete the Dalia's Game side quest to get the sixth orb. You can find her and the orb near the main entrance of Gerudo Town.
XYZ Coordinates: -3814, -2874, 0043
The Seventh Orb

You can find the last orb by completing the Lost in the Dunes side quest in Kara Kara Bazaar. Make sure to rent a Sleigh Seal so you can transport the orb back to Gerudo Town.
XYZ Coordinates: -3273, -2581, 0023
Returning the Orbs
| How to Complete The Mysterious Eighth - Returning the Orbs |
|---|
Transporting the Orb
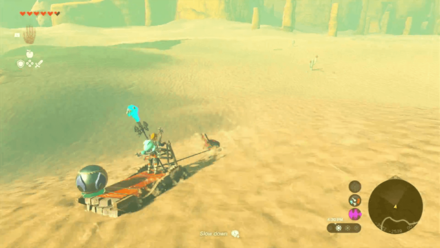
Use the Sleigh Seal you rented and attached the orb to it. Return to Gerudo Town to give Rotana the last orb needed.
Place the Orbs on the Statues
Use the Ultrahand ability to place the orbs on the hands of the statues. Make sure to match the symbols etched on the orbs and statues accordingly.
Enter the Secret Room
Once you have placed all of the orbs correctly, a secret entrance will reveal itself. Enter the newly found place to discover a giant orb.
Head to North Gerudo Ruins
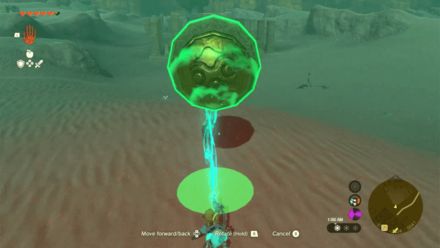
Rotana mentioned that you need to head to the North Gerudo Ruins with the giant orb. Use the Ultrahand ability to grab the ball and take it there.
Enter the Gerudo Sanctuary
Place the giant orb in front of the Gerudo Sanctuary to open the gate leading inside. Be careful of the enemies lurking in the North Gerudo Ruins as they can hinder you from reaching the place.
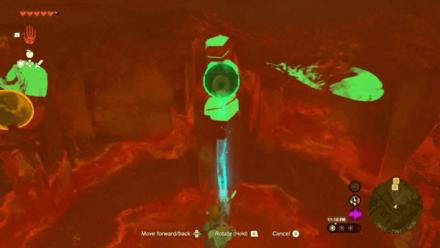
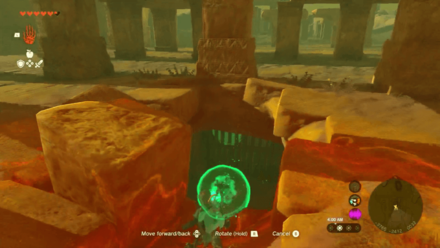
Head Inside the Gerudo Sanctuary
Enter the sanctuary until you find a passage blocked by tiles. Use the Ultrahand to set the tiles aside and open up the blocked passage. You might encounter Gibdos along the way. Use elemental attacks to make them vulnerable, then follow up with melee attacks.
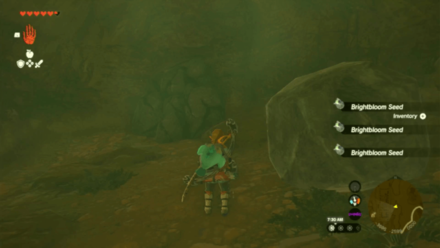
Glide Down the Hidden Pathway
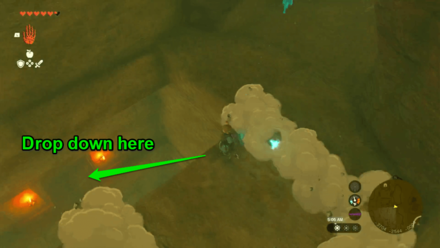
Continue deeper into the sanctuary until you find an area with collapsible floors. Use your glider to maneuver into a hidden passage below. If you fall all the way to the bottom, you can use the Ascend ability to get into the hidden passage.
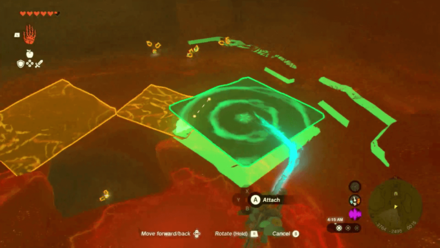
Choose the Panel on the Left
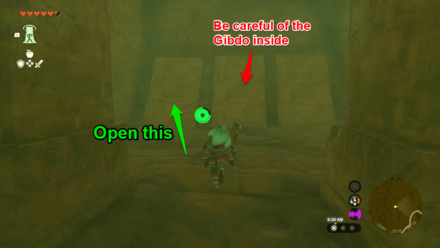
Press on until you find a room with three panels. Use the Ultrahand ability to move the panel on the left and reveal a hidden passage. Be careful of moving the panel in the middle, as there is a Gibdo hiding behind it.
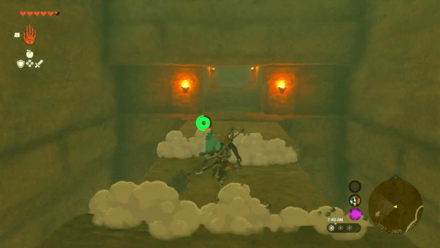
Destroy the Breakable Rocks
Continue heading deeper into the sanctuary until you reach an area with breakable rocks. Use a blunt weapon break the rocks.
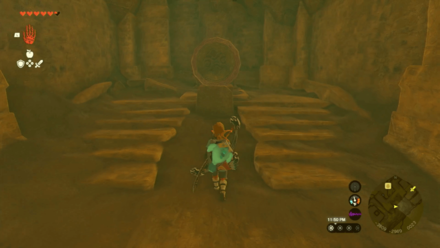
Head to the Statue of the Eighth Heroine Room
The last hurdle in the sanctuary is getting past the collapsible floors leading to the Statue of the Eighth Heroine Room. Sprint past the collapsible floors and jump when necessary.
Enter the room and interact with the stone tablet to learn the mystery behind the Eighth Heroine. Inside you'll find a complete set of Gerudo weapons, including a Shield, Scimitar, Bow, Spear, and Claymore, as well as precious gems like a Topaz, Ruby, and Sapphire.
XYZ Coordinates: -3763, -2546, 0008
Return to Rotana
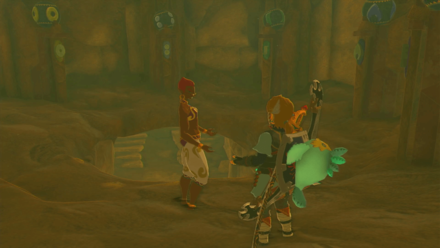
Head back to the Gerudo Sanctuary and talk to Rotana. Tell her the truth behind the Eighth Heroine to finish the side quest and claim a diamond for your reward!
The Legend of Zelda: Tears of the Kingdom Related Guides
List of All Walkthroughs
| All Quest Types | ||
|---|---|---|
 Main Quests Main Quests |
 Side Quests Side Quests |
 Side Adventures Side Adventures |
List of All Side Quests
Comment
1  Anonymous almost 3 years
Nice guide, thanks. One mistake though. For the fourth orb, you mean 'SouthEAST' side of town, not 'Southwest'.Had me confused for a little bit there until I read the minimap.
Author

The Legend of Zelda: Tears of the Kingdom Walkthrough & Guides Wiki
The Mysterious Eighth Walkthrough and How to Unlock
Please participate in our site
improvement survey
03/2026
improvement survey
03/2026
Would you assist in
improving Game8's site?
improving Game8's site?

×
We are listening to our users' valuable opinions and discussing how to act on them.
The information collected through this survey will be used for the purpose of improving our services. In addition, the information will only be disclosed a part of a statistic in a format that will not allow identification of personal information.
Begin Survey
Not Now
×
Please rate each item regarding Game8.co's Advertisements.
Amount of Ads
Very Dissatisfied
Somewhat Dissatisfied
Fine
Somewhat Satisfied
Highly Satisfied
Placement of Ads
Timing of Ad Display
Ad Loading Speed
Safeness of Ads
Content of Ads
×
Please rate each item regarding Game8.co's Quality of Articles.
Amount of information
Very Dissatisfied
Somewhat Dissatisfied
Fine
Somewhat Satisfied
Highly Satisfied
Frequency of updates
Speed of new information
Accuracy of articles
Understandibility of articles
Readability of sentences
×
Please rate each item regarding Game8.co's Usability of the Site.
Ease of finding information
Very Dissatisfied
Somewhat Dissatisfied
Fine
Somewhat Satisfied
Highly Satisfied
Loading Speed
Use of Color
Font Size
Visibility of Images
Easy to Understand Layout
×
Please rate each item regarding Game8.co's Message Boards, Comments.
Ease of Writing
Very Dissatisfied
Somewhat Dissatisfied
Fine
Somewhat Satisfied
Highly Satisfied
Readability
Ease in Finding Information
Comment Quality
Comment Quantity
Admin Response
×
Please rate each item regarding Game8.co's Site's new design.
Please rate our site's new design
Very Dissatisfied
Somewhat Dissatisfied
Fine
Somewhat Satisfied
Highly Satisfied
Do you think that the website's design change makes the site easier to use?
Has the new design made it easier for you to find information on the site?
Has the new design improved the overall visual appeal of the site?
How would you rate your overall satisfaction with the new design of the site?
×
How likely are you to recommend Game8 to someone you know?
Very Unlikely
0
1
2
3
4
5
6
7
8
9
10
Very Likely
If you have other opinions regarding potential improvement to the website, please share them with us. We would appreciate your honest opinion.
Note: This is a free response section, so you can proceed without entering anything.
Note: Please be sure not to enter any kind of personal information into your response.
Note: Please be sure not to enter any kind of personal information into your response.
×
Thank You
×
Thank you for participating in our survey! Your answers will help us to improve the quality of our website and services.
We hope you continue to make use of Game8.
We hope you continue to make use of Game8.
Close
Rankings
Gaming News


![Monster Hunter Stories 3 Review [First Impressions] | Simply Rejuvenating](https://img.game8.co/4438641/2a31b7702bd70e78ec8efd24661dacda.jpeg/thumb)
Popular Games

Genshin Impact Walkthrough & Guides Wiki
Honkai: Star Rail Walkthrough & Guides Wiki
Umamusume: Pretty Derby Walkthrough & Guides Wiki
Pokemon Pokopia Walkthrough & Guides Wiki
Resident Evil Requiem (RE9) Walkthrough & Guides Wiki
Monster Hunter Wilds Walkthrough & Guides Wiki
Wuthering Waves Walkthrough & Guides Wiki
Arknights: Endfield Walkthrough & Guides Wiki
Pokemon FireRed and LeafGreen (FRLG) Walkthrough & Guides Wiki
Pokemon TCG Pocket (PTCGP) Strategies & Guides Wiki


Recommended Games
Diablo 4: Vessel of Hatred Walkthrough & Guides Wiki
Fire Emblem Heroes (FEH) Walkthrough & Guides Wiki
Yu-Gi-Oh! Master Duel Walkthrough & Guides Wiki
Super Smash Bros. Ultimate Walkthrough & Guides Wiki
Pokemon Brilliant Diamond and Shining Pearl (BDSP) Walkthrough & Guides Wiki
Elden Ring Shadow of the Erdtree Walkthrough & Guides Wiki
Monster Hunter World Walkthrough & Guides Wiki
The Legend of Zelda: Tears of the Kingdom Walkthrough & Guides Wiki
Persona 3 Reload Walkthrough & Guides Wiki
Cyberpunk 2077: Ultimate Edition Walkthrough & Guides Wiki


All rights reserved
© Nintendo. The Legend of Zelda and Nintendo Switch are trademarks of Nintendo.
The copyrights of videos of games used in our content and other intellectual property rights belong to the provider of the game.
The contents we provide on this site were created personally by members of the Game8 editorial department.
We refuse the right to reuse or repost content taken without our permission such as data or images to other sites.
I love your guide! I’d appreciate if you’d put a note on the orbs that can only be accquired after getting rid of the sandshroud though. :-)