This survey will take about 1 minute.
Your answers will help us to improve our website.
Zelda: Tears of the Kingdom (TotK)
Tabantha Frontier Region Map: Korok Seed Locations, Shrines, and Quests
▲ Get Pristine Weapons from the depths!
△ All 1000 Koroks | All 4 Great Fairies
▲ 81 Addison Signs | 147 Caves | 58 Wells
△ Tips: Farm Rupees | Starting Armor
▲ Best Weapons | Best Armor | Best Food
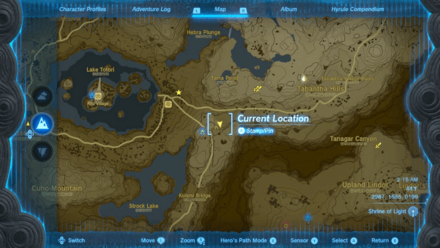
Tabantha Frontier is a region found in the Surface of Hyrule in The Legend of Zelda: Tears of the Kingdom (TotK). Read on to see the full Tabantha Frontier region map, as well as locations for Korok Seeds, Shrines, Quests, and other points of interest found within the Tabantha Frontier!
List of Contents
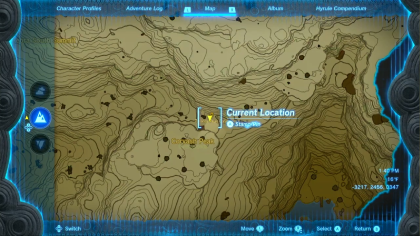
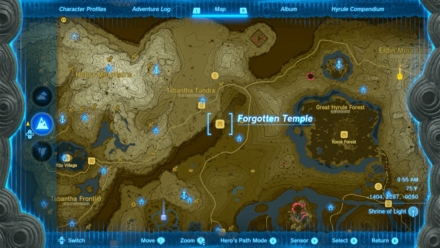
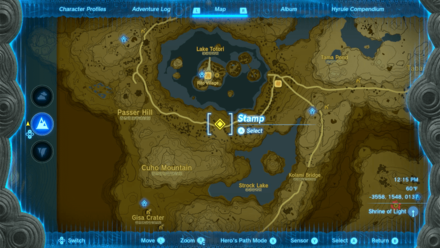
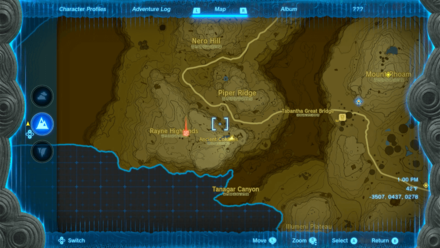
Tabantha Frontier Region Map
Tabantha Frontier Full Map
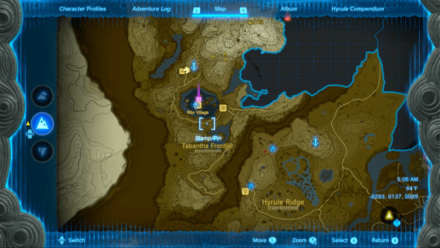 Enlarge EnlargeView Full Image |
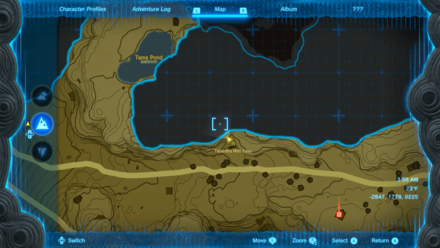
Tabantha Frontier Tower Map Location
Map and Coordinates
| Overworld Location | Coordinates |
|---|---|
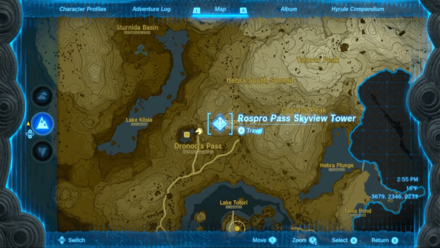 Enlarge EnlargeRospro Pass Skyview Tower |
-3679, 2346, 0233 |
Shared Tower between Hebra Mountains.
Skyview Tower Guide: All Tower Locations
Tabantha Frontier Shrine Locations
Shrine Map Locations and Coordinates
| Location | Coordinates |
|---|---|
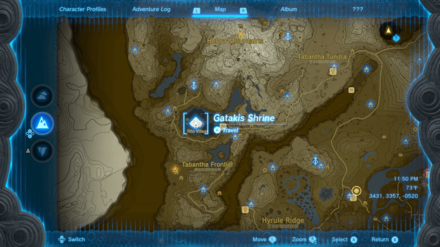 Enlarge EnlargeGatakis Shrine (Ride the Winds) |
Video Guide -3652, 1806, 0168 |
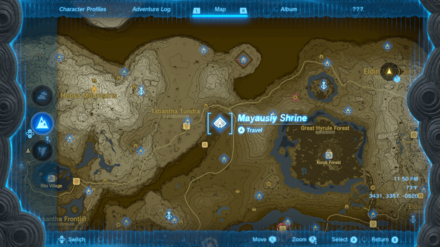 Enlarge EnlargeMayausiy Shrine (Building Blocks) |
Video Guide -1169, 2602, -0083 |
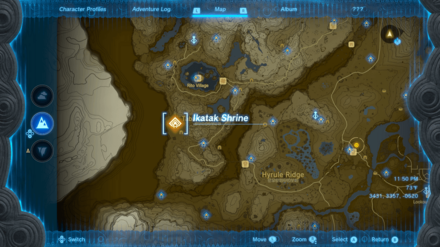 Enlarge EnlargeIkatak Shrine (Rauru's Blessing) |
-3950, 1138, 0112 |
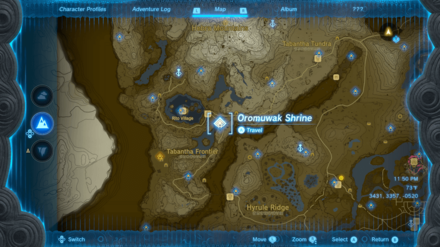 Enlarge EnlargeOromuwak Shrine (A Launching Device) |
-3079, 1617, 0243 |
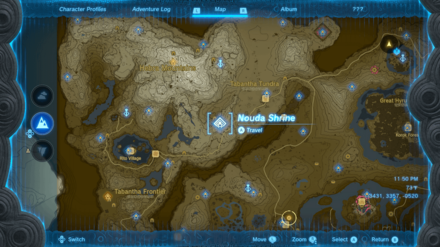 Enlarge EnlargeNouda Shrine (Proving Grounds: Intermediate) |
-2318, 2201, 0173 |
 Enlarge EnlargeWao-os Shrine (Lever Power) |
-4059, 1990, 0183 |
 Enlarge EnlargeIun-orok Shrine (The Right Roll) |
-3538, 0850, -0133 |
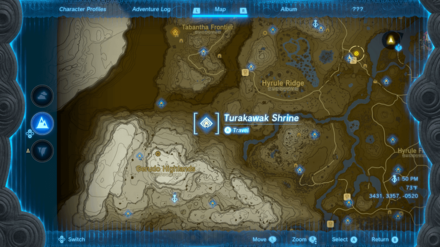 Enlarge EnlargeTurakawak Shrine (Stacking a Path) |
-3496, -0197, 0066 |
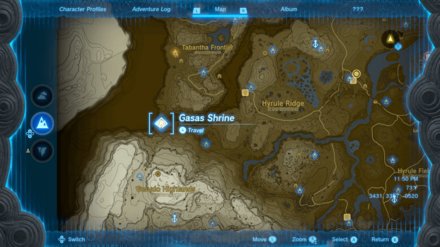 Enlarge EnlargeGasas Shrine (Well-Timed Cuts) |
-4152, 0098, 0040 |
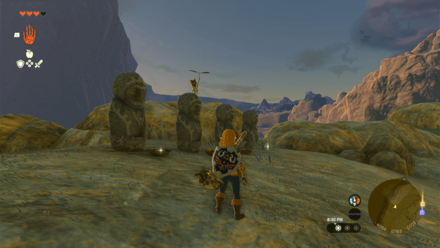
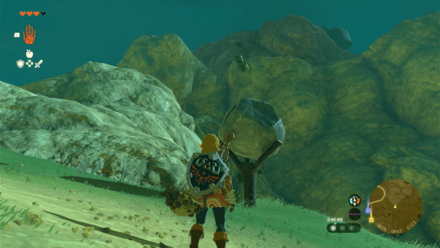
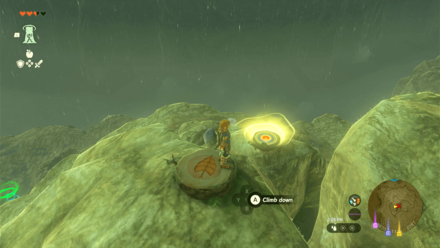
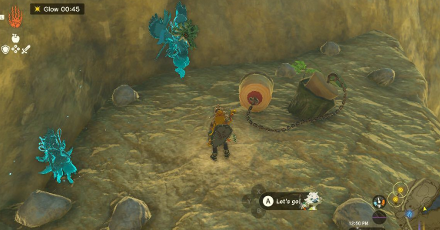
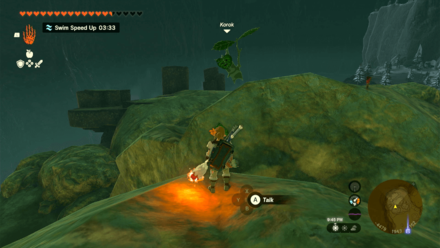
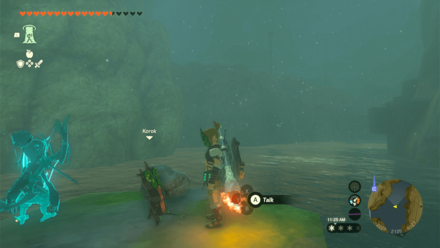
Tabantha Frontier Korok Seed Locations
Korok Seed Locations and Coordinates
| Overworld | Location Details |
|---|---|
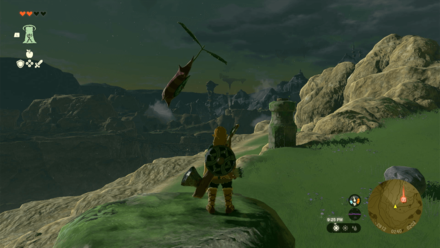
 Enlarge EnlargeKorok Seed |
Start Coordinates -3646, 1808, 0167 Pick up the lone rock in front of Gatakis Shrine to reveal the Korok. |
 Enlarge EnlargeKorok Seed |
Start Coordinates -3132, -0113, 0210 Pick up the lone rock at the center of the geoglyph to reveal the Korok. |
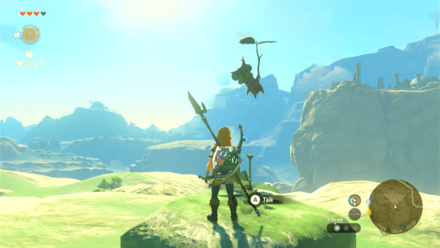
 Enlarge EnlargeKorok Seed |
Start Coordinates -3549, 1754, 0182 Shoot the floating balloon by the canyon with an arrow. |
 Enlarge EnlargeKorok Seed |
Start Coordinates -2021, 0077, 0156 Chase the moving sparkles to reveal the Korok. |
 Enlarge EnlargeKorok Seed |
Start Coordinates -3108, 0240, 0111 End Coordinates -3115, 0232, 0112 Follow the disappearing yellow flowers around the small grove until you reach a white flower. |
 Enlarge EnlargeKorok Seed |
Start Coordinates -2919, 0285, 0207 End Coordinates -2912, 0240, 0202 Step on the tree stump and race towards the ring before time runs out. |
 Enlarge EnlargeKorok Seed |
Start Coordinates -3443, 0662, 0250 Interact with the dandelion and catch it. |
 Enlarge EnlargeKorok Seed |
Start Coordinates -3552, 0594, 0211 Burn the pile of leaves and pick up the rock hidden beneath. |
 Enlarge EnlargeKorok Seed |
Start Coordinates -4056, 0769, 0102 Place two Spicy Peppers on the empty bowls in front of the prayer statues. |
 Enlarge EnlargeKorok Seed |
Start Coordinates -3981, 0929, 0112 Examine the sparkles at the top of the tree trunk to reveal the Korok. |
 Enlarge EnlargeKorok Seed |
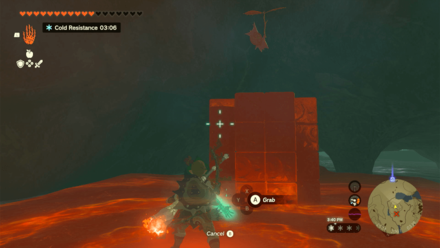
Start Coordinates -3817, 0836, 0124 Place the nearby boulder ontop of the wooden pedestal to reveal the Korok. |
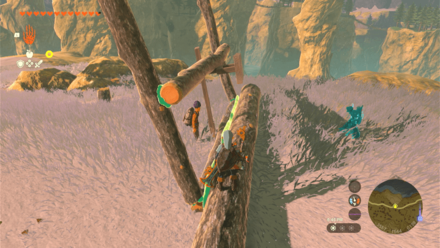
 Enlarge EnlargeKorok Seed |
Start Coordinates -3715, 1038, 0247 Locate the Korok sign under the cliff face and use Ascend to pass through it. |
 Enlarge EnlargeKorok Seed x2 |
Start Coordinates -3613, 0987, 0288 End Coordinates -3555, 0770, 0187 Reunite the Korok with his friend at the adjacent hill. Use the Zonai devices to reach the area. |
 Enlarge EnlargeKorok Seed |
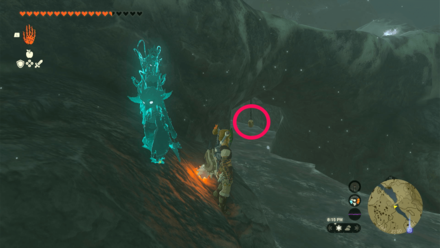
Start Coordinates -3527, 0744, 0186 Chase the moving sparkles circling around the tall boulder and interact with it to reveal the Korok. |
 Enlarge EnlargeKorok Seed |
Start Coordinates -3820, 1319, 0287 Jump from the initial platform and glide towards the target platform. |
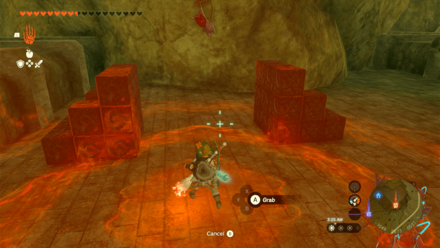
 Enlarge EnlargeKorok Seed |
Start Coordinates -3441, 1315, 0120 Complete the metal block set to reveal the Korok. Copy the arrangement of the blocks on the opposite side to solve the puzzle. |
 Enlarge EnlargeKorok Seed |
Start Coordinates -3285, 1339, 0187 Pick up the lone rock at the summit of the rocku mountain to reveal the Korok. |
 Enlarge EnlargeKorok Seed |
Start Coordinates -3094, 1321, 0208 Shoot the hanging acorn under the bridge with an arrow. |
 Enlarge EnlargeKorok Seed |
Start Coordinates -2522, 1833, 0276 Shoot the hanging acorn near the geoglyph. |
 Enlarge EnlargeKorok Seed |
Start Coordinates -3135, 1557, 0123 Attach the rock to the cork and then throw the rock off the cliff to uncork the hole and get the Korok Seed. |
 Enlarge EnlargeKorok Seed |
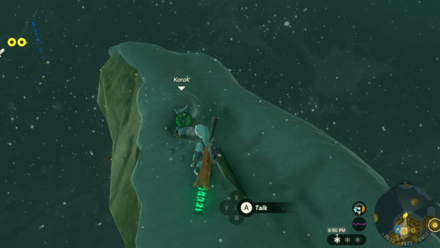
Start Coordinates -3613, 1877, 0402 Pick up the lone rock at the edge of the snowy rock formation. |
 Enlarge EnlargeKorok Seed |
Start Coordinates -3696, 1686, 0103 Pick up the rock at the southwest rock pillar in Lake Totori. |
 Enlarge EnlargeKorok Seed |
Start Coordinates -3773, 1866, 0260 Grab the wooden plank piece on the left and insert it in on the gap of the roof using Ultrahand. |
 Enlarge EnlargeKorok Seed |
Start Coordinates -3881, 1754, 0104 Fill the space in the metal block formation. Use Ultrahand to lift the separated block and rotate it until it's oriented like a huge 'L' before sliding it in. |
 Enlarge EnlargeKorok Seed |
Start Coordinates -3984, 1708, -0179 Climb up the tree and lift the lone rock at the top. |
 Enlarge EnlargeKorok Seed |
Start Coordinates -4013, 1643, 0165 Grab a rock and place it in the missing gap in the circle of stones. |
 Enlarge EnlargeKorok Seed |
Start Coordinates -4168, 1694, 0110 Grab the lone rock on the land in the middle of a brown bog. |
 Enlarge EnlargeKorok Seed |
Start Coordinates -4231, 1748, 0111 End Coordinates -4224, 1739, 0124 Follow the trail of flowers. It will be within the area, with the flowers spawning on the bone, so don't worry about getting too far. |
 Enlarge EnlargeKorok Seed |
Start Coordinates -3618, 1525, -0140 End Coordinates -3597, 1535, -0143 Follow the trail of disappearing flowers across the small ruins. The path should lead to the road close by. |
 Enlarge EnlargeKorok Seed |
Start Coordinates -4062, 1793, 0150 Look for the stump underneath the rock formation and use Ascend to find the Korok. |
 Enlarge EnlargeKorok Seed |
Start Coordinates -3966, 0624, 0189 The first platform is located on an upright column. North of this location is the landing platform on a fallen column. |
 Enlarge EnlargeKorok Seed |
Start Coordinates -4479, 1942, 0162 Scale the top of the rocky hill pointed at by red arrows to reach the sparkles. Interact with it to reveal the Korok. |
 Enlarge EnlargeKorok Seed |
Start Coordinates -3527, 0579, 0169 Shoot the target balloon to reveal the Korok. |
 Enlarge EnlargeKorok Seed |
Start Coordinates -3434, 0709, 0172 On a small alcove, two statues is located underneath a target stump. Use Ascend on this stump to reveal the Korok. |
 Enlarge EnlargeKorok Seed |
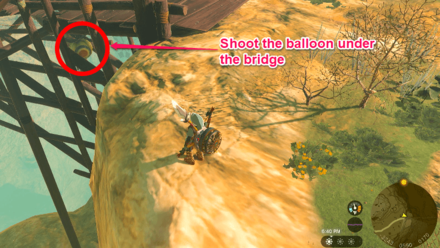
Start Coordinates -3243, 0590, 0170 Shoot the balloon underneath Tabantha Great Bridge. |
 Enlarge EnlargeKorok Seed |
Start Coordinates -3524, 0494, 0238 Complete the metal block set to reveal the korok. Rotate the separated piece until it can slide right in the gap. |
 Enlarge EnlargeKorok Seed |
Start Coordinates -3649, 0511, 0286 End Coordinates -3605, 0358, 0297 Start the flower trail on top of the column east of the Ancient Columns. Follow the trail until you reach the column south of the area. Be careful of the Flame Gleeok nearby! |
 Enlarge EnlargeKorok Seed |
Start Coordinates -3148, 1105, 0156 Pick the lone rock by the edge of the cliff to reveal the Korok. |
 Enlarge EnlargeKorok Seed |
Start Coordinates -3088, 2120, 0121 Glide towards the pillar in the middle of Hebra Plunge. Pick up the rock to reveal the Korok. |
 Enlarge EnlargeKorok Seed |
Start Coordinates -3040, 2359, 0113 Complete the metal block set to reveal the korok. Rotate the separated piece until it can fit to complete the set of blocks. |
 Enlarge EnlargeKorok Seed x2 |
Start Coordinates -2794, 2306, 0354 End Coordinates -2836, 2318, 0391 Reunite the Korok to its friend atop the cliff. |
 Enlarge EnlargeKorok Seed |
Start Coordinates -2739, 2267, 0343 Shoot the acorn under the bridge with an arrow to reveal the Korok. |
 Enlarge EnlargeKorok Seed |
Start Coordinates -2635, 2058, 0338 Follow the nearby freezing river to reach a cavern and a metal block puzzle. Slide the cross and flip it to solve the puzzle and get a Korok seed. |
 Enlarge EnlargeKorok Seed |
Start Coordinates -2797, 1949, 0273 Complete the rock pattern surrounding the dead tree on the middle of the island. |
 Enlarge EnlargeKorok Seed |
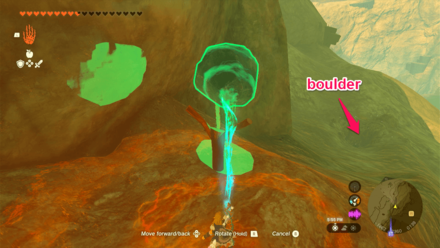
Start Coordinates -2268, 2288, 0324 Get the boulder southeast of the pedestal and place it to reveal the Korok. |
 Enlarge EnlargeKorok Seed |
Start Coordinates -2383, 2134, 0393 Hit the spinning balloons to get the Korok Seed. |
 Enlarge EnlargeKorok Seed |
Start Coordinates -2295, 1908, 0294 Shoot the acorn inside the tree stump to reveal the Korok. |
 Enlarge EnlargeKorok Seed |
Start Coordinates -2210, 2090, 0323 Use the wooden plank from the nearby Hudson construction materials stack and cover the statues. |
 Enlarge EnlargeKorok Seed |
Start Coordinates -2077, 2074, 0286 Shoot the acorn hanging off the ruined house to reveal the Korok. |
 Enlarge EnlargeKorok Seed |
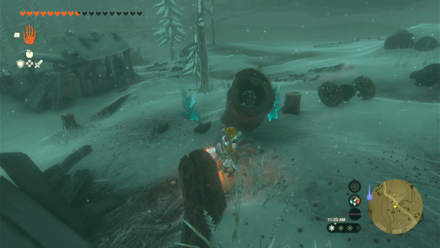
Start Coordinates -1464, 2362, 0138 Place the boulder on top of the pedestal to reveal the Korok. The boulder is found at a pit below. |
 Enlarge EnlargeKorok Seed |
Start Coordinates -1581, 2134, -0038 Reach the top of the pillar and shoot the balloons revolving around it. |
 Enlarge EnlargeKorok Seed |
Start Coordinates -1186, 2482, -0100 Lift up the rock beside the pillar to reveal the Korok. |
 Enlarge EnlargeKorok Seed |
Start Coordinates -1147, 2533, -0033 Lift the rock at the tree protruding out of the Forgotten Temple's wall. |
 Enlarge EnlargeKorok Seed |
Start Coordinates -1050, 2611, 0031 Complete the metal block set at the roof of the Forgotten Temple. Copy the blocks on the right to solve the puzzle. |
 Enlarge EnlargeKorok Seed |
Start Coordinates -2686, 1663, 0268 Interact with the sparkles near the chimney to reveal the Korok. |
 Enlarge EnlargeKorok Seed |
Start Coordinates -2821, 1594, -0019 Complete the metal block puzzle found at the bottom of the canyon by placing the L-shaped block flat in the air and attaching it to the rest of the blocks. Use the set of blocks above the incomplete set as a guide. |
 Enlarge EnlargeKorok Seed |
Start Coordinates -3821, 0175, 0049 Complete the metal block set which resemble the shape of a windmill. Attach the separated block to complete the fans. |
 Enlarge EnlargeKorok Seed |
Start Coordinates -3600, 0110, -0102 Use Ascend on the tree stump at the cave's ceiling to reveal a Korok. |
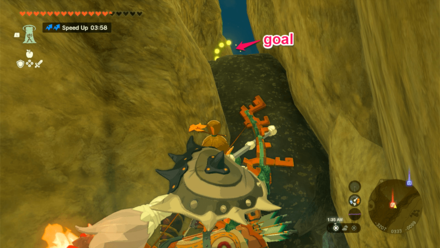 Enlarge EnlargeKorok Seed |
Start Coordinates -3207, 0333, -0099 End Coordinates -3199, 0343, -0071 Step on the tree stump and race towards the ring before time runs out. Use Ascend on the rock to quickly reach the goal. |
Korok Seed Map: All Korok Seed Locations
Tabantha Frontier Quests
Main Quests
| Quest | Coordinates |
|---|---|
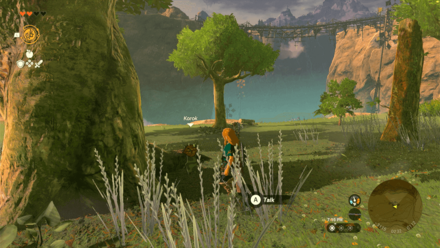
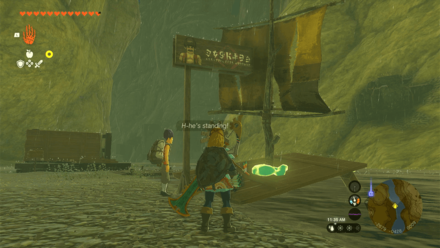
 Enlarge EnlargeTulin of Rito Village |
-3596, 1802, 0212 |
Side Quests
| Quest | Coordinates |
|---|---|
 Enlarge EnlargeMolli the Fletcher's Quest |
-3616, 1793, 0214 |
 Enlarge EnlargeCrossing the Cold Pool |
-3217, 2456, 0347 |
 Enlarge EnlargeCave Mushrooms That Glow |
-2987, 1655, 0199 |
 Enlarge EnlargeThe Mother Goddess Statue |
-1068, 2684, -0081 |
 Enlarge EnlargeGenli's Home Cooking |
-3641, 1820, 0184 |
 Enlarge EnlargeThe Blocked Cave |
-3581, 2474, 0228 |
 Enlarge EnlargeFish for Fletching |
-3654, 1763, 0214 |
 Enlarge EnlargeLegacy of the Rito |
-3609, 1824, 0218 |
 Enlarge EnlargeTreasure of the Secret Springs |
-3610, 1822, 0218 |
 Enlarge EnlargeThe Rito Rope Bridge |
-3296, 1802, 0121 |
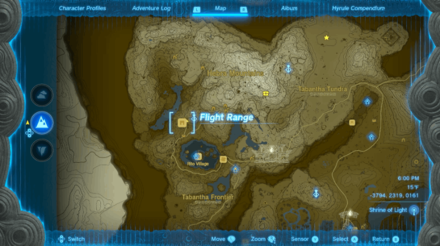 Enlarge EnlargeKaneli's Flight Training |
-3794, 2319, 0161 |
 Enlarge EnlargeOpen the Door |
-2682, 1673, 0258 |
 Enlarge EnlargeSupply-Eyeing Fliers |
-2175, 2028, 0363 |
Side Adventures
| Quest | Coordinates |
|---|---|
 Enlarge EnlargePotential Princess Sightings |
-3256, 1764, 0119 |
 Enlarge EnlargeThe Hornist's Dramatic Escape |
-3649, 0768, 0117 |
Tabantha Frontier Settlements
All Towns and Settlement Locations
| Overworld Location | Coordinates |
|---|---|
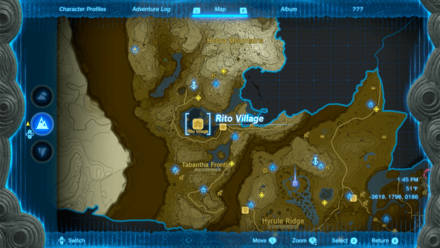 Enlarge EnlargeRito Village |
-3619, 1796, 0186 |
 Enlarge EnlargeForgotten Temple |
-1404, 2287, -0050 |
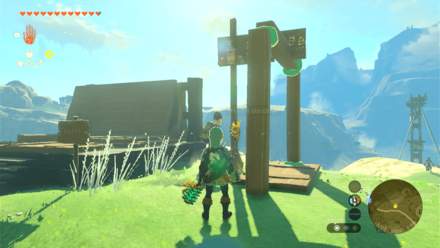
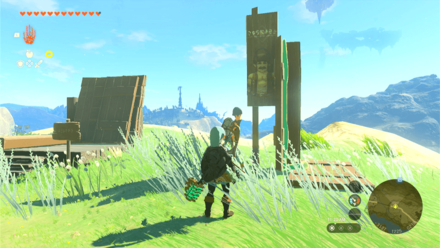
Tabantha Frontier Hudson Signs
Addison Sign Locations
| Location | Solution |
|---|---|
 Enlarge Enlarge |
 Enlarge Enlarge |
| Coordinates: -3321, 0505, 0170 Solution: Build a wooden arc using the wooden materials nearby. Place the arc under the chipped part of the Hudson sign. |
|
 Enlarge Enlarge |
 Enlarge Enlarge |
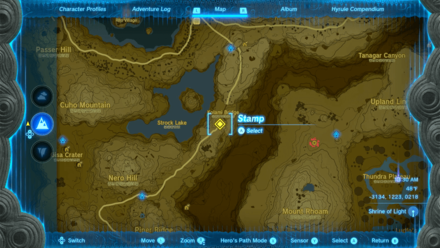
| Coordinates: -3134, 1223, 0218 Solution: Build a wooden stand using the materials nearby. Place it beside the Hudson sign. |
|
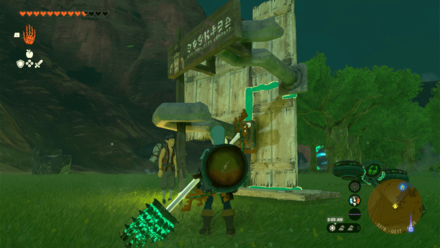
 Enlarge Enlarge |
 Enlarge Enlarge |
| Coordinates: -3558, 1548, 0137 Solution: Cut the trees and use the logs to make a frame. Attach one log in front of the post above the Hudson sign. |
|
 Enlarge Enlarge |
 Enlarge Enlarge |
| Coordinates: -2676, -0426, 0009 Solution: Build a ramp and use the nearby sail to catch the Hudson sign. Attach a boulder at the bottom of the ramp to hold it steady on the river. |
|
 Enlarge Enlarge |
 Enlarge Enlarge |
| Coordinates: -3381, -0218, 0068 Solution: Make a stand using the nearby wooden boards. Attach the hooks to the Hudson sign and post to secure it. |
|
All Hudson Sign Locations: How to Help Addison's Signs Stand
Tabantha Frontier Points of Interest
Cave Locations and Coordinates
| Overworld Location | Coordinates |
|---|---|
 Enlarge EnlargeTamio River Downstream Cave |
-2923, -0806, 0009 |
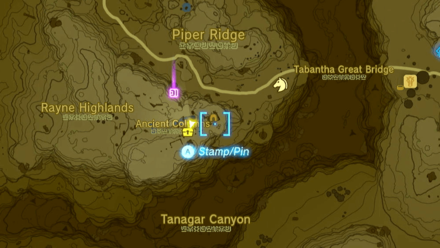 Enlarge EnlargeAncient Columns Cave |
-3464, 0449, 0265 |
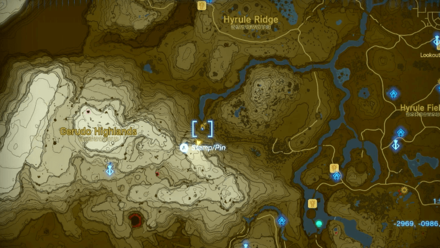
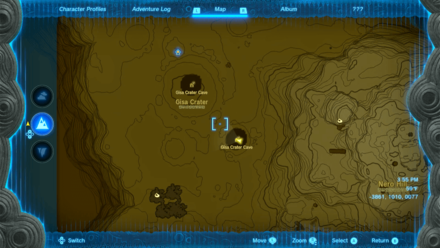 Enlarge EnlargeGisa Crater Cave |
-3861, 1010, 0077 |
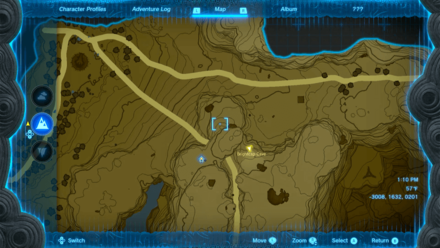 Enlarge EnlargeBrightcap Cave |
-3008, 1632, 0201 |
 Enlarge EnlargeTabantha Hills Cave |
-2837, 1770, 0225 |
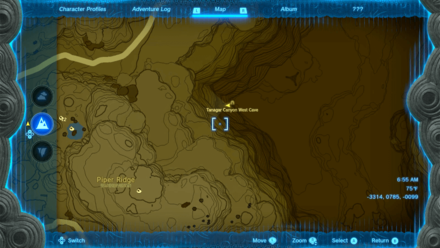 Enlarge EnlargeTanagar Canyon West Cave |
-3314, 0785, -0099 |
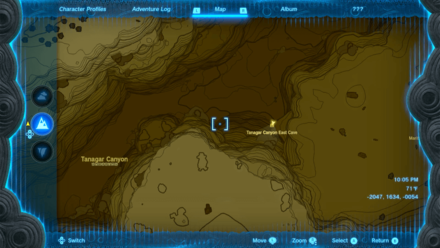 Enlarge EnlargeTanagar Canyon East Cave |
-2047, 1634, --0054 |
 Enlarge EnlargeHebra Headspring Cave |
-2905, 2517, 0393 |
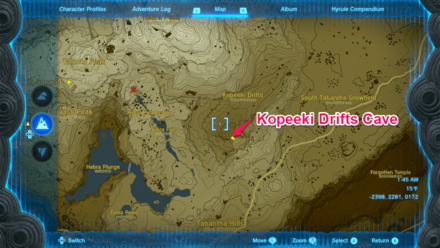 Enlarge EnlargeKopeeki Drifts Cave |
-2398, 2281, 0172 |
Notable Map Locations
| Overworld Location | Coordinates |
|---|---|
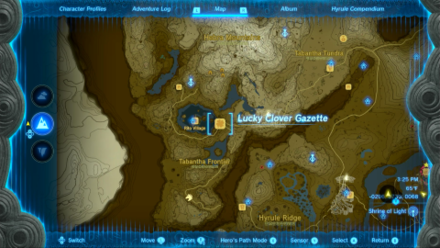
 Enlarge EnlargeLucky Clover Gazette |
-3249, 1775, 0119 |
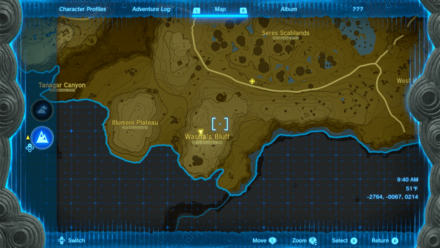 Enlarge EnlargeWasha's Bluff |
-2764, -0067, 0214 |
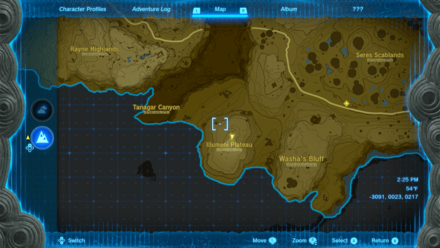 Enlarge EnlargeIllumeni Plateau |
-3091, 0023, 0217 |
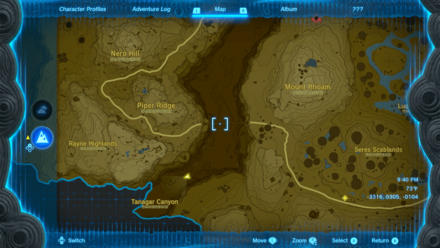 Enlarge EnlargeTanagar Canyon |
-33166, 0305, -0104 |
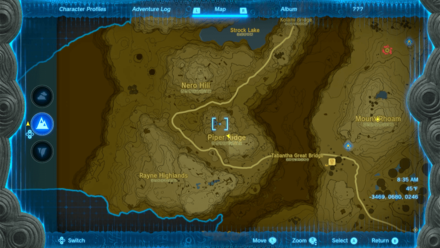 Enlarge EnlargePiper Ridge |
-3469, 0680, 0246 |
 Enlarge EnlargeAncient Columns |
-3583, 0430, 0264 |
 Enlarge EnlargeRayne Highlands |
-3767, 0500, 0260 |
 Enlarge EnlargeNero Hill |
-3634, 0928, 0250 |
 Enlarge EnlargeGisa Crater |
-3914, 1037, 0104 |
 Enlarge EnlargeCuho Mountain |
-3826, 1336, 0283 |
 Enlarge EnlargeStrock Lake |
-3372, 1235, 0073 |
 Enlarge EnlargeKolami Bridge |
-3112, 1294, 0217 |
 Enlarge EnlargeTama Pond |
-3012, 1881, 0269 |
 Enlarge EnlargeTabantha Hills |
-2517, 1830, 0274 |
 Enlarge EnlargeDragon Bone Mire |
-4157, 1733, 0140 |
The Legend of Zelda: Tears of the Kingdom Related Guides

Interactive Map of Hyrule:
All Locations and Map Icons
All Area Maps and Locations
| Hyrule Map Locations | |||||
|---|---|---|---|---|---|
Other Maps
List of Surface Regions
Comment
Author

The Legend of Zelda: Tears of the Kingdom Walkthrough & Guides Wiki
Tabantha Frontier Region Map: Korok Seed Locations, Shrines, and Quests
Please participate in our site
improvement survey
03/2026
improvement survey
03/2026
Would you assist in
improving Game8's site?
improving Game8's site?

×
We are listening to our users' valuable opinions and discussing how to act on them.
The information collected through this survey will be used for the purpose of improving our services. In addition, the information will only be disclosed a part of a statistic in a format that will not allow identification of personal information.
Begin Survey
Not Now
×
Please rate each item regarding Game8.co's Advertisements.
Amount of Ads
Very Dissatisfied
Somewhat Dissatisfied
Fine
Somewhat Satisfied
Highly Satisfied
Placement of Ads
Timing of Ad Display
Ad Loading Speed
Safeness of Ads
Content of Ads
×
Please rate each item regarding Game8.co's Quality of Articles.
Amount of information
Very Dissatisfied
Somewhat Dissatisfied
Fine
Somewhat Satisfied
Highly Satisfied
Frequency of updates
Speed of new information
Accuracy of articles
Understandibility of articles
Readability of sentences
×
Please rate each item regarding Game8.co's Usability of the Site.
Ease of finding information
Very Dissatisfied
Somewhat Dissatisfied
Fine
Somewhat Satisfied
Highly Satisfied
Loading Speed
Use of Color
Font Size
Visibility of Images
Easy to Understand Layout
×
Please rate each item regarding Game8.co's Message Boards, Comments.
Ease of Writing
Very Dissatisfied
Somewhat Dissatisfied
Fine
Somewhat Satisfied
Highly Satisfied
Readability
Ease in Finding Information
Comment Quality
Comment Quantity
Admin Response
×
Please rate each item regarding Game8.co's Site's new design.
Please rate our site's new design
Very Dissatisfied
Somewhat Dissatisfied
Fine
Somewhat Satisfied
Highly Satisfied
Do you think that the website's design change makes the site easier to use?
Has the new design made it easier for you to find information on the site?
Has the new design improved the overall visual appeal of the site?
How would you rate your overall satisfaction with the new design of the site?
×
How likely are you to recommend Game8 to someone you know?
Very Unlikely
0
1
2
3
4
5
6
7
8
9
10
Very Likely
If you have other opinions regarding potential improvement to the website, please share them with us. We would appreciate your honest opinion.
Note: This is a free response section, so you can proceed without entering anything.
Note: Please be sure not to enter any kind of personal information into your response.
Note: Please be sure not to enter any kind of personal information into your response.
×
Thank You
×
Thank you for participating in our survey! Your answers will help us to improve the quality of our website and services.
We hope you continue to make use of Game8.
We hope you continue to make use of Game8.
Close
Rankings
- We could not find the message board you were looking for.
Gaming News


![Everwind Review [Early Access] | The Shaky First Step to A Very Long Journey](https://img.game8.co/4440226/ab079b1153298a042633dd1ef51e878e.png/thumb)

![Monster Hunter Stories 3 Review [First Impressions] | Simply Rejuvenating](https://img.game8.co/4438641/2a31b7702bd70e78ec8efd24661dacda.jpeg/thumb)
Popular Games

Genshin Impact Walkthrough & Guides Wiki
Honkai: Star Rail Walkthrough & Guides Wiki
Umamusume: Pretty Derby Walkthrough & Guides Wiki
Pokemon Pokopia Walkthrough & Guides Wiki
Resident Evil Requiem (RE9) Walkthrough & Guides Wiki
Monster Hunter Wilds Walkthrough & Guides Wiki
Wuthering Waves Walkthrough & Guides Wiki
Arknights: Endfield Walkthrough & Guides Wiki
Pokemon FireRed and LeafGreen (FRLG) Walkthrough & Guides Wiki
Pokemon TCG Pocket (PTCGP) Strategies & Guides Wiki


Recommended Games
Diablo 4: Vessel of Hatred Walkthrough & Guides Wiki
Fire Emblem Heroes (FEH) Walkthrough & Guides Wiki
Yu-Gi-Oh! Master Duel Walkthrough & Guides Wiki
Super Smash Bros. Ultimate Walkthrough & Guides Wiki
Pokemon Brilliant Diamond and Shining Pearl (BDSP) Walkthrough & Guides Wiki
Elden Ring Shadow of the Erdtree Walkthrough & Guides Wiki
Monster Hunter World Walkthrough & Guides Wiki
The Legend of Zelda: Tears of the Kingdom Walkthrough & Guides Wiki
Persona 3 Reload Walkthrough & Guides Wiki
Cyberpunk 2077: Ultimate Edition Walkthrough & Guides Wiki


All rights reserved
© Nintendo. The Legend of Zelda and Nintendo Switch are trademarks of Nintendo.
The copyrights of videos of games used in our content and other intellectual property rights belong to the provider of the game.
The contents we provide on this site were created personally by members of the Game8 editorial department.
We refuse the right to reuse or repost content taken without our permission such as data or images to other sites.