Sphere Trader Locations and List of Exchange Items
✬ Pokemon HOME Dex Completion Shiny Rewards:
┗ Meloetta | Manaphy | Enamorus | Keldeo | Meltan
☆ All Maps & Pokemon Locations
★ Best Battle Tower Team (100 Win Streak!)
☆ How to Complete the National Dex
★ Tier List and Movesets for Online Battle

Sphere Traders let you trade spheres that you dig up in the Grand Underground for Pedestals, TMs, and more spheres. Read on to learn where these Sphere Hunters are located, their list of exchange items, and the pattern of their exchange requests!
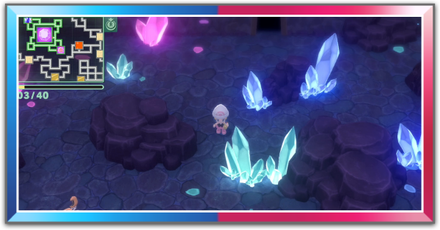
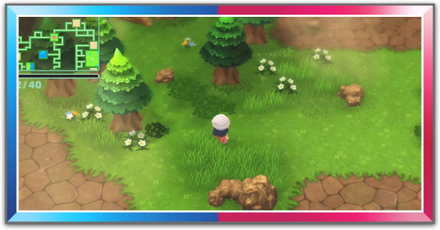
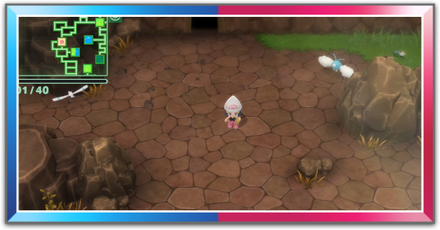
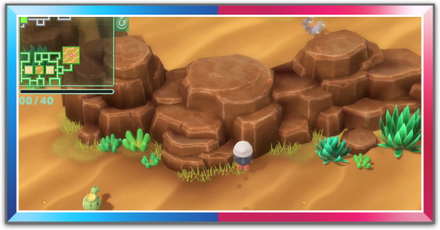
Sphere Trader Locations
| Zone Map and Sphere Trader Locations | |
|---|---|
| Eastern and Western Zone | Central Zone |
| Southeastern Zone | Southwestern Zone |
| Northwestern Zone | Northeastern Zone |
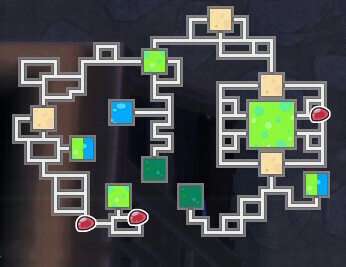
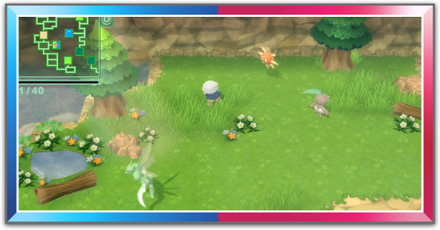
Eastern and Western Zone
| Sphere Trader Location | Entry Point |
|---|---|
| Eastern Zone | Eterna City Hearthome City Veilstone City and Connected Routes |
 |
|
| Western Zone | |
 |
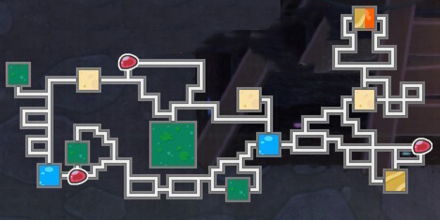
Central Zone
| Sphere Trader Location | Entry Point |
|---|---|
 |
Celestic Town |
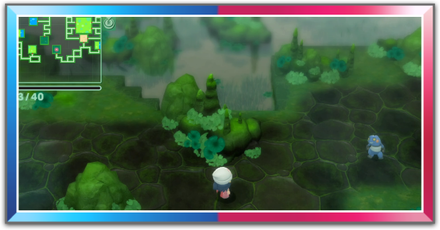
Southeastern Zone
| Sphere Trader Location | Entry Point |
|---|---|
 |
Sunyshore City |
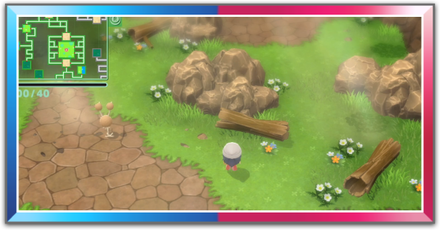
Southwestern Zone
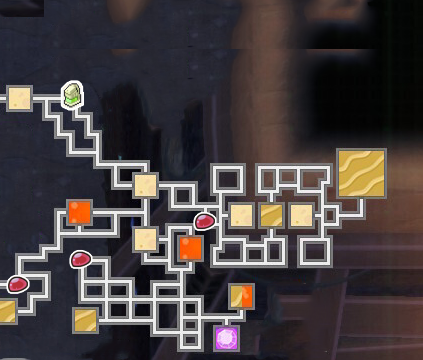
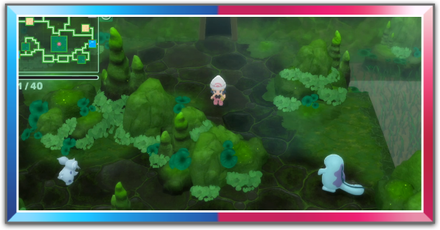
| Sphere Trader Location | Entry Point |
|---|---|
 |
Twinleaf Town Jubilife City Canalave City and Connected Routes |
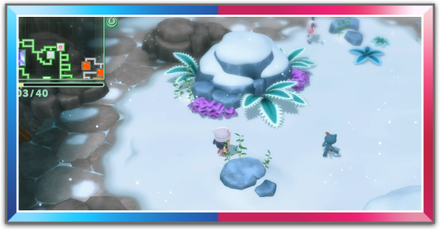
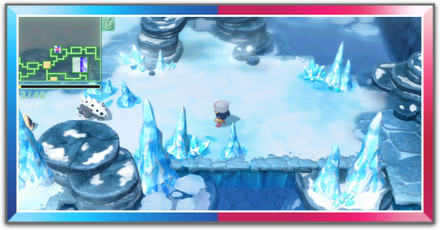
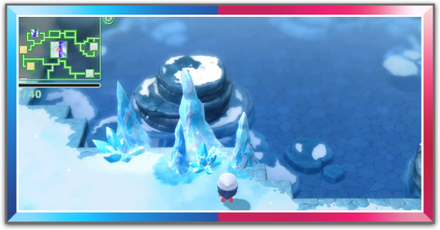
Northwestern Zone
| Sphere Trader Location | Entry Point |
|---|---|
 |
Snowpoint City and Connected Routes Fullmoon Island |
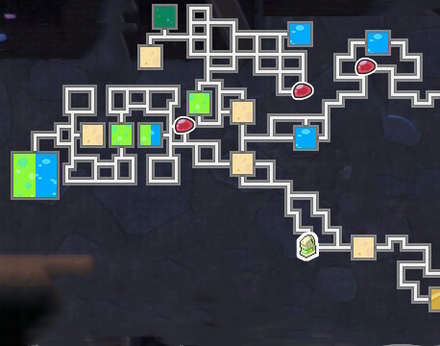
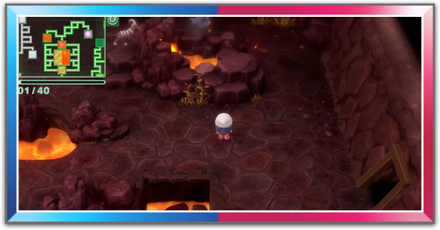
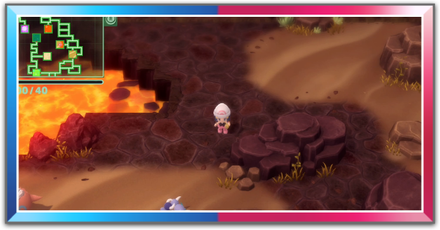
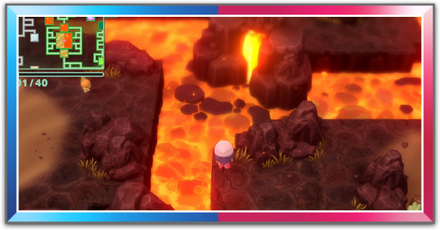
Northeastern Zone
| Sphere Trader Location | Entry Point |
|---|---|
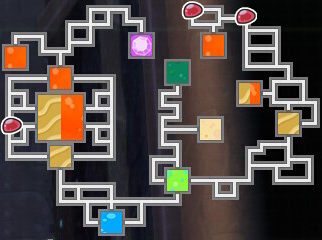 |
Fight Area Survival Area Resort Area Stark Mountain and Connected Routes |
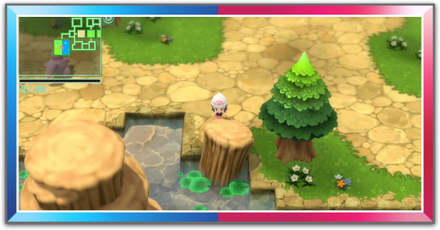
Sphere Traders appear in the same location
Sphere Traders have a set location in the Grand Underground and will appear in the same place even if you exit the area. For example, there's a Sphere Trader located in the lower left area of the Grand Underground of Twinleaf Town.
Sphere exchange rate changes everyday
 |
 |
While Sphere Traders stay in the same place and their list of goods do not change, the sphere exchange rate changes everyday. If you don't have the right amount of spheres for trade at the moment, you can check back tomorrow for a better deal!
List of Exchange Items
List of Pedestals and Exchange Rate
| Item | Exchange Rate | |
|---|---|---|
| Sturdy Pedestal M | Red Sphere S | x 25 |
| Sturdy Pedestal L | Red Sphere L | x 15 |
| Sturdy Pedestal XL | Blue Sphere L | x 20 |
| Prism Sphere L | x12 | |
| Square Pedestal S | Red Sphere S | x 20 |
| Square Pedestal M | Pale Sphere S | x 9 |
| Square Pedestal XL | Prism Sphere L | x 10 |
| Spin Pedestal XL | Prism Sphere L | x 10 |
| Green Sphere L | x25 | |
| Spinback Pedestal M | Prism Sphere L | x 10 |
| Spinback Pedestal XL | Green Sphere L | x 40 |
| Blue Sphere L | x 50 | |
| Clear Pedestal XL | Green Sphere L | x 20 |
List of TMs and Exchange Rate
| Item | Exchange Rate | |
|---|---|---|
| TM02 (Dragon Claw) | Red Sphere L | x 8 |
| TM05 (Roar) | Blue Sphere L | x 5 |
| TM12 (Taunt) | Red Sphere S | x 18 |
| TM26 (Earthquake) | Red Sphere L | x15 |
| Blue Sphere L | x15 | |
| TM30 (Shadow Ball) | Red Sphere L | x 12 |
| TM36 (Sludge Bomb) | Blue Sphere L | x 10 |
| TM42 (Facade) | Prism Sphere L | x 8 |
| TM63 (Nasty Plot) | Red Sphere S | x 25 |
| TM64 (Explosion) | Prism Sphere L | x 8 |
| TM71 (Stone Edge) | Pale Sphere L | x 8 |
| TM72 (Avalanche) | Pale Sphere L | x 8 |
| TM78 (Snarl) | Prism Sphere L | x 8 |
| TM86 (Grass Knot) | Pale Sphere S | x 13 |
| TM897 (Defog) | Red Sphere S | x 18 |
List of Spheres and Exchange Rate
| Item | Exchange Rate | ||
|---|---|---|---|
| Blue Sphere S | x40 | Blue Sphere L | x2 |
| Pale Sphere L | x1 | Pale Sphere S | x55 |
| Pale Sphere S | x40 | Pale Sphere L | x2 |
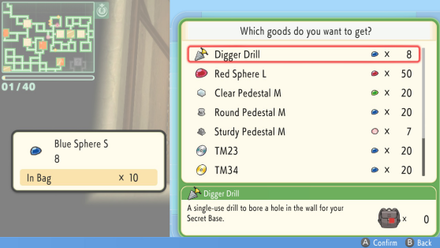
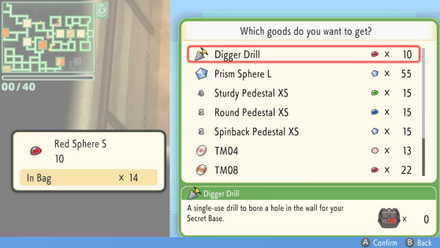
Other Items for Trade and Exchange Rate
| Item | Exchange Rate | ||
|---|---|---|---|
| Digger Drill | Blue Sphere S | x10 | |
| Blue Sphere S | x8 | ||
| Red Sphere S | x10 | ||
Exchange List Pattern
We're still testing the exchange patterns and we'll update the page as we uncover more information!
Exchange Pattern A
| List of Big Sphere Exchange Requests | |
|---|---|
| Blue Sphere S | Sturdy Pedestal XL |
| Square Pedestal M | Spin Pedestal XL |
| Spinback Pedestal XL | Clear Pedestal XL |
| TM02 (Dragon Claw) | TM05 (Roar) |
| TM26 (Earthquake) | TM36 (Sludge Bomb) |
| TM71 (Stone Edge) | |
Exchange Pattern B
| List of Small Sphere Exchange Requests | |
|---|---|
| Digger Drill | Pale Sphere L |
| Sturdy Pedestal M | Square Pedestal M |
| Square Pedestal S | TM12 (Taunt) |
| TM63 (Nasty Plot) | TM72 (Avalanche) |
| TM86 (Grass Knot) | TM897 (Defog) |
| List of Big Sphere Exchange Requests | |
| Pale Sphere S | Spinback Pedestal M |
| Sturdy Pedestal XL | Spinback Pedestal XL |
| Sturdy Pedestal L | TM26 (Earthquake) |
| TM30 (Shadow Ball) | TM42 (Facade) |
| TM64 (Explosion) | TM78 (Snarl) |
Pokemon BDSP Related Guides

Grand Underground Guides
| Grand Underground Maps & Data | |
|---|---|
| All Underground Pokemon | Grand Underground Map: Items & NPC Locations |
| Grand Underground Guides | |
| Pokemon Hideaways | Underground Man Missions |
| List of Statues and Effects | How to Get Shiny Statues |
| Digging for Treasure | All Treasures and Appearance Rates |
| How to Make a Secret Base | How to Find Diglett |
| Sphere Trader Locations | List of Spheres |
| List of Pedestals | |
| Removed Features | |
| Capture the Flag | Traps |
| Decorations | |
Grand Underground Pokemon Locations
| Hideaways and List of Pokemon | ||
|---|---|---|
 Fountainspring Cave Fountainspring Cave  |
 Stargleam Cavern Stargleam Cavern(Various types) |
 Dazzling Cave Dazzling Cave(Various types) |
 Grassland Cave Grassland Cave |
 Spacious Cave Spacious Cave(Various types) |
 Big Bluff Cavern  |
 Riverbank Cave Riverbank Cave(Various types) |
 Volcanic Cave Volcanic Cave |
 Sandsear Cave Sandsear Cave |
 Rocky Cave Rocky Cave |
 Bogsunk Cavern Bogsunk Cavern |
 Still-Water Cavern Still-Water Cavern |
 Whiteout Cave Whiteout Cave |
 Icy Cave Icy Cave |
 Glacial Cavern Glacial Cavern |
 Swampy Cave Swampy Cave |
 Typhlo Cavern Typhlo Cavern |
 Sunlit Cavern Sunlit Cavern(Various types) |
Comment
this needs updating, many of the tms are available but not listed, example ive found thief and volt switch from the trader
Author

Pokemon Brilliant Diamond and Shining Pearl (BDSP) Walkthrough & Guides Wiki
Sphere Trader Locations and List of Exchange Items
Rankings
Gaming News


![Monster Hunter Stories 3 Review [First Impressions] | Simply Rejuvenating](https://img.game8.co/4438641/2a31b7702bd70e78ec8efd24661dacda.jpeg/thumb)
Popular Games

Genshin Impact Walkthrough & Guides Wiki
Honkai: Star Rail Walkthrough & Guides Wiki
Umamusume: Pretty Derby Walkthrough & Guides Wiki
Pokemon Pokopia Walkthrough & Guides Wiki
Resident Evil Requiem (RE9) Walkthrough & Guides Wiki
Monster Hunter Wilds Walkthrough & Guides Wiki
Wuthering Waves Walkthrough & Guides Wiki
Arknights: Endfield Walkthrough & Guides Wiki
Pokemon FireRed and LeafGreen (FRLG) Walkthrough & Guides Wiki
Pokemon TCG Pocket (PTCGP) Strategies & Guides Wiki


Recommended Games
Diablo 4: Vessel of Hatred Walkthrough & Guides Wiki
Cyberpunk 2077: Ultimate Edition Walkthrough & Guides Wiki
Fire Emblem Heroes (FEH) Walkthrough & Guides Wiki
Yu-Gi-Oh! Master Duel Walkthrough & Guides Wiki
Super Smash Bros. Ultimate Walkthrough & Guides Wiki
Pokemon Brilliant Diamond and Shining Pearl (BDSP) Walkthrough & Guides Wiki
Elden Ring Shadow of the Erdtree Walkthrough & Guides Wiki
Monster Hunter World Walkthrough & Guides Wiki
The Legend of Zelda: Tears of the Kingdom Walkthrough & Guides Wiki
Persona 3 Reload Walkthrough & Guides Wiki


All rights reserved
©2021 Pokémon. TM, ®Nintendo.
The copyrights of videos of games used in our content and other intellectual property rights belong to the provider of the game.
The contents we provide on this site were created personally by members of the Game8 editorial department.
We refuse the right to reuse or repost content taken without our permission such as data or images to other sites.
The second from the left sphere trader on the southwestern map does not exist.