Best Loadout
★ The Resident Evil Requiem wiki is now live!
☆ Learn the best ways to speedrun & reach Professional S+!
★ Discover all the Skips you can make in a single playthrough!
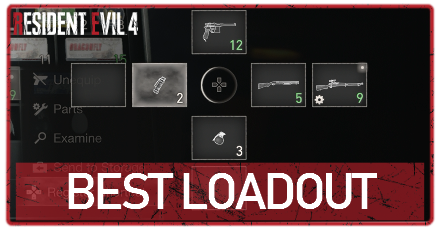
In the Resident Evil 4 Remake (RE4), knowing the best loadout allows you to maximize your firepower while making the most of your inventory space. Check out our recommended best loadouts from the early game to the late game!
| Best Weapon Guides | |
|---|---|
| Best Weapons List | Best Loadout |
| Strongest Guns | Weapons to Get First |
Best Late Game Loadout
Endgame All-Rounder
| Suggested Late Game Loadout | |||
|---|---|---|---|
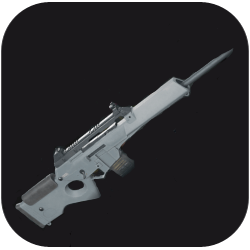
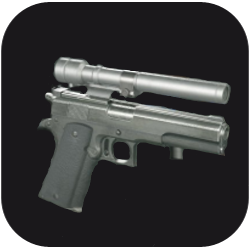
| Handgun | SMG | Assault Rifle | Magnum |
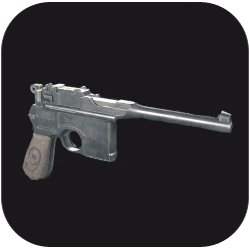 Red9 Red9
|
 LE 5 LE 5
|
 Stingray Stingray
|
 Killer7 Killer7
|
| How to Use | ▶ Use the Red9 to take down weaker threats like Ganados, and Parasites.
▶ Combine the Stingray with the Biometric Sensor to deal with Regenerators. ▶ Use the LE 5 to quickly gun down nearby foes and track down fast-moving enemies like the Novistador. ▶ Save the Killer7 for dealing massive damage against the Island's numerous resilient enemies and bosses. ▶ Stick to the Striker and Broken Butterfly until you get the Killer7 and LE 5. |
||
Loadout Explanation and Suggestions
Like the previous loadouts, this spread of guns is meant to excel at every range and deal with the unique enemies that appear on the Island. It also has a solid balance of crowd control and massive weak point damage due to the addition of the LE 5 and Killer7.
However, we also recommend keeping your Striker handy in case you need more close-range firepower and crowd control, and upgrading to the Fighting Knife after beating Krauser in Chapter 14.
As always, we highly suggest bringing a healthy supply of Hand Grenades and Flash Grenades to supplement your crowd control and help get yourself out of difficult situations.
Best Mid Game Loadout
Mid Game Castle Crasher
| Suggested Mid Game Loadout | |||
|---|---|---|---|
| Handgun | Shotgun | Assault Rifle | Magnum |
 Red9 Red9
|
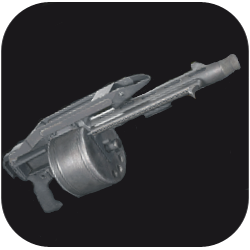 Striker Striker
|
 Stingray Stingray
|
 Broken Butterfly Broken Butterfly
|
| How to Use | ▶ Use the Red9 to take down common threats like Zealots, Ganados, and Zombie Dogs.
▶ Save the Striker and Broken Butterfly for dealing with resilient enemies like the Armadura and Shielded Zealots. ▶ Use the Stingray to snipe enemies from far away and land high-damage weak point shots against the Castle's bosses. ▶ Stick to the TMP, Riot Gun, and SR M1903 until you get the Broken Butterfly, Striker, and Stingray. |
||
Loadout Explanation and Suggestions
This loadout prioritizes having weapons that cover every range and work well for dealing with the new foes that appear inside the Castle. In addition, it also only features weapons from Chapters 7 to 12.
However, we also recommend keeping a Bolt Thrower handy as an alternative weapon. Its silent Bolts work well for dealing with the Garrador, and its Attachable Mines are a potent option for taking down Shielded Zealots.
In addition, as previously suggested, we also recommend maxing out your Combat Knife's Durability and keeping at least two Hand Grenades and Flash Grenades handy for particularly difficult situations.
Best Early Game Loadout
Pre-Castle All-Rounder
| Suggested Early Game Loadout | |||
|---|---|---|---|
| Handgun | Shotgun | Sniper Rifle | SMG |
 Red9 Red9
|
 Riot Gun Riot Gun
|
 SR M1903 SR M1903
|
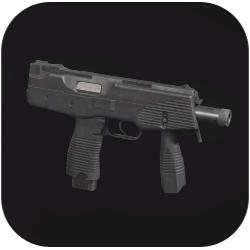 TMP TMP
|
| How to Use | ▶ Use the Red9 to take down common threats like Ganados and Zombie Dogs.
▶ Save the Riot Gun and TMP for dealing with groups of foes surrounding you and any resilient enemy that gets too close. ▶ Use the SR M1903 to snipe enemies from far away and land high-damage weak point shots against stronger foes like Chainsaw Men and Minotaurs. ▶ Stick to the SG 09 R and W-870 as your Handgun and Shotgun options until you get the Red9 and Riot Gun. |
||
Loadout Explanation and Suggestions
This loadout emphasizes having a well-balanced spread of guns for every situation before entering the Castle and only features weapons from Chapters 1 to 6.
On top of these weapons, we also recommend maxing out your Combat Knife's Durability and keeping at least two Hand Grenades and Flash Grenades handy for particularly difficult situations.
Resident Evil 4 Remake Related Guides

Tips and Tricks: A Beginner's Guide
All Tips and Tricks Guides
Author
improvement survey
03/2026
improving Game8's site?

Your answers will help us to improve our website.
Note: Please be sure not to enter any kind of personal information into your response.

We hope you continue to make use of Game8.
Rankings
- We could not find the message board you were looking for.
Gaming News
Popular Games

Genshin Impact Walkthrough & Guides Wiki

Honkai: Star Rail Walkthrough & Guides Wiki

Umamusume: Pretty Derby Walkthrough & Guides Wiki

Pokemon Pokopia Walkthrough & Guides Wiki

Resident Evil Requiem (RE9) Walkthrough & Guides Wiki

Monster Hunter Wilds Walkthrough & Guides Wiki

Wuthering Waves Walkthrough & Guides Wiki

Arknights: Endfield Walkthrough & Guides Wiki

Pokemon FireRed and LeafGreen (FRLG) Walkthrough & Guides Wiki

Pokemon TCG Pocket (PTCGP) Strategies & Guides Wiki
Recommended Games

Diablo 4: Vessel of Hatred Walkthrough & Guides Wiki

Fire Emblem Heroes (FEH) Walkthrough & Guides Wiki

Yu-Gi-Oh! Master Duel Walkthrough & Guides Wiki

Super Smash Bros. Ultimate Walkthrough & Guides Wiki

Pokemon Brilliant Diamond and Shining Pearl (BDSP) Walkthrough & Guides Wiki

Elden Ring Shadow of the Erdtree Walkthrough & Guides Wiki

Monster Hunter World Walkthrough & Guides Wiki

The Legend of Zelda: Tears of the Kingdom Walkthrough & Guides Wiki

Persona 3 Reload Walkthrough & Guides Wiki

Cyberpunk 2077: Ultimate Edition Walkthrough & Guides Wiki
All rights reserved
©CAPCOM CO., LTD. ALL RIGHTS RESERVED.
The copyrights of videos of games used in our content and other intellectual property rights belong to the provider of the game.
The contents we provide on this site were created personally by members of the Game8 editorial department.
We refuse the right to reuse or repost content taken without our permission such as data or images to other sites.


![Everwind Review [Early Access] | The Shaky First Step to A Very Long Journey](https://img.game8.co/4440226/ab079b1153298a042633dd1ef51e878e.png/thumb)

![Monster Hunter Stories 3 Review [First Impressions] | Simply Rejuvenating](https://img.game8.co/4438641/2a31b7702bd70e78ec8efd24661dacda.jpeg/thumb)


