Chapter 10 Walkthrough
★ The Resident Evil Requiem wiki is now live!
☆ Learn the best ways to speedrun & reach Professional S+!
★ Discover all the Skips you can make in a single playthrough!
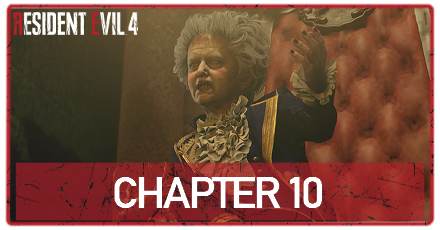
This is a walkthrough for Chapter 10 of Resident Evil 4 Remake (RE4). Read on for a detailed walkthrough, route maps for each objective, a list of important items obtainable, and tips on how to complete this chapter!
| ◄ Previous Chapter | Next Chapter ▶ |
|---|---|
|
Chapter 9 |
Chapter 11 |
List of Contents
Chapter 10 Basic Information
Chapter Summary
After rescuing Leon from a cage trap, Ashley gets captured by one of the Verdugo and is taken away. Now, Leon needs to find a way to the Throne Room where Ashley presumably is and save her from Salazar.
Chapter Details
| Chapter 10 | |
|---|---|
| Location | Castle Underground Laboratory |
| Recommended Weapons |
Broken Butterfly
Stingray Bolt Thrower |
Enemies Encountered
 Cultist (Zealot) Cultist (Zealot)
|
 Garrador Garrador
|
 Verdugo Verdugo
|
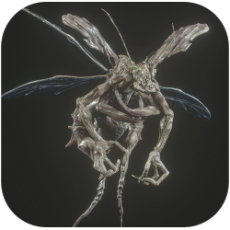 Novistador Novistador
|
Chapter 10 Walkthrough
Chapter Objectives
| Objectives | |
|---|---|
| 1 | Head for the Throne Room |
| 2 | Make your way to the surface |
Head For the Throne Room
| Route Map | |
|---|---|
 |
 |
Open the Gate to the Throne Room
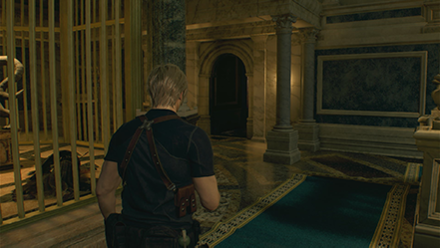
You heard Ada. Get to the Throne Room quick.
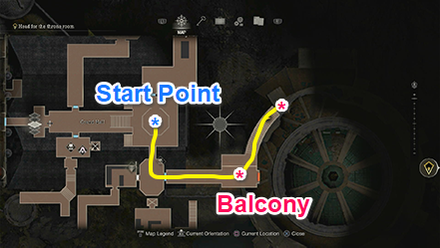
Head south and through the double doors to reach a balcony. Just as you reach the other side, you will be attacked by a new enemy called Novistador. They are large fast-moving insects that can fly and turn invisible.
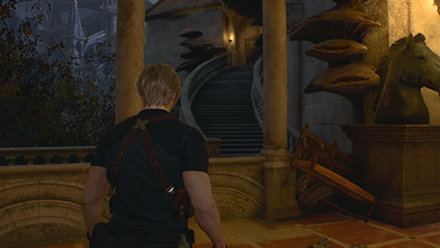
The other door is locked so vault over to the other side of the balcony and climb the flight of stairs up. Enter the room and exit through the other door to a large hall with a chandelier hanging at the center.
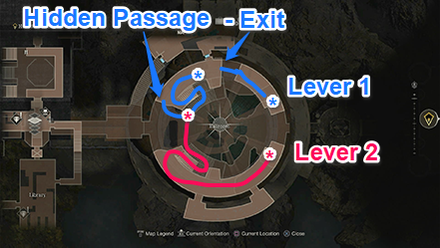
Turn right and go downstairs where more Novistador are then circle around to the north side where you can spot the Merchant. Take the ladder up, as the gate is locked from the inside, and pull the lever to raise the gate's first layer.
Drop down and take the stairs on the south side to find the lever that activates the second layer of the gate.
Gather the Unicorn Horns
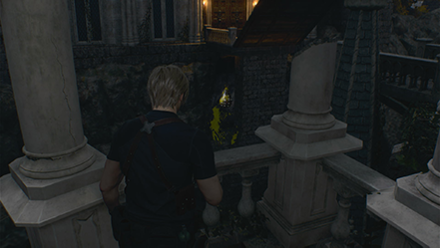
Go back outside by passing through the opened gates and up to the drawbridge. Shoot the weights to the right of the bridge and another below it to bring it down. The second weight can only be shot from the balcony on the right side.
Use the Bell to Lure the Garradors
Cross the bridge and enter the next building where two Garrador have been waiting. Take the two Unicorn Horns from the Garrador's corpses and place it on the sculptures to open the door to the next area.
Make Your Way to the Surface
| Route Map | |
|---|---|
 |
 |
Exit the Muddy Tunnels
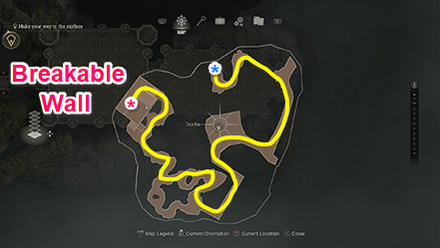
Follow the tunnels infested with more Novistador until you end up in a stone room. At the other end is an Elegant Crown sitting at the corner as well as a hole in the wall that you can break down to access the room next to it. Climb the ladder at the corner to reach the sewers.
Make Your Way Through the Sewers
Go through the tunnel to the merchant and gear up for the upcoming boss fight. Enter through the next door ahead to find another part of the sewers covered with frost.
In the sewers, you will find levers on the walls that will release liquid nitrogen showers when pulled. Don't use them just yet as they're crucial against your next enemy.
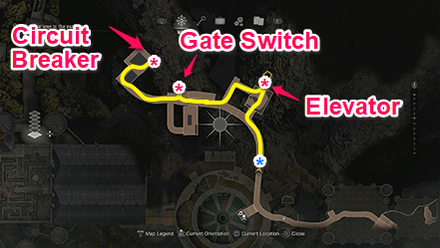
The next room is where the elevator to the surface is, but is currently unusable due to a power outage. The circuit breaker is located on the far west of the sewers so make your way there.
Restore Power to the Elevator
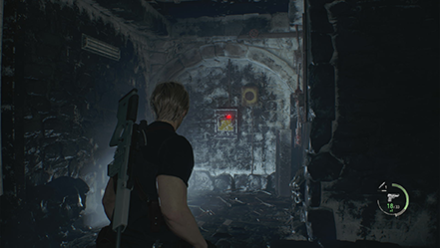
When you reach the end, check the room to your right for a lever that will open the gate ahead. Continue making your way to the circuit breaker after opening it, but watch out for Verdugo's sneak attacks and follow the on-screen prompt quickly.
Defeat the Verdugo
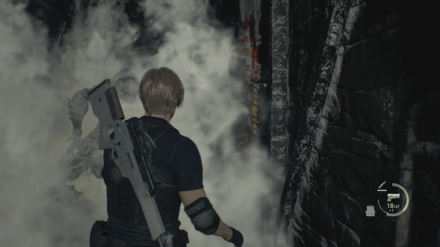
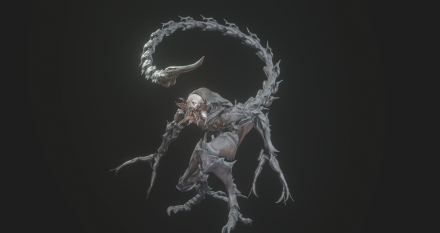
Now that the power is restored, you can return to the elevator, but your trip back won't be easy as one of Salazar's Verdugo will attack you as you leave the room. The elevator will also take time to reach the floor you're currently on so surviving the attack is another challenge.
The Verdugo is highly durable that your weapons will barely have an effect under normal circumstances. You need to lure it towards the liquid nitrogen showers to freeze its exoskeleton first before unloading your strongest weapons, preferably a Broken Butterfly or Stingray.
You'll need to do this a couple of times on different liquid nitrogen showers to eliminate the Verdugo.
Once it's clear, ride the elevator up to complete the chapter.
| ◄ Previous Chapter | Next Chapter ▶ |
|---|---|
|
Chapter 9 |
Chapter 11 |
Chapter 10 Tips and Strategies
| Chapter 10 Tips and Strategies |
|---|
|
|
Save the Liquid Nitrogen Showers For Later
Even though they're tempting to pull, don't interact with the levers along the sewers just yet as they're all one-time use, and you will need their help once the Verdugo reveals itself.
During the boss fight, lure the Verdugo to one of them and let the monster freeze over to make it vulnerable to your weapons.
Skip the Verdugo Boss Fight
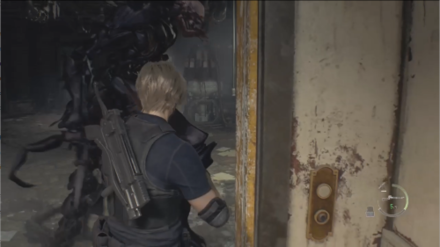
| Update 4/23: This scope glitch has been fixed as of the Ver. 1.05 update and will no longer work. |
You can skip the Verdugo boss fight by activating the elevator and waiting for it to go down. You can either run around or use the sniper scope glitch on the elevator door to avoid Verdugo.
Chapter 10 Requests
Merciless Knight
| Map View | In-Game View |
|---|---|
 |
 |
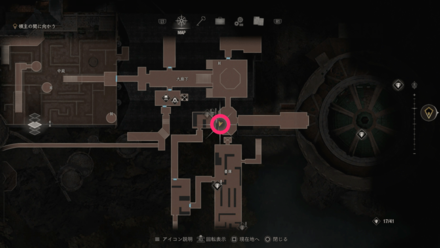
The Merciless Knight request is found on top of a dresser in a room in-between the Grand Hall and the Library.
Chapter 10 Collectibles
Clockwork Castellan
| Map Location | In-Game Location |
|---|---|
 |
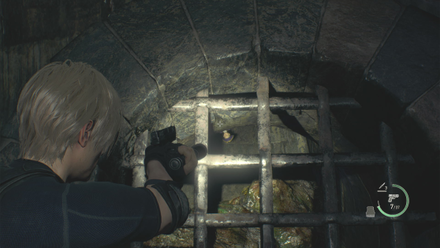 |
You can find this Clockwork Castellan near the Merchant's shop in the chapter's sewer section. Look past the metal grates across the store's entrance to find the Castellan hanging from the ceiling.
All Clockwork Castellans Locations
Treasures
CQBR Assault Rifle
| Map Location | In-Game Location |
|---|---|
 |
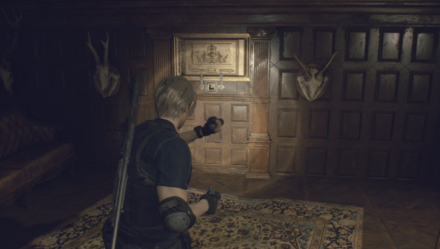 |
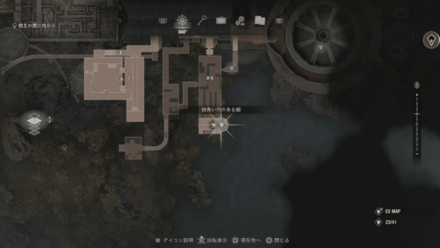
The CQBR Assault Rifle can be obtained by unlocking the Square Lock Box using the Cubic Device in the southeast corner of the Library.
CQBR Assault Rifle Location, Weapons Stats, and Upgrades
Golden Lynx
| Map Location | In-Game Location |
|---|---|
 |
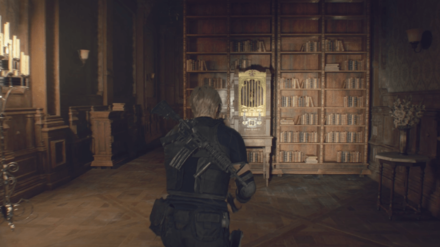 |
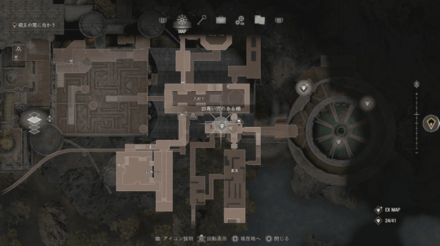
The Golden Lynx in the Castle can be obtained by using the Cubic Device to unlock the Square Lock Box near some bookshelves.
Ruby
| Map Location | In-Game Location |
|---|---|
 |
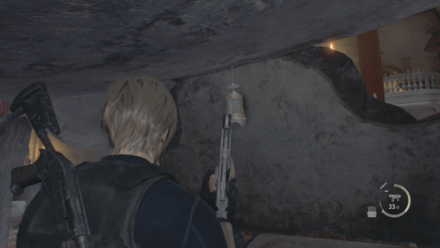 |
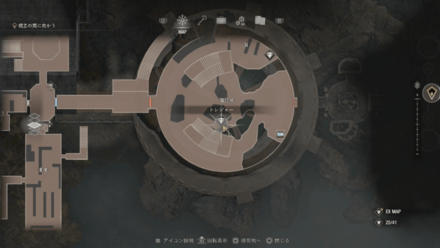
Another Ruby can be ontained in the Castle by shooting down a container suspended from behind the rubble in the center of the first floor of the Ballroom.
Ornate Beetle
| Map Location | In-Game Location |
|---|---|
 |
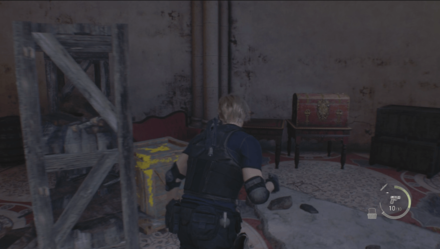 |
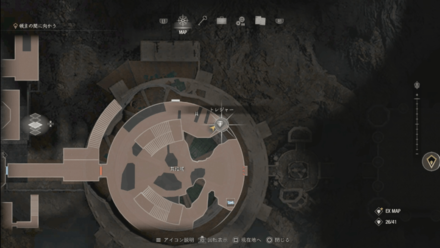
The Ornate Beetle in the Castle can be obtained from a treasure east in the northeast side of the first floor of the Ballroom.
Elegant Crown
| Map Location | In-Game Location |
|---|---|
 |
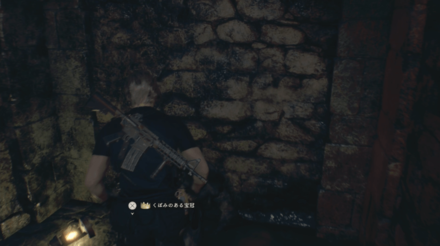 |
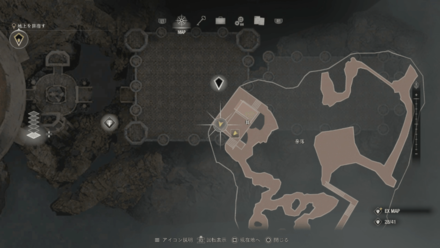
Another Elegant Crown can be obtained in the Castle near the ladder at the end of the area.
Red Beryl
| Map Location | In-Game Location |
|---|---|
 |
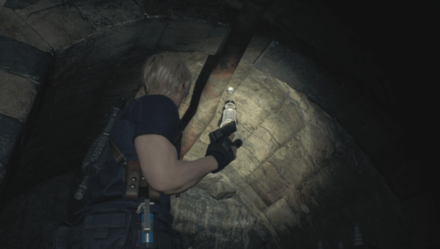 |
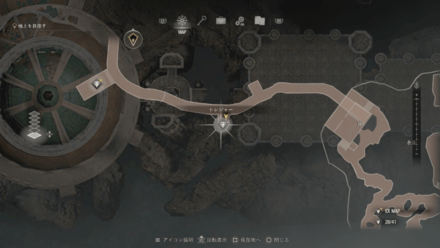
The Red Beryl in the Castle can be obtained by climbing the ladder in the Depths and shooting down the container hanging from the ceiling in the path on the way to the Merchant's room.
Yellow Diamond
| Map Location | In-Game Location |
|---|---|
 |
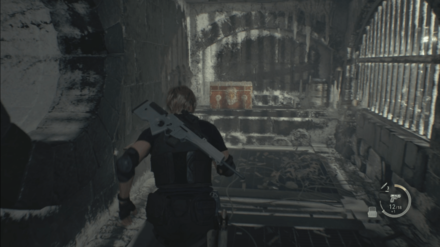 |
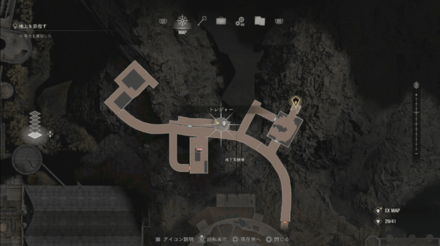
Another Yellow Diamond can be obtained in the Castle after restoring power to the elevator that opens the shutter blocking the way.
Golden Monocle
| Map Location | In-Game Location |
|---|---|
 |
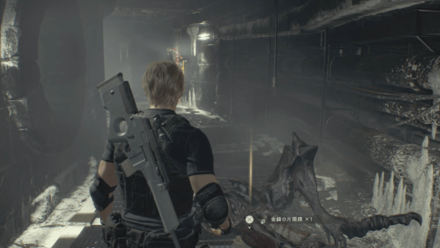 |
The Golden Monocle in the Castle can be obtained after defeating Verdugo.
Hidden Treasures
| Note: Hidden Treasures only appear with the Expanded Treasure Map from the Deluxe Edition. |
Yellow Diamond
| Map Location | In-Game Location |
|---|---|
 |
 |
Another Yellow Diamond can be obtained in the Castle by shooting down the container hanging from the bottom of the staircase at the northeast side of the Library.
Silver Token
| Map Location | In-Game Location |
|---|---|
 |
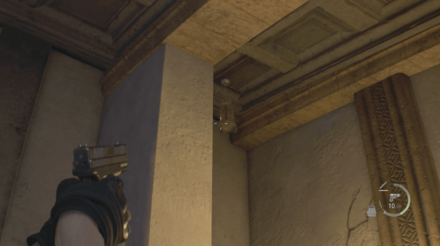 |
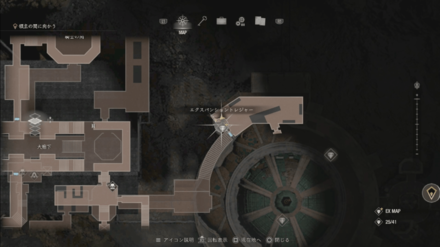
Another Silver Token can be obtained in the Castle by shooting down the container hanging at the corner of the path just before entering the Ballroom.
Spinel
| Map Location | In-Game Location |
|---|---|
 |
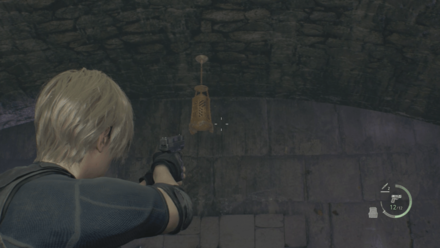 |
Another Spinel can be obtained in the Castle by shooting down the container above the entrance of the Merchant's room in the Depths.
Emerald
| Map Location | In-Game Location |
|---|---|
 |
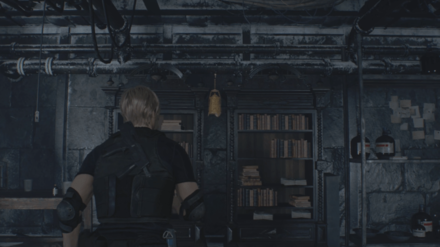 |
Another Emerald can be obtained in the Castle by shooting down the container hanging between the two bookshelves on the right after riding the elevator.
Chapter 10 Bosses
Garrador
 |
|
| First Chapter Appearance |
Chapter 7 |
|---|---|
Garrador is a blind enemy that uses metal claws as its main weapon. It is sensitive to any sound to make up for its blindness. It is also almost fully armored, but you can hit its back to deal significant damage and potentially kill it.
How to Beat the Garrador
- Shoot it on the Back
- Use Noise to Distract it
- Crouch and Go for a Stealth Attack
Verdugo
 |
|
| Rewards | Gold Monocle |
|---|---|
| Chapter |
Chapter 10 |
How to Defeat Verdugo
- Use the Nitrogen Pipes to make it vulnerable to attacks
- Watch out and dodge the attacks
- Utilize Melee Prompts
How to Beat Verdugo: Boss Fight Guide
Resident Evil 4 Remake Related Guides

Story Walkthrough: All Chapters
Village Chapters
| All Village Chapters | |
|---|---|
| Chainsaw Demo | Chapter 1 |
| Chapter 2 | Chapter 3 |
| Chapter 4 | Chapter 5 |
| Chapter 6 | - |
Castle Chapters
| All Castle Chapters | |
|---|---|
| Chapter 7 | Chapter 8 |
| Chapter 9 | Chapter 10 |
| Chapter 11 | Chapter 12 |
Island Chapters
| All Island Chapters | |
|---|---|
| Chapter 13 | Chapter 14 |
| Chapter 15 | Chapter 16 |
Author
Chapter 10 Walkthrough
improvement survey
03/2026
improving Game8's site?

Your answers will help us to improve our website.
Note: Please be sure not to enter any kind of personal information into your response.

We hope you continue to make use of Game8.
Rankings
- We could not find the message board you were looking for.
Gaming News
Popular Games

Genshin Impact Walkthrough & Guides Wiki

Honkai: Star Rail Walkthrough & Guides Wiki

Umamusume: Pretty Derby Walkthrough & Guides Wiki

Pokemon Pokopia Walkthrough & Guides Wiki

Resident Evil Requiem (RE9) Walkthrough & Guides Wiki

Monster Hunter Wilds Walkthrough & Guides Wiki

Wuthering Waves Walkthrough & Guides Wiki

Arknights: Endfield Walkthrough & Guides Wiki

Pokemon FireRed and LeafGreen (FRLG) Walkthrough & Guides Wiki

Pokemon TCG Pocket (PTCGP) Strategies & Guides Wiki
Recommended Games

Diablo 4: Vessel of Hatred Walkthrough & Guides Wiki

Cyberpunk 2077: Ultimate Edition Walkthrough & Guides Wiki

Fire Emblem Heroes (FEH) Walkthrough & Guides Wiki

Yu-Gi-Oh! Master Duel Walkthrough & Guides Wiki

Super Smash Bros. Ultimate Walkthrough & Guides Wiki

Pokemon Brilliant Diamond and Shining Pearl (BDSP) Walkthrough & Guides Wiki

Elden Ring Shadow of the Erdtree Walkthrough & Guides Wiki

Monster Hunter World Walkthrough & Guides Wiki

The Legend of Zelda: Tears of the Kingdom Walkthrough & Guides Wiki

Persona 3 Reload Walkthrough & Guides Wiki
All rights reserved
©CAPCOM CO., LTD. ALL RIGHTS RESERVED.
The copyrights of videos of games used in our content and other intellectual property rights belong to the provider of the game.
The contents we provide on this site were created personally by members of the Game8 editorial department.
We refuse the right to reuse or repost content taken without our permission such as data or images to other sites.


![Monster Hunter Stories 3 Review [First Impressions] | Simply Rejuvenating](https://img.game8.co/4438641/2a31b7702bd70e78ec8efd24661dacda.jpeg/thumb)


