This survey will take about 1 minute.
Your answers will help us to improve our website.
Resident Evil 4 Remake (RE4)
All Shooting Range Locations and Rewards
★ The Resident Evil Requiem wiki is now live!
☆ Learn the best ways to speedrun & reach Professional S+!
★ Discover all the Skips you can make in a single playthrough!
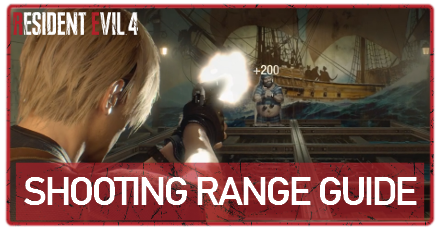
In the Resident Evil 4 Remake (RE4), the Shooting Range is a minigame that rewards players with Silver and Gold Tokens to unlock random Charms. Read on to learn about all Shooting Range locations, their game types and rewards, and more about the minigame!
List of Contents
All Shooting Range Locations
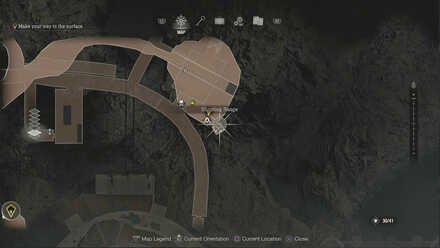
Chapter 3 - Quarry Merchant
| Map Location | In-Game Location |
|---|---|
 View Large Size |
 View Large Size |
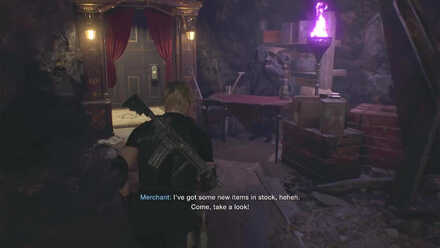
You can find the first Shooting Range near the Merchant in the Quarry in Chapter 3. After entering his shop, use the elevator to the right of the Merchant to access the Shooting Range minigame.
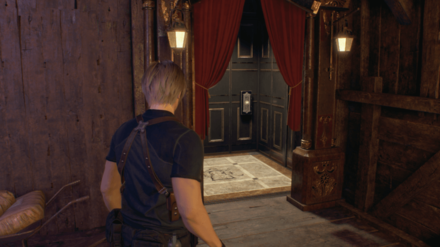
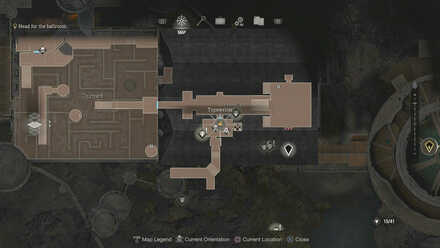
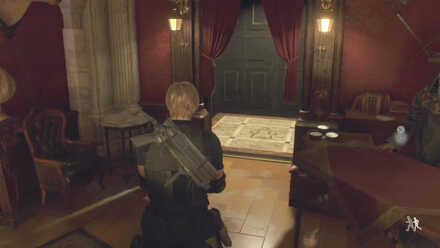
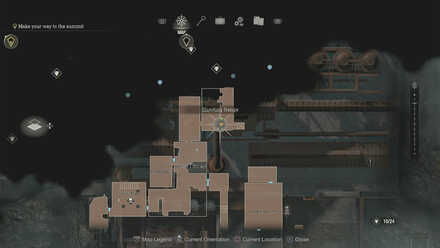
Chapter 9 - Grand Hall Merchant
| Map Location | In-Game Location |
|---|---|
 View Large Size |
 View Large Size |
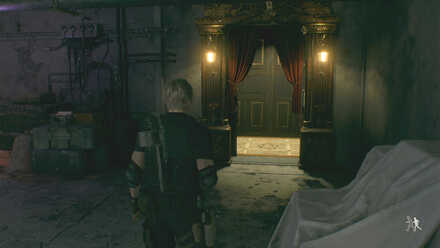
You can find the second Shooting Range near the Merchant on the ground floor of the Grand Hall in Chapter 9. After entering his shop, use the elevator to the right of the Merchant to access the Shooting Range minigame.
Chapter 11 - Depths
| Map Location | In-Game Location |
|---|---|
 View Large Size |
 View Large Size |
You can find the third Shooting Range near the Merchant in the Depths in Chapter 11. After entering his shop, use the elevator to the right of the Merchant to access the Shooting Range minigame.
Chapter 14 - Facility 1 Storage
| Map Location | In-Game Location |
|---|---|
 View Large Size |
 View Large Size |
You can find the fourth Shooting Range near the Facility 1 Storage in Chapter 14. Head Northeast to access the Shooting Range minigame.
Game Types and Rewards
| Game Types | |||||
|---|---|---|---|---|---|
| 1-A | 1-B | 1-C | 2-A | 2-B | 2-C |
| 3-A | 3-B | 3-C | 4-A | 4-B | 4-C |
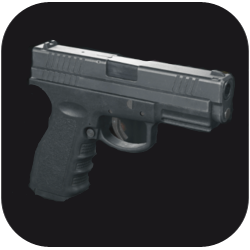
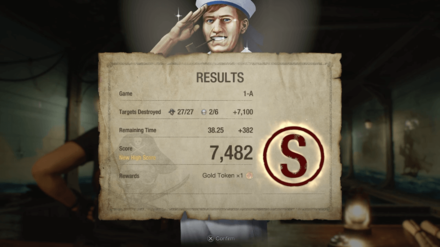
1-A Course and Rewards
| Usable Guns | Requirement | Reward |
|---|---|---|
 SG-09 SG-09 |
At least 3,000 pts | Silver Token |
| At least 5,000 pts | Silver Token | |
| At least 7,000 pts | Gold Token | |
| Every +1,000 pts | Silver Token | |
| Shot All Skulls | Gold Token | |
| Bonus Condition: Destroy All Pirates | ||
1-B Course and Rewards
| Usable Guns | Requirement | Reward |
|---|---|---|
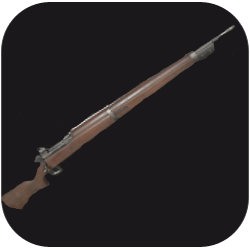 SR M1903 SR M1903 |
At least 3,000 pts | Silver Token |
| At least 4,000 pts | Silver Token | |
| At least 5,000 pts | Gold Token | |
| Every +1,000 pts | Silver Token | |
| Shot All Skulls | Gold Token | |
| Bonus Condition: Destroy All Pirates | ||
1-C Course and Rewards
| Usable Guns | Requirement | Reward |
|---|---|---|
| SG-09SR M1903 |
At least 4,000 pts | Silver Token |
| At least 6,000 pts | Silver Token | |
| At least 8,000 pts | Gold Token | |
| Every +1,000 pts | Silver Token | |
| Shot All Skulls | Gold Token | |
| Bonus Condition: Destroy All Pirates | ||
2-A Course and Rewards
| Usable Guns | Requirement | Reward |
|---|---|---|
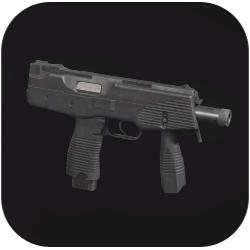 TMP TMP |
At least 4,000 pts | Silver Token |
| At least 6,000 pts | Silver Token | |
| At least 8,000 pts | Gold Token | |
| Every +1,000 pts | Silver Token | |
| Shot All Skulls | Gold Token | |
| Bonus Condition: Destroy All Pirates with 20 seconds or more remaining. | ||
2-B Course and Rewards
| Usable Guns | Requirement | Reward |
|---|---|---|
 Riot Gun Riot Gun |
At least 3,000 pts | Silver Token |
| At least 6,000 pts | Silver Token | |
| At least 9,000 pts | Gold Token | |
| Every +1,000 pts | Silver Token | |
| Shot All Skulls | Gold Token | |
| Bonus Condition: Destroy All Pirates with 30 seconds or more remaining. | ||
2-C Course and Rewards
| Usable Guns | Requirement | Reward |
|---|---|---|
| TMPRiot Gun |
At least 6,000 pts | Silver Token |
| At least 9,000 pts | Silver Token | |
| At least 12,000 pts | Gold Token | |
| Every +1,500 pts | Silver Token | |
| Shot All Skulls | Gold Token | |
| Bonus Condition: Destroy All Pirates with 30 seconds or more remaining. | ||
3-A Course and Rewards
| Usable Guns | Requirement | Reward |
|---|---|---|
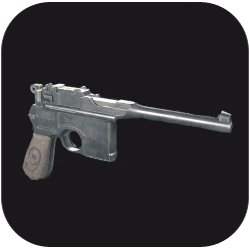 Red9 Red9 |
At least 4,000 pts | Silver Token |
| At least 6,000 pts | Silver Token | |
| At least 8,000 pts | Gold Token | |
| Every +1,000 pts | Silver Token | |
| Shot All Skulls | Gold Token | |
| Bonus Condition: Destroy All Pirates in 10 shots or less. | ||
3-B Course and Rewards
| Usable Guns | Requirement | Reward |
|---|---|---|
 Punisher Punisher |
At least 4,000 pts | Silver Token |
| At least 6,000 pts | Silver Token | |
| At least 8,000 pts | Gold Token | |
| Every +1,000 pts | Silver Token | |
| Shot All Skulls | Gold Token | |
| Bonus Condition: Destroy All Pirates in 10 shots or less. | ||
3-C Course and Rewards
| Usable Guns | Requirement | Reward |
|---|---|---|
| Punisher |
At least 5,000 pts | Silver Token |
| At least 7,000 pts | Silver Token | |
| At least 9,000 pts | Gold Token | |
| Every +1,000 pts | Silver Token | |
| Shot All Skulls | Gold Token | |
| Bonus Condition: Destroy All Pirates in 10 shots or less. | ||
4-A Course and Rewards
| Usable Guns | Requirement | Reward |
|---|---|---|
| PunisherRiot Gun |
At least 3,000 pts | Silver Token |
| At least 6,000 pts | Silver Token | |
| At least 9,000 pts | Gold Token | |
| Every +1,500 pts | Silver Token | |
| Shot All Skulls | Gold Token | |
| Bonus Condition: Destroy All Pirates in 20 shots or less. | ||
4-B Course and Rewards
| Usable Guns | Requirement | Reward |
|---|---|---|
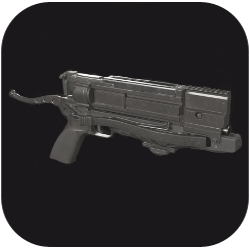 Bolt Thrower Bolt Thrower |
At least 2,000 pts | Silver Token |
| At least 4,000 pts | Silver Token | |
| At least 6,000 pts | Gold Token | |
| Every +1,000 pts | Silver Token | |
| Shot All Skulls | Gold Token | |
| Bonus Condition: Destroy All Pirates. | ||
4-C Course and Rewards
| Usable Guns | Requirement | Reward |
|---|---|---|
 Blacktail Blacktail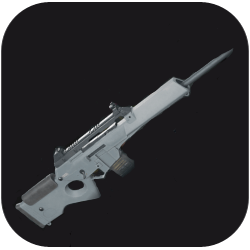 Stingray Stingray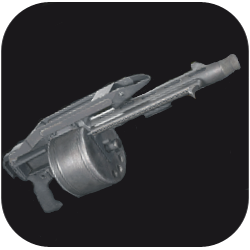 StrikerTMP StrikerTMP |
At least 10,000 pts | Gold Token |
| At least 14,000 pts | Gold Token | |
| At least 18,000 pts | Gold Token | |
| Every +1,500 pts | Silver Token | |
| Shot All Skulls | Gold Token | |
| Bonus Condition: Destroy All Pirates. | ||
Shooting Range Tips
Learn Target Patterns
Course Patterns are Fixed
Each course has fixed patterns so it is a good idea to do a few runs before aiming for an S-rank. Try to learn the movement patterns of the targets and take note of the tricky ones.
Skulls are Also Fixed
As with the movement patterns of targets, skulls also appear on the same targets every time. Keep in mind when the skulls and which target they are on when trying to go for an S-rank.
Be Accurate to Minimize Reloading
Prioritize Accuracy Over Speed
The shooting range values accuracy more than the speed of finishing a course. You are given enough time to clear courses so it is best to pace your shots and make every bullet count.
Reload at the Designated Time
Every course has its own designated reload time so make sure your magazine does not run out of bullets before reload time. It is vital to hit your shots so you do not find yourself reloading at an inopportune time.
Movement
Utilize the Ability to Move Around
Remember that you are not locked in a stationary position when starting the shooting range so feel free to strafe left and right. Some targets may be obscured by sailors and you will need to move around to get a clear shot.
Aim for Collateral Shots
For courses with weapons that are able to pierce through targets like the Punisher and SR M1903, it will be necessary to take out multiple targets in one shot. Some targets will line up in a straight line so be try to be patient with your shots, especially with the limited ammo capacity.
Bonus Rounds
Fulfill Bonus Conditions
Each course has a bonus condition that when met, will give you a bonus round to take down even more targets and add to your score. Take note of the bonus condition of a course before starting one!
Gun-Specific Tips
Handguns
Handguns are effective in close to medium range. If a target is a little farther, you can hold aim down sights for a few seconds so the reticle shrinks and make a more precise shot.
Shotguns
Shotguns are very effective in close range and are perfect for taking down multiple targets that are grouped up and close to you. Avoid using shotguns against multiple targets if a sailor is nearby so you do not lose points.
SMGs
Just like the shotgun, SMGs are effective in close range with the high rate of fire. If multiple targets are grouped up and a sailor is close to them, use the SMG instead of the shotgun so you can pick off your intended targets and avoid being penalized.
Rifles
Rifles are effective in medium to long ranges and excellent for hitting skulls. Try to look for opportunities where you can take down multiple targets in one shot to take advantage of the piercing ability of the rifle, just look out for sailors behind your target.
Bolt Thrower
The Bolt Thrower is effective in close to medium ranges but will take some time getting used to. The bolts are projectile-based so you will need to lead your target to hit your shots.
Bolt Thrower Location, Weapons Stats, and Upgrades
What Is the Shooting Range?
Target Practice Minigame
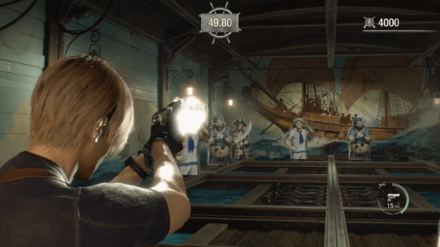
The Shooting Range is a target practice minigame in the Resident Evil 4 Remake. In this minigame, players have to rack up points and complete objectives under a time limit by accurately shooting enemy targets while not landing shots on friendly targets.
There is no cost to play games at the Shooting Range, and the guns provided while playing the minigame have unlimited ammo.
Requires Using Preset Loadouts
While ammo is unlimited in the Shooting Range, each game type will lock players to specific weapon loadouts. For example, Game Type 3-A forces players to only use the SG-09 R pistol and SR M1903 rifle during the minigame.
High Scores Provide Silver and Gold Tokens
Reaching specific scores in each of the Shooting Range's game types will reward players with Silver and Gold Tokens. You can use these Tokens to unlock random Charms from the nearby Token Machine. Using Gold Tokens increases your chances of getting higher rarity charms.
Game Types Have Hidden Bonus Conditions
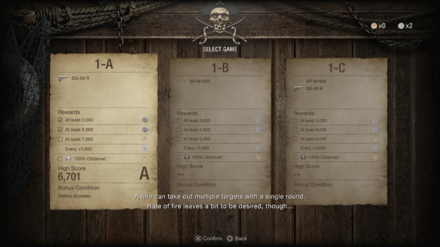
Each game type in the Shooting Range has Bonus Conditions that cause additional targets to spawn, allowing you to improve your final score. While the Shooting Range initially hides Bonus Conditions, completing a game type once will reveal their Bonus Condition on the game selection screen.
Shooting Range Trophies and Challenges
Trophies
| Achievement | Unlock Condition |
|---|---|
 Amateur Shooter Amateur Shooter
|
Complete a game at the shooting range.
► All Shooting Range Locations and Rewards |
 Real Deadeye Real Deadeye
|
Earn an S rank in all games at the shooting range.
► How to Complete Real Deadeye Trophy and Challenge |
|
Trick Shot
|
Shoot through and destroy 5 targets at the shooting range with a single shot. |
Achievements List and Trophy Guide
Challenges
| Challenge | Condition | Rewards |
|---|---|---|
| Amateur Shooter |
Complete a game at the shooting range.
► All Shooting Range Locations and Rewards |
200 CP |
| Respectable Marksman | Earn an S rank in a game at the shooting range. | 300 CP |
| Real Deadeye |
Earn an S rank in all games at the shooting range.
► How to Complete Real Deadeye Trophy and Challenge |
1000 CP |
| Trick Shot | Destroy 5 targets at the shooting range with one shot. | 300 CP |
| Perfect Game | Destroy all targets (except sailors) in a game at the shooting range without missing a single shot. | 300 CP |
All Challenges and How to Complete
Resident Evil 4 Remake Related Guides

Tips and Tricks: A Beginner's Guide
All Tips and Tricks Guides
Author

All Shooting Range Locations and Rewards
Please participate in our site
improvement survey
03/2026
improvement survey
03/2026
Would you assist in
improving Game8's site?
improving Game8's site?

×
We are listening to our users' valuable opinions and discussing how to act on them.
The information collected through this survey will be used for the purpose of improving our services. In addition, the information will only be disclosed a part of a statistic in a format that will not allow identification of personal information.
Begin Survey
Not Now
×
Please rate each item regarding Game8.co's Advertisements.
Amount of Ads
Very Dissatisfied
Somewhat Dissatisfied
Fine
Somewhat Satisfied
Highly Satisfied
Placement of Ads
Timing of Ad Display
Ad Loading Speed
Safeness of Ads
Content of Ads
×
Please rate each item regarding Game8.co's Quality of Articles.
Amount of information
Very Dissatisfied
Somewhat Dissatisfied
Fine
Somewhat Satisfied
Highly Satisfied
Frequency of updates
Speed of new information
Accuracy of articles
Understandibility of articles
Readability of sentences
×
Please rate each item regarding Game8.co's Usability of the Site.
Ease of finding information
Very Dissatisfied
Somewhat Dissatisfied
Fine
Somewhat Satisfied
Highly Satisfied
Loading Speed
Use of Color
Font Size
Visibility of Images
Easy to Understand Layout
×
Please rate each item regarding Game8.co's Message Boards, Comments.
Ease of Writing
Very Dissatisfied
Somewhat Dissatisfied
Fine
Somewhat Satisfied
Highly Satisfied
Readability
Ease in Finding Information
Comment Quality
Comment Quantity
Admin Response
×
Please rate each item regarding Game8.co's Site's new design.
Please rate our site's new design
Very Dissatisfied
Somewhat Dissatisfied
Fine
Somewhat Satisfied
Highly Satisfied
Do you think that the website's design change makes the site easier to use?
Has the new design made it easier for you to find information on the site?
Has the new design improved the overall visual appeal of the site?
How would you rate your overall satisfaction with the new design of the site?
×
How likely are you to recommend Game8 to someone you know?
Very Unlikely
0
1
2
3
4
5
6
7
8
9
10
Very Likely
If you have other opinions regarding potential improvement to the website, please share them with us. We would appreciate your honest opinion.
Note: This is a free response section, so you can proceed without entering anything.
Note: Please be sure not to enter any kind of personal information into your response.
Note: Please be sure not to enter any kind of personal information into your response.
×
Thank You
×
Thank you for participating in our survey! Your answers will help us to improve the quality of our website and services.
We hope you continue to make use of Game8.
We hope you continue to make use of Game8.
Close
Rankings
- We could not find the message board you were looking for.
Gaming News


![Monster Hunter Stories 3 Review [First Impressions] | Simply Rejuvenating](https://img.game8.co/4438641/2a31b7702bd70e78ec8efd24661dacda.jpeg/thumb)
Popular Games

Genshin Impact Walkthrough & Guides Wiki
Honkai: Star Rail Walkthrough & Guides Wiki
Umamusume: Pretty Derby Walkthrough & Guides Wiki
Pokemon Pokopia Walkthrough & Guides Wiki
Resident Evil Requiem (RE9) Walkthrough & Guides Wiki
Monster Hunter Wilds Walkthrough & Guides Wiki
Wuthering Waves Walkthrough & Guides Wiki
Arknights: Endfield Walkthrough & Guides Wiki
Pokemon FireRed and LeafGreen (FRLG) Walkthrough & Guides Wiki
Pokemon TCG Pocket (PTCGP) Strategies & Guides Wiki


Recommended Games
Diablo 4: Vessel of Hatred Walkthrough & Guides Wiki
Cyberpunk 2077: Ultimate Edition Walkthrough & Guides Wiki
Fire Emblem Heroes (FEH) Walkthrough & Guides Wiki
Yu-Gi-Oh! Master Duel Walkthrough & Guides Wiki
Super Smash Bros. Ultimate Walkthrough & Guides Wiki
Pokemon Brilliant Diamond and Shining Pearl (BDSP) Walkthrough & Guides Wiki
Elden Ring Shadow of the Erdtree Walkthrough & Guides Wiki
Monster Hunter World Walkthrough & Guides Wiki
The Legend of Zelda: Tears of the Kingdom Walkthrough & Guides Wiki
Persona 3 Reload Walkthrough & Guides Wiki


All rights reserved
©CAPCOM CO., LTD. ALL RIGHTS RESERVED.
The copyrights of videos of games used in our content and other intellectual property rights belong to the provider of the game.
The contents we provide on this site were created personally by members of the Game8 editorial department.
We refuse the right to reuse or repost content taken without our permission such as data or images to other sites.