Chapter 8 Walkthrough
★ The Resident Evil Requiem wiki is now live!
☆ Learn the best ways to speedrun & reach Professional S+!
★ Discover all the Skips you can make in a single playthrough!
This is a walkthrough for Chapter 8 of Resident Evil 4 Remake (RE4). Read on for a detailed walkthrough, route maps for each objective, a list of important items obtainable, and tips on how to complete this chapter!
| ◄ Previous Chapter | Next Chapter ▶ |
|---|---|
|
Chapter 7 |
Chapter 9 |
Chapter 8 Basic Information
Chapter Summary
After being separated from Ashley, Leon tries to contact Hunnigan to report the situation, but fails to establish a secure connection.
Chapter Details
| Chapter 8 | |
|---|---|
| Location | Castle |
| Recommended Weapons |
SG-09 R
Broken Butterfly SR M1903 |
Enemies Encountered
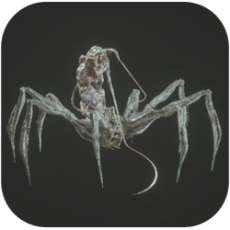 Parasite Parasite
|
Chapter 8 Walkthrough
Chapter Objectives
| Objectives | |
|---|---|
| 1 | Find Ashley |
Find Ashley
| Route Map | |
|---|---|
 |
 |
Exit the Courtyard
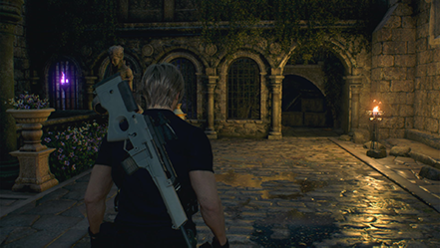
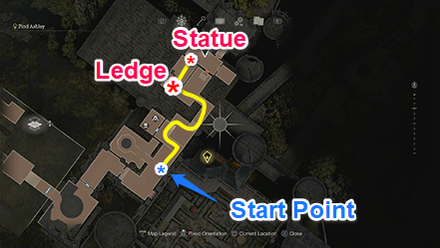
After the cutscene, make your way towards the Merchant indicated by the purple torch. Stock up on items, then head outside. Take the staircase leading up to the upper floor. Head inside where you can see the gruesome aftermath of a ritual performed by the cultists.
Continue heading south, and you will find a ledge where you can vault over. Once below, you can find a File to your left.
Recover the Crimson Flame
Based on the File by the wall, you must Consign the Crimson Flame to its rightful place for the path to be revealed. Enter the small passageway on the left by crouching, where you will quickly be met with Cultists. After the cutscene where Parasites emerge from the cultists, you can either defeat the Parasites in the room, or sneak around to reach the next area.
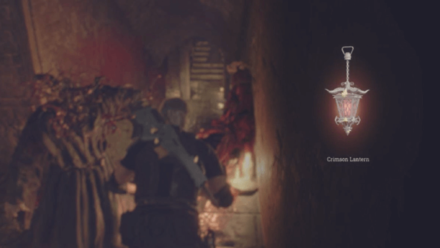
As you make your way to the second level, more cultists surround the Cultist Leader. Once alerted to your presence, the Cultist Leader will attempt to flee. Once you successfully kill the Cultist Leader, the Crimson Lantern can be looted from its corpse.
Return the Crimson Lantern
| Solution | |||
|---|---|---|---|
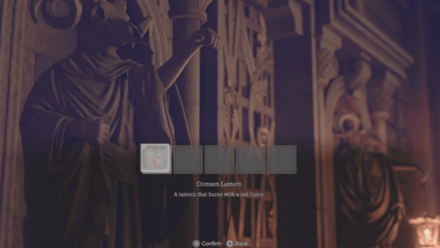 Put the Crimson Lantern on the Cultist Statue that is not holding anything. |
Crimson Lantern Puzzle
As the note instructs, you must return the Crimson Flame to its rightful place. Head back to the room where you found the note, and place the Crimson Lantern on the Cultist statue that is not holding anything. With both statues holding their lanterns, the gate will be unlocked. Enter the room to find three doors. The door directly in front can only be opened with Ashley's help, and the door to the right leads back to the previous room. Take the door to the left and follow the corridor to trigger the cutscene.
Complete the Lithographic Castle Tile Puzzle
| Lithographic Castle Tiles Location | |
|---|---|
| Lithographic Stone A |  Already inserted in the puzzle |
| Lithographic Stone B | 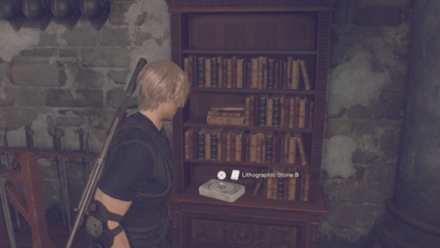 On top of the shelf |
| Lithographic Stone C | 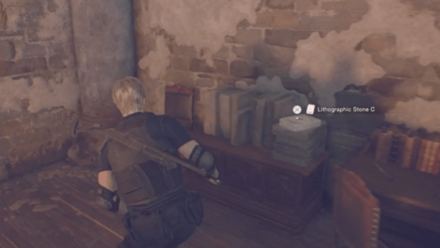 On top of the table near the door |
| Lithographic Stone D | 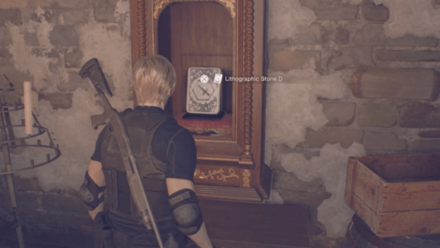 Inside the display case |
After being reunited with Ada Wong, you can find the Lithographic Stone B by the desk. Interact with the stone carving on the wall to inlay the Lithographic Stone B, but you will quickly find that there are two other stones missing. Directly behind you, you can find a display case housing the Lithographic Stone D. Break the glass on the display case to obtain the stone. From there, head towards the entrance where you can find the Lithographic Stone C on top of the shelf.
| Lithographic Castle Tile Puzzle Solution | |||
|---|---|---|---|
 |
|||
| North Slot | West Slot | East Slot | South Slot |
| Red Square Shield | Red Hexagon Helmet | Blue Square Sword | Blue Hexagon Armor |
Lithographic Castle Tile Puzzle
Return to the Stone Puzzle, and arrange the plates in the correct way. A Red Shield Plate should be at the North slot, Red Helmet Plate on the West slot, a Blue sword on the East slot, and a Blue Armor plate on the South slot. After solving the puzzle, a secret passageway will be revealed.
Look for Ashley

Continue heading straight the Corridor where you will find several rooms of Cultist scholars. Continue to the room by the second level to obtain the Small Key. Head back to the room with the Stone Puzzle, and use the small key to unlock the dresser by the door to obtain the Bronze Pocket Watch.
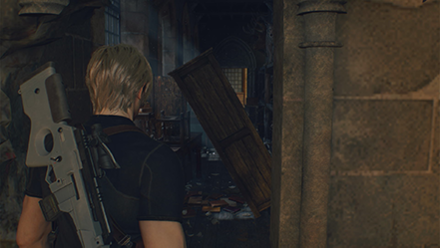
From the room on the second floor, take the corridor on the right, and interact with the shelf to trigger the next cutscene. A Plaga C will take over the nearby cultist, and steer it to attack you. After killing the Cultist, remember to kill the Plaga C as well since it has a separate HP from the Cultist host.
Cross the Castle Walls
| Route Map |
|---|
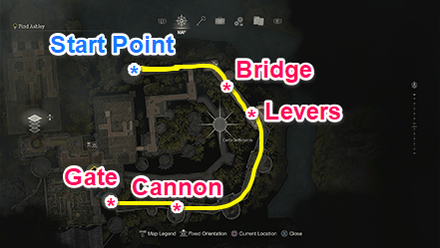 |
After killing the Plaga C, head down where you can find a Merchant. After stocking up on items, head out the gate where Ramon Salazar will talk to you via the speakers. Take out the Crossbow Cultists by using a Sniper Rifle, before shooting the weight on the drawbridge to lower it.
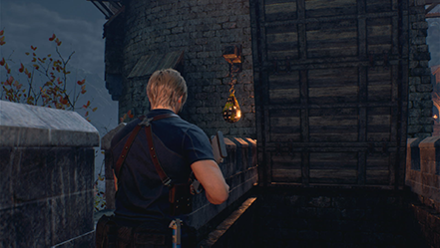
A group of cultists will be waiting on the other side of the bridge, so get ready to take them on as soon as the bridge is down. Head inside the room after killing the cultists, just watch out for the occasional Plaga C and Cultist. Use the lever on the lower floor and enter through the unlocked door. Climb the ladder and pull the other lever so you can pass through the second gate below.
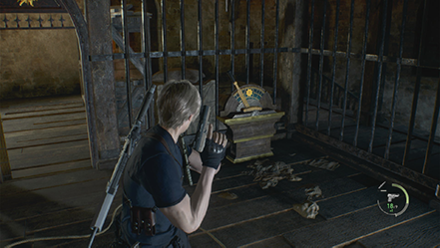
Vault down to the new area where you will be met with Cultists and Parasites. Look for a lever tucked in the west side of the room to open the gate to the next area. Head up the second level indicated by marked wooden planks to find another lever. Do not pull this lever just yet!
Proceed forward to find two unaware Cultists then go back to the hole near the lever and vault down below. Pass through the moon door ahead with a lone Cultist then check the small room next to it for a treasure chest containing an Ornate Necklace.
The ladder nearby leads to a locked room. Open the gate from the inside then climb the stairs. A shielded Cultist will try to drive you back as well as a crossbow Cultist firing at you from above. Take them out as well as the other Cultists on the upper level.
Go up the other staircase next to a lever to reach the top of the castle ramparts.
Evade the Armored Giant

An armored giant will appear and start hurling rocks from the other side. You can use the stacked crates, barricades, or even the walls itself as cover. Just crouch down if your cover is not high enough.
Quickly drop down to the left and follow the walls to an area with some Cultists. The giant's rocks can still you reach you here so keep that in mind while dealing with the other enemies.
Run to the next rampart and drop down. Immediately turn around to spot a lone Cultist waiting for you at the entrance of the room. The lever inside controls both doors. Before you pull it, snipe the crossbow Cultists across the other door so you can safely (kinda) pass through.
Wait for the giant to throw another round before dropping down and immediately taking cover behind the wall next to you. Let the giant throw again then climb the ladder on the other side of the wall so you can proceed to the next room from earlier.
Use the Cannon
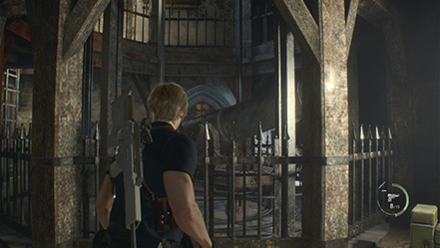
You'll find a cannon inside the rampart, but you need to raise it all the way to the top first before you can actually use it. Shoot the weight to raise it by one level then climb the ladder to the second floor.
The next wait is found in front of the cannon this time, next to a gate. Now that it's at the top of the rampart, go up the spiral stairs and use the cannon to blast the armored giant out of your way.
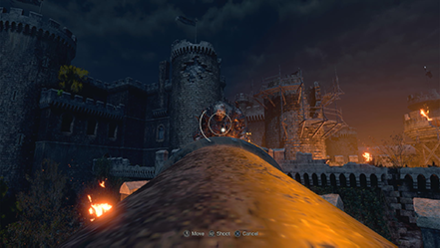
With the giant down, turn the cannon a bit to the left to find a gate marked on your HUD. Blast it open with a cannonball to open the path forward. There are also some enemies near the gate that you might want to clear out with you heavy weaponry.
Continue Looking For Ashley
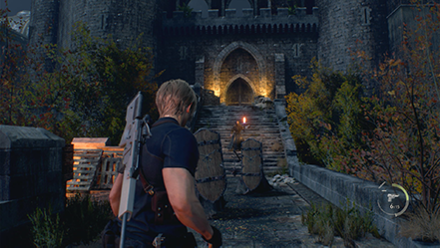
Drop down and cross to the gate you took down for a suprise cutscene (wink). Once you're back in control, move two rooms to the left and pass through the next door to reach a balcony overviewing a hedge maze. Run to the door on the other side and enter the room to complete the chapter.
| ◄ Previous Chapter | Next Chapter ▶ |
|---|---|
|
Chapter 7 |
Chapter 9 |
Chapter 8 Tips and Strategies
| Chapter 8 Tips and Strategies |
|---|
|
|
Make Use of the Explosive Barrels
Against the Cultist Leader and the Parasites, you can lure them towards explosive barrels on the lower floor to kill them quickly.
Kill the Plaga C Immediately
The Plaga C type parasite can give you trouble with or without a host. It moves quickly by itself and can control Cultists to turn them into madmen that will rush at you and swiftly perform melee attacks.
Kill them quickly, preferably with a shotgun so it's easier to hit, while they are hostless before going for the other enemies.
Chapter 8 Collectibles
Clockwork Castellan
| Map Location | In-Game Location |
|---|---|
 |
 |
You can find this Clockwork Castellan on the westernmost tower at the top of the Castle Battlements. Climb the tower and follow the winding path to find the Castellan above some sandbags.
All Clockwork Castellans Locations
Yellow Herbs
| Map Location | In-Game Location |
|---|---|
 |
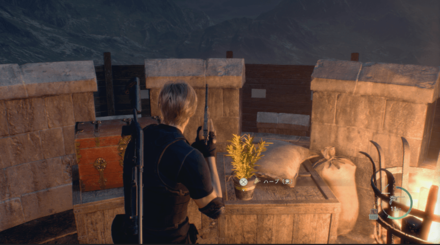 |
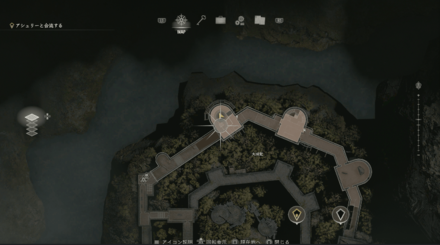
A Yellow Herb can be found in Chapter 8 at the top of the castle that can be accessed through a ladder.
Treasures
Mirror with Pearls and Rubies
| Map Location | In-Game Location |
|---|---|
 |
 |
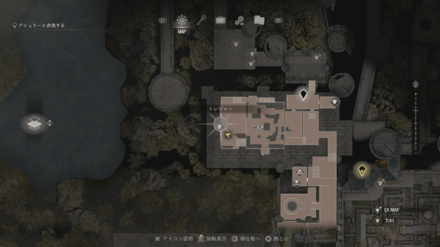
The Mirror with Pearls and Rubies in the Castle can be obtained from a treasure chest on top of a table behind the Red Priest.
Extravagant Clock
| Map Location | In-Game Location |
|---|---|
 |
 |
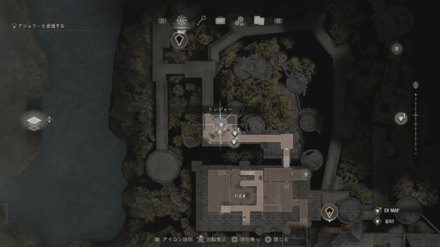
The Extravagant Clock in the Castle can be obtained from a treasure chest right in the Bindery.
Brass Pocket Watch
| Map Location | In-Game Location |
|---|---|
 |
 |
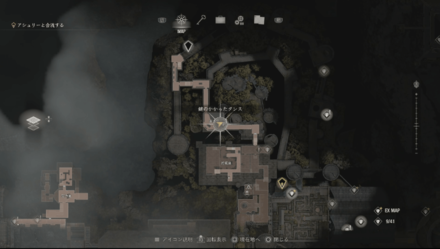
The Brass Pocket Watch in the Castle can be obtained by opening the Locked Drawer in the Bindery using a Small Key.
Hidden Treasures
| Note: Hidden Treasures only appear with the Expanded Treasure Map from the Deluxe Edition. |
Alexandrite
| Map Location | In-Game Location |
|---|---|
 |
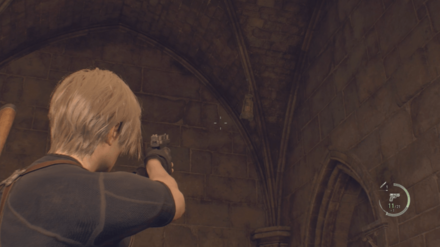 |
The Alexandrite in the Castle can be obtained by shooting down the container suspended from the ceiling in the middle of the path from the Wine Cellar into the Bindary.
Silver Token
| Map Location | In-Game Location |
|---|---|
 |
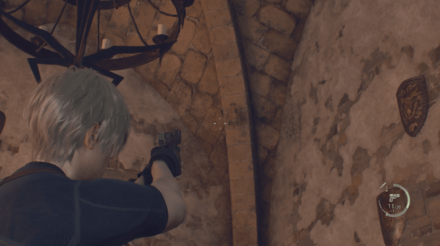 |
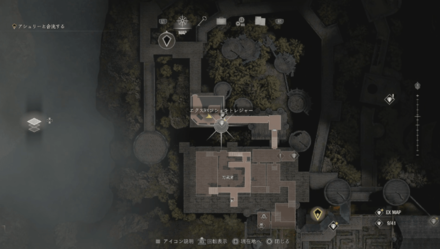
Another Silver Token can be obtained in the Castle by shooting down the container hanging from the ceiling in the southeast of the Bindary.
Elegant Mask and Gold Token
| Map Location | In-Game Location |
|---|---|
 |
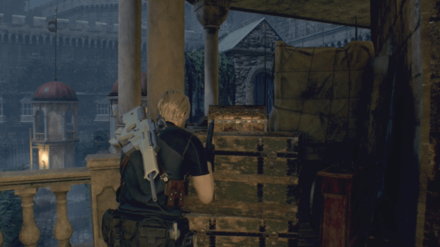 |
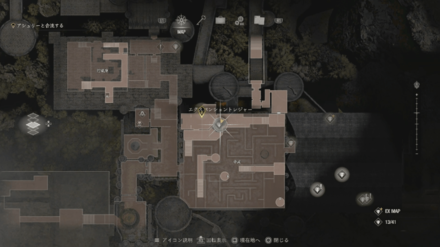
The Elegant Mask and Gold Token in the Castle can be obtained from a treasure chest after the fight with the Armored Gigante. Proceed down the hall to the Courtyard playing close attention to a chest that will appear on your left as you reach the door.
Resident Evil 4 Remake Related Guides

Story Walkthrough: All Chapters
Village Chapters
| All Village Chapters | |
|---|---|
| Chainsaw Demo | Chapter 1 |
| Chapter 2 | Chapter 3 |
| Chapter 4 | Chapter 5 |
| Chapter 6 | - |
Castle Chapters
| All Castle Chapters | |
|---|---|
| Chapter 7 | Chapter 8 |
| Chapter 9 | Chapter 10 |
| Chapter 11 | Chapter 12 |
Island Chapters
| All Island Chapters | |
|---|---|
| Chapter 13 | Chapter 14 |
| Chapter 15 | Chapter 16 |
Author
Chapter 8 Walkthrough
improvement survey
03/2026
improving Game8's site?

Your answers will help us to improve our website.
Note: Please be sure not to enter any kind of personal information into your response.

We hope you continue to make use of Game8.
Rankings
- We could not find the message board you were looking for.
Gaming News
Popular Games

Genshin Impact Walkthrough & Guides Wiki

Honkai: Star Rail Walkthrough & Guides Wiki

Umamusume: Pretty Derby Walkthrough & Guides Wiki

Pokemon Pokopia Walkthrough & Guides Wiki

Resident Evil Requiem (RE9) Walkthrough & Guides Wiki

Monster Hunter Wilds Walkthrough & Guides Wiki

Wuthering Waves Walkthrough & Guides Wiki

Arknights: Endfield Walkthrough & Guides Wiki

Pokemon FireRed and LeafGreen (FRLG) Walkthrough & Guides Wiki

Pokemon TCG Pocket (PTCGP) Strategies & Guides Wiki
Recommended Games

Diablo 4: Vessel of Hatred Walkthrough & Guides Wiki

Cyberpunk 2077: Ultimate Edition Walkthrough & Guides Wiki

Fire Emblem Heroes (FEH) Walkthrough & Guides Wiki

Yu-Gi-Oh! Master Duel Walkthrough & Guides Wiki

Super Smash Bros. Ultimate Walkthrough & Guides Wiki

Pokemon Brilliant Diamond and Shining Pearl (BDSP) Walkthrough & Guides Wiki

Elden Ring Shadow of the Erdtree Walkthrough & Guides Wiki

Monster Hunter World Walkthrough & Guides Wiki

The Legend of Zelda: Tears of the Kingdom Walkthrough & Guides Wiki

Persona 3 Reload Walkthrough & Guides Wiki
All rights reserved
©CAPCOM CO., LTD. ALL RIGHTS RESERVED.
The copyrights of videos of games used in our content and other intellectual property rights belong to the provider of the game.
The contents we provide on this site were created personally by members of the Game8 editorial department.
We refuse the right to reuse or repost content taken without our permission such as data or images to other sites.


![Monster Hunter Stories 3 Review [First Impressions] | Simply Rejuvenating](https://img.game8.co/4438641/2a31b7702bd70e78ec8efd24661dacda.jpeg/thumb)


Is there anyway back to the other side of the towers after using cannon on armored giant?