This survey will take about 1 minute.
Your answers will help us to improve our website.
Resident Evil 4 Remake (RE4)
Separate Ways - Chapter 6 Walkthrough
★ The Resident Evil Requiem wiki is now live!
☆ Learn the best ways to speedrun & reach Professional S+!
★ Discover all the Skips you can make in a single playthrough!
This is a walkthrough for Separate Ways - Chapter 6 of Resident Evil 4 Remake (RE4). Read on for a detailed walkthrough, route maps for each objective, a list of important items obtainable, and tips on how to complete this chapter!
| ◄ Previous Chapter | Next Chapter ▶ |
|---|---|
|
Separate Ways - Chapter 5 |
Separate Ways - Chapter 7 |
Separate Ways - Chapter 6 Basic Information
Chapter Summary
As Ada chases Krauser who just stole the Amber, Ada will reunite with Leon once again and will make their way to the cult's stronghold.
Chapter Details
| Separate Ways - Chapter 6 | |
|---|---|
| Location | Campsite Facility Loft 1 Freight Lift Laboratory |
| Recommended Weapons |
Blacktail
SR M1903 TMP |
Enemies Encountered
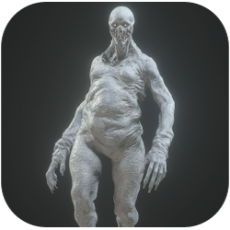 Regenerators Regenerators
|
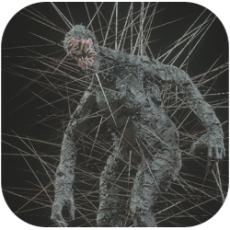 Iron Maiden Iron Maiden
|
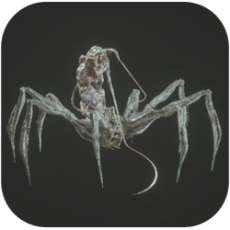 Parasite Parasite
|
 Brute (Minotaur) Brute (Minotaur)
|
 Soldiers Soldiers
|
Separate Ways - Chapter 6 Walkthrough
Chapter Objectives
| Objectives | |
|---|---|
| 1 | Head for the Comms Facility |
| 2 | Find a Way Out of Facility 1 |
| 3 | Proceed to the Comms Facility |
| 4 | Unlock the Facility Doors |
| 5 | Leave the Facility |
Head for the Comms Facility
| Route Map |
|---|
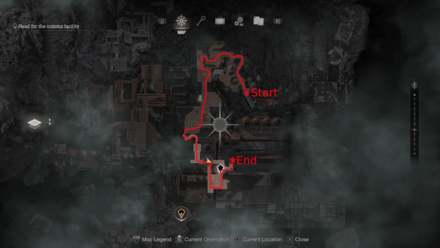 |
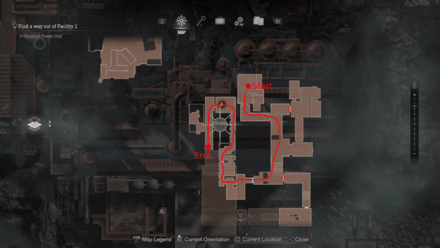
Exit the Campsite and enter the cave with a large metal gate. Continue straight toward the Amber Storeroom and proceed outside the warehouse until you reach the elevator.
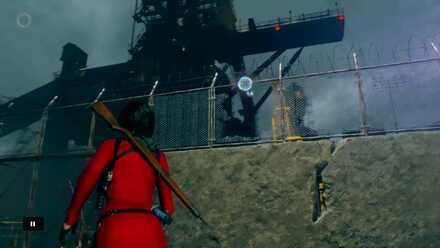
Use your Grappling Hook to get over the fence, where you will encounter multiple Soldiers and two Brutes. Take advantage of the explosives in the area and try to lure the enemies here to defeat them much quicker. After dealing with the enemies in the area, go upstairs and head straight to Facility 1 Loft.
Find a Way Out of Facility 1
| Route Map |
|---|
 |
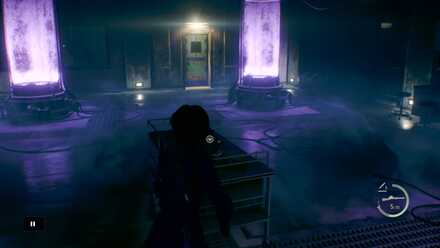
Jump down through the small hole and follow the path through the Systems Room and Dissection Room until you reach the Freezer. In this area, you will encounter a couple of Regenerators, so make sure to equip your Biometric Scope on your Rifle.
Beautiful Beetle Request
While you are in this area, you can also complete the Beautiful Beetles request from the Merchant. Collect the first Ornate Beetle from the Regenerator inside the tank after dropping from Facility Loft 1. The second Ornate Beetle can be found inside the Dissection Room, the room to your right before reaching the Freezer area. Be sure to collect them before grabbing the Power Unit, as it will cause a power loss and prevent further exploration.
Beautiful Beetles Request Guide
Return to the Facility
| Route Map |
|---|
 |
After obtaining the Power Unit from the Freezer, return to Facility 1 Loft. On your way back, you will encounter additional Regenerators and one Iron Maiden. This area is confined and will restrict your mobility. Maintain distance from the Regenerators and the Iron Maiden, and eliminate the parasites one at a time until you defeat them.
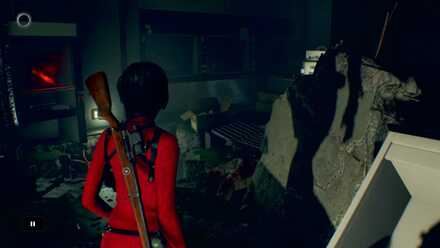
Proceed to the Comms Facility

Exit the Facility 1 Loft by using the Power Unit to open the gate. After you're outside, continue following the path until you reach the Freight Lift. While you're on the lift, enemies will try to attack you from the incoming lift and towers. It's best to use your handgun due to its high fire rate to eliminate incoming enemies before they are in range.
Go Through the Defensive Line
| Route Map |
|---|
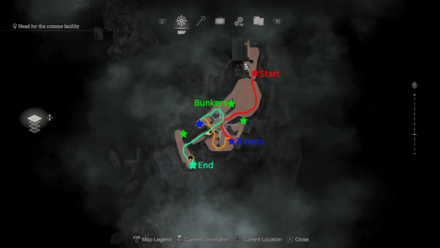 |
After leaving the lift, you'll find yourself in an open area with multiple bunkers defending the facility. Your objective is to make your way through it and disable the turrets along the way. Progress slowly, using cover to avoid taking damage from the bunkers. Once you get close enough, the machinegun from the bunker won't be able to hit you.
Start by disabling the First Turret to advance further within the defensive line. As you reach the center, you'll encounter a bridge defended by a third bunker machinegun. Cross it immediately, and you'll find cover before it can target you. At this point, disable the Second Turret, then jump over the railings to descend to the lower floor. From there, sprint your way to the Laboratory.
Unlock the Facility Doors
| Route Map |
|---|
 |
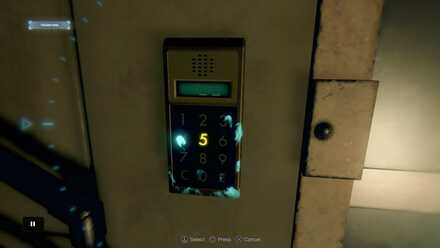
Upon reaching the Laboratory, you will use IRIS to determine the number code needed to unlock the door. In total, there are three doors with this type of lock.
Door Code Puzzle Solution
| Door Area | Code |
|---|---|
| Amber Laboratory | 148 |
| Sewer Door | 237 |
| Comms Control Room | 430 |
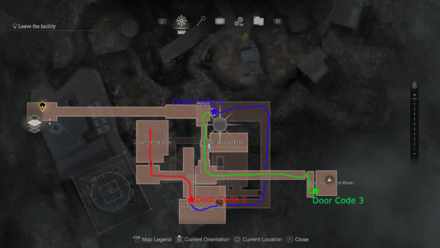
From the Laboratory Storage, turn right to The Amber Laboratory. Here, you'll encounter the First Door Code Puzzle. To solve it, use IRIS to identify the numbers needed to unlock the door.
Afterward, descend through the hole in The Amber Laboratory and follow the path through the sewers. As you try to escape from the sewers, a monster will start chasing you. Just before your exit from the sewers, you'll encounter the Second Door Code Puzzle.
Continue heading straight and turn left past the Monitoring Room to reach the third and Final Door Code Puzzle, which unlocks the Comms Control Room.
Leave the Facility
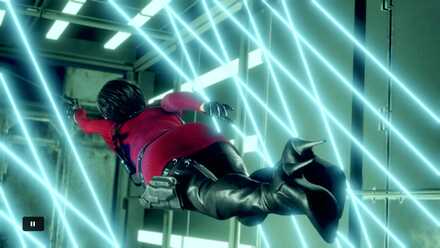
After the dialogue with Wesker, proceed back through the hallway, past the Monitoring Room, and then take a left turn. In this area, a cutscene will initiate and a button prompt that you need to press to dodge the lasers.
| ◄ Previous Chapter | Next Chapter ▶ |
|---|---|
|
Separate Ways - Chapter 5 |
Separate Ways - Chapter 7 |
Separate Ways - Chapter 6 Tips and Strategies
| Separate Ways - Chapter 6 Tips and Strategies |
|---|
|
|
Aim for the Knees
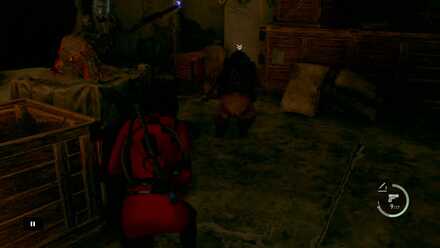
In this area, some enemies wear helmets and vests. It will require more ammo to defeat them if you shoot their bodies. Try aiming for their knees to stagger them and then use your melee attack to eliminate them efficiently, and helping you conserving ammo.
Complete the Requests
You can get 10 Spinels for completing the Beautiful Beetles request and 9 Spinels for completing the Bug Buster 2 request. Make sure that you finish these requests and trade your Spinels for valuable items, such as treasures and gunpowder.
| Related Request Guides | |
|---|---|
| Beautiful Beetles | Bug Buster 2 |
Chapter 6 Completion Reward

Completing Chapter 6 of the Separate Ways DLC rewards you with 400 CP for completing the Don't Play by the Rules challenge. You can use the CP earned from completing challenges in the Extras Shop to unlock exclusive content.
Resident Evil 4 Remake Related Guides

Separate Ways DLC Content
| ▼Separate Ways DLC Contents | |
|---|---|
| Walkthrough | Puzzles |
| Tips and Tricks | Weapons |
| Collectibles | Bosses |
Separate Ways Story Walkthrough
| Separate Ways Story Walkthrough | |
|---|---|
| Chapter 1 | Chapter 2 |
| Chapter 3 | Chapter 4 |
| Chapter 5 | Chapter 6 |
| Chapter 7 | |
Comment
Author

Separate Ways - Chapter 6 Walkthrough
Please participate in our site
improvement survey
03/2026
improvement survey
03/2026
Would you assist in
improving Game8's site?
improving Game8's site?

×
We are listening to our users' valuable opinions and discussing how to act on them.
The information collected through this survey will be used for the purpose of improving our services. In addition, the information will only be disclosed a part of a statistic in a format that will not allow identification of personal information.
Begin Survey
Not Now
×
Please rate each item regarding Game8.co's Advertisements.
Amount of Ads
Very Dissatisfied
Somewhat Dissatisfied
Fine
Somewhat Satisfied
Highly Satisfied
Placement of Ads
Timing of Ad Display
Ad Loading Speed
Safeness of Ads
Content of Ads
×
Please rate each item regarding Game8.co's Quality of Articles.
Amount of information
Very Dissatisfied
Somewhat Dissatisfied
Fine
Somewhat Satisfied
Highly Satisfied
Frequency of updates
Speed of new information
Accuracy of articles
Understandibility of articles
Readability of sentences
×
Please rate each item regarding Game8.co's Usability of the Site.
Ease of finding information
Very Dissatisfied
Somewhat Dissatisfied
Fine
Somewhat Satisfied
Highly Satisfied
Loading Speed
Use of Color
Font Size
Visibility of Images
Easy to Understand Layout
×
Please rate each item regarding Game8.co's Message Boards, Comments.
Ease of Writing
Very Dissatisfied
Somewhat Dissatisfied
Fine
Somewhat Satisfied
Highly Satisfied
Readability
Ease in Finding Information
Comment Quality
Comment Quantity
Admin Response
×
Please rate each item regarding Game8.co's Site's new design.
Please rate our site's new design
Very Dissatisfied
Somewhat Dissatisfied
Fine
Somewhat Satisfied
Highly Satisfied
Do you think that the website's design change makes the site easier to use?
Has the new design made it easier for you to find information on the site?
Has the new design improved the overall visual appeal of the site?
How would you rate your overall satisfaction with the new design of the site?
×
How likely are you to recommend Game8 to someone you know?
Very Unlikely
0
1
2
3
4
5
6
7
8
9
10
Very Likely
If you have other opinions regarding potential improvement to the website, please share them with us. We would appreciate your honest opinion.
Note: This is a free response section, so you can proceed without entering anything.
Note: Please be sure not to enter any kind of personal information into your response.
Note: Please be sure not to enter any kind of personal information into your response.
×
Thank You
×
Thank you for participating in our survey! Your answers will help us to improve the quality of our website and services.
We hope you continue to make use of Game8.
We hope you continue to make use of Game8.
Close
Rankings
- We could not find the message board you were looking for.
Gaming News


![Monster Hunter Stories 3 Review [First Impressions] | Simply Rejuvenating](https://img.game8.co/4438641/2a31b7702bd70e78ec8efd24661dacda.jpeg/thumb)
Popular Games

Genshin Impact Walkthrough & Guides Wiki
Honkai: Star Rail Walkthrough & Guides Wiki
Umamusume: Pretty Derby Walkthrough & Guides Wiki
Pokemon Pokopia Walkthrough & Guides Wiki
Resident Evil Requiem (RE9) Walkthrough & Guides Wiki
Monster Hunter Wilds Walkthrough & Guides Wiki
Wuthering Waves Walkthrough & Guides Wiki
Arknights: Endfield Walkthrough & Guides Wiki
Pokemon FireRed and LeafGreen (FRLG) Walkthrough & Guides Wiki
Pokemon TCG Pocket (PTCGP) Strategies & Guides Wiki


Recommended Games
Diablo 4: Vessel of Hatred Walkthrough & Guides Wiki
Cyberpunk 2077: Ultimate Edition Walkthrough & Guides Wiki
Fire Emblem Heroes (FEH) Walkthrough & Guides Wiki
Yu-Gi-Oh! Master Duel Walkthrough & Guides Wiki
Super Smash Bros. Ultimate Walkthrough & Guides Wiki
Pokemon Brilliant Diamond and Shining Pearl (BDSP) Walkthrough & Guides Wiki
Elden Ring Shadow of the Erdtree Walkthrough & Guides Wiki
Monster Hunter World Walkthrough & Guides Wiki
The Legend of Zelda: Tears of the Kingdom Walkthrough & Guides Wiki
Persona 3 Reload Walkthrough & Guides Wiki


All rights reserved
©CAPCOM CO., LTD. ALL RIGHTS RESERVED.
The copyrights of videos of games used in our content and other intellectual property rights belong to the provider of the game.
The contents we provide on this site were created personally by members of the Game8 editorial department.
We refuse the right to reuse or repost content taken without our permission such as data or images to other sites.