This survey will take about 1 minute.
Your answers will help us to improve our website.
Resident Evil 4 Remake (RE4)
Speedrun Guide: How to Finish in Under 5 Hours
★ The Resident Evil Requiem wiki is now live!
☆ Learn the best ways to speedrun & reach Professional S+!
★ Discover all the Skips you can make in a single playthrough!
Speedrunning Resident Evil 4 Remake's (RE4) main story allows you to get a high rank and complete Challenges and Trophies! Here's a guide on how to finish the game in under 5 hours, as well as tips on how to get through each chapter fast!
List of Contents
Speedrun Ideal Times
Playtime Requirements for S+ Rank
| Difficulty | Max Playtime Requirement |
|---|---|
| Assisted | 04:00:00 |
| Standard | 05:00:00 |
| Hardcore | 05:30:00 |
| Professional | 05:30:00 15 Manual Saves Only |
Your rank at the end of the game is determined by how fast you finish the story, as well as how many saves you used in Professional. Speedrunning the game and finishing it under 5 hours gets you the highest rank (S+) in the harder difficulties.
Note that it has to be a fresh save, not New Game Plus, for you to reach S+ Rank.
Preparing For Speedrun
Best Items to Get
| Recommended Items | Effect / How to Get |
|---|---|
 Armor Armor
(Ashley Knight Armor) |
Effect: Makes Ashley invulnerable to enemy attacks. Complete the main story on Hardcore mode or higher with A-rank. |
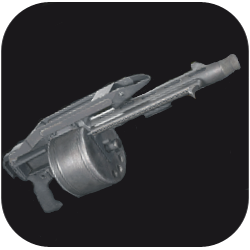
 Chicago Sweeper Chicago Sweeper |
Beat Professional with A-Rank. |
These items are the best items you can bring in your speedrun playthrough. The Armor Costume will make Ashley invulnerable to any attacks, while the Chicago Sweeper can kill enemies quickly without reloading from time to time.
Get Chicago Sweeper' infinite ammo quickly by saving Spinels and obtaining the Exclusive Upgrade Ticket. It is especially needed on a Professional S+ Speedrun playthrough, as enemies will take more bullets before they die. You won't also get much ammo as you will be focusing on speed and not looting, making the infinite ammo more needed.
Does Pausing Stop the Timer?
Yes, Pausing Stops the Timer
Pausing the game also stops the game's timer. You can halt your progress and the timer if you have to change something in the settings or do something in real life.
The game can be paused via the options menu or by leaving the game, like doing the alt+tab on PC or pressing the Home Button for PS.
Timer Is Not Paused while in the Inventory or Map
Checking out the map or doing some crafting in your inventory doesn't stop the timer from ticking. Open them up only when absolutely needed to save time on your playthrough.
How to Finish Under 5 Hours
| How to Finish Game Within 5 Hours |
|---|
|
|
Skip All Cutscenes and Comms

Cutscenes and comms with characters like Hunnigan adds to your overall time in the game. You can hold the skip button to skip the scene or you can pause the game and skip.
Avoid Dying at All Costs

Dying and continuing to the game will add the time you spent when progressing before you die. This is a must as it will be hard to hit the under 5 hours playing time, especially on Professional mode where the autosave won't work.
Use Aim Assist on Assisted or Standard

If you're only aiming for the S+ Rank on Assisted or Standard Mode, it's better to turn on the Aim Assists to help you with your aim. You can control its strength and choose how the aim assist will help you out in the game.
If you're confident with your aim and wants more freedom with the crosshair, you can turn it off entirely instead!
Aiming Guide: How to Aim Better
Give the Right Commands to Ashley

Knowing how each command works will save you time and prevent Ashley from dying or getting kidnapped. If you want to hold your ground and battle the enemies, it would better to tell her to spread out. It also works if you don't have no choice but to fight.
On the other hand, if you want to run away and escape the area quickly with Ashley, it's best if you order her to stay close. This way Ashley will focus on following Leon and won't look for covers to hide herself.
Utilize the the locker rooms as well and order Ashley to hide, especially with the Chainsaw Sisters fight and first encounter on an Iron Maiden in the story.
Don't Collect the Treasures
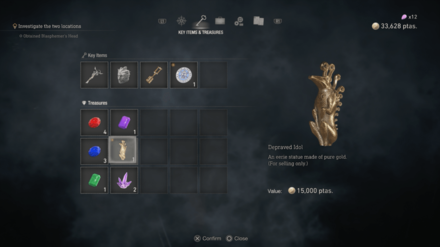
Treasures, especially Hidden Treasures, will only waste precious time when collecting them. It's better to only follow the main path to progress in the story and keep your time in check.
Loot Everything on the Main Path
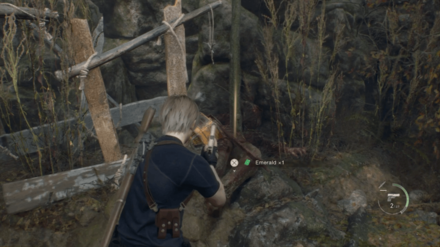
There are times that you will have to kill enemies on the way so they won't hinder your playthrough. You can loot their drops if they are in the main path. The same goes for containers like crates and jars destroyed in battle.
Don't Inspect Files
Don't go out of your way to inspect files and other lore items. These are not required to progress the chapters and will just waste a few seconds of your run especially if they're out of the main path.
List of All Files and Where to Find Them
Skip Battle Scenarios
There are forced battles or time-based scenarios in the game. All of the listed skips above can be skipped with exploits to save a lot of time on your speedrun playthrough.
All Skips
Best Save Points
If youre playing on Professional or any difficulty, it's best to know where to save in the story. It's usually best to save before a hard chapter, like fighting Elite Enemies or Bosses.
Best Save Points on Professional
Sneaking Can Save You Time
Arriving at the areas with gun blazing isn't always the best approach in a speedrun. You should consider sneaking through the enemies lines and stealth killing them, as it will be faster than killing everyone head on in some scenarios, like the First Chapter in the Island.
Practice Makes Perfect
Doing a speedrun will require a lot of practice and patience to pull it off. Keep practicing and improving your player skills to complete a speedrun successfully.
Try doing multiple playthroughs on lower difficulties first until you master each and every turn of the game.
Village Chapters Speedrun Walkthrough
| Difficulty | Ideal Finish Time |
|---|---|
| Assisted | 45 Minutes or less |
| Standard | 1 Hour or less |
| Hardcore | 1 Hour or less |
| Professional | 1 Hour and 30 Minutes or less |
Sentinel Nine and Charms (Deluxe & Collector's Edition Only)
If you own a Deluxe or Collector's Edition of the game, you can change your default Handgun with Sentinel Nine and equip the bonus Charms. It will allow you to have a smoother gameplay and finish the early chapters quicly.
All Game Editions and Available Bonuses
Get W-870 and Camp the Roof - Chapter 1
In the first village fight, you can rush to the house north of the village. It will lead to a short cutscene and summon a Chainsaw Man in the area. Rush to the second floor, get the W-870 and Hand Grenade, and camp the roof to funnel enemies down in a single spot.
Kill as many enemies as you can to trigger the bell faster and obtain as many items before you go to the next area.
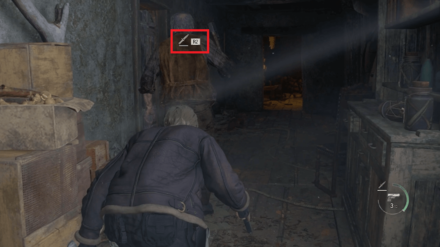
Get Wooden Cog Fast - Chapter 1
Throw a Grenade Inside the Barn
You can get the Wooden Cog fast by throwing a grenade on the small window of the barn to break the lock on the back door. Proceed to open the gate and ignore all enemies as you make your way to the bridge.
You can also use a pistol here if you position yourself near the window and shoot the lock to open the door.
Combination Puzzle - Chapter 2
| Solution | ||
|---|---|---|
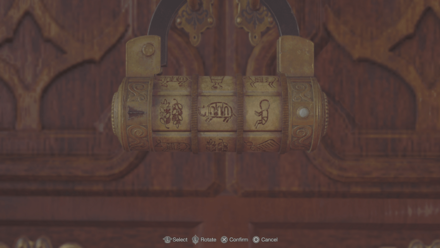 |
||
| 1st | 2nd | 3rd |
| Crop | Pig | Babe |
Immediately put the Crop, Pig, and Babe once you get to the combination lock in the Manor during Chapter 2. You don't have to look for the clue as the combination is the same, even if you change difficulties.
Combination Lock Code and Puzzle Solution
Save the Dog - Chapter 3
Saving the dog is a must if you want to speedrun, as it can help you with the fight against El Gigante. The dog can cause a scene where the giant will fall on the ground, giving you chance to attack.
How to Beat El Gigante (The Giant)
Del Lago Boss Fight - Chapter 3
You can finish this boss fight quickly by avoiding bumping into obstacles and dodging all of Del Lago's attacks. You should also anticipate how it will move to plan where to attack and where you move the boat.
Don't Shoot the Lake before the Boss Fight
Shooting the lake before the boss fight starts will make Del Lago appear after a few seconds and devour Leon, causing an instant death. Don't try to shoot it, intentionally or accidentally, to avoid impeding your progress through the village.
Cave Shrine Puzzles - Chapter 4
 |
 |
When you're on your way to get the heads to get the key to the church, you will have to solve the cave shrine puzzles to get them. You can skip looking for clues and start pressing the buttons to solve once you get to their location.
Start solving the Large Cave Shrine first as it is the nearest one to your starting location.
Get Red9 in the Middle of the Lake - Chapter 4
 Map View |
 World View |
When you're done with the Large Cave Shrine Puzzle and you're on your way to the Small Cave Shrine Puzzle, grab the Red9 on a wrecked ship in the middle of the lake. Use it as a replacement for your current handgun as it has better power that can stagger enemies easily.
Red9 Location, Weapons Stats, and Upgrades
Church Stained Glass Puzzle - Chapter 4
| Church Stained Glass Solution | |
|---|---|
| Blue | 5 o'clock |
| Green | 3 o'clock |
| Red | 9 o'clock |
Rotate the Stained Glasses to the correct angle to cover all the gaps and solve the puzzle. You can get the Blue Stained Glass on the cabinet on the right corridor of the church.
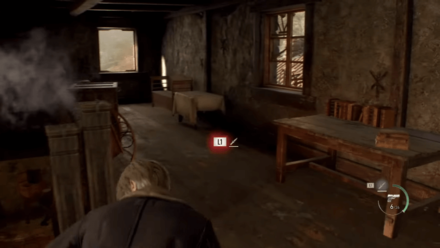
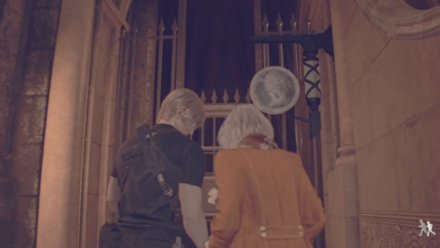
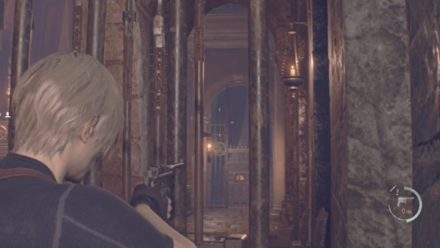
Church Escape Skip - Chapter 5
Instead of exiting down the window at the start of chapter 5, you can go down by glitching through the wall and leaving Ashley behind. Enemies won't be able to reach Ashley and you can progress while evading enemies without her.
Ashlley will spawn as soon as you reach the bridge leading to the house where Luis is hiding.
Camp the Stairs when Defending the House - Chapter 5
Defend the house by baiting the enemies in the stairs and picking them off there. It will save you time as you can kill them all in that spot and wonn't have to worry about getting hit from behind.
When the ladders are coming in, quickly go to the second floor and remove them. The Brute (Minotaur) will spawn a few minutes after the ladders are up. You can use the stairs and the ladder to kill him.
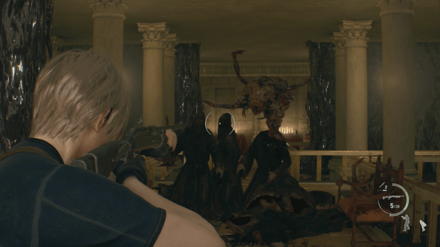
Chainsaw Sisters Fight Skip - Chapter 6
Note: This only works on Assisted, Standard, and Hardcore difficulties.
| Update 4/23: This scope glitch has been fixed as of the Ver. 1.05 update and will no longer work. |
Players can skip the fight against the Chainsaw Sisters by glitching through the wall using Autosave and Sniper Rifle with a Scope.
First, you have to shoot the lock at the back of the house to open it. Walk inside, but make sure you're walking on the edges starting from the right to the left to make sure the glitch will work. Next, aim you're scope on the ground, enough to see the wooden crates, then move to the right. Pause and then load the autosave and you should now be inside the wall.
Follow the path while aiming with a Pistol and go right at the wall intersection. Follow the wooden fences until you reach the a rough, bulging rock at the end then go left. You will see the Chainsaw Sisters on the way, but ignore them and continue walking the path.
How to Beat Chainsaw Sisters
Mendez Boss Fight Skip - Chapter 6
Note: This only works on Assisted, Standard, and Hardcore difficulties.
| Update 4/23: This scope glitch has been fixed as of the Ver. 1.05 update and will no longer work. |
You can skip this boss fight easily and proceed to the Castle area. To do this, go upstairs and wait for Ashley to speak, and then go back and use the SR M1903 with a Scope and aim at the stairs railing while going down slowly until the first stair step. Pause and load the autosave after that and you'll glitch through the wall.
Follow the wall on the Merchant's side but don't leave the wall to make it work. Once you reach the solid wall at the end, crouch and go left until you're outside the house. Run straight and ignore Ashley's call out until you reach the draw bridge.
Castle Chapters Speedrun Walkthrough
| Difficulty | Ideal Finish Time |
|---|---|
| Assisted | 1 Hour and 30 Minutes or less |
| Standard | 1 Hour and 45 Minutes or less |
| Hardcore | 2 Hours or less |
| Professional | 2 Hours or less |
Rush The Battle Segments - Chapter 7
Once you reach the castle, rush to lift the cannon immediately and fire it at the castle gate. You can immediately bring the cannon up by shooting its suspension from the stairs through the cage.
Keep in mind that some enemies will try to kidnap Ashley, so keep a tight formation and shoot any enemy that tries to kidnap her.
Rush Towards the Dungeon: Ignore Garrador

Once you enter the main castle, immediately lift Ashley to open the door for you while ignoring the enemies in the room.
Run to the dungeon to get the dungeon key, and ignore the Garrador but make sure to make a slight noise. Use a Flash Grenade to stagger it and open the door.
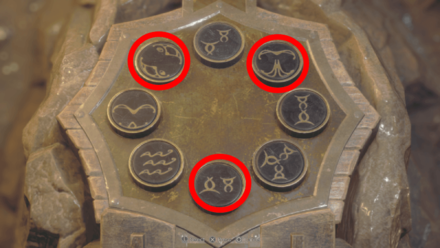
First Animal Gong Puzzle
| Solution | ||
|---|---|---|
 |
 |
 |
Once you reach the first puzzle room with images of knights, immediately turn left and pull the Deer Gong's lever, then shoot the Bird and Snake Gong.
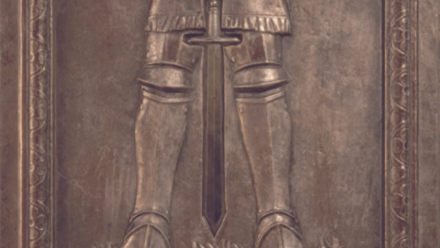
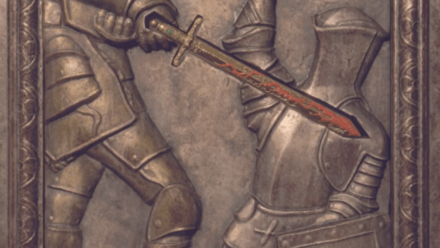
Four Swords Puzzle
| Solution | |
|---|---|
 |
 |
 |
 |
Take the Bloodied Sword from the room with the Animal Gong room and place the swords in their respective knight images.
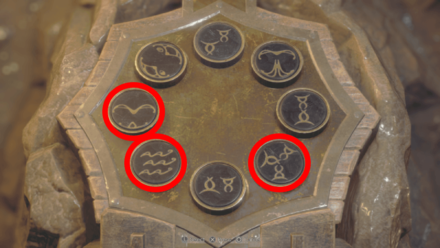
Second Animal Gong Puzzle
| Solution | |
|---|---|
 |
 |
After opening the door from the Knight Images room, turn left to shoot the Dragon Gong then use the chandelier to cross, the Snake Gong will be on the left side. The door will be unlocked once both gongs are rung.
Precise Aim in Black Fountain Room
Halo Wheel
Once you reach the room with black fountains, rush to the lower level to get the Halo Wheel for the stairs to be brought down.
You need to aim precisely for enemy weak spots to simply stagger them to give you some time to rotate the wheel and to protect Ashley. You need to do this two times, one for the lower level, and one for the higher level.
Bridge Sequence

Protect Ashley from the Zealots by using a rifle or a sniper rifle. Keep in mind that some Zealots will also come for you, and there is now way to rush this portion unless you eliminate all mobs.
This part of the castle is also one of the best times to loot money from enemies.
Crimson Lantern Puzzle - Chapter 8
| Solution | |||
|---|---|---|---|
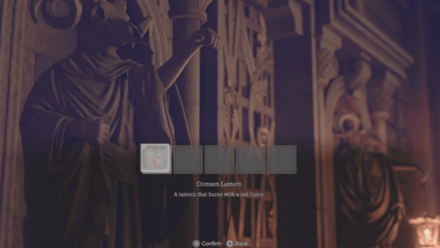 Put the Crimson Lantern on the Cultist Statue that is not holding anything. |
Once you reach the winery, use a rifle to kill the Red Zealot from afar and loot the Crimson Lantern from its body to unlock the door then make your way to the Lithographic Puzzle Room.
Crimson Lantern Puzzle Solution
Lithographic Tile Puzzle
| Solution | |||
|---|---|---|---|
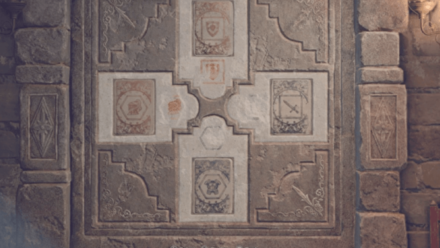 |
|||
| North Slot | West Slot | East Slot | South Slot |
| Red Shield | Red Helmet | Blue Sword | Blue Armor |
Loot all tiles in the room and arrange them accordingl to their respective markers.
Lithographic Castle Tile Puzzle Solution
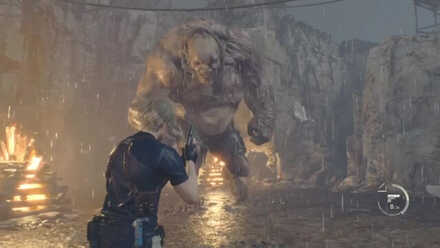
Castle Walls - Armored Gigante
Rush the castle walls until by skipping the Sun and Moon switches and ignore every mob you encounter.
Fire the cannon on Armored Gigante and on the second castle gate and run towards the entrance until you reach Ashley.
How to Beat Armored El Gigante
Courtyard Maze Puzzle - Chapter 9
| Solution | ||
|---|---|---|
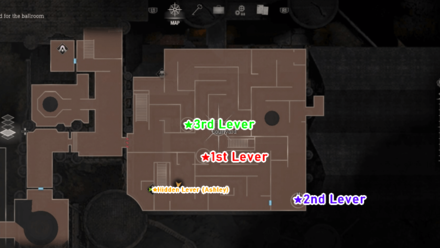 |
Run towards each of the three towers to pull their levers and activate their flags to open the gate. Be wary of Colmillos and Zealots trying to ambush you and kidnap Ashley.
Courtyard Maze Puzzle Solution
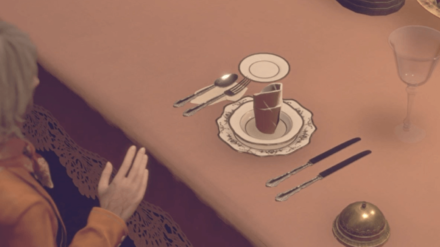
Ballroom Puzzle - Animal Heads
Dining Hall Puzzle - Snake Head
| Solution | |
|---|---|
 Female Portrait |
 Male Portrait |
 Ashley |
 Leon |
Head to the dining hall and order Ashley to sit in the chair that matches the table setting of the female portrait, while you sit in the chair that matches the male portrait.
Dining Hall Bell Puzzle Solution
Armory - Lion Head
Head to the northwest of the Grand Hall and drop from the ledge to get the Lion Head. Prepare Flash grenades for this section to easily kill the Armaduras after taking the Lion Head.
Gallery - Goat Head Skip
You can skip this fight in the gallery by using the Bolt Thrower to shoot a bolt with an Attachable Mine right behind the bridge switch. Simply grab the Goat Head and return to the Grand Hall.
Playing as Ashley
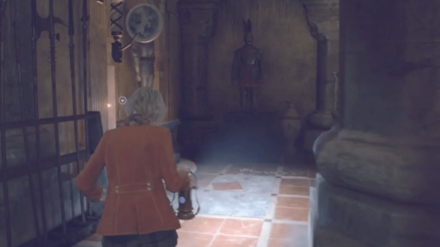
Clock Puzzle
| Grandfather Clock Puzzle Solution | |
|---|---|
| Assisted or Standard Difficulty | 11:04 |
| Hardcore or Professional Difficulty | 7:00 |
Immediately open a path towards the Mausoleum by changing the clock's hands to 11:04 or 7:00 depending on your difficulty you're on.
Ashley Grandfather Clock Puzzle Solutions
Third Animal Gong Puzzle
| Solution | |
|---|---|
 |
 |
 |
 |
Simply pull all the levers of each gong that can be found in every corner of the room.
Mausoleum Lamp Puzzle
| West Slot |  |
|---|---|
| North Slot | 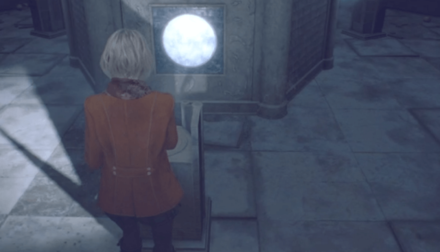 |
| East Slot | 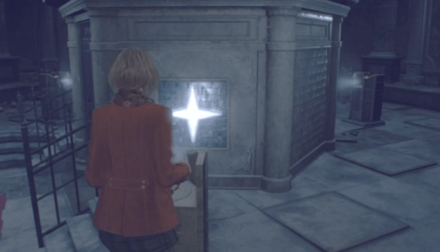 |
Place each lamp to its corresponding shape on the wall, and take the Salazar Family Insignia inside then make youre way to the upper floor of the library to free Leon.
Ashley Mausoleum Lamp Puzzle Solution
Rush to the Throne Room - Chapter 10
You will encounter a ruined hall with lots of Novistadors inside and a locked gate. Ignore all Novistadors and head to the two balconies then activate the gate switches on each end.
You can pass this area safely by looking upwards while trying to open the gate. Most of the Novistadors will only fly, but some of them will still attack so be wary and shoot them!
Once through the gate, head to the left to shoot one of the bridge suspensions and shoot the last suspension in front of the bridge itself.
Double Garrador Fight - Chapter 10
After crossing the bridge you will encounter a room with Two Garradors guarding the Throne Room, you will need to kill these two in order to open the doors.
The most efficient way to deal with the Garradors and other mobs in the area is by using Grenades or Bolt Thrower with Attachable Mines.
Verdugo Boss Fight - Chapter 10
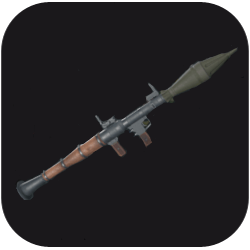
Use your strongest weapons and grenades to damage Verdugo while he is affected by Nitrogen; the faster you kill Verdugo, the faster the elevator comes. It's recommended to save up a Rocket Launcher for this boss fight to save huge amount of time on your playthrough.
Skip the Verdugo Boss Fight

| Update 4/23: This scope glitch has been fixed as of the Ver. 1.05 update and will no longer work. |
Alternatively, you can skip the Verdugo boss fight by using the sniper scope glitch. Freeze and ignore Verdugo in order to head straight into the elevator room.
Once you are in the room, aim down through the scope then lean towards the elevator door. This will result in a glitch that will place you through the elevator door. From there, all you have to do is wait for the elevator to arrive.
Keep in mind that this method still requires time to wait for the elevator to arrive. It is only recommended if you have trouble dealing with Verdugo.
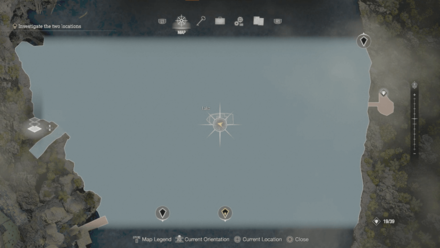
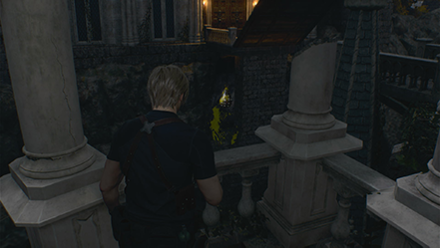
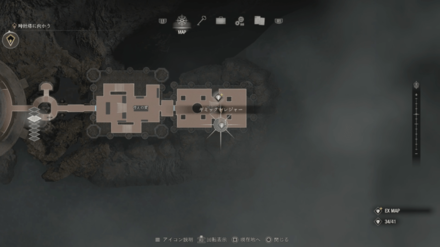
Block Mining Path - Chapter 11
| Route Map |
|---|
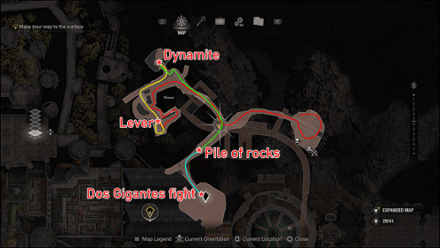 |
Simply run past all the enemies until you get the dynamite and clear the blockade.
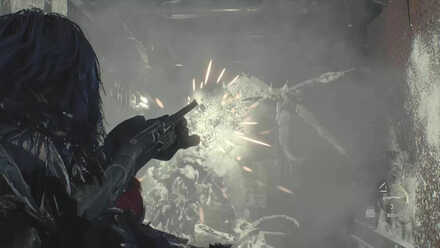
After clearing the path, proceed normally to the Two Giants Boss Fight, the mine kart section and Jack Krauser Boss Fight.
Clock Tower - Chapter 12
Once you reach the clock tower, ingore all enemies as you make your way towards the lift.
To quickly progress this area, shoot the back of the head of Salazar's statue to disable it from breathing fire and make your climb smoother.
Once you've activated the lift, wait for enemies to jump and shoot them while airborne, this instantly kills them and does not land them on the lift.
Use Golden Egg on Salazar - Chapter 12
After exiting the lift, make your way to Salazar and fight him with a Gold Chicken Egg on hand that you can get from his throne room. The Gold Chicken Egg deals a lot of damage against Salazar and will help you end the boss fight faster.
How to Beat Ramon Salazar
Closest Gold Chicken Egg Location
| Map Location | In-Game Location |
|---|---|
 |
 |
The Gold Chicken Egg in the Castle can be obtained by going back to the Throne Room to the east and unlock the Square Lock Box using the Cubic Device.
All Gold Chicken Egg Locations
Island Chapters Speedrun Walkthrough
| Difficulty | Ideal Finish Time |
|---|---|
| Assisted | 1 Hour or less |
| Standard | 1 Hour or less |
| Hardcore | 1 Hour and 30 Minutes or less |
| Professional | 1 Hour and 45 Minutes or less |
Use the Brute to Skip the Turret - Chapter 13
You can immediately go to the next area by using the Brute (Minotaur) as a shield against the Automatic Turret.
To do that, rush to the metal door while the guard on the first building is outside to trigger the alarm a little late. Then go up the stairs to the metal door, but make sure not to cross the red laser.
Wait for the Brute (Minotaur) to get close and start passing through the red laser. You can then start running at the door once he's getting shot by the Automatic Turret and open it to get to the next area.
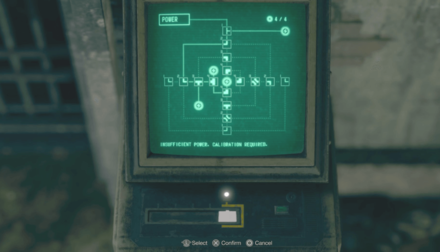
Keycards - Chapter 13
Level 1 Keycard Puzzle - First Regenerator
| Solutions | |
|---|---|
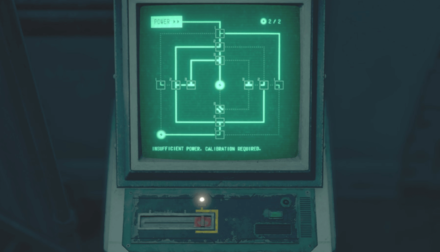 |
 |
Simply rotate the nodes to connect the power line on all power icons to unlock the door. Take the keycard, and fire a shotgun to the Regenerator's face then run away.
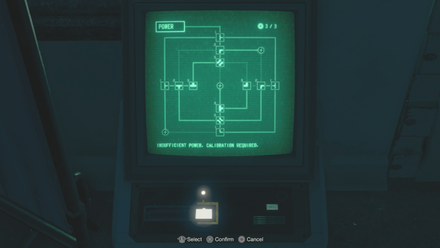
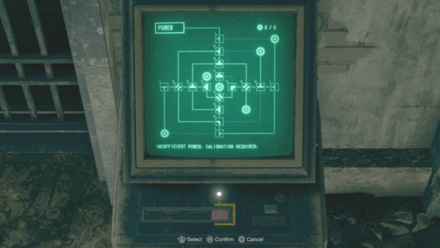
Level 2 Keycard - Second Regenerator
| Solutions | |
|---|---|
 |
 |
You can find the LE 5 in a locked room inside the freezer area, you can use this gun or sell it for money. To solve the puzzle, simply connect the power line onto the power nodes to unlock the door, then upgrade your keycard.
Insert the keycard for its upgrade and shoot the Regenerator on the face again, you can lure the regenerator outside to give yourself some space to run to when confronted.
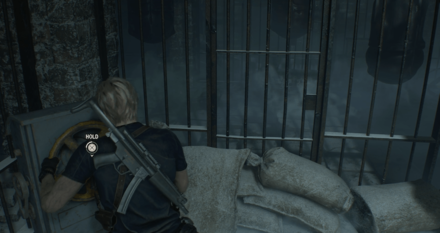
From this point, progress regularly until the third keycard upgrade and unlocking Ashley's cell.
Electronic Lock Puzzle Solutions: How to Solve Power Puzzles
Door Skip to the Lift - Chapter 14
| Update 4/23: This scope glitch has been fixed as of the Ver. 1.05 update and will no longer work. |
You can skip the Waste Disposal Area and the Wrecking Ball area using this skip. You will need a Rifle and a Scope to make this skip work.
To do this skip, you need to be on the gate and holding the Rifle with a Scope. Move your back against the gate and aim downwards. Flip your aim to the left or right quickly and you should be able to glitch through the other side of th egate.
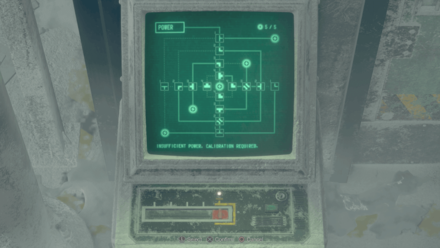
Disposal Power Switch - Chapter 14
When commanding Ashley to turn and hold the wheel to put the bridge up, shoot some Attachable mines with the Bolt Thrower just behind her. Do this before crossing the bridge so that when enemies come after her, they can either die or take damage from the explosion.
Never go back to the bridge unless all Soldiers are killed, as this spawns the Iron Maiden. Once all enemies are finished, run back to Ashley while ignoring the Iron Maiden and solve the electronic lock puzzle.
Chapter 14 Electronic Lock Puzzle Solution
| Solutions | |
|---|---|
 |
 |
Wrecking Ball Skip - Chapter 14
To make this section faster, you can throw two grenades on the wall crack to make it fall with one hit from the wrecking ball. It's important to note that you have to start the cutscene before throwing the grenades as this seems to be the only time when the wall takes damage.
You can also use Attachable Mines on the wall and lure enemies in to inflict more damage to the wall. Dynamites and Rocket Launchers from enemies can also wear the wall down.
After this section you can proceed by ignoring all enemies and taking on Krauser's second encounter normally.
How to Skip Wrecking Ball Wall
Lure Enemies Out - Chapter 15

During the segment with Mike and his chopper, you can lure enemies out in the open. Mike will kill everyone in you way, preventing you from getting damaged and saving you precious ammo.
Destroy AA Gun with Heavy Grenades - Chapter 15
You can skip the part where you need to use to a mounted turret to destroy the AA Gun by throwing two Heavy Grenades directly on it. Make sure you're close enough to it or the Heavy Grenades will hit nothing but air.
Skip Automatic Turret - Chapter 15
Use the Novistador to hit and push you to the other side while near the Automatic Turret. But make sure you have enough health to take a damage or you'll die. This method will save you time and resources, as you won't have to enter the building and fend off enemies as you try to redirect the Automatic Turret.
Ignore Regenerators and Iron Maidens - Chapter 15
There will be a bunch of Regenerators and Iron Maidens hidden on the way to Luis' laboratory. You can ignore them and continue getting out quickly. You can use Flash Grenades or any explosive grenades to stun them for a short time while you open the door.
Saddler Boss Fight - Chapter 16

You can quickly defeat Saddler if you use high-damaging weapons like Magnum, Rifle, or Shotgun, especially on higher difficulties. Utillize the explosive barrels as well to stagger Saddler and give you a chance to rain him down with bullets.
You can use a Rocket Launcher instead if you've save enough money on your playthrough.
How to Beat Saddler: Saddler Final Boss Fight Guide
Use the Rocket Launcher (Special) Fast
On Saddler's second phase, immediately grab the Rocket Launcher (Special) that is thrown by Ada to finish the battle immediately. If you still have your own Rocket Launcher, you can use that instead to kill Saddler without having to wait for Ada.
Escaping with the Jet Ski
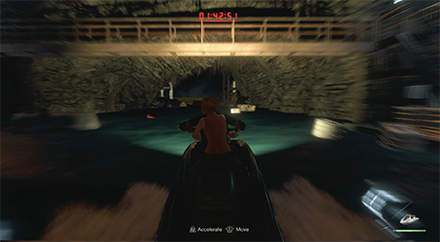
Ignore all enemies you'll encounter, as they'll become unable to move as you get closer to the Jet Ski. Once you reached the Jet Ski, run it quickly and start following the path that will lead outside the island.
You don't have to be extremely fast and slow down if needed, especially on making hard turns or going for the ramps.
Speedrun Recommended Weapons
Assisted and Standard Weapons
| Recommended Weapons | ||
|---|---|---|
 Red9 Red9
|
 W-870 W-870
|
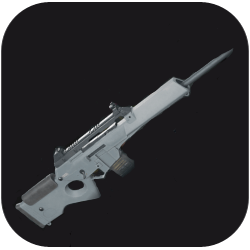
 SR M1903 SR M1903
|
 Broken Butterfly Broken Butterfly
|
 LE 5 LE 5
|
 Rocket Launcher Rocket Launcher
|
Explanation:
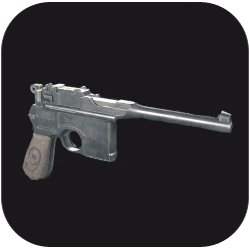
- Red9 - Red9 is a free handgun you can get after defeating Del Lago. It has a high firepower for a pistol that can stagger weaker enemies frequently.
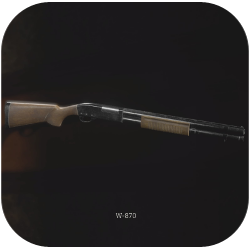
- W-870 - W-870 is a shotgun you can get for free on a house from the first village fight. It has decent damage and range, and it is best to keep it to save money on other items than focusing on changing it mid to late game.
- SR M1903 - Purchase the SR M1903 once it becomes available and on sale from the Merchant. You can get a free scope for buying it and you will need both of them, specifically during the black fountain room with Ashley.
- Broken Butterfly - Broken Butterfly will be your main weapon against hard-to-kill enemies and bosses. Get it from the Merchant once it becomes on sale, as it will come with a free Magnum Ammo recipe and will be cheaper!
- LE 5 - LE 5 is a free endgame weapon and you can get it easily behind a Power Calibration Puzzle. You can use it against Elite or multiple enemies lined up to take them out quickly.
- Rocket Launcher - Verdugo and Saddler (1st Phase) will take too much time if you want to beat them. The Rocket Launcher will save you time on both of them as they can be killed in one-shot with it.
Hardcore and Professional Weapons
| Recommended Weapons | ||
|---|---|---|
 Blacktail Blacktail
|
Red9
|
W-870
|
 Riot Gun Riot Gun
|
 Striker Striker
|
 Stingray Stingray
|
|
Broken Butterfly
|
 Killer7 Killer7
|
LE 5
|
Explanation:
- Blacktail - Blacktail is your leading weapon due to the abundance of handgun ammo you can loot around. Max out its rate of fire and firepower to dispatch enemies in a pinch. It is also a decent secondary weapon during boss fights.
- Red9 - Red9 is a free handgun you can get after defeating Del Lago. It has a high firepower and can stagger weaker enemies frequently. This is useful during the Mendez fight as you can dish out more firepower at a distance during his 2nd phase!
- W-870 > Riot Gun > Striker - It is recommended to progressively buy newer shotguns once they become available from the Merchant. Always have a shotgun in the inventory to deal with large groups of enemies in an enclosed space.
- Stringray - Purchase the Stringray once it becomes available and on sale from the Merchant. With the Biosensor Scope attached, this will be extremely useful against the Regenerators.
- Broken Butterfly - Get the Broken Butterfly from the Merchant starting in Chapter 7 for this will be a great weapon against hard-to-kill enemies and bosses. Get it from the Merchant once it becomes on sale, as it will come with a free Magnum Ammo recipe and will be cheaper!
- Killer7 - Sell the Broken Butterfly then purchase the Killer7 when it becomes available from the Merchant in Chapter 11. This will become your main weapon against tougher enemies and bosses. Use this against the Cultist to avoid being stunned from his attacks!
- LE 5 - LE 5 is a free endgame weapon and you can get it easily behind a Power Calibration Puzzle. This is a good back up weapon when you're out of other ammo types.
Best Weapons: Weapon Tier List
Trophy and Achievement
Sprinter Trophy
 Silver Silver
|
Sprinter |
|---|---|
| Complete the main story within 8 hours.
► How to Complete Sprinter Trophy and Challenge |
Completing the main story in any difficulty under 8 hours unlocks the Sprinter Silver Trophy. There are also Challenges that requires you to finish it in each difficulty under a fewer amount of time.
Achievements List and Trophy Guide
Resident Evil 4 Remake (RE4) Related Guides

Tips and Tricks: A Beginner's Guide
All Tips and Tricks Guides
Author

Speedrun Guide: How to Finish in Under 5 Hours
Please participate in our site
improvement survey
03/2026
improvement survey
03/2026
Would you assist in
improving Game8's site?
improving Game8's site?

×
We are listening to our users' valuable opinions and discussing how to act on them.
The information collected through this survey will be used for the purpose of improving our services. In addition, the information will only be disclosed a part of a statistic in a format that will not allow identification of personal information.
Begin Survey
Not Now
×
Please rate each item regarding Game8.co's Advertisements.
Amount of Ads
Very Dissatisfied
Somewhat Dissatisfied
Fine
Somewhat Satisfied
Highly Satisfied
Placement of Ads
Timing of Ad Display
Ad Loading Speed
Safeness of Ads
Content of Ads
×
Please rate each item regarding Game8.co's Quality of Articles.
Amount of information
Very Dissatisfied
Somewhat Dissatisfied
Fine
Somewhat Satisfied
Highly Satisfied
Frequency of updates
Speed of new information
Accuracy of articles
Understandibility of articles
Readability of sentences
×
Please rate each item regarding Game8.co's Usability of the Site.
Ease of finding information
Very Dissatisfied
Somewhat Dissatisfied
Fine
Somewhat Satisfied
Highly Satisfied
Loading Speed
Use of Color
Font Size
Visibility of Images
Easy to Understand Layout
×
Please rate each item regarding Game8.co's Message Boards, Comments.
Ease of Writing
Very Dissatisfied
Somewhat Dissatisfied
Fine
Somewhat Satisfied
Highly Satisfied
Readability
Ease in Finding Information
Comment Quality
Comment Quantity
Admin Response
×
Please rate each item regarding Game8.co's Site's new design.
Please rate our site's new design
Very Dissatisfied
Somewhat Dissatisfied
Fine
Somewhat Satisfied
Highly Satisfied
Do you think that the website's design change makes the site easier to use?
Has the new design made it easier for you to find information on the site?
Has the new design improved the overall visual appeal of the site?
How would you rate your overall satisfaction with the new design of the site?
×
How likely are you to recommend Game8 to someone you know?
Very Unlikely
0
1
2
3
4
5
6
7
8
9
10
Very Likely
If you have other opinions regarding potential improvement to the website, please share them with us. We would appreciate your honest opinion.
Note: This is a free response section, so you can proceed without entering anything.
Note: Please be sure not to enter any kind of personal information into your response.
Note: Please be sure not to enter any kind of personal information into your response.
×
Thank You
×
Thank you for participating in our survey! Your answers will help us to improve the quality of our website and services.
We hope you continue to make use of Game8.
We hope you continue to make use of Game8.
Close
Rankings
- We could not find the message board you were looking for.
Gaming News


Popular Games

Genshin Impact Walkthrough & Guides Wiki
Honkai: Star Rail Walkthrough & Guides Wiki
Umamusume: Pretty Derby Walkthrough & Guides Wiki
Pokemon Pokopia Walkthrough & Guides Wiki
Resident Evil Requiem (RE9) Walkthrough & Guides Wiki
Monster Hunter Wilds Walkthrough & Guides Wiki
Wuthering Waves Walkthrough & Guides Wiki
Arknights: Endfield Walkthrough & Guides Wiki
Pokemon FireRed and LeafGreen (FRLG) Walkthrough & Guides Wiki
Pokemon TCG Pocket (PTCGP) Strategies & Guides Wiki


Recommended Games
Diablo 4: Vessel of Hatred Walkthrough & Guides Wiki
Fire Emblem Heroes (FEH) Walkthrough & Guides Wiki
Yu-Gi-Oh! Master Duel Walkthrough & Guides Wiki
Super Smash Bros. Ultimate Walkthrough & Guides Wiki
Pokemon Brilliant Diamond and Shining Pearl (BDSP) Walkthrough & Guides Wiki
Elden Ring Shadow of the Erdtree Walkthrough & Guides Wiki
Monster Hunter World Walkthrough & Guides Wiki
The Legend of Zelda: Tears of the Kingdom Walkthrough & Guides Wiki
Persona 3 Reload Walkthrough & Guides Wiki
Cyberpunk 2077: Ultimate Edition Walkthrough & Guides Wiki


All rights reserved
©CAPCOM CO., LTD. ALL RIGHTS RESERVED.
The copyrights of videos of games used in our content and other intellectual property rights belong to the provider of the game.
The contents we provide on this site were created personally by members of the Game8 editorial department.
We refuse the right to reuse or repost content taken without our permission such as data or images to other sites.