This survey will take about 1 minute.
Your answers will help us to improve our website.
Resident Evil 4 Remake (RE4)
Chapter 7 Walkthrough
★ The Resident Evil Requiem wiki is now live!
☆ Learn the best ways to speedrun & reach Professional S+!
★ Discover all the Skips you can make in a single playthrough!

This is a walkthrough for Chapter 7 of Resident Evil 4 Remake (RE4). Read on for a detailed walkthrough, route maps for each objective, a list of important items obtainable, and tips on how to complete this chapter!
| ◄ Previous Chapter | Next Chapter ▶ |
|---|---|
|
Chapter 6 |
Chapter 8 |
List of Contents
Chapter 7 Basic Information
Chapter Summary
After finding their way into the castle, Leon receives a call from Luis saying that he has a medicine for Leon's problem. Leon must now make his way through the castle to find their meeting place: The Castle Courtyard.
Chapter Details
| Chapter 7 | |
|---|---|
| Location | Castle |
| Recommended Weapons |
SG-09 R
Broken Butterfly SR M1903 |
Enemies Encountered
 Garrador Garrador
|
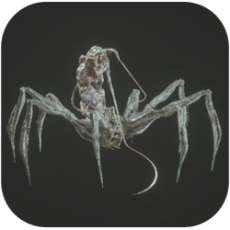 Parasite Parasite
|
Chapter 7 Walkthrough
Chapter Objectives
| Objectives | |
|---|---|
| 1 | Head for the Courtyard |
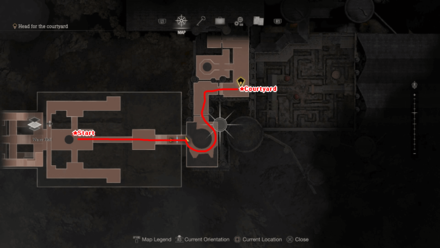
Head for the Courtyard
Follow the Path
| Map Location | In-Game Location |
|---|---|
 |
 |
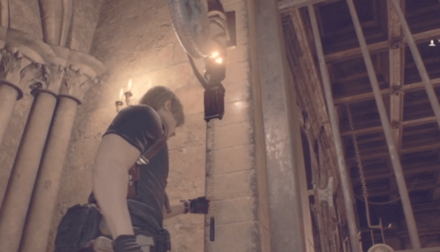
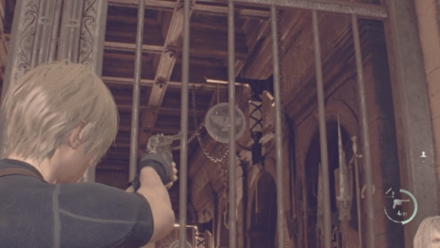
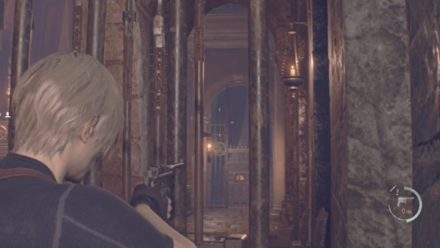
Head deeper into the castle, where you can find a merchant just beyond the entrance. Stock up on items and ammo before proceeding! After making your preparations, take the stairs going up and towards the ledge where you can use your binoculars to scout ahead. The Castle Gate can be seen directly across, but is heavily guarded by Cultists.
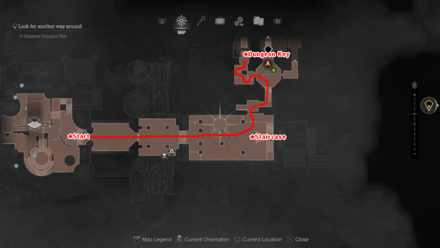
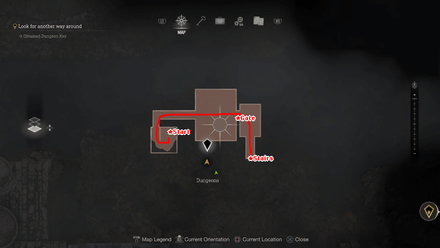
Find a Way to the Gate
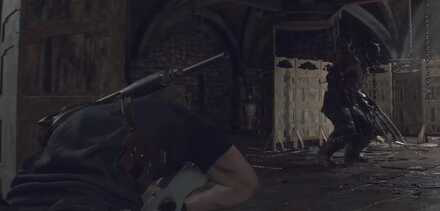
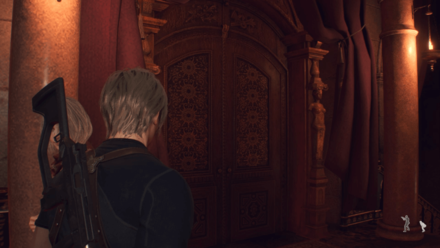
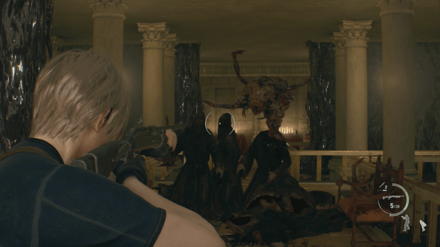
After scouting the Cultists, head to the lower floor of the castle, and wait for the cultists to pass through. Head to the next room to witness and fight against a cultist that was violently taken over by a Parasite. Enter door behind the altar, then outside towards the staircase, where a cutscene will be triggered.
Defeat the Cultists
After the brief cutscene, cultists will start shooting at you using their crossbows. Kill them using a rifle to safely proceed to the next area. Once all the cultists are defeated, make your way up the stairs of the castle walls where you will be targeted by the Cultists' catapult. Kill the approaching Cultists while also dodging the incoming projectiles from the catapult.
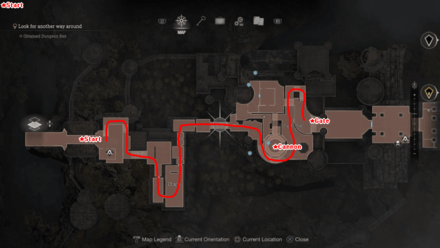
Find the Cannon
Continue making your way through the Cultists until you find a fenced off area. Drop down to find the cannon, and shoot the chain to trigger the mechanism that will lift the cannon up. Head up to where the cannon is and man the cannon to start firing back at the Cultists! Targets will be marked by a solid white circle, so fire the cannon at these targets!
After shooting the remaining Catapults using the cannon, aim it towards the Castle Gate to break it to trigger the cutscene. Once the path is clear, make your way to the newly unlocked path. Head inside the castle, and there should be a merchant to your right, so stock up on items and ammo before proceeding.
Approach the Staircase
| Map Location | In-Game Location |
|---|---|
 |
 |
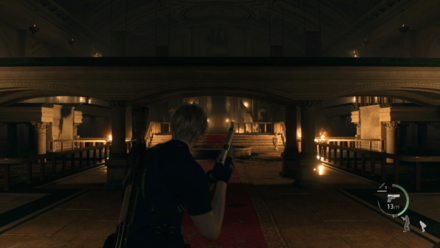
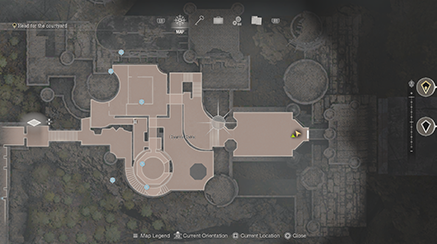
After stocking up on items and ammo, approach the staircase on the other side of the room to trigger the cutscene where Ramon Salazar introduces himself. Once Ramon finishes his monologue, more cultists will appear to attack you and Ashley.
Defeat the Cultists
Multiple Cultists will arrive and attack you and Ashley. Defeat them while also keeping Ashley safe to proceed to the next area.
Head Deeper into the Castle
After defeating the Cultists, head towards the wall with the torn cloth draped over it. Vault Ashley over to have her unlock the steel gate frin the inside. Once inside, crawl through the small gap in the walls and head through the corridor, and into the Torture Chamber. You can interact with the victims to get a closer look.
Follow the trail of blood on the floor, which is also accompanied by the sound of clanging metal. Continue following the trail where you will find a corpse leaning against the wall. Interact with the corpse by the wall to retrieve the Dungeon Key. Walk back to trigger the cutscene where Leon falls through the floor and finds the source of the clanging metal.
Find a Way Back Up
| Map Location | In-Game Location |
|---|---|
 |
 |
After the cutscene with the Garrador, Leon learns that it cannot see, and relies on sound to figure out your position. It is initially chained when you first see it, but making loud noises, such as passing through chains will alert the Garrador of your presence, and will proceed to chase after and attack you.
Once you quietly reach the next room, or once the Garrador is defeated, open the gate, and head inside the small room. Take the ladder inside the room back up to the upper floor, where you can begin to hear Ashley coughing from the other side of the door. After your rendezvous with Ashley, unlock the locked gate using the Dungeon Key that you obtained from the Cultist corpse earlier.
Solve the Animal Bell Puzzle
| Solution | ||
|---|---|---|
 |
 |
 |
After unlocking the gate, head up the stairs and into the storage room. Exit the storage room to find a room full of paintings and statues. As per Ashley's suggestion, you can ring the Gongs by shooting at them. Ring the Deer Gong outside by interacting with it, then shoot the Eagle and Snake Gongs by the right side of the room.
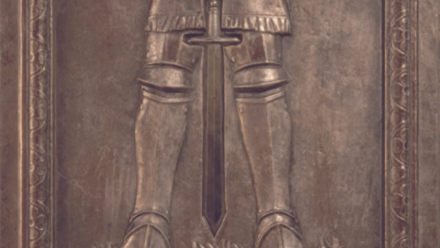
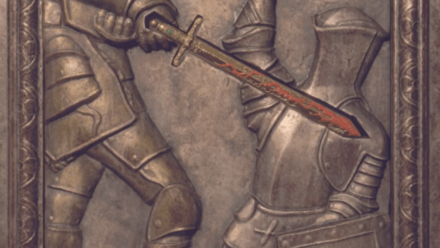
Solve the Swords Puzzle
| Solution | |
|---|---|
 |
 |
 |
 |
Take the Iron Sword from the Gravestone mural, the Rusted Sword from the Knighting mural, and the Golden Sword from the Standing Knight mural. Afterwards, place the Iron Sword on the Standing Knight mural, the Golden Sword on the Knighting mural, and the Rusted Sword on the Gravestone mural. The fourth sword is in the other locked gate, which can be unlocked after solving the Animal Gong Puzzle
Take the Bloodied Sword
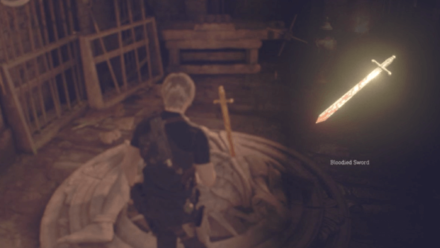
Take the Bloodied sword from the room and place it on the mural next to the gate to unlock it. This room will have a chest that you can open to get the Golden Bangle.
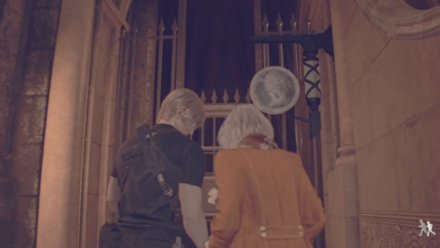
Solve the Animal Bell Puzzle
| Solution | |
|---|---|
 |
 |
After leaving the room, you and Ashley will find yourselves in a balcony with another locked gate. This is another Animal Bell Puzzle that requires you hit the two bells where one is on the other side. To do this, jump on the chandelier to go to the other side. Shoot the gong as soon as you find it. Ashley will help you out on this, so no need to worry about hitting the first one. Enter the next door you find after.
Explore the Next Area
| Map Location | In-Game Location |
|---|---|
 |
 |
Follow the path down as you enter the door. Head to the right to unlock the door to the main hall. You can also enter the room to save your progress. There should be a book inside the room, too where you can learn more about some parasites.
Defeat the Cultists
Head to the hallway to the left to reach the next room. You will face a couple of Cultists here so make sure to defeat them first before going down.
Take the Halo Wheel
Walk down to the stairs on the left side of the hall to meet a small wave of parasites. Look for the Halo Wheel from the statue next to the area where you dropped off. Find your way to the podium to lower the staircase to head back to the previous floor. Take the Halo Wheel once again as you'll be needing it again to lower another staircase in the upper floor.
Lower Down the Staircase
The previous floor will have a couple of Cultists once again, so clear them out before you use the Halo Wheel to lower down another staircase.
Protect Ashley

Upon reaching the upper hall, you'll find another wheel that only lifts up half of the path. You'll have to send Ashley to find the other wheel on the upper floor. Protect her as Cultists will try to kill her. You'll be attacked as well, so try to be cautious of your surrounding.
Move to the Castle Courtyard
| Map Location | In-Game Location |
|---|---|
 |
 |
Once Ashley finds the other wheel, Leon will ask her to come down and proceed to the next area with her. There's another locked door along the way, but you only need to send Ashley to the other side to unlock it. This will trigger the next cutscene where Ashley threatens to kill herself, and gets separated from Leon after coming to her senses.
| ◄ Previous Chapter | Next Chapter ▶ |
|---|---|
|
Chapter 6 |
Chapter 8 |
Chapter 7 Tips and Strategies
| Chapter 7 Tips and Strategies |
|---|
|
|
Shoot the Garrador's Back to Kill it
Once the Garrador is chasing after and attacking you, sneak past it without bumping into any objects. This makes the Garrador an easy target since it will stay in place and just listen for clues, allowing you to line up a shot.
The Garrador's weak point is the Plaga on its back, and shooting it several times will be enough to kill it.
Make Use of the Environment Against the Parasites
During the part where you must take the Halo Wheel, you can use your sniper to get a headstart and shoot the parasites before dropping down.
Once below, you can lure the parasites towards the back where you can shoot an explosive barrel to easily defeat them.
Chapter 7 Requests
Destroy the Blue Medallions 3
| Map View | In-Game View |
|---|---|
 |
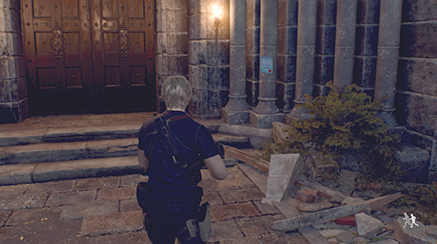 |
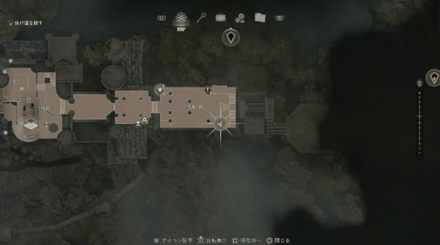
The Destroy the Blue Medallions 3 request is found posted on the wall beside the double doors on the eastern section of the Castle Gate area.
Destroy the Blue Medallions 3 Request
Chapter 7 Collectibles
Clockwork Castellan
| Map Location | In-Game Location |
|---|---|
 |
 |
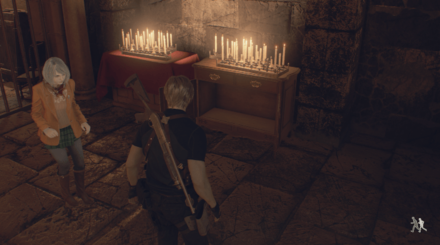
You can find this Clockwork Castellan right after leaving the Dungeon using the Dungeon Key. Head up the ladder and listen for the Castellan's distinct ticking noise to find it on top of one of the nearby shelves.
All Clockwork Castellans Locations
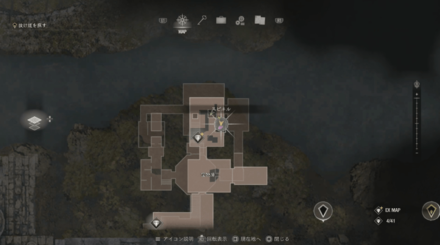
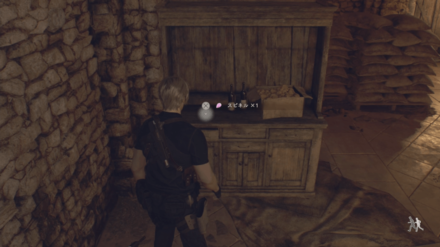
Yellow Herb
| Map Location | In-Game Location |
|---|---|
 |
 |
A Yellow Herb can be found in Chapter 7 in a cabinet in the next room from the merchant.
Treasures
Vintage Compass
| Map Location | In-Game Location |
|---|---|
 |
 |
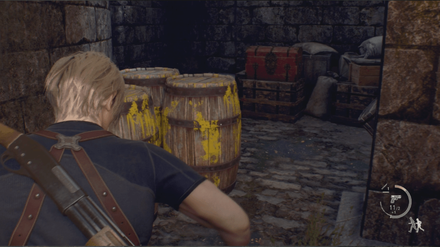
The Vintage Compass in the Castle can be obtained from a treasure chest behind the Merchant's shop.
Elegant Bangle
| Map Location | In-Game Location |
|---|---|
 |
 |
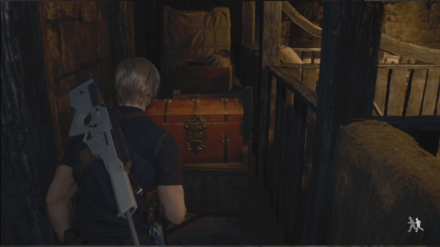
The Elegant Bangle in the Castle can be obtained from a treasure chest after going under the turret and climbing up the ladder.
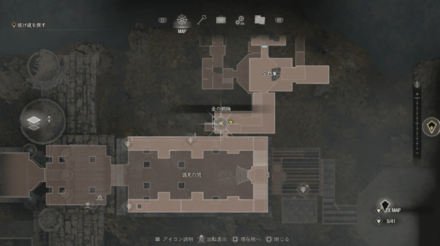
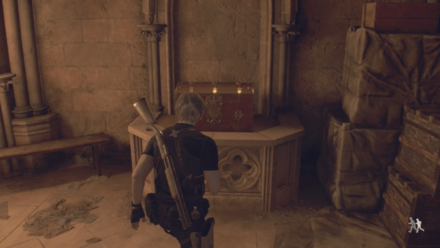
Elegant Perfume Bottle
| Map Location | In-Game Location |
|---|---|
 |
 |
The Elegant Perfume Bottle in the Castle can be obtained from a treasure chest by going through the gate in the southeast corner of the Audience Chamber.
Ruby
| Map Location | In-Game Location |
|---|---|
 |
 |
The Ruby in the Castle can be obtained by going through the gate in the Audience Chamber and shooting the container hanging from the ceiling.
Golden Hourglass
| Map Location | In-Game Location |
|---|---|
 |
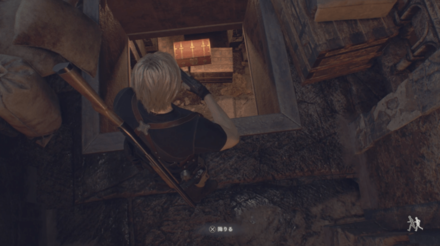 |
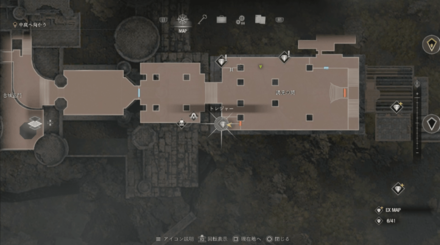
The Golden Hourglass in the Castle can be obtained from a treasure chest by going to the second floor of the Audience Chamber and using the chandelier to get to the other side. Drop down through the hole on the right to get the treasure.
Spinel
| Map Location | In-Game Location |
|---|---|
 |
 |
The Spinel in the Castle can be obtained by picking it up on top of a shelf in a storage room after making your way through the dungeon.
Gold Bangle
| Map Location | In-Game Location |
|---|---|
 |
 |
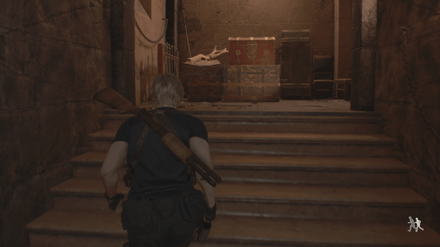
The Gold Bangle in the Castle can be obtained from a treasure chest in a corridor as you make your way from the Treasury Hall and into the Audience Chamber.
Hidden Treasures
| Note: Hidden Treasures only appear with the Expanded Treasure Map from the Deluxe Edition. |
Sapphire
| Map Location | In-Game Location |
|---|---|
 |
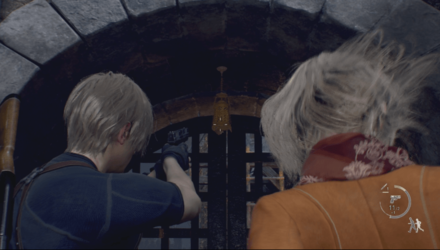 |
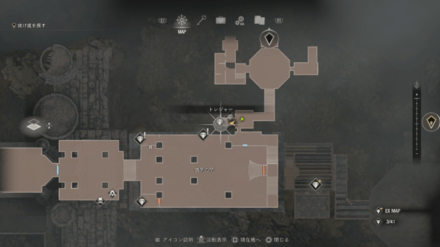
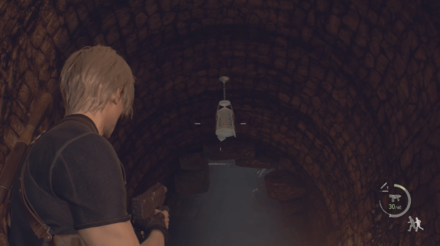
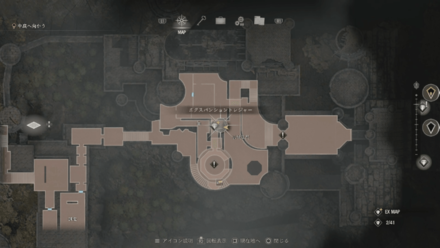
The Sapphire in the Castle can be obtained by shooting down a container hanging from an archway by the closed gate at the center.
Silver Token
| Map Location | In-Game Location |
|---|---|
 |
 |
After defeating the Garrador in the Dungeon, the Silver Token in the Castle can be obtained by shooting down a container hanging from the ceiling as you make your way out of the dungeon to the Treasury Hall.
Spinel
| Map Location | In-Game Location |
|---|---|
|
|
Another Spinel can be obtained in the Castle by shooting down a container hanging from the ceiling in a room as you make your way from the Audience Chamber and into the Water Hall.
Chapter 7 Bosses
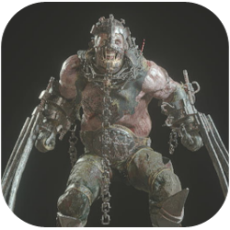
Garrador
 |
|
| First Chapter Appearance |
Chapter 7 |
|---|---|
Garrador is a blind enemy that uses metal claws as its main weapon. It is sensitive to any sound to make up for its blindness. It is also almost fully armored, but you can hit its back to deal significant damage and potentially kill it.
How to Beat the Garrador
- Shoot it on the Back
- Use Noise to Distract it
- Crouch and Go for a Stealth Attack
Resident Evil 4 Remake Related Guides

Story Walkthrough: All Chapters
Village Chapters
| All Village Chapters | |
|---|---|
| Chainsaw Demo | Chapter 1 |
| Chapter 2 | Chapter 3 |
| Chapter 4 | Chapter 5 |
| Chapter 6 | - |
Castle Chapters
| All Castle Chapters | |
|---|---|
| Chapter 7 | Chapter 8 |
| Chapter 9 | Chapter 10 |
| Chapter 11 | Chapter 12 |
Island Chapters
| All Island Chapters | |
|---|---|
| Chapter 13 | Chapter 14 |
| Chapter 15 | Chapter 16 |
Author

Chapter 7 Walkthrough
Please participate in our site
improvement survey
03/2026
improvement survey
03/2026
Would you assist in
improving Game8's site?
improving Game8's site?

×
We are listening to our users' valuable opinions and discussing how to act on them.
The information collected through this survey will be used for the purpose of improving our services. In addition, the information will only be disclosed a part of a statistic in a format that will not allow identification of personal information.
Begin Survey
Not Now
×
Please rate each item regarding Game8.co's Advertisements.
Amount of Ads
Very Dissatisfied
Somewhat Dissatisfied
Fine
Somewhat Satisfied
Highly Satisfied
Placement of Ads
Timing of Ad Display
Ad Loading Speed
Safeness of Ads
Content of Ads
×
Please rate each item regarding Game8.co's Quality of Articles.
Amount of information
Very Dissatisfied
Somewhat Dissatisfied
Fine
Somewhat Satisfied
Highly Satisfied
Frequency of updates
Speed of new information
Accuracy of articles
Understandibility of articles
Readability of sentences
×
Please rate each item regarding Game8.co's Usability of the Site.
Ease of finding information
Very Dissatisfied
Somewhat Dissatisfied
Fine
Somewhat Satisfied
Highly Satisfied
Loading Speed
Use of Color
Font Size
Visibility of Images
Easy to Understand Layout
×
Please rate each item regarding Game8.co's Message Boards, Comments.
Ease of Writing
Very Dissatisfied
Somewhat Dissatisfied
Fine
Somewhat Satisfied
Highly Satisfied
Readability
Ease in Finding Information
Comment Quality
Comment Quantity
Admin Response
×
Please rate each item regarding Game8.co's Site's new design.
Please rate our site's new design
Very Dissatisfied
Somewhat Dissatisfied
Fine
Somewhat Satisfied
Highly Satisfied
Do you think that the website's design change makes the site easier to use?
Has the new design made it easier for you to find information on the site?
Has the new design improved the overall visual appeal of the site?
How would you rate your overall satisfaction with the new design of the site?
×
How likely are you to recommend Game8 to someone you know?
Very Unlikely
0
1
2
3
4
5
6
7
8
9
10
Very Likely
If you have other opinions regarding potential improvement to the website, please share them with us. We would appreciate your honest opinion.
Note: This is a free response section, so you can proceed without entering anything.
Note: Please be sure not to enter any kind of personal information into your response.
Note: Please be sure not to enter any kind of personal information into your response.
×
Thank You
×
Thank you for participating in our survey! Your answers will help us to improve the quality of our website and services.
We hope you continue to make use of Game8.
We hope you continue to make use of Game8.
Close
Rankings
- We could not find the message board you were looking for.
Gaming News


![Monster Hunter Stories 3 Review [First Impressions] | Simply Rejuvenating](https://img.game8.co/4438641/2a31b7702bd70e78ec8efd24661dacda.jpeg/thumb)
Popular Games

Genshin Impact Walkthrough & Guides Wiki
Honkai: Star Rail Walkthrough & Guides Wiki
Umamusume: Pretty Derby Walkthrough & Guides Wiki
Pokemon Pokopia Walkthrough & Guides Wiki
Resident Evil Requiem (RE9) Walkthrough & Guides Wiki
Monster Hunter Wilds Walkthrough & Guides Wiki
Wuthering Waves Walkthrough & Guides Wiki
Arknights: Endfield Walkthrough & Guides Wiki
Pokemon FireRed and LeafGreen (FRLG) Walkthrough & Guides Wiki
Pokemon TCG Pocket (PTCGP) Strategies & Guides Wiki


Recommended Games
Diablo 4: Vessel of Hatred Walkthrough & Guides Wiki
Cyberpunk 2077: Ultimate Edition Walkthrough & Guides Wiki
Fire Emblem Heroes (FEH) Walkthrough & Guides Wiki
Yu-Gi-Oh! Master Duel Walkthrough & Guides Wiki
Super Smash Bros. Ultimate Walkthrough & Guides Wiki
Pokemon Brilliant Diamond and Shining Pearl (BDSP) Walkthrough & Guides Wiki
Elden Ring Shadow of the Erdtree Walkthrough & Guides Wiki
Monster Hunter World Walkthrough & Guides Wiki
The Legend of Zelda: Tears of the Kingdom Walkthrough & Guides Wiki
Persona 3 Reload Walkthrough & Guides Wiki


All rights reserved
©CAPCOM CO., LTD. ALL RIGHTS RESERVED.
The copyrights of videos of games used in our content and other intellectual property rights belong to the provider of the game.
The contents we provide on this site were created personally by members of the Game8 editorial department.
We refuse the right to reuse or repost content taken without our permission such as data or images to other sites.