This survey will take about 1 minute.
Your answers will help us to improve our website.
Resident Evil 4 Remake (RE4)
Professional S+ Guide: How to Speedrun Professional Mode
★ The Resident Evil Requiem wiki is now live!
☆ Learn the best ways to speedrun & reach Professional S+!
★ Discover all the Skips you can make in a single playthrough!
Getting an S+ Rank in Professional Mode means completing the main story in a fresh save under 5 hours and 30 minutes with 15 manual saves or less! Here are tips on how to speedrun Professional Mode with S+ Rank in Resident Evil 4 Remake (RE4)!
List of Contents
How to Get S+ Rank in Professional Mode
Finish the Story Within 5 Hours and 30 Minutes and No More Than 15 Saves
| Difficulty | Max Playtime Requirement for S+ Rank |
|---|---|
| Professional | 05:30:00 15 Manual Saves Only |
To get an S+ rank in Professional Mode, you must complete the main story in under 5 hours and 30 minutes and without using more than 15 manual saves.
Note that it has to be a fresh save, not New Game Plus, for you to achieve S+ Rank.
Preparing for Professional Speedrun
| Things to Do First |
|---|
|
|
Finish the Game in Assisted Mode and Save Money
| Weapon | Perks | How to Get |
|---|---|---|
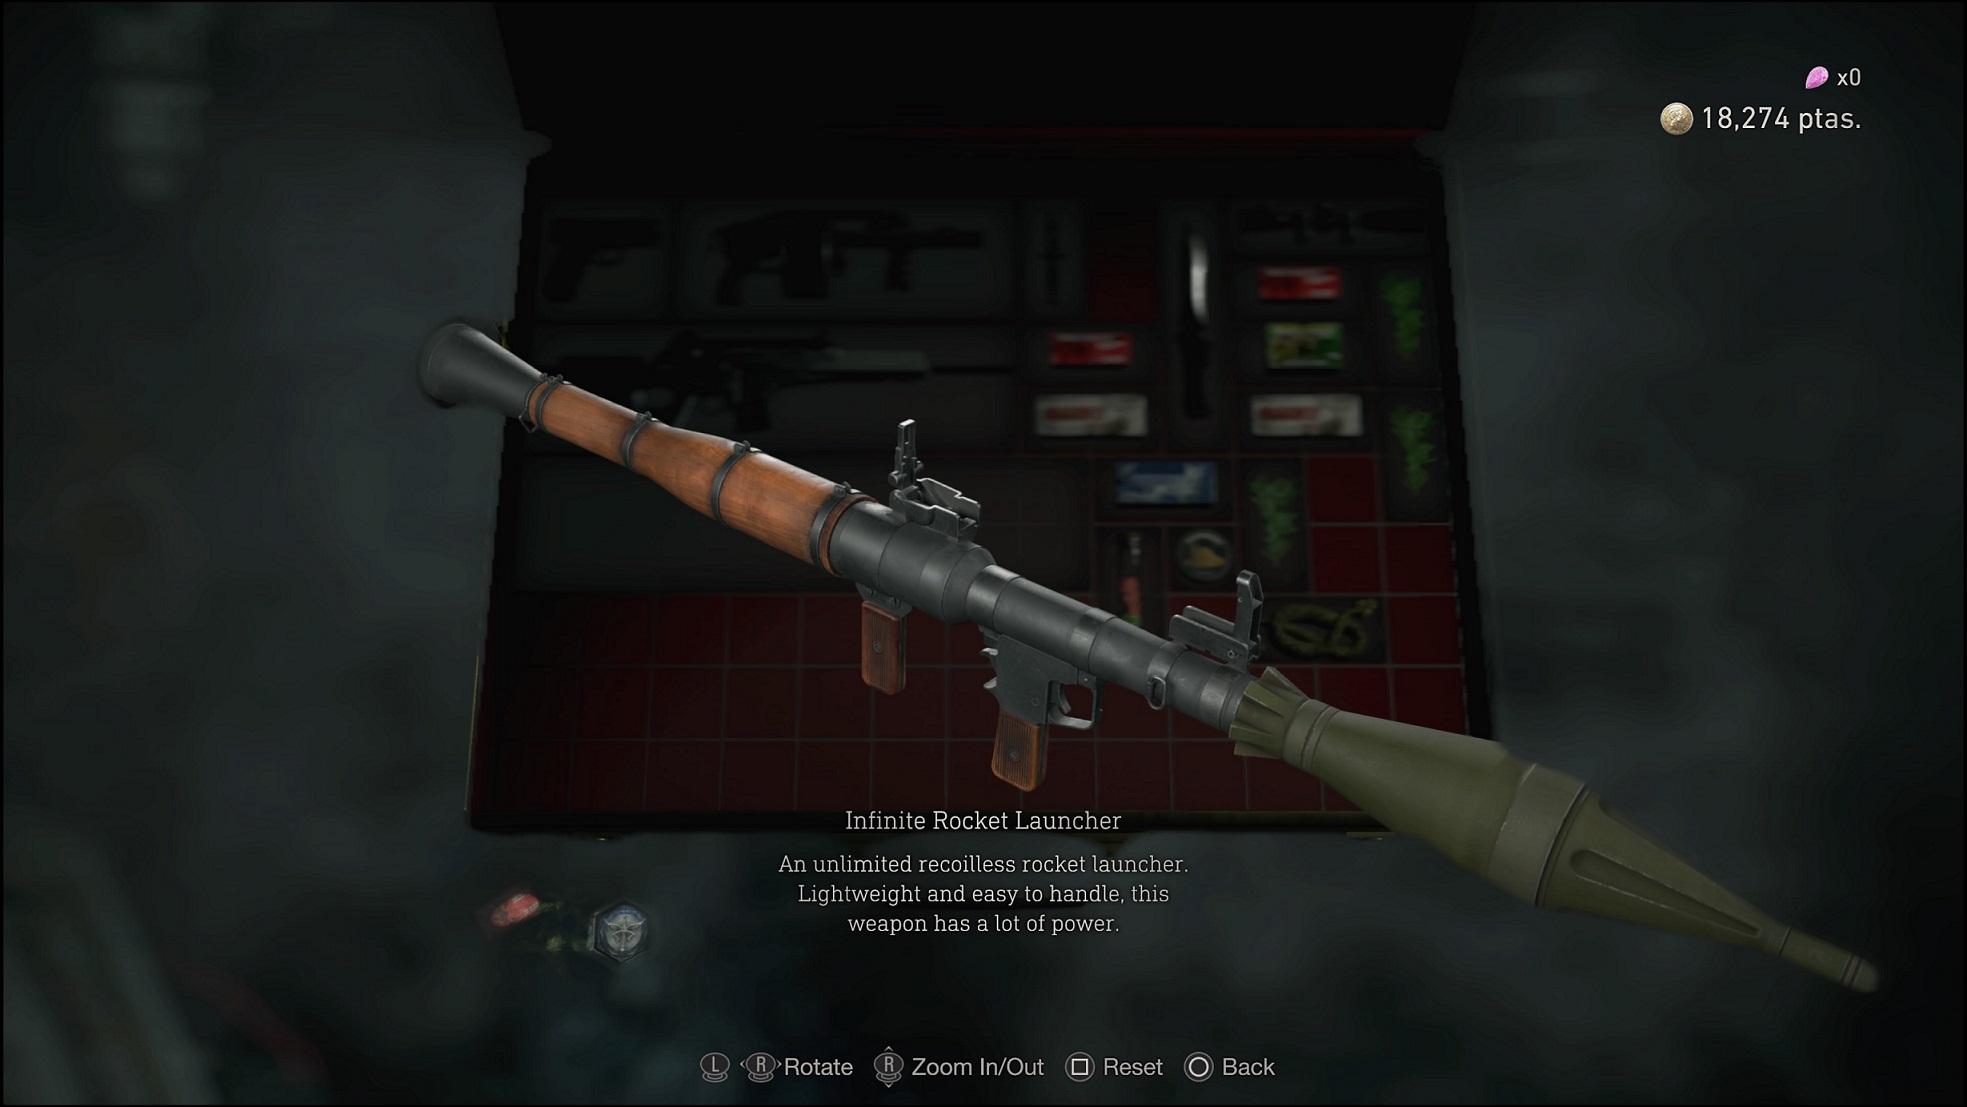
 Infinite Rocket Launcher Infinite Rocket Launcher
|
N/A | Purchase from the Merchant in a New Game Plus file. |
Finishing the main story for the first time in any difficulty unlocks Professional Mode (and the Pinstripe Costume). During your very first playthrough, try to get and save as much money as you can to purchase the Infinite Rocket Launcher as early as possible in the next.
We also recommend doing this playthrough on Assisted Mode to make some of the items cheaper. You also won't need to upgrade your weapons too much in this difficulty as enemies are weaker.
Farm Money Through Treasures
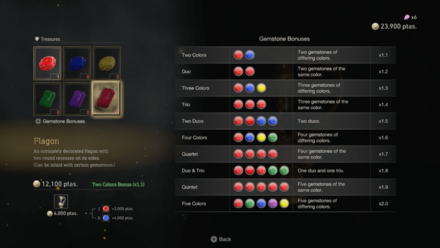
One way to farm money in the game is to grab all the Treasures and sell them to the merchant. Be sure to have them all marked on your map by trading Spinels for Treasure Maps from the merchant.
Get the Leon w/ Rocket Launcher Charm
| Charm | How to Get | Perk |
|---|---|---|
 Leon w/ Rocket Launcher |
Token Machines at Shooting Ranges. | 20% off the rocket launcher. |
While you're on your first playthrough, give the Shooting Range a try to obtain Tokens. You can then use these tokens to test your luck at the Gacha Machine to obtain the Leon w/ Rocket Launcher Charm.
Equip this charm to have the Infinite Rocket Launcher's price drop from 2 million pesetas to just 1.6 million.
List of Charms and Charm Perks
Complete a New Game+ Run in Professional
| Weapon | Perks | How to Get |
|---|---|---|
 Chicago Sweeper Chicago Sweeper
|
N/A | Beat Professional with A-Rank. |
The next step is to get a Special Weapon that you can use in a fresh run. The Infinite Rocket Launcher is a special weapon but it can only be used in New Game+, so we'll go with the Chicago Sweeper instead.
Take note that you need to finish this run under 7 hours to unlock the Chicago Sweeper. Doing so also unlocks the Knight Armor for Ashley that makes her invulnerable and uncapturable.
Purchase the Infinite Rocket Launcher ASAP
The merchant is first encountered in the story at the beginning of Chapter 2. With your gear from the first playthrough, rushing through the first chapter should be easy.
As soon as you find the merchant, equip the Leon w/ Rocket Launcher Charm and purchase the Infinite Rocket Launcher. You can also sell some of your current weapons if you're short on pesetas since the IRL alone can demolish most enemies in one hit. Although, try to at least spare a handgun or shotgun for close combat as the rocket explosion can still damage Leon and Ashley.
How to Unlock the Infinite Rocket Launcher
Get an S+ Rank in Hardcore Mode
Now that you unlocked the Chicago Sweeper, you can use this on a fresh save as soon as you reach the first Typewriter. Start a new file on Hardcore Mode (so it's eligible for an S+ rank) and aim to finish the story in under 5 hours and 30 minutes.
| Difficulty | Max Playtime Requirement for S+ Rank |
|---|---|
| Hardcore | 05:30:00 |
The purpose of this run is to unlock the Chicken Hat for the next.
Get as Much Spinels as You Can
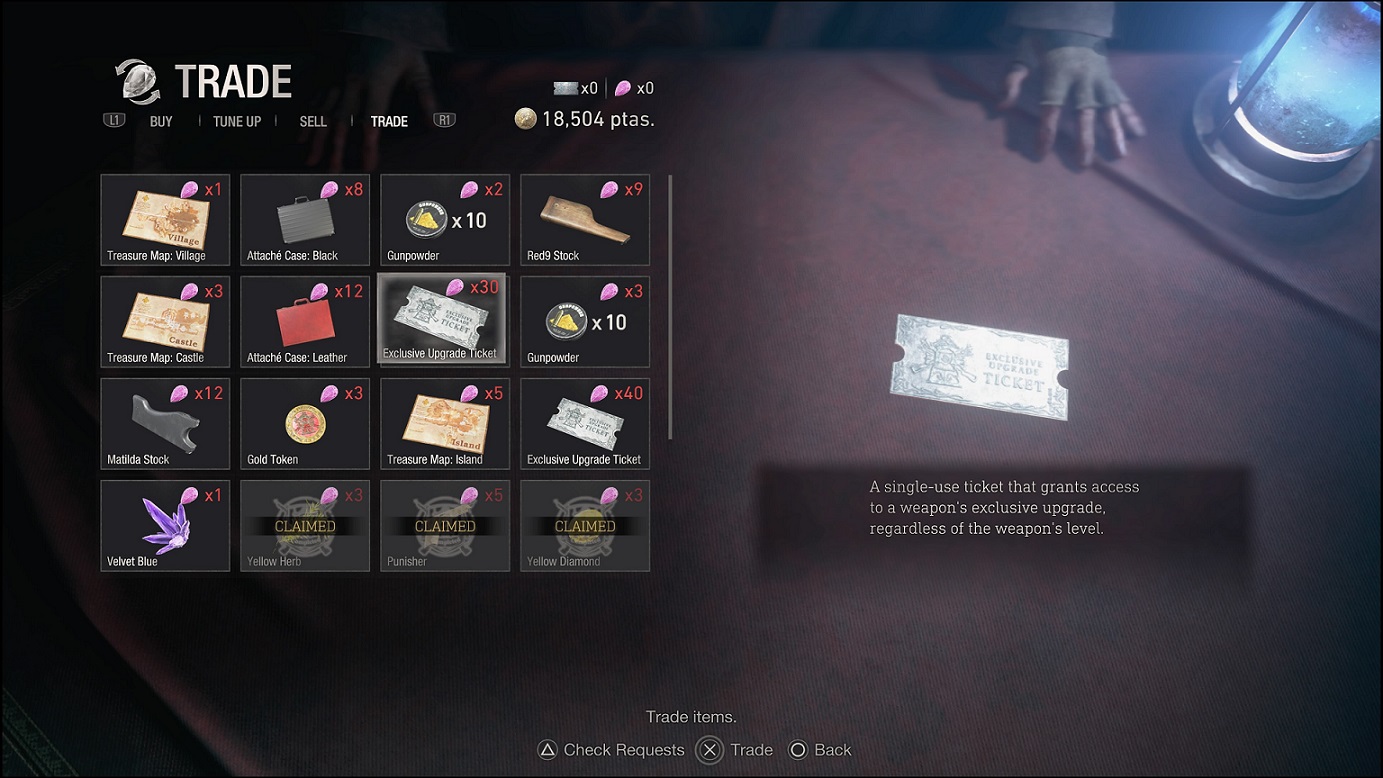
Take on and complete all the Requests in the Village area until you get at least 30 Spinels. This will be used to purchase an Exclusive Upgrade Ticket from the merchant once you reach the Castle area.
Using the ticket on the Chicago Sweeper unlocks its unlimited ammo upgrade and makes the remaining chapters much easier.
You still need to purchase its other upgrades, though.
Run a New Save in Professional
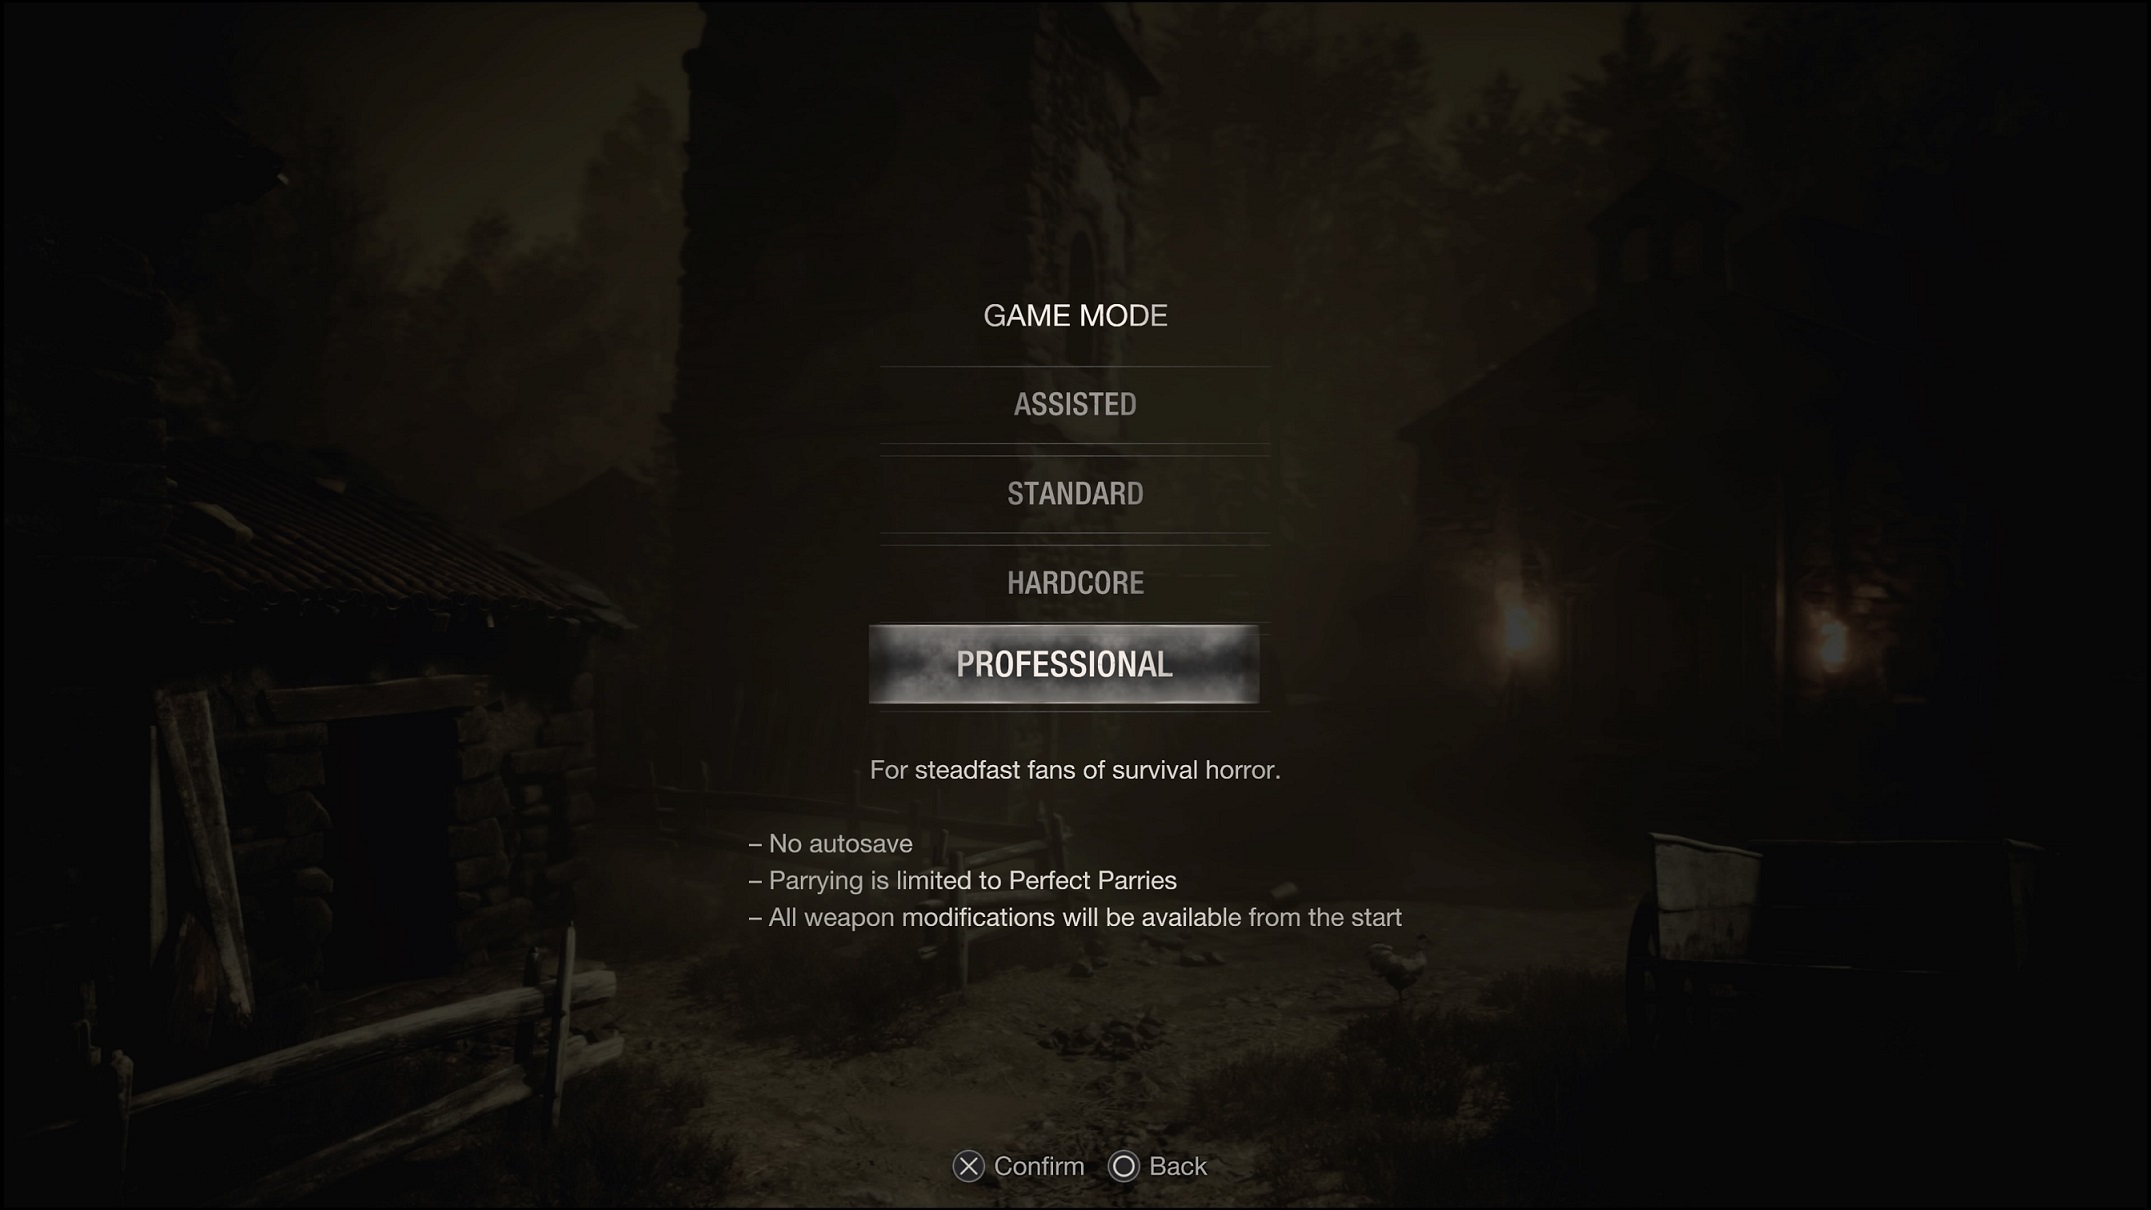
Time for the real challenge. Basically, you just need to repeat what you did in the previous step, but in Professional Mode and without using more than 15 manual saves. Be sure to equip the Chicken Hat Accessory before starting the game for its damage reduction effect.
Get the Sweeper from the first typewriter, complete the Requests in the Village area until you accumulate 30 Spinels, then purchase the Exclusive Upgrade Ticket as soon as you reach the Castle area for the unlimited Sweeper ammo.
Check out below for more general tips in speedrunning Professional Mode, as well as key points on each chapter!
How to Speedrun Professional Mode
| How to Finish Game Within 5 Hours |
|---|
|
|
Avoid Unnecessary Fights
Throughout the story, there are multiple areas where you can just run past the enemies and go to your main objective. This can help you save a lot of time to finish the game in under 5 hours and 30 minutes.
Learn the Skips
There are a couple of fight skips that you can do to be able to progress faster in certain areas. Learn all the skips to save more time on your progress.
Learn How to Perfect Parry and Dodge
Since you are playing in Professional Difficulty, the enemies deal a lot of damage if you get hit. Make sure that you learn how to Perfect Parry and Dodge attacks to avoid dying during your playthrough.
Skip Cutscenes and Comms

Immediately skip all the cutscenes and comms as soon as they start. Leon cannot interact with objects and will walk slowly if he is in comms with characters like Hunnigan.
Pause the Game to Stop the Timer
If you need to plan your next steps ahead or take a quick break, you can press the pause button to stop the timer. The timer will keep on running when viewing any other menu like the inventory screen or the Merchant.
Use the Armor Costume and Chicken Hat Accessory (Optional)
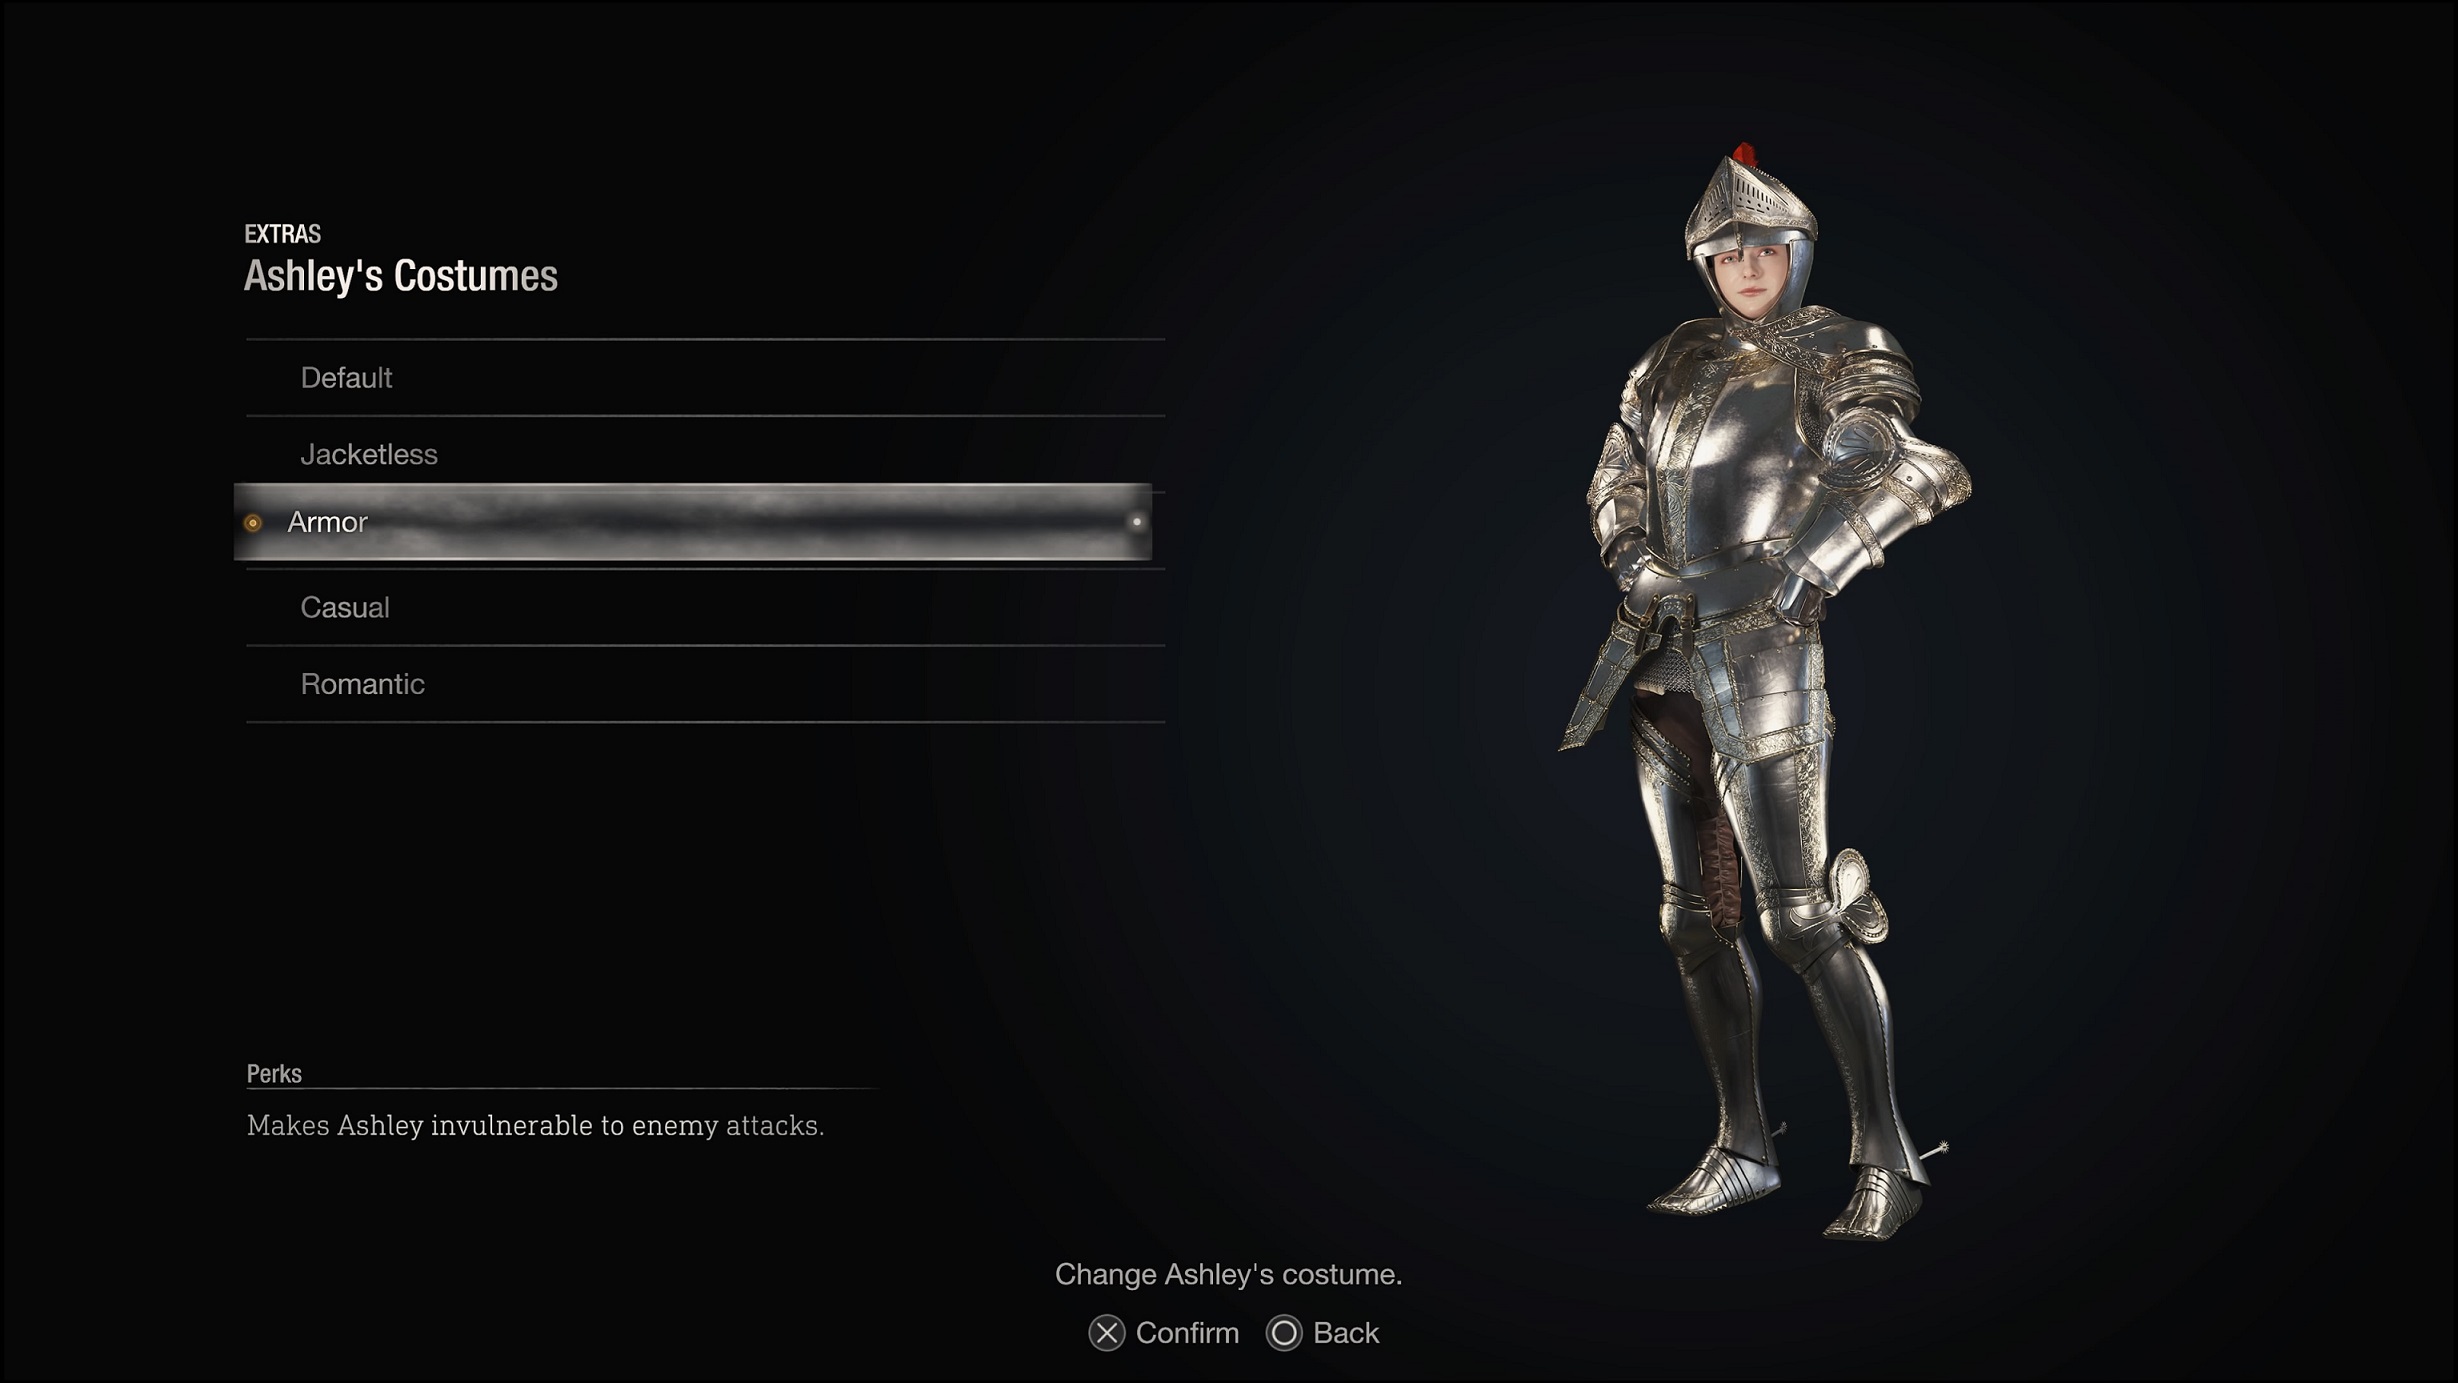
Equipping the Armor Costume for Ashley makes her invulnerable to enemy attacks, this makes the game so much easier if you have it available. You can also equip the Chicken Hat or the Gas Mask for Leon to reduce incoming damage or enable aim assist.
Shooting Range is Optional
| Charm | Perk |
|---|---|
 Striker |
+8% running speed. |
The charms that you get from the Shooting Range can be pre-determined depending on which coin you use. The charm perk that you get from this is unnecessary to complete the game. However, getting the Striker Perk can drastically affect your speed run time.
If you want to get the charm, make sure that you familiarize yourself with the range to get S on your first attempt. This will allow you to spend less time in the shooting range.
Loot Items Along the Way
Even if you're in a rush, you still need to pick up items along the way to have enough Pesetas for upgrading your weapons.
Do Not Inspect Files
Don't go out of your way to inspect files and other lore items. These are not required to progress the chapters and will just waste a few seconds of your run especially if they're out of the main path.
List of All Files and Where to Find Them
Do Not Continue or Load Save File on Death

Lastly, whenever Leon or Ashley dies or Ashley is captured, do not choose "Continue" or "Load Game" from the Game Over screen. These two options will add the time you spent until your death to the loaded save (assuming it's still the same playthrough).
Instead, choose "Quit Game" and load your most recent save file to reset the timer.
Village Chapters Professional Mode
| Ideal Finish Time |
|---|
| 1 Hour and 30 Minutes or less |
Chapter 1
Immediately get the Chicago Sweeper as soon as you reach the first Typewriter. Submachine Gun Ammo can now appear in containers when you have this in your inventory.
Since you will be playing a new game, you do not have a weapon that you can use to ring the bell and skip the village fight. You should focus on defeating the Chainsaw Man instead to get the Emerald, picking up the shotgun, and grabbing all the loot in the village while waiting for the cutscene to trigger. Once you have done that, you can just run past all the enemies in the Farm and Lakeside Settlement.
Chapter 2
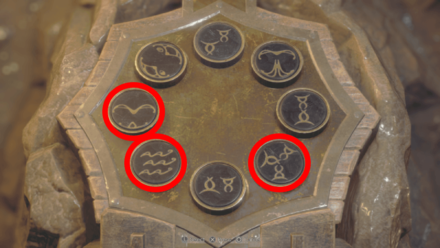
Perform Stealth Kills on the first few enemies that you will encounter at the beginning of the chapter. After recovering your items and meeting the Merchant, you can save your game right next to the Hexagonal Emblem Puzzle.
Make sure that you use the exploding barrels to clear some of the enemies while focusing on grabbing the emblem and turning the wheel. You can run past all of the enemies after grabbing the emblem and turning the wheel.
| Solution |
|---|
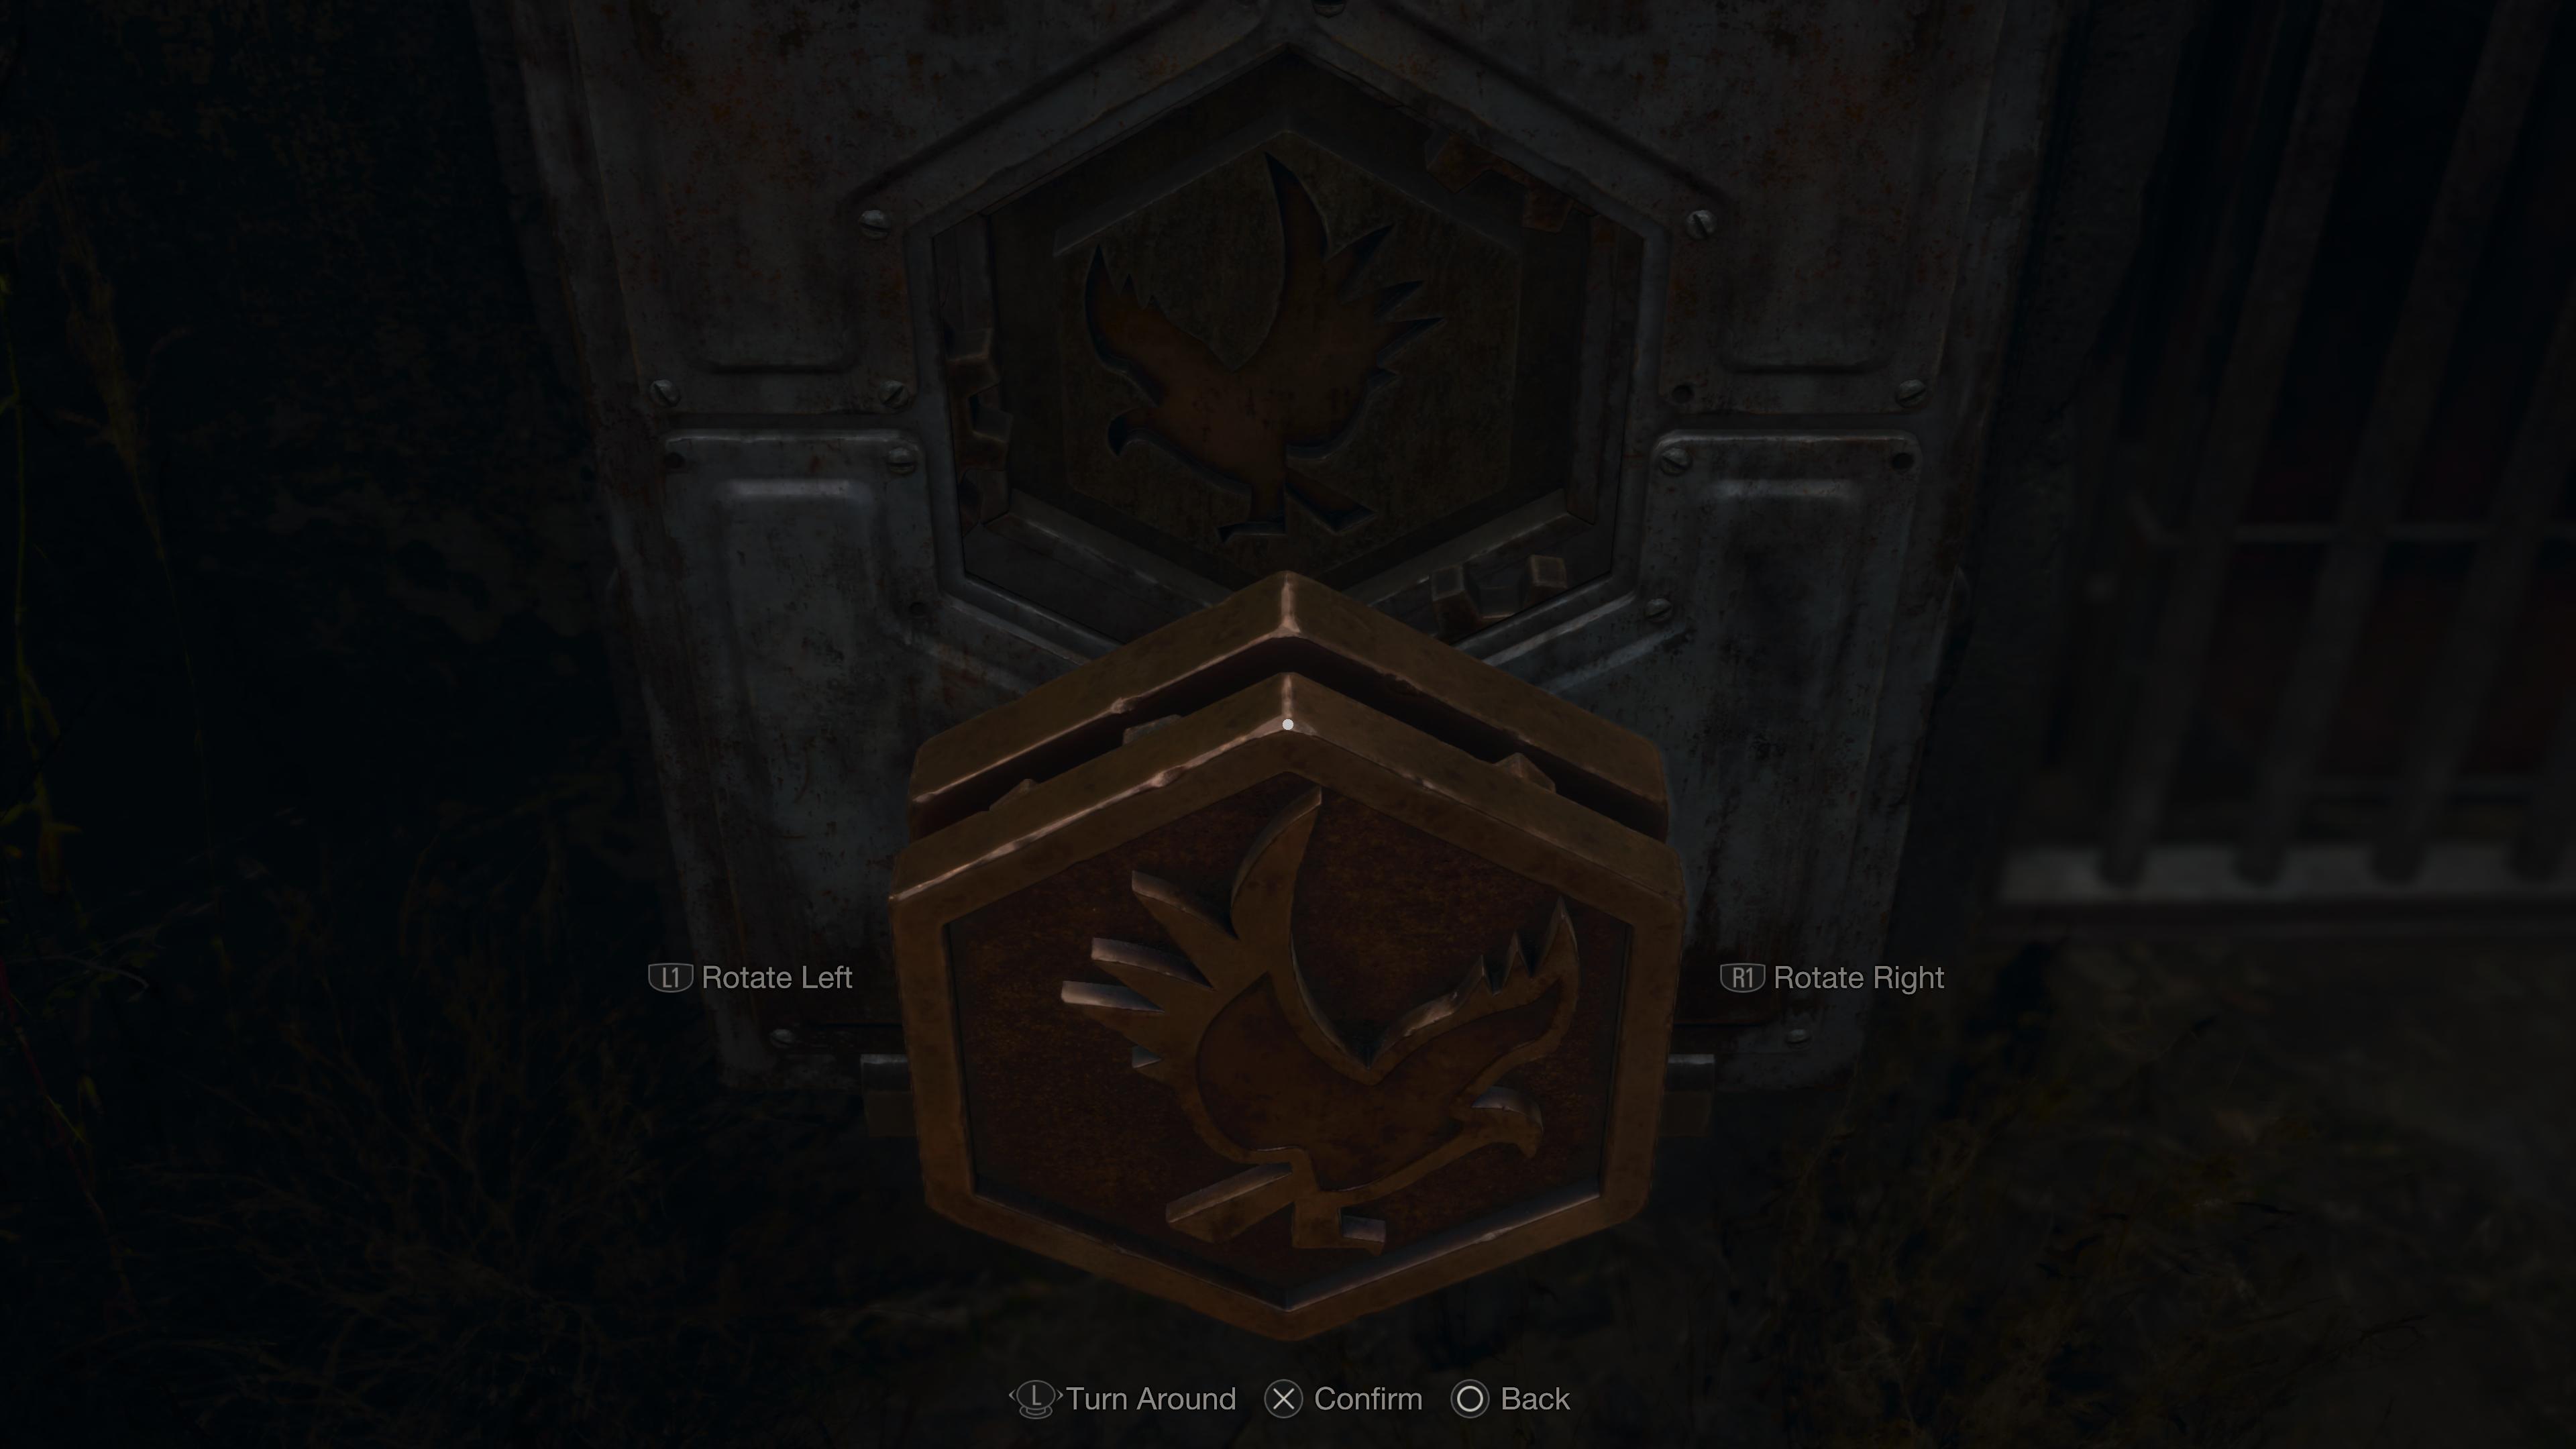 Rotate to the left once, then flip the emblem. |
After that, you can run through the Abandoned Factory Grounds and solve the Combination Lock Puzzle inside Mendez's Manor to obtain the Crystal Marble.
| Solution | ||
|---|---|---|
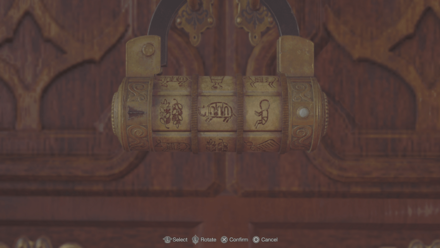 |
||
| 1st | 2nd | 3rd |
| Crop | Pig | Babe |
Once you have the Crystal Marble, go up the stairs and head right towards the Crystal Marble Puzzle .
| Solution |
|---|
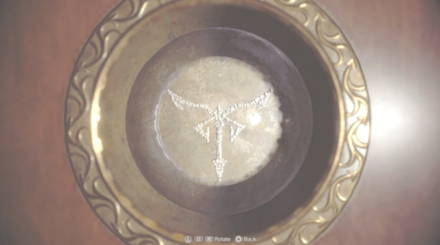 Align the pellets inside the Crystal Marble to form the shape of the Insignia |
Chapter 3
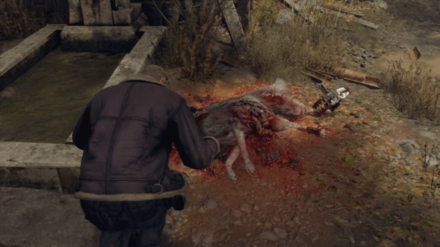
Make sure to save the dog from the beartrap after leaving the manor. The dog will help you later on in Chapter 4 during the El Gigante fight.
Go through the well in the Village Square and pick up treasures along the way. Run past all the enemies through the church and Quarry to reach the Merchant. From here, you should save the game to prepare for the Fish Farm and Del Lago fight. You can also try getting the Striker Charm from the shooting range by saving in this area.
Continue rushing towards the Boat Fuel and avoid all the enemies in the Fish Farm, and then head to the lake to fight Del Lago.
How to Beat Del Lago (Lake Monster)
Shooting Range (Optional)
This is the first time you will be able to access the shooting range. If you are confident enough to get an S rank on all three of them, you can do this to try getting the Striker Charm.
Chapter 4
Get the Church Key by completing the Cave Shrine Puzzles. Be extremely careful in the Large Cave Shrine area since it is full of enemies. After that, pick up the treasures at the center and right side of the lake to have more pesetas.
 |
 |
Grab the Church Key and head back to the Quarry to fight El Gigante.
How to Beat El Gigante (The Giant)
Continue going to the church while avoiding all enemies and solve the Church Stained Glass Puzzle.
| Solution | ||
|---|---|---|
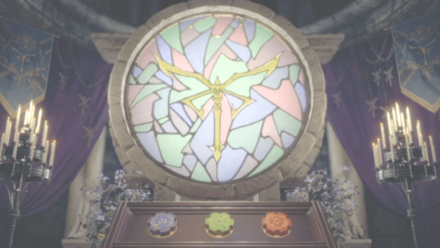 |
||
| Blue | Green | Red |
| 5 o'clock | 3 o'clock | 9 o'clock |
Chapter 5
Use a Flash Grenade against the enemies at the cemetery then run past them while they're stunned. Upon reaching the Merchant, save your game before going through the Village Farm and the Abandoned House. In the Abandoned House, use the Hand Grenades that you have gathered from previous chapters to clear incoming enemies.
Focus all your fire on the Brute (Minotaur) after it barges into the house to trigger the cutscene and complete the chapter.
Chapter 6
Replace your W-870 with the Riot Gun at the Merchant and spend all your remaining Pesetas to upgrade its power. After this, save your game and continue heading to the Chainsaw Sisters while avoiding enemies.
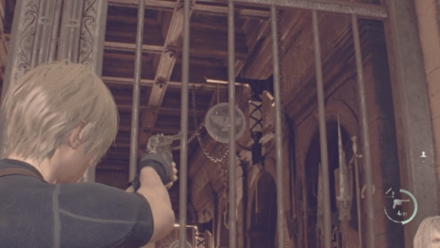
Before starting the Chainsaw Sisters' fight, command Ashley to hide inside the locker. You can either focus on defeating the one with the Crank or defeat all of the enemies in the area. It can be extremely difficult to open the gate if you only killed one of the Chainsaw Sisters.
Continue running past all the enemies and use the red barrels in the area to clear some of them. Once you reach the Merchant, upgrade your pistol power as much as possible and save the game before you fight Mendez.
Castle Chapters Professional Mode
| Ideal Finish Time |
|---|
| 2 Hours or less |
Chapter 7
Now that you unlocked the Exclusive Upgrade Ticket, use the Spinels you obtained from the first chapters to get one and use it on the Chicago Sweeper for unlimited ammo. Now that you have your main weapon with unlimited ammo, you should purchase the Stingray and the Scope.
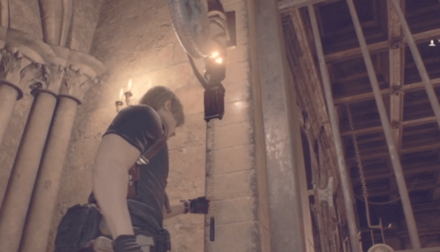
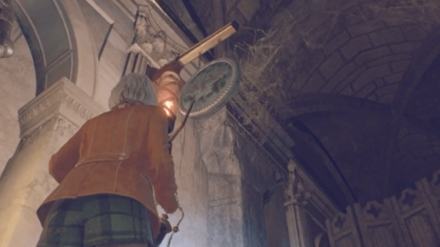
From there, continue heading towards the stairs and shoot the net through the window to raise the cannon.
On your way up, shoot the red barrels to destroy some of the catapults. Upon reaching the top, use the cannon to kill incoming enemies and destroy the remaining catapults.
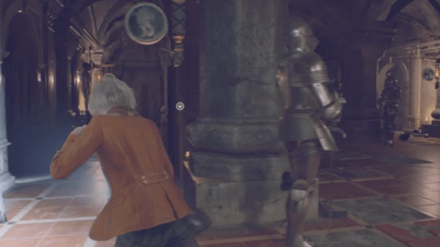
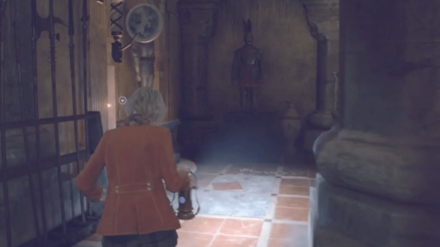
From here, you will encounter the first Garrador in the game. This can be fairly easy since you have a powerful weapon. Make sure to use the hanging chains to lure him and sneak up behind him.
Alternatively, you can skip the Garrador fight using a Flash Grenade. After falling down the wooden floor, head towards the gate that will lead you back up. Then, throw a Flash Grenade to stun the Garrador, giving you ample time to open the gate and escape.
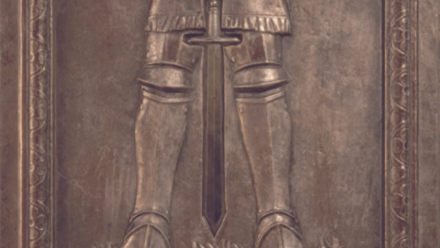
Solve the Animal Gong Puzzle to obtain the Bloodied Sword. You will need this to solve the Four Swords Puzzle.
| Solution | ||
|---|---|---|
 |
 |
 |
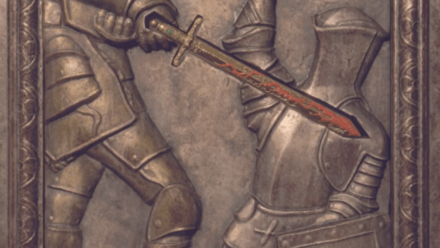
After obtaining the Bloodied Sword, you can now solve the Four Swords Puzzle.
| Solution | |
|---|---|
 |
 |
 |
 |
Head towards the Audience Chamber. Save the game before you continue inside the Water Hall. Rush towards the lower floor and pick up the Halo Wheel. It is best that you eliminate all of the enemies here since you cannot protect Ashley while turning the wheel. Continue towards the bridge and protect Ashley from incoming enemies by using the Stingray you just upgraded. You have to constantly check your surroundings since you will be swarmed by enemies too.
Chapter 8
If you are running low on herbs, you can kill some of the fish by the fountain to restock and replenish your health.
List of Recovery Items and Heals
Continue heading straight towards the Crimson Lantern Puzzle. You can run past all of the enemies in this area and just kill the Cultist Leader to obtain the Crimson Lantern.
| Solution | |||
|---|---|---|---|
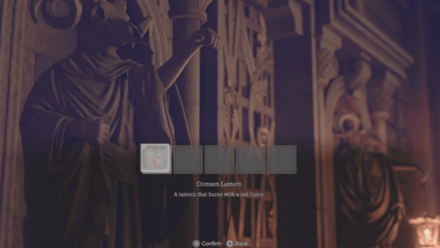 Put the Crimson Lantern on the Cultist Statue that is not holding anything. |
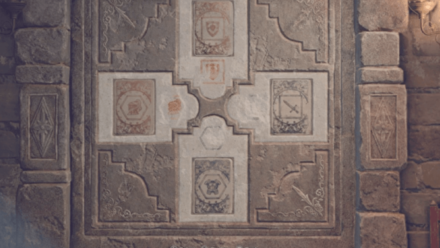
Solve the Lithographic Castle Tiles Puzzle and continue until you reach the castle rampart.
| Solution | |||
|---|---|---|---|
 |
|||
| North Slot | West Slot | East Slot | South Slot |
| Red Shield | Red Helmet | Blue Sword | Blue Armor |
Once you reach the castle rampart, you can do the Sun and Moon Switch Skip while running past all of the enemies that you will encounter along the way. This will help you save a lot of time for this section of the game.
How to Skip the Sun and Moon Switches
After you complete the chapter, save the game before starting Chapter 9.
Chapter 9
Run towards each of the towers to pull their levers to solve the Courtyard Maze Puzzle. Be extremely careful of Colmillos and Cultists that will constantly try to ambush you and kidnap Ashley.
| Solution | ||
|---|---|---|
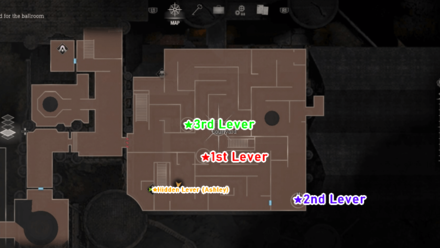 |
Once the gate is open, head straight towards the Grand Hall and save the game before you start solving the Headless Statue Puzzle.
The first Statue Head that you should get should be the Goat Head since there is a skip that you can easily fail. Go to the Gallery on the second floor of the grand hall and do the Goat Head Skip.
| Goat Head Map | Goat Head Location |
|---|---|
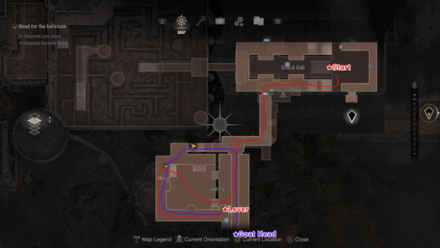 |
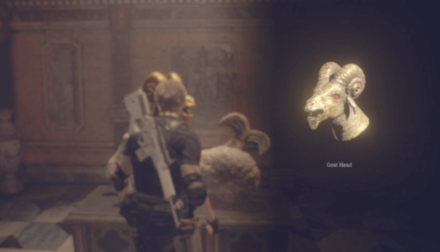 |
After that, you can now go to the Armory to get the Lion Head. Its entrance is also located on the second floor of the Grand Hall. Don't forget to grab the Cubic Device on your way out as you will need it later.
| Lion Head Map | Lion Head Location |
|---|---|
 |
 |
Lastly, get the Serpent Head on the Dining Hall at the end of the stairs near the Headless Statue.
| Serpent Head Map | Serpent Head Location |
|---|---|
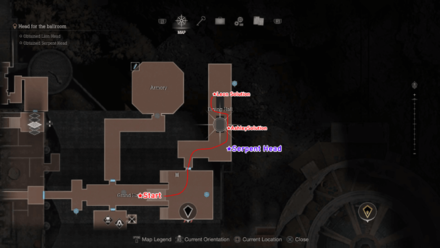 |
 |
Dining Hall Bell Puzzle Solution
Upon completing the Headless Statue Puzzle, you will now play as Ashley. You can immediately open the path to the Mausoleum by solving the first Grandfather Clock Puzzle. Since you are playing in Professional Difficulty, the solution for this Puzzle is 7:00.
Grandfather Clock Puzzle Solution
While on your way to the Mausoleum, you will need to solve the last Animal Gong Puzzle while being chased by a couple of Armaduras.
| Solution | |
|---|---|
 |
 |
 |
 |
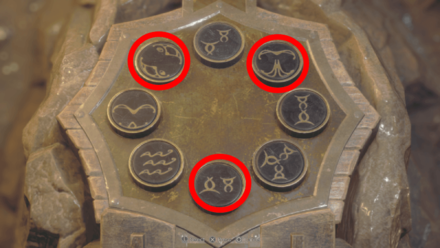
After solving the Animal Gong Puzzle, you will be able to obtain the Salazar Family Insignia by solving the Mausoleum Lamp Puzzle.
| West Slot | 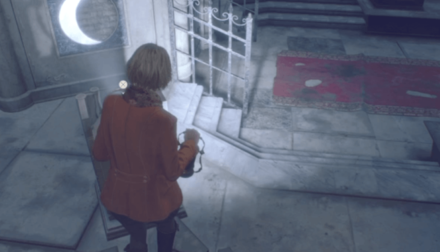 |
|---|---|
| North Slot | 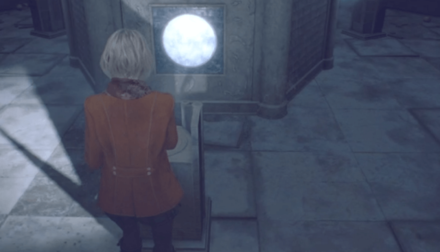 |
| East Slot | 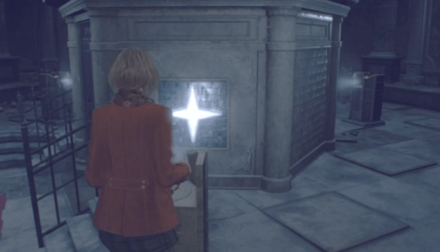 |
Mausoleum Lamp Puzzle Solution
You will now be able to open the gate and save Leon. Do not forget to save the game at the end of the chapter.
Chapter 10
Deal with the Novistadors
It can be difficult to pull the levers since there are a lot of Novistadors in the area. Try to clear them all from the second floor before going down.
Be Wary of the Double Garrador
Next, you will have to deal with the double Garradors to get the Unicorn Horns. Deal with all of the cultists immediately before the Garradors can get close. Use the sound of the bells to lure them and kill them as soon as you are behind them.
Continue heading straight and clear the enemies along the way to avoid taking any damage until you can leave the cave and reach the Merchant.
Verdugo Boss Fight
Use all of the levers to shower Verdugo with liquid nitrogen, this will allow you to stall long enough until the elevator arrives. Keep in mind that you can use the levers multiple times to freeze Verdugo and you do not need to kill him to finish this chapter. Just loot all the items in the area when Verdugo is frozen.
Alternatively, you can use the sniper scope glitch to wait for the elevator. To do this, lean against the elevator door while aiming down with a scope. This will glitch you through the door and prevent Verdugo from reaching you. Once you can enter the elevator, the chapter will end. Do not forget to save the game here.
| Update 4/23: This scope glitch has been fixed as of the Ver. 1.05 update and will no longer work. |
Chapter 11
You cannot simply run past all the enemies in the mines to get the Dynamite since there are 2 Chainsaw Men in the area. Clear them using the Chicago Sweeper and grab the Dynamite and then go back to clear the path.
After this, you will have to fight two El Gigantes with Luis. Focus on fighting the unarmored El Gigante using the Chicago Sweeper You can kill him faster by dropping him into the lava using the lever if they are staggered in the middle of the area. Next, you will have to deal with the Armored El Gigante. A cutscene will trigger once Luis gets back. Use the Dynamite that Luis attached to the Armored El Gigante's back to deal enough damage. Make sure that the Armored El Gigante is standing at the center so you can use the lever to kill him easily.
How to Beat Armored El Gigante
You will now be riding the minecart with Luis. You cannot rely on your weapon in this section since you will be using Luis's Red9. Most of the enemies in this area will immediately die after landing 1 hit. Use this to your advantage and focus on killing the Chainsaw Man and clearing the obstacles.
While you're in the Hive, make sure that you deal with the Novistadors that are camouflaged in the area. Eliminate them as soon as you see them coming. They can be easy to deal with in smaller groups, do not let them gang up on you.
Before going up the elevator, there is a small passage where you can meet the Merchant. Upgrade your Knife durability and power as much as possible and repair it to prepare for the next fight.
After that, you will have to fight Krauser. This is where perfect parry and dodge will be extremely handy. Try to avoid taking damage from his attacks.
Make sure that you save the game at the end of the chapter.
Chapter 12
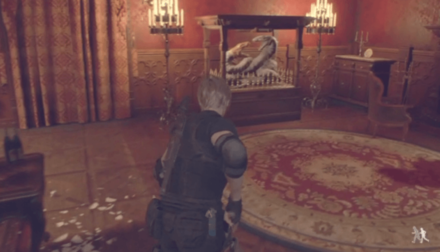
Before you ride the gondola, backtrack to the Throne Room (where Leon was dropped to the underground) where you can find chickens. Grab the Gold Chicken Egg from the square lock box along with any other egg the chickens might have laid. These are for the next boss fight.
Reach the clock tower and climb until you reach the back of the Salazar Statue. Shoot the red barrel at the back of its head to keep it from activating then continue up to the lift.
You don't want anyone else riding this lift, lest it will stop moving. Use the Sweeper to quickly stop any Zealot from hopping on.
Don't forget to take out the crossbow Zealots on the other side before you cross the rickety bridge. Cross slowly to the other side and into the boss room.
Get close to Salazar then throw all the eggs at him. The Gold Chicken Egg alone can take a huge chunk of his health. After you run out of eggs to throw, chip his remaining health with the Sweeper.
Island Chapters Professional Mode
| Ideal Finish Time |
|---|
| 1 Hour and 45 Minutes or less |
Chapter 13
Quickly run towards the turret near the gate and position yourself just before the turret scanner. Wait for the Brute to pass through the scanner and get shot then use his body as cover to skip the turret. Save your progress once you reach the merchant before the Regenerador area.
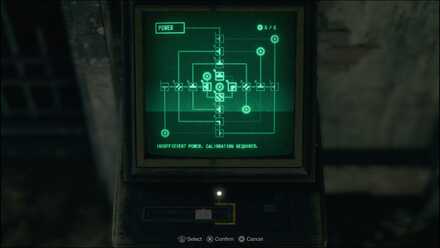
The calibration puzzles in the Freezer and Dissection areas are different in Hardcore and Professional Mode. Though you only need to solve the first one in the Dissection wing, you can also unlock the second one in the Freezer wing then sell the LE 5 for additional funds.
| Dissection Area | Freezer Area |
|---|---|
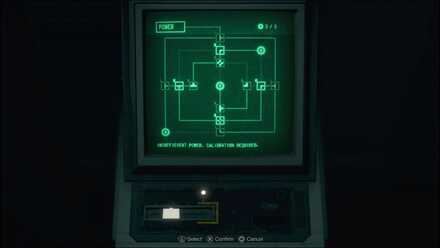 |
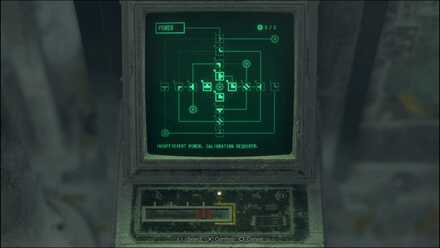 |
Chapter 14
You should start preparing at least 5 Heavy Grenades (2 for this chapter and 3 on the next) starting here. If you still need more, you can purchase the crafting recipe from the merchant and reserve some Gunpowder and Resources (L) for the grenades.
In the Waste Disposal room (area where another calibration puzzle is), shoot down the enemies coming for Ashley before you go back. On your way to Ashley, an Iron Maiden will awaken, which you can lure towards the bridge before commanding Ashley to let go of the crank so it drops down the sewage.
The calibration puzzle here is also different from Assisted and Standard difficulties.
| Waste Disposal Calibration Solution |
|---|
 |
Upon reaching the wrecking ball area, get Ashley in the crane first then throw 2 Heavy Grenades on the wall. This will cause the wall to weaken drastically and be destroyed the next time the wrecking ball smashes into it.
Continue onward and save your progress again before the Krauser fight.
Chapter 15
Let Mike do the honors of taking out rocket launchers and turrets on the first combat areas. Do the Anti-Aircraft Gun skip by throwing 3 Heavy Grenades at it. This will allow Mike to get back into the fight and help you wipe out the remaining militias.
Be careful not to wake the Iron Maidens in the cadaver room. In the room before the merchant (second door with a crank), destroy the crates first and use these paths you cleared when running towards the door. You will have enough time until the door completely closes so immediately crouch so you can roll inside.
Use your last manual save in the merchant ahead.
In the final ascent, make use of another turret skip near the summit by having a Novistador push you through the scanners. The next sections after finding Ashley should be straightforward.
Chapter 16
Purchase a Rocket Launcher at the merchant. You can sell all your items (except for the Chicago Sweeper) if you need more pesetas as this boss fight should be over quickly.
Confront Saddler and wait for him to jump down to the platform you're on, as he's still invulnerable when he's on the platform above you. Blast him with the Rocket Launcher to instantly trigger the second phase then use the Sweeper on his core until Ada hands over the Special Rocket Launcher. End the fight with it then run to the water scooter with Ashley.
You'll only have around 1 minute and 30 seconds to finish the ending sequence. Don't forget to use the accelerate button (R2 for PS4/PS5) while on the water scooter to pull off the escape.
Best Professional S+ Rank Save Points
Best Save Points
| Saves | Chapter | Location |
|---|---|---|
| 1st | Chapter 2 | After meeting the Merchant |
| 2nd | Chapter 3 | Shooting Range |
| 3rd | Chapter 5 | Before Abandoned House |
| 4th | Chapter 6 | Before Chainsaw Sisters |
| 5th | Chapter 6 | Before Mendez fight |
| 6th | Chapter 7 | Before the Water Hall |
| 7th | Chapter 8 | End of Chapter 8 |
| 8th | Chapter 9 | Grand Hall |
| 9th | Chapter 9 | End of Chapter 9 |
| 10th | Chapter 10 | End of Chapter 10 |
| 11th | Chapter 11 | End of Chapter 11 |
| 12th | Chapter 13 | Before getting the Lv1 Keycard |
| 13th | Chapter 14 | Before fighting Krauser |
| 14th | Chapter 14 | End of Chapter 14 |
| 15th | Chapter 15 | After the cadaver pouch room |
Best Save Points on Professional
Resident Evil 4 Remake Related Guides

Tips and Tricks: A Beginner's Guide
All Tips and Tricks Guides
Author

Professional S+ Guide: How to Speedrun Professional Mode
Please participate in our site
improvement survey
03/2026
improvement survey
03/2026
Would you assist in
improving Game8's site?
improving Game8's site?

×
We are listening to our users' valuable opinions and discussing how to act on them.
The information collected through this survey will be used for the purpose of improving our services. In addition, the information will only be disclosed a part of a statistic in a format that will not allow identification of personal information.
Begin Survey
Not Now
×
Please rate each item regarding Game8.co's Advertisements.
Amount of Ads
Very Dissatisfied
Somewhat Dissatisfied
Fine
Somewhat Satisfied
Highly Satisfied
Placement of Ads
Timing of Ad Display
Ad Loading Speed
Safeness of Ads
Content of Ads
×
Please rate each item regarding Game8.co's Quality of Articles.
Amount of information
Very Dissatisfied
Somewhat Dissatisfied
Fine
Somewhat Satisfied
Highly Satisfied
Frequency of updates
Speed of new information
Accuracy of articles
Understandibility of articles
Readability of sentences
×
Please rate each item regarding Game8.co's Usability of the Site.
Ease of finding information
Very Dissatisfied
Somewhat Dissatisfied
Fine
Somewhat Satisfied
Highly Satisfied
Loading Speed
Use of Color
Font Size
Visibility of Images
Easy to Understand Layout
×
Please rate each item regarding Game8.co's Message Boards, Comments.
Ease of Writing
Very Dissatisfied
Somewhat Dissatisfied
Fine
Somewhat Satisfied
Highly Satisfied
Readability
Ease in Finding Information
Comment Quality
Comment Quantity
Admin Response
×
Please rate each item regarding Game8.co's Site's new design.
Please rate our site's new design
Very Dissatisfied
Somewhat Dissatisfied
Fine
Somewhat Satisfied
Highly Satisfied
Do you think that the website's design change makes the site easier to use?
Has the new design made it easier for you to find information on the site?
Has the new design improved the overall visual appeal of the site?
How would you rate your overall satisfaction with the new design of the site?
×
How likely are you to recommend Game8 to someone you know?
Very Unlikely
0
1
2
3
4
5
6
7
8
9
10
Very Likely
If you have other opinions regarding potential improvement to the website, please share them with us. We would appreciate your honest opinion.
Note: This is a free response section, so you can proceed without entering anything.
Note: Please be sure not to enter any kind of personal information into your response.
Note: Please be sure not to enter any kind of personal information into your response.
×
Thank You
×
Thank you for participating in our survey! Your answers will help us to improve the quality of our website and services.
We hope you continue to make use of Game8.
We hope you continue to make use of Game8.
Close
Rankings
- We could not find the message board you were looking for.
Gaming News


Popular Games

Genshin Impact Walkthrough & Guides Wiki
Honkai: Star Rail Walkthrough & Guides Wiki
Umamusume: Pretty Derby Walkthrough & Guides Wiki
Pokemon Pokopia Walkthrough & Guides Wiki
Resident Evil Requiem (RE9) Walkthrough & Guides Wiki
Monster Hunter Wilds Walkthrough & Guides Wiki
Wuthering Waves Walkthrough & Guides Wiki
Arknights: Endfield Walkthrough & Guides Wiki
Pokemon FireRed and LeafGreen (FRLG) Walkthrough & Guides Wiki
Pokemon TCG Pocket (PTCGP) Strategies & Guides Wiki


Recommended Games
Diablo 4: Vessel of Hatred Walkthrough & Guides Wiki
Fire Emblem Heroes (FEH) Walkthrough & Guides Wiki
Yu-Gi-Oh! Master Duel Walkthrough & Guides Wiki
Super Smash Bros. Ultimate Walkthrough & Guides Wiki
Pokemon Brilliant Diamond and Shining Pearl (BDSP) Walkthrough & Guides Wiki
Elden Ring Shadow of the Erdtree Walkthrough & Guides Wiki
Monster Hunter World Walkthrough & Guides Wiki
The Legend of Zelda: Tears of the Kingdom Walkthrough & Guides Wiki
Persona 3 Reload Walkthrough & Guides Wiki
Cyberpunk 2077: Ultimate Edition Walkthrough & Guides Wiki


All rights reserved
©CAPCOM CO., LTD. ALL RIGHTS RESERVED.
The copyrights of videos of games used in our content and other intellectual property rights belong to the provider of the game.
The contents we provide on this site were created personally by members of the Game8 editorial department.
We refuse the right to reuse or repost content taken without our permission such as data or images to other sites.