This survey will take about 1 minute.
Your answers will help us to improve our website.
Resident Evil 4 Remake (RE4)
Chapter 9 Walkthrough
★ The Resident Evil Requiem wiki is now live!
☆ Learn the best ways to speedrun & reach Professional S+!
★ Discover all the Skips you can make in a single playthrough!
This is a walkthrough for Chapter 9 of Resident Evil 4 Remake (RE4). Read on for a detailed walkthrough, route maps for each objective, a list of important items obtainable, and tips on how to complete this chapter!
| ◄ Previous Chapter | Next Chapter ▶ |
|---|---|
|
Chapter 8 |
Chapter 10 |
Chapter 9 Basic Information
Chapter Summary
After finding Ashley, Leon receives a call from Luis asking for a rescue. Fortunately, he's just in the ballroom at the other side of the courtyard where the duo was reunited.
Chapter Details
| Chapter 9 | |
|---|---|
| Location | Courtyard Grand Hall Gallery Dining Hall Armory |
| Recommended Weapons |
Blacktail
Riot Gun Stingray |
Enemies Encountered
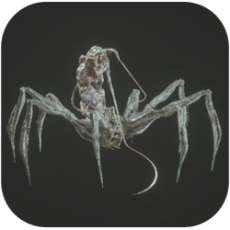 Parasite Parasite
|
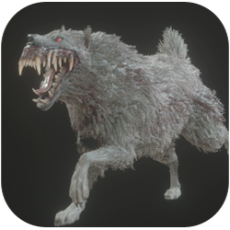 Colmillos Colmillos
|
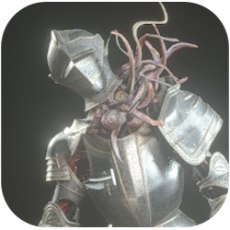 Armadura Armadura
|
Chapter 9 Walkthrough
Chapter Objectives
| Objectives | |
|---|---|
| 1 | Head to the ballroom |
| 2 | Rescue Leon |
Head to the Ballroom
| Map Location | In-Game Location |
|---|---|
 |
 |
Lower the First Flag
| Map Route | In-Game Location |
|---|---|
 |
 |
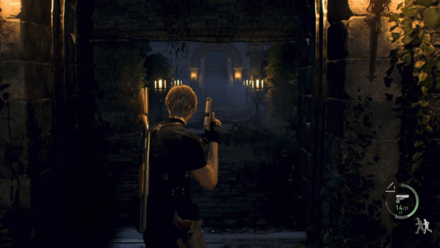
The chapter starts with a call from Luis who invites Leon to the ballroom just past the courtyard.
Go through the double doors to go back outside the said courtyard where the garden maze is. Head down the stairs to your right and get to the center of the maze where you'll find another staircase with an archway.
You will face a couple of Colmillos—vicious wolves infected with plagas—that may jump on you from the hedges, so be cautious. Facing the archway, turn right then left on the next turn and you'll find a wandering Colmillos.
Check the area where the Colmillos came from to find a locked door on your left and a path to your right. Take the right path and greet another Colmillos on your way. At the end, you will find a kennel containing three wolves that will immediately release plagas on their backs, giving them access to ranged attacks.
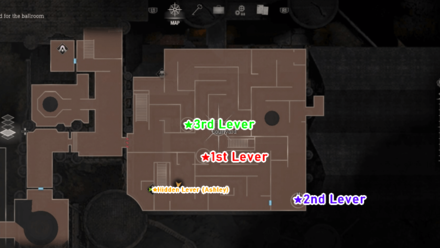
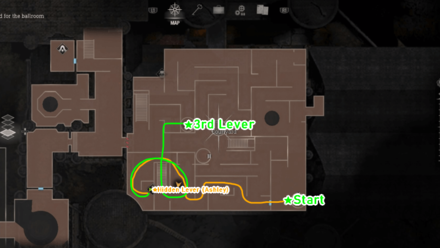
Past the kennel is another path that leads to a lever. Order Ashley to hold it down and prepare to defend yourself against one last wolf attack on this side of the maze.
Go back to where the kennel is (Ashley will be fine) and through the nearby gate Ashley is holding open to reach the small bridge in the middle of the maze. Cross over to the other side to find the other lever that will lower the first of the three flags.
Lower the Second Flag
| Map Route | In-Game Location |
|---|---|
 |
 |
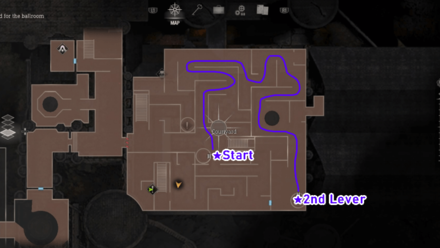
The lever that will lower the second is found on the other side of the maze (left path from the archway). This side has Colmillos doing hit-and-runs from the hedges so be vigilant and listen to their footsteps.
Follow the path until you reach another kennel of Colmillos, which you will run into before a fountain. Past the fountain is the tower where the last lever is.
Lower the Third Flag
| Map Route | In-Game Location |
|---|---|
 |
 |
Lowering the third flag also releases a couple of Cultists into the maze. Run back to the bridge, vault down the gap, and quickly get to Ashley before any of the zealots do. Once it's clear, climb the tower in front of the archway at the center of the maze to find the lever that will lower the third flag.
Enter the Castle
Before you leave the maze, return to the fountain you just passed by and check the newly opened room nearby. Kill the wolf guarding it before grabbing the Elegant Chessboard from the chest inside.
Return to the archway in the middle and climb the stairs to enter the Castle. You can find the Merchant on the first room to your right as well as the request for Destroy the Blue Medallions 4. The door next to the Merchant leads to a cart downstairs that can take you to and from a room near the Water Hall.
Obtain the Goat Head
| Map Location | In-Game Location |
|---|---|
 |
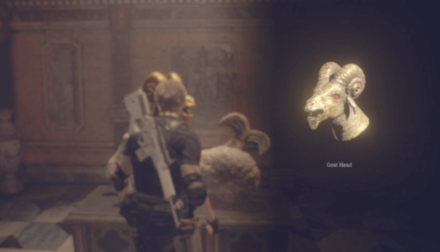 |
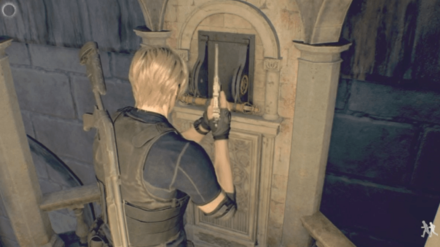
When you're ready, exit the room and go up the stairs to find an incomplete statue. You need three pieces of ornaments to complete it and proceed to the next area. On the wall north of the statue is a request for More Pest Control.
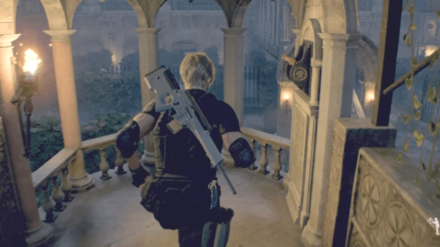
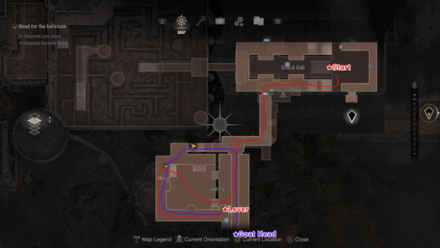
Go up the second floor and enter through the door on the southwest. Follow this path to reach the Gallery.
A Cultist will lower down the bridge before you reach the end, trapping you on the floor below with other Cultists. The goal here is to survive the waves of enemies and eliminate the Cultist Leader above. After that, you can climb to where the leader is and pull the lever to raise the bridge again. The Goat Head is found on the other side of the bridge.
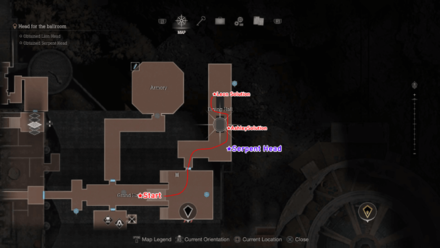
Obtain the Serpent Head
| Map Location | In-Game Location |
|---|---|
 |
 |
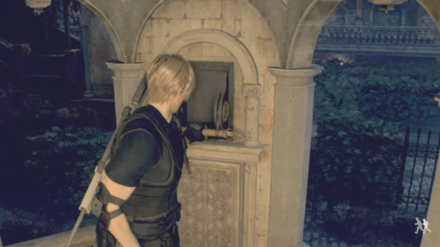
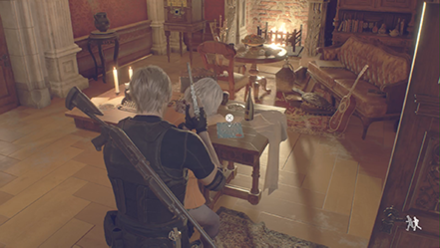
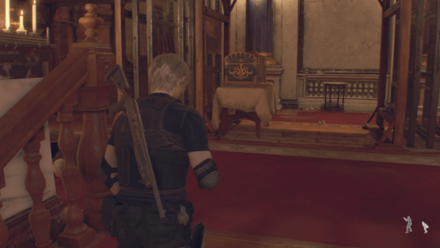
Return to the Grand Hall and take the northeast room this time. The puzzle here is solved by ringing the bells on the two correct spots in the table. You can find the clue on the portraits hanging at the end of the room.
| Solution | |
|---|---|
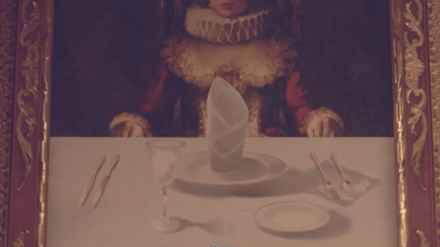 Female Portrait |
 Male Portrait |
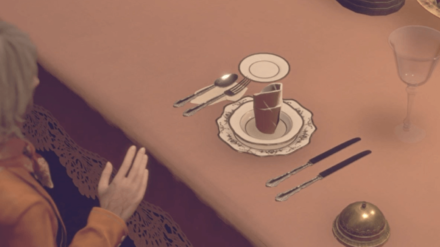 Ashley |
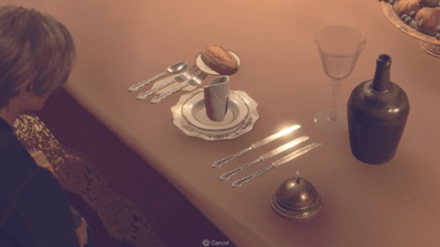 Leon |
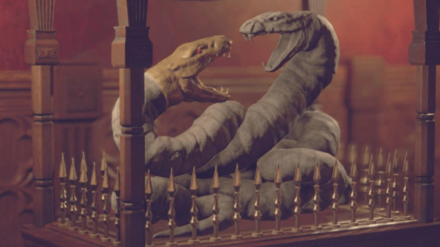
On the first table (nearest to the door), have Ashley sit on the northeast chair then run to the other table and sit on the northwest chair. Ring the bells to unlock the cage on the snake statues and obtain the Serpent Head.
Obtain the Lion Head
| Map Location | In-Game Location |
|---|---|
 |
 |
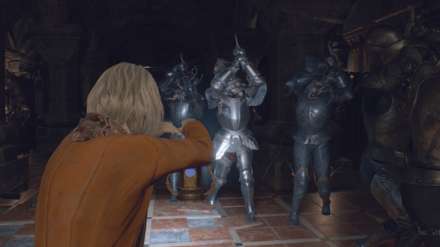
The last piece is on the northwest room of the Grand Hall. Enter the Armory and drop down at the center where the Lion Head is. Removing the piece from the statue releases several Armadura into the arena.
Defeat the Plagas
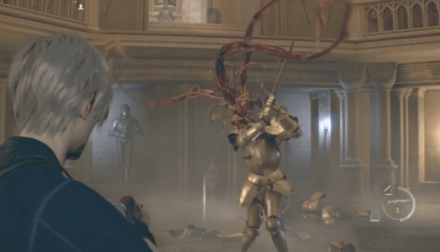
These armor sets have plagas inside that will be released after taking enough damage. Shoot the plagas or throw a Flash Grenade to defeat them.
Ashley will also help out by throwing down lanterns that will set the floor ablaze with blue flames. These flames immobilize Armadura, so try to lure them into it so you can safely pick them with your weapons.
Get the Cubic Device
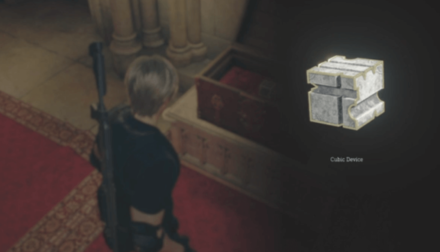
Get Ashley down so you can open the door ahead together. You'll spot another treasure chest as you turn right, which contains a Cubic Device. Following the corridor past the chest leads you back to the lower floor of the Grand Hall. Place all three ornaments you obtained on the statue to complete the Chimera.
Rescue Leon
Find the Keys
| Map Location | In-Game Location |
|---|---|
 |
 |
You'll now play as Ashley with no weapon or anything in hand. Check the other side of the room where the light is coming from and grab the lantern from the pedestal. The lantern can be used with the aim button to light your path or immobilize Armadura that you will encounter.
Upon picking up the lantern, the wall next to it will reveal a new path. Follow it until you reach a room with a broken clock that you will need to solve later on.
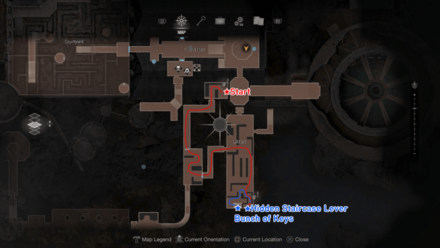
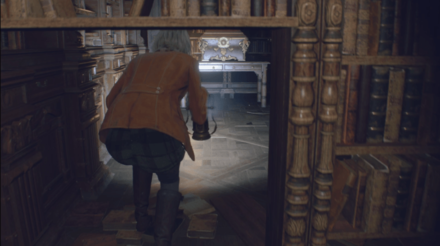
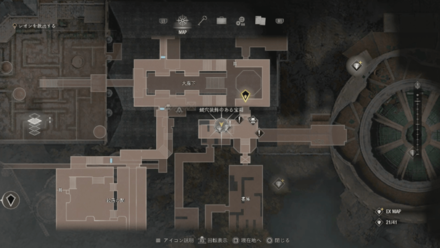
Before that, turn left through the door that takes you to a library area. Go around the bookcases in this room until you find a pedestal you can place the lantern on. Place the lantern and find the wheel at the end of the path that you can turn to reveal a hidden staircase.
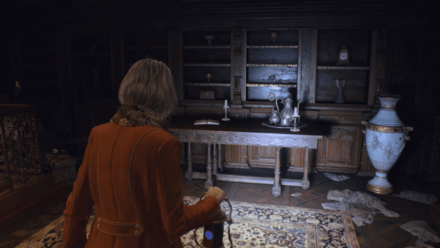
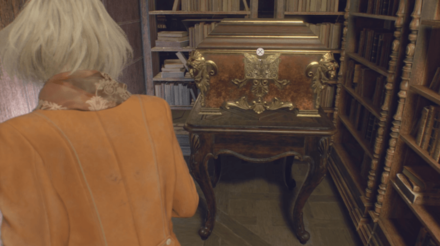
Return to the lantern and go up the staircase to find a Bunch of Keys on the table. The vault across the table is where you should put the Cubic Device from earlier once you get Leon back.
Fix the Clocks
| Map Location | In-Game Location |
|---|---|
 |
 |
Go back downstairs to the locked gate where you can use the keys. On your way to the gate, an Armadura will knock down a bookshelf and attack you. Immediately aim your lantern at the Armadura to immobilize it and avoid getting slashed by its plaga. Make your way to the gate and use the third key to unlock it.
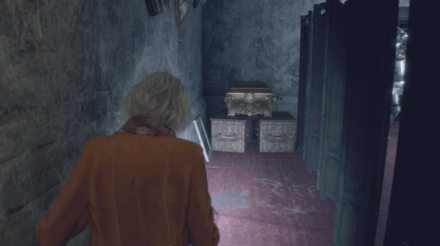
Ride the elevator up to a room just above where Leon was trapped. Turn left to the bookcases then right on the next turn to find a locked chest. Open it with the fourth key to obtain a Sapphire.
Backtrack to the bloodstained path and proceed further to find a note on a table with "11:04" written on it.
| Solution |
|---|
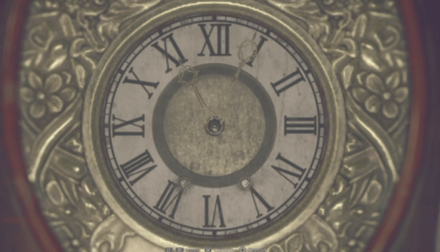 Set the time to 11:04 (Assisted / Standard Difficulty) or 7:00 (Hardcore / Professional Difficulty) |
Ashley Grandfather Clock Puzzle Solutions
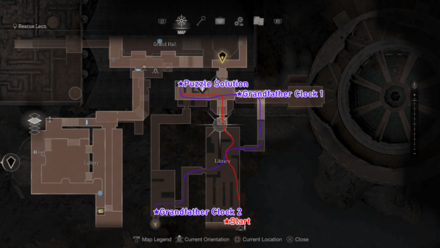
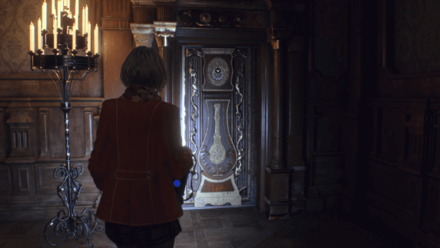
Go to the clock next to the typewriter and move the hands so that it's exactly at 11:04 (7:00 on Hardcore or Professional Difficulty). Wait for it to reveal a hidden path then follow it down. Ready your lantern as you reach the base and quickly shine the lantern at the Armadura so you can safely get to the wheel at the end.
Turn the wheel to open a path back to the library then backtrack to the first broken clock that you encountered. Turn its hands to 11:04 as well to reveal another corridor.
Get the Family Insignia
| Map Location | In-Game Location |
|---|---|
 |
 |
Downstairs is a room with an elevator to the lower floor. Watch your back and ready your lantern while waiting for the elevator as an Armadura will charge at you!
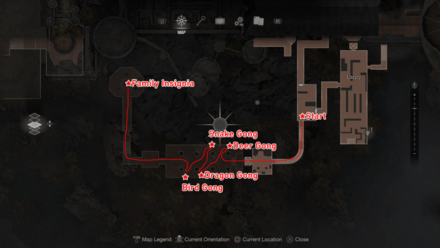
Once you're at the lower floor, you will notice that the hall is filled with Armadura. To open the door on the other side, you must sound all four gongs found on the corners of the hall, which also wakes up the Armadura.
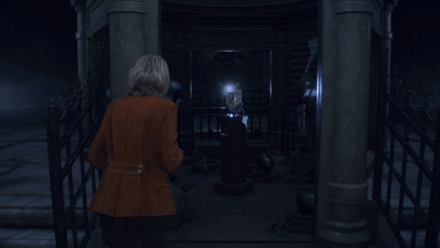
Keep following the path until you reach a lamp puzzle where you need to put three lamps, including the one you're holding, on the correct spots. First, swap the lantern you're holding with the lantern at the back. Next, place this lantern on the left side, with the crescent symbol. The last lamp should then be placed in front of the star symbol.
| West Slot | 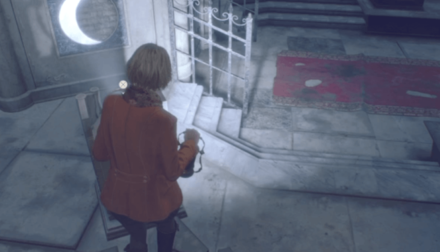 |
|---|---|
| North Slot | 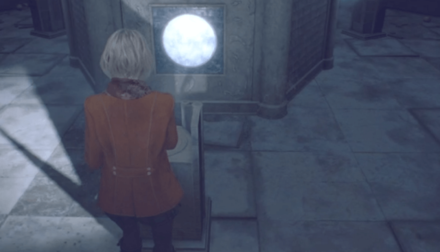 |
| East Slot | 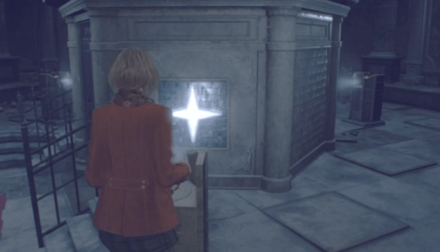 |
Ashley Mausoleum Lamp Puzzle Solution
Grab the Salazar Family Insignia from the pedestal then run back to the room above Leon. You don't have Medusa's head this time so just run and avoid the Armadura on your way back.
Use the Insignia to open the door and complete the chapter.
| ◄ Previous Chapter | Next Chapter ▶ |
|---|---|
|
Chapter 8 |
Chapter 10 |
Chapter 9 Tips and Strategies
| Chapter 9 Tips and Strategies |
|---|
|
|
Listen Carefully For the Colmillos' Footsteps
During the hedge maze run, we recommend turning the volume up a bit and listen for the footsteps of the Colmillos to locate where they're coming from. They can pounce on you and take a chunk off your health if you let your guard down, unless you're willing to sacrifice a huge portion of your knife's durability for a quick getaway.
Aim the Lantern at the Armadura
Ashley's only way to defend herself as she's trying to rescue Leon is by using the blue flame from the lantern. Aiming the lantern at Armadura immobilizes them for a few seconds, enough to clear a path forward.
Chapter 9 Requests
Destroy the Blue Medallions 4
| Map View | In-Game View |
|---|---|
 |
 |
The Destroy the Blue Medallions 4 request note can be found on a table in the room where a Typewriter save point and the Merchant can be found.
Destroy the Blue Medallions 4 Request
More Pest Control
| Map View | In-Game View |
|---|---|
 |
 |
The More Pest Control request can be found posted on a wall by the entrance of the Dining Hall.
More Pest Control Rat Locations
Chapter 9 Collectibles
Clockwork Castellan
| Map Location | In-Game Location |
|---|---|
 |
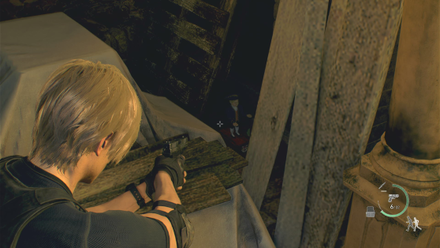 |
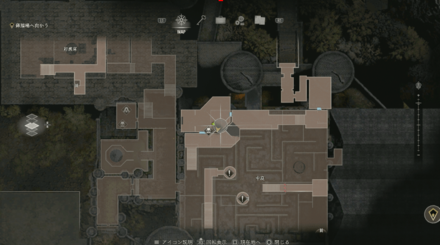
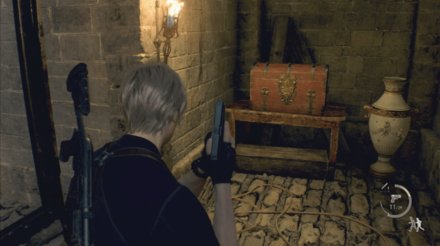
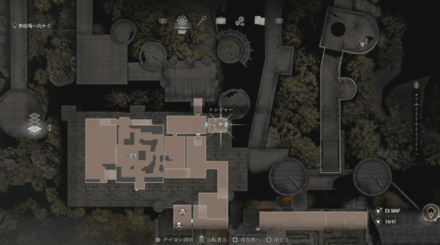
You can find this Clockwork Castellan past a lit torch at the northwestern edge of the Courtyard. The Castellan is on the floor, hidden behind some wooden planks.
All Clockwork Castellans Locations
Yellow Herb
| Map Location | In-Game Location |
|---|---|
 |
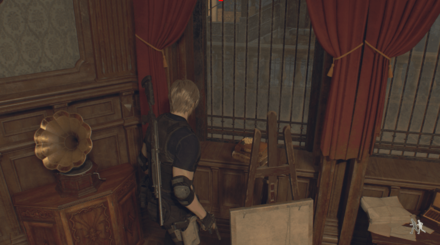 |
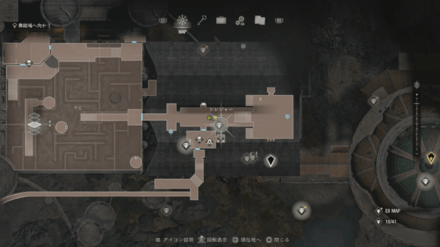
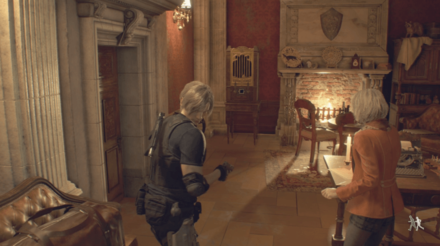
A Yellow Herb can be found in Chapter 9 by the window in the room where the chapter begins.
Treasures
Elegant Chessboard
| Map Location | In-Game Location |
|---|---|
 |
 |
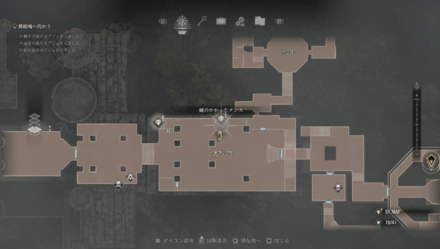
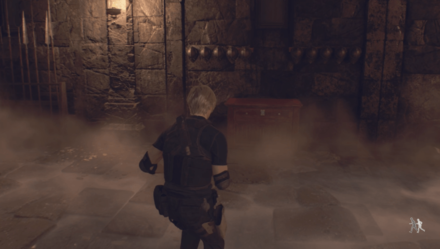
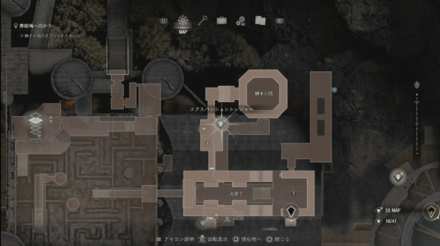
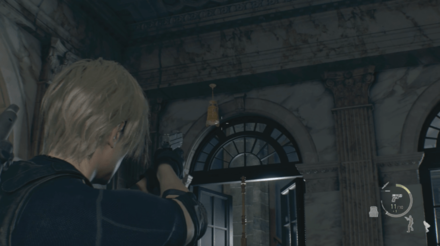
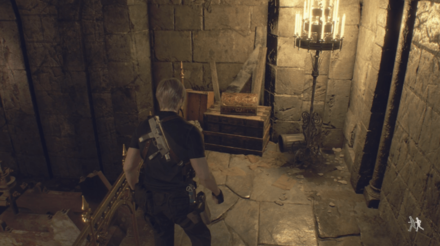
The Elegant Chessboard in the Castle can be obtained from a treasure chest at the east side of the Courtyard.
Depraved Idol
| Map Location | In-Game Location |
|---|---|
 |
 |
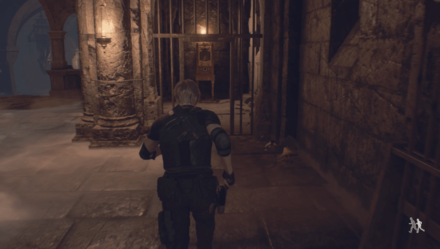
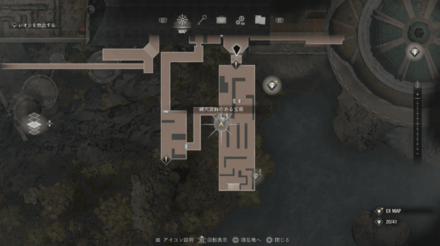
The Depraved Idol can be obtained from a treasure chest after clearing the maze in the Courtyard. Make your way back to the Wine Cellar and have Ashley assist in getting it.
Alexandrite
| Map Location | In-Game Location |
|---|---|
 |
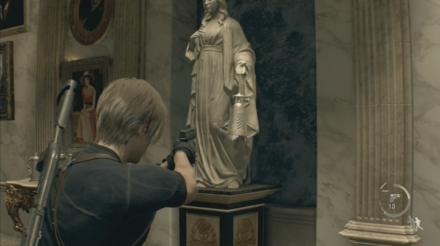 |
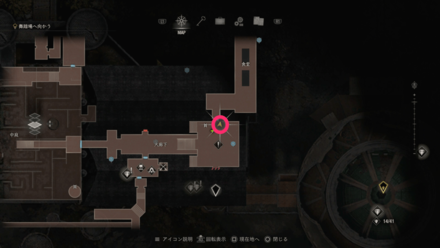
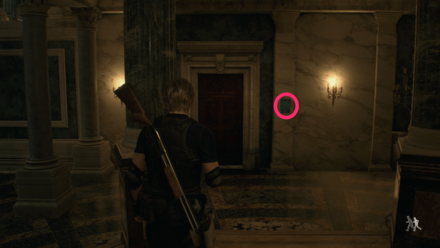
Another Alexandrite in the Castle can be obtained by going east after the maze and shooting the container being held by a statue.
Butterfly Lamp
| Map Location | In-Game Location |
|---|---|
 |
 |
The Butterfly Lamp in the Castle can be obtained by using the Cubic Device on the Square Lock Box in the room where the Merchant is.
Yellow Diamond
| Map Location | In-Game Location |
|---|---|
 |
 |
The Yellow Diamond in the Castle can be obtained from a treasure chest by pulling the levers between the paintings.
Gold Bar
| Map Location | In-Game Location |
|---|---|
 |
 |
The Gold Bar in the Castle can be obtained from a Locked Drawer by backtracking to the Audience Chamber by using the gondola to return to the Merchant's room.
Justitia Statue
| Map Location | In-Game Location |
|---|---|
 |
 |
The Justitia Statue can be obtained by unlocking the Square Lock Box with the Cubic Device in the Audience Chamber.
Elegant Perfume Bottle
| Map Location | In-Game Location |
|---|---|
 |
 |
Another Elegant Perfume Bottle can be obtained in the Castle from a treasure chest by entering the Library as Ashley and crouching through with the Bunch of Keys. Unlock the chest by using the second key from the left.
Sapphire
| Map Location | In-Game Location |
|---|---|
 |
 |
Another Sapphire inn the Castle can be obtained by in a treasure chest after taking the elevator north side of the Library. Unlock the chest by using the fourth key.
Emerald
| Map Location | In-Game Location |
|---|---|
 |
 |
Another Emerald in the Castle can be obtained by opening the treasure chest behind the closed door of the Mausoleum. Unlock the chest by using the first key.
Hidden Treasures
| Note: Hidden Treasures only appear with the Expanded Treasure Map from the Deluxe Edition. |
Silver Token
| Map Location | In-Game Location |
|---|---|
 |
 |
Another Silver Token can be obtained in the castle by shooting down the container hanging from the ceiling to the north on the second floor of the Great Hall.
Elegant Crown
| Map Location | In-Game Location |
|---|---|
 |
 |
The Elegant Crown in in the Castle can be obtained by returning to the Audience Chamber via the gondola from the Merchant's room at the end of the courtyard.
Resident Evil 4 Remake Related Guides

Story Walkthrough: All Chapters
Village Chapters
| All Village Chapters | |
|---|---|
| Chainsaw Demo | Chapter 1 |
| Chapter 2 | Chapter 3 |
| Chapter 4 | Chapter 5 |
| Chapter 6 | - |
Castle Chapters
| All Castle Chapters | |
|---|---|
| Chapter 7 | Chapter 8 |
| Chapter 9 | Chapter 10 |
| Chapter 11 | Chapter 12 |
Island Chapters
| All Island Chapters | |
|---|---|
| Chapter 13 | Chapter 14 |
| Chapter 15 | Chapter 16 |
Author

Chapter 9 Walkthrough
Please participate in our site
improvement survey
03/2026
improvement survey
03/2026
Would you assist in
improving Game8's site?
improving Game8's site?

×
We are listening to our users' valuable opinions and discussing how to act on them.
The information collected through this survey will be used for the purpose of improving our services. In addition, the information will only be disclosed a part of a statistic in a format that will not allow identification of personal information.
Begin Survey
Not Now
×
Please rate each item regarding Game8.co's Advertisements.
Amount of Ads
Very Dissatisfied
Somewhat Dissatisfied
Fine
Somewhat Satisfied
Highly Satisfied
Placement of Ads
Timing of Ad Display
Ad Loading Speed
Safeness of Ads
Content of Ads
×
Please rate each item regarding Game8.co's Quality of Articles.
Amount of information
Very Dissatisfied
Somewhat Dissatisfied
Fine
Somewhat Satisfied
Highly Satisfied
Frequency of updates
Speed of new information
Accuracy of articles
Understandibility of articles
Readability of sentences
×
Please rate each item regarding Game8.co's Usability of the Site.
Ease of finding information
Very Dissatisfied
Somewhat Dissatisfied
Fine
Somewhat Satisfied
Highly Satisfied
Loading Speed
Use of Color
Font Size
Visibility of Images
Easy to Understand Layout
×
Please rate each item regarding Game8.co's Message Boards, Comments.
Ease of Writing
Very Dissatisfied
Somewhat Dissatisfied
Fine
Somewhat Satisfied
Highly Satisfied
Readability
Ease in Finding Information
Comment Quality
Comment Quantity
Admin Response
×
Please rate each item regarding Game8.co's Site's new design.
Please rate our site's new design
Very Dissatisfied
Somewhat Dissatisfied
Fine
Somewhat Satisfied
Highly Satisfied
Do you think that the website's design change makes the site easier to use?
Has the new design made it easier for you to find information on the site?
Has the new design improved the overall visual appeal of the site?
How would you rate your overall satisfaction with the new design of the site?
×
How likely are you to recommend Game8 to someone you know?
Very Unlikely
0
1
2
3
4
5
6
7
8
9
10
Very Likely
If you have other opinions regarding potential improvement to the website, please share them with us. We would appreciate your honest opinion.
Note: This is a free response section, so you can proceed without entering anything.
Note: Please be sure not to enter any kind of personal information into your response.
Note: Please be sure not to enter any kind of personal information into your response.
×
Thank You
×
Thank you for participating in our survey! Your answers will help us to improve the quality of our website and services.
We hope you continue to make use of Game8.
We hope you continue to make use of Game8.
Close
Rankings
- We could not find the message board you were looking for.
Gaming News


![Monster Hunter Stories 3 Review [First Impressions] | Simply Rejuvenating](https://img.game8.co/4438641/2a31b7702bd70e78ec8efd24661dacda.jpeg/thumb)
Popular Games

Genshin Impact Walkthrough & Guides Wiki
Honkai: Star Rail Walkthrough & Guides Wiki
Umamusume: Pretty Derby Walkthrough & Guides Wiki
Pokemon Pokopia Walkthrough & Guides Wiki
Resident Evil Requiem (RE9) Walkthrough & Guides Wiki
Monster Hunter Wilds Walkthrough & Guides Wiki
Wuthering Waves Walkthrough & Guides Wiki
Arknights: Endfield Walkthrough & Guides Wiki
Pokemon FireRed and LeafGreen (FRLG) Walkthrough & Guides Wiki
Pokemon TCG Pocket (PTCGP) Strategies & Guides Wiki


Recommended Games
Diablo 4: Vessel of Hatred Walkthrough & Guides Wiki
Cyberpunk 2077: Ultimate Edition Walkthrough & Guides Wiki
Fire Emblem Heroes (FEH) Walkthrough & Guides Wiki
Yu-Gi-Oh! Master Duel Walkthrough & Guides Wiki
Super Smash Bros. Ultimate Walkthrough & Guides Wiki
Pokemon Brilliant Diamond and Shining Pearl (BDSP) Walkthrough & Guides Wiki
Elden Ring Shadow of the Erdtree Walkthrough & Guides Wiki
Monster Hunter World Walkthrough & Guides Wiki
The Legend of Zelda: Tears of the Kingdom Walkthrough & Guides Wiki
Persona 3 Reload Walkthrough & Guides Wiki


All rights reserved
©CAPCOM CO., LTD. ALL RIGHTS RESERVED.
The copyrights of videos of games used in our content and other intellectual property rights belong to the provider of the game.
The contents we provide on this site were created personally by members of the Game8 editorial department.
We refuse the right to reuse or repost content taken without our permission such as data or images to other sites.