Chapter 13 Walkthrough
★ The Resident Evil Requiem wiki is now live!
☆ Learn the best ways to speedrun & reach Professional S+!
★ Discover all the Skips you can make in a single playthrough!
This is a walkthrough for Chapter 13 of Resident Evil 4 Remake (RE4). Read on for a detailed walkthrough, route maps for each objective, a list of important items obtainable, and tips on how to complete this chapter!
| ◄ Previous Chapter | Next Chapter ▶ |
|---|---|
|
Chapter 12 |
Chapter 14 |
Chapter 13 Basic Information
Chapter Summary
Ashley was taken by Krauser to an island far from the castle. Leon has to find a way to get to Ashley's holding cell and deliver the medicine in time.
Chapter Details
| Chapter 13 | |
|---|---|
| Location | Island |
| Recommended Weapons |
TMP
Striker Stingray |
Enemies Encountered
 Ganados (Villagers) Ganados (Villagers)
|
 Regenerators Regenerators
|
Chapter 13 Walkthrough
Chapter Objectives
| Objectives | |
|---|---|
| 1 | Go after Ashley |
| 2 | Rescue Ashley |
| 3 | Get the Level 3 Keycard |
Go After Ashley
| Route Map | |
|---|---|
 |
 |
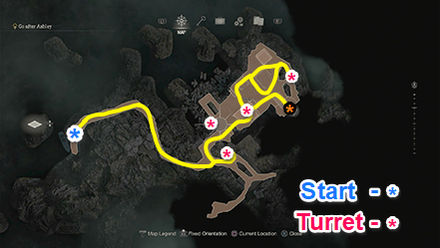
Sneak Past the Turrets
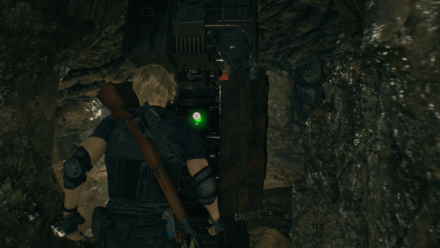
Follow the path ahead to the tunnels until you reach a turret. A bit further from here, you will find a small opening to your left which you can use to reach the back of the turret and make it face the wall.
Now that it's safe to pass, cross to the next area where you can find your first kills on this new area. There are also turrets here that you can use to redirect the enemies as even they won't dare to pass through the scanners.
Climb to the turret on the right and make it switch directions. Drop down and go around the first turret you came across and do the same.
Head towards the last turret on the other side and interact with it so its scanners aren't aimed at the doors. Now return to where the second turret is to find a clear path towards the building.
Move to the Next Area
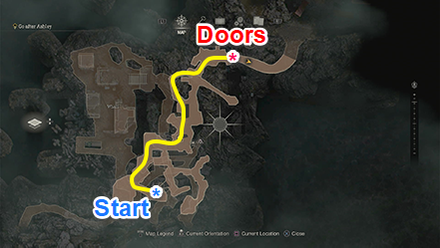
Cross the wooden bridges until you find a ladder. Climb up to the next area with more enemies. Turn right towards the direction of the next building that you need to get to then follow the path up ahead.
You might want to snipe down the enemy holding a Rocket Launcher first then the crossbows before rushing in.
Open the Door in the Surveillance Room
Pass through the double doors and follow the path down. Turn left on the fork then left again up the stairs. The door at the end is booby trapped so disarm it first before entering the Surveillance room.
Climb the ladder on your left, turn left again, and follow the path to another room where you can unlock the marked door below.
Head downstairs through the newly unlocked door and you'll spot Ashley down the room below.
Rescue Ashley
| Route Map |
|---|
 |
Find a Way to Unlock the Holding Cell
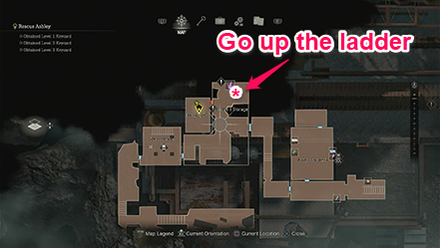
Drop down the ledge and look on your left to find two enemies guarding Ashley's room. Climb the ladder across and enter the room to your right. Move through the rooms and keep following the path until you end up at the next merchant.
Enter the next room from the merchant and turn left to the other end of the hallway. Turn right again and enter the Dissection area. Head for the southeast room to find the Laboratory Notice file and your next objective.
Get the Level 3 Keycard
| Route Map | |
|---|---|
 |
 |
Find the Level 1 Keycard
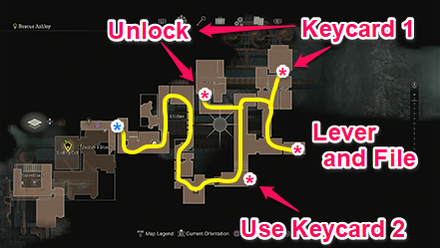
Pull the lever next to you to reroute the power to the Dissection area. Leave the room and pull the lever next to the gate to open a shortcut between the Dissection area and the hallway in the middle.
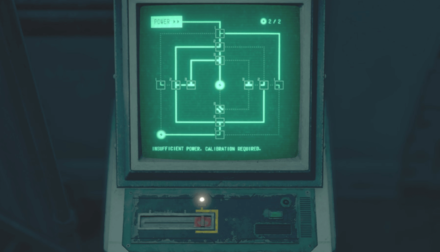
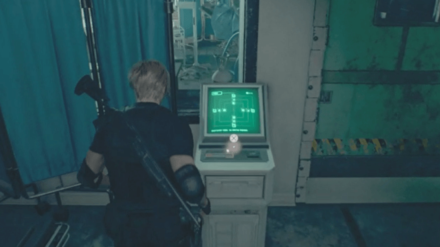
Run all the way north (still in the same area) to find a console where you need to solve a calibration puzzle to complete. Enter the room and grab the Level 1 Keycard at the back.
| Solution | |
|---|---|
 |
|
| Map | Location |
 |
 |
Electronic Lock Puzzle Solutions
The Regeneradors will now come at you.
Increase the Keycard Clearance
Go back to the southeast room and reroute the power back to the Freezer area. Run to the Freezer area and unlock it using the keycard. Interact with the terminal at the back of the room to start overwriting your keycard with level 2 clearance. This awakens another Regenerador.
Get the Biosensor Scope
Now go back to the central hallway and run all the way south to the locked door (near the merchant room). Open it with the keycard and go down to the lower level.
Enter the Incubation Lab and check the small room north to find the Biosensor Scope, an attachment for your rifle that lets you see the plagas inside the Regeneradors.
Get the Wrench
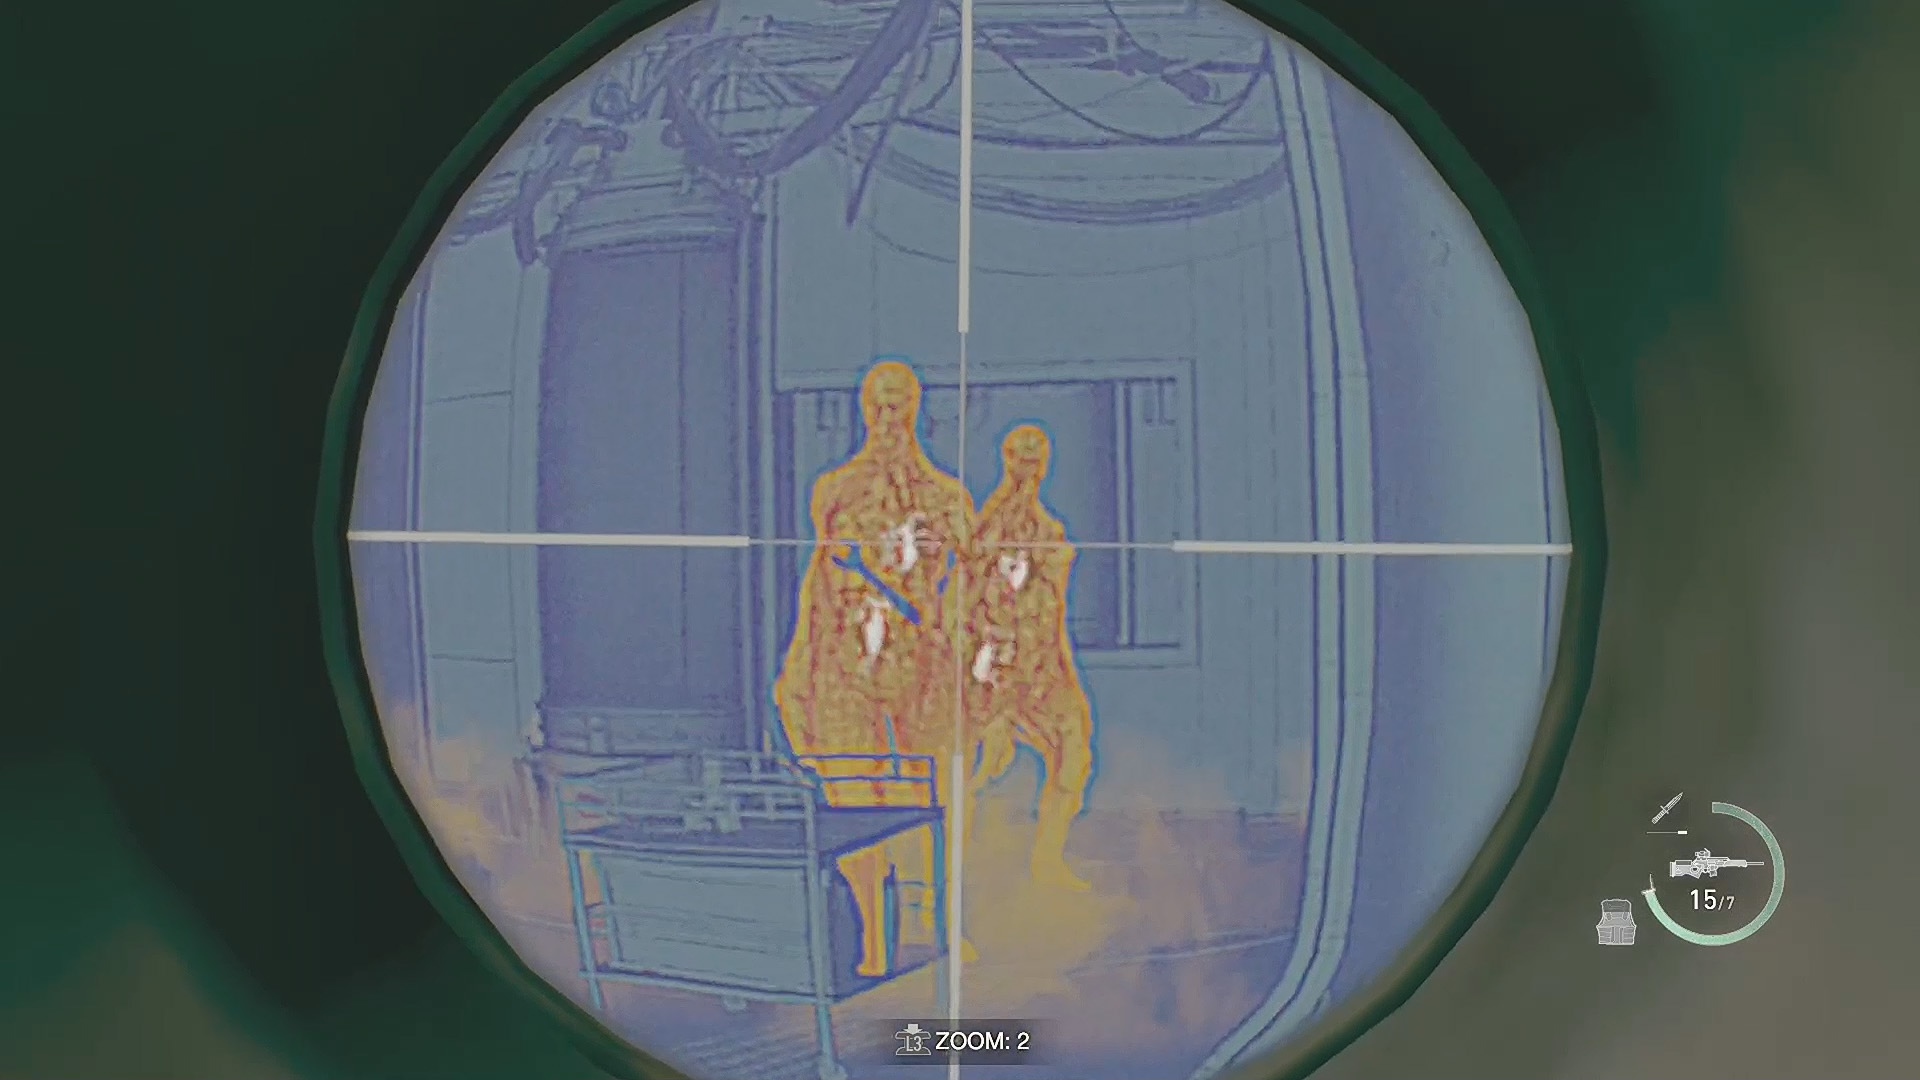
Use the Biosensor Scope to look at all of the Regeneradors in the incubators and see which one has absorbed the Wrench key item into its body. Kill that Regenerador by shooting both of the glowing parasites inside its body. After it's dead, pick up the Wrench and use it to open the terminal in the small room that increases your clearance to level 3. Survive the wave of enemies while it's being overwritten.
Return to Ashley
With the Level 3 Keycard in hand, take the shortcut west of the Incubation Lab and return to the Holding Cell where Ashley is to complete the chapter.
| ◄ Previous Chapter | Next Chapter ▶ |
|---|---|
|
Chapter 12 |
Chapter 14 |
Chapter 13 Tips and Strategies
| Chapter 13 Tips and Strategies |
|---|
|
|
Get the LE 5 in the Freezer Area
| Solution | |
|---|---|
 |
|
| Map | Location |
 |
 |
Electronic Lock Puzzle Solutions
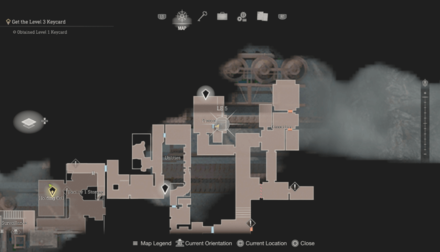
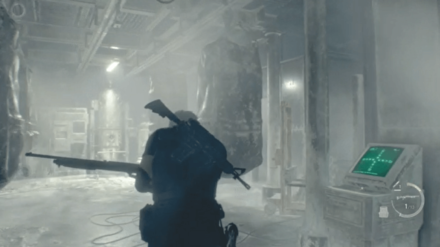
After getting the Level 1 Keycard from the Dissection Area, you can redirect the power back to the freezer area to access another Electronic Lock. You will need the Level 1 Keycard from the first Electronic Lock to access this area.
Use Shotguns Against the Regeneradors in the Meantime
Regeneradors can be encountered before you get the Bioisensor Scope. In the meantime, you can use shotguns to expose the plagas inside the Regeneradors' body before shooting them with a more accurate weapon.
Some plagas are located at the target's back, so you might need to dismember their legs so they drop drown and expose their backs.
Chapter 13 Collectibles
Clockwork Castellan
| Map Location | In-Game Location |
|---|---|
 |
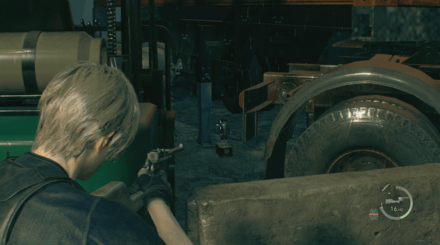 |
You can find this Clockwork Castellan in the southeasternmost area from the Surveillance section on the map. Look for the green forklift and red truck and zoom in on the gap between them to find the Castellan on the floor.
All Clockwork Castellans Locations
Yellow Herb
| Map Location | In-Game Location |
|---|---|
 |
 |
 |
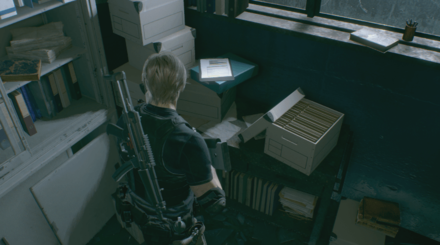 |
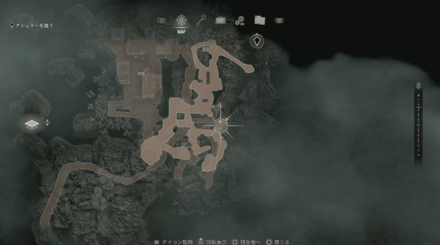
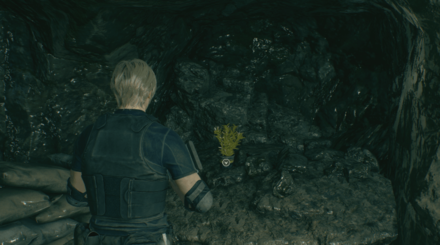
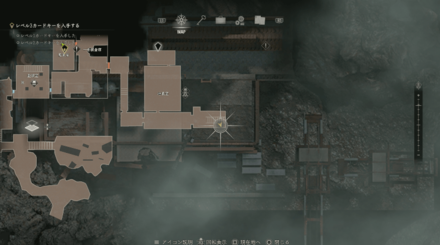
A Yellow Herb can be found in Chapter 13 in the caves of the Wharf. A second Yellow Herb can be found in the same chapter under the stairs in the Incubation Lab.
Treasures
Pearl Bangle
| Map Location | In-Game Location |
|---|---|
 |
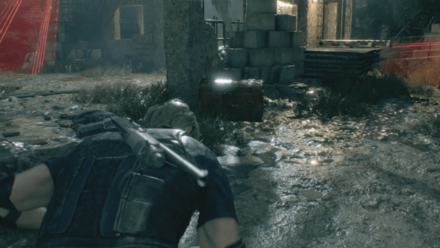 |
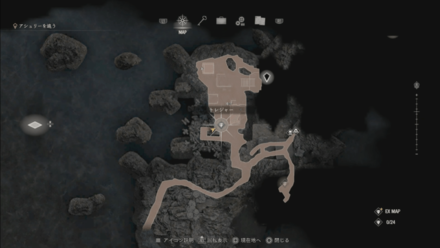
The Pearl Bangle can be obtained from a treasure chest on the ground by moving the turret on the left.
Golden Lynx
| Map Location | In-Game Location |
|---|---|
 |
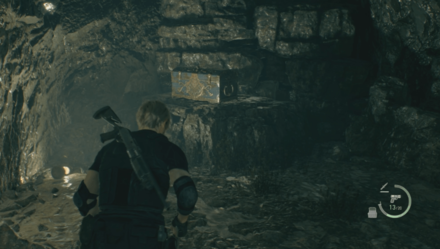 |
The Golden Lynx can be obtained behind the large door in the wharf on the second floor to the southeast cave. Shoot the explosive barrel to destroy the walls.
Elegant Crown
| Map Location | In-Game Location |
|---|---|
 |
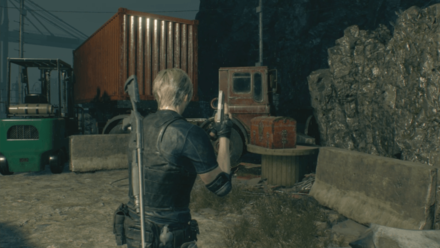 |
The Elegant Crown can be obtained from a treasure chest after defeating an enemy wielding a rocket launcher guarding a closed gate.
Velvet Blue
| Map Location | In-Game Location |
|---|---|
 |
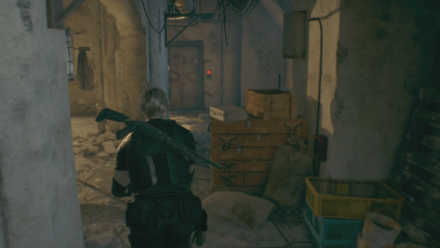 |
The Velvet Blue can be obtained from an attache case in the Surveillance room.
Velvet Blue
| Map Location | In-Game Location |
|---|---|
 |
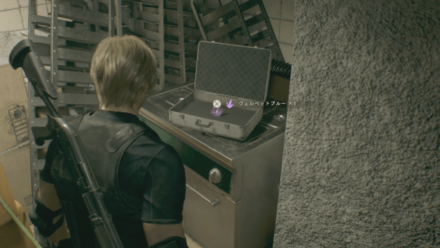 |
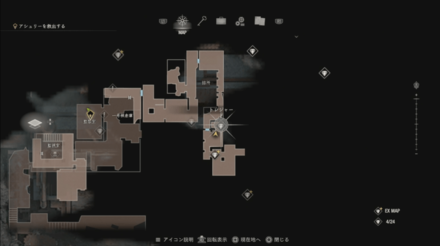
Another Velvet Blue can be obtained from an attache case in the Utilities room.
Red Beryl
| Map Location | In-Game Location |
|---|---|
 |
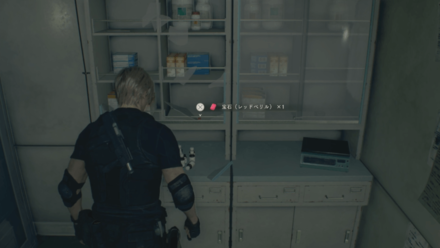 |
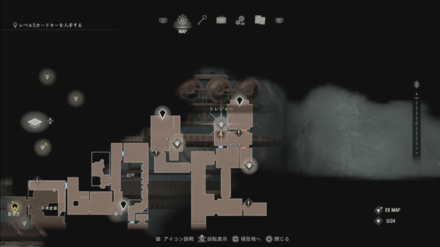
The Red Beryl can be obtained by breaking the glass in the small room on the left side of the Dissection room.
Gold Ingot
| Map Location | In-Game Location |
|---|---|
 |
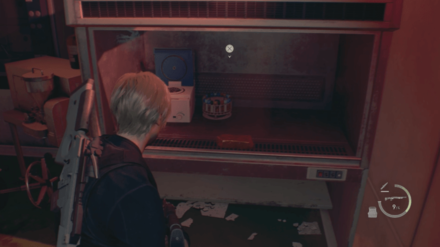 |
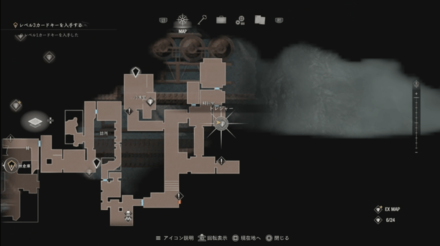
The Gold Ingot can be obtained by breaking the glass in the opposite room to the west of the Dissection room.
Biosensor Scope
| Map Location | In-Game Location |
|---|---|
 |
 |
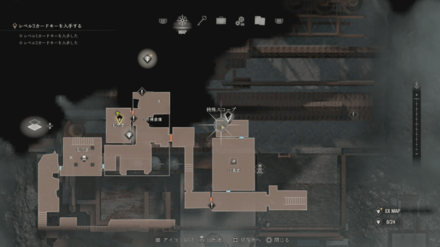
The Biosensor Scope can be found in a small room at the back of the Incubation Lab.
Hidden Treasures
| Note: Hidden Treasures only appear with the Expanded Treasure Map from the Deluxe Edition. |
Emerald
| Map Location | In-Game Location |
|---|---|
 |
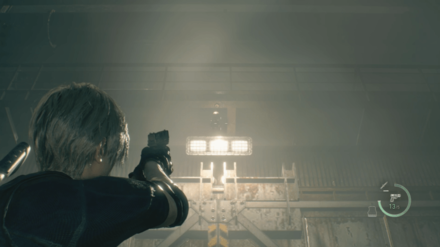 |
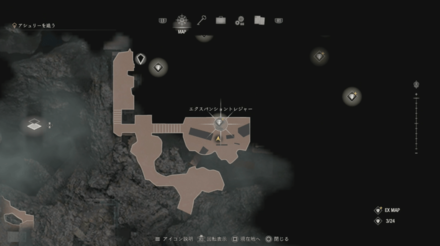
The Emerald can be obtained after defeating an enemy wielding a rocket launcher at the wharf guarding the gate. Shoot down the basket hanging above the gate.
Spinel
| Map Location | In-Game Location |
|---|---|
 |
 |
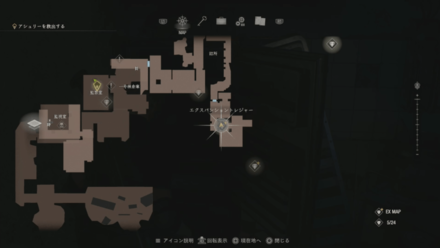
The Spinel can be obtained by shooting down the container hanging from the ceiling in the Merchant's room.
Silver Token
| Map Location | In-Game Location |
|---|---|
 |
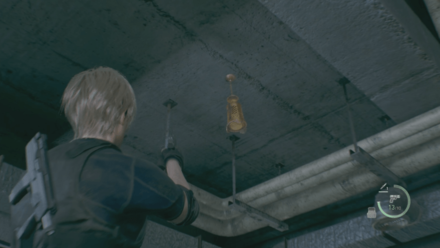 |
The Silver Token can be obtained by shooting down the container suspended from the ceiling at the bottom of the stairs leading down from Dissection to the Incubation Lab.
Resident Evil 4 Remake Related Guides

Story Walkthrough: All Chapters
Village Chapters
| All Village Chapters | |
|---|---|
| Chainsaw Demo | Chapter 1 |
| Chapter 2 | Chapter 3 |
| Chapter 4 | Chapter 5 |
| Chapter 6 | - |
Castle Chapters
| All Castle Chapters | |
|---|---|
| Chapter 7 | Chapter 8 |
| Chapter 9 | Chapter 10 |
| Chapter 11 | Chapter 12 |
Island Chapters
| All Island Chapters | |
|---|---|
| Chapter 13 | Chapter 14 |
| Chapter 15 | Chapter 16 |
Author
Chapter 13 Walkthrough
improvement survey
03/2026
improving Game8's site?

Your answers will help us to improve our website.
Note: Please be sure not to enter any kind of personal information into your response.

We hope you continue to make use of Game8.
Rankings
- We could not find the message board you were looking for.
Gaming News
Popular Games

Genshin Impact Walkthrough & Guides Wiki

Honkai: Star Rail Walkthrough & Guides Wiki

Umamusume: Pretty Derby Walkthrough & Guides Wiki

Pokemon Pokopia Walkthrough & Guides Wiki

Resident Evil Requiem (RE9) Walkthrough & Guides Wiki

Monster Hunter Wilds Walkthrough & Guides Wiki

Wuthering Waves Walkthrough & Guides Wiki

Arknights: Endfield Walkthrough & Guides Wiki

Pokemon FireRed and LeafGreen (FRLG) Walkthrough & Guides Wiki

Pokemon TCG Pocket (PTCGP) Strategies & Guides Wiki
Recommended Games

Diablo 4: Vessel of Hatred Walkthrough & Guides Wiki

Cyberpunk 2077: Ultimate Edition Walkthrough & Guides Wiki

Fire Emblem Heroes (FEH) Walkthrough & Guides Wiki

Yu-Gi-Oh! Master Duel Walkthrough & Guides Wiki

Super Smash Bros. Ultimate Walkthrough & Guides Wiki

Pokemon Brilliant Diamond and Shining Pearl (BDSP) Walkthrough & Guides Wiki

Elden Ring Shadow of the Erdtree Walkthrough & Guides Wiki

Monster Hunter World Walkthrough & Guides Wiki

The Legend of Zelda: Tears of the Kingdom Walkthrough & Guides Wiki

Persona 3 Reload Walkthrough & Guides Wiki
All rights reserved
©CAPCOM CO., LTD. ALL RIGHTS RESERVED.
The copyrights of videos of games used in our content and other intellectual property rights belong to the provider of the game.
The contents we provide on this site were created personally by members of the Game8 editorial department.
We refuse the right to reuse or repost content taken without our permission such as data or images to other sites.


![Monster Hunter Stories 3 Review [First Impressions] | Simply Rejuvenating](https://img.game8.co/4438641/2a31b7702bd70e78ec8efd24661dacda.jpeg/thumb)


