Chapter 14 Walkthrough
★ The Resident Evil Requiem wiki is now live!
☆ Learn the best ways to speedrun & reach Professional S+!
★ Discover all the Skips you can make in a single playthrough!

This is a walkthrough for Chapter 14 of Resident Evil 4 Remake (RE4). Read on for a detailed walkthrough, route maps for each objective, a list of important items obtainable, and tips on how to complete this chapter!
| ◄ Previous Chapter | Next Chapter ▶ |
|---|---|
|
Chapter 13 |
Chapter 15 |
List of Contents
Chapter 14 Basic Information
Chapter Summary
Leon and Ashley now has to find Luis' lab where they can remove the parasites from their bodies. They learn from Ada that—as one of the important facilities—the lab is possibly at the summit, which marks their next destination.
Chapter Details
| Chapter 14 | |
|---|---|
| Location | Cargo Depot Facility 2 Waste Disposal Amber Storeroom Campsite |
| Recommended Weapons |
LE 5
Stingray Striker Killer7 |
Enemies Encountered
 Ganados (Villagers) Ganados (Villagers)
|
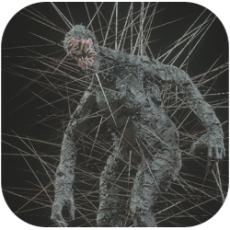 Iron Maiden Iron Maiden
|
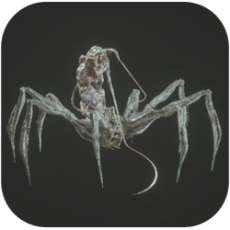 Parasite Parasite
|
 Krauser Krauser
|
Chapter 14 Walkthrough
Chapter Objectives
| Objectives | |
|---|---|
| 1 | Make your way to the summit |
| 2 | Go after Ashley |
| 3 | Defeat Krauser |
Make Your Way to the Summit
| Route Map | |
|---|---|
 |
 |
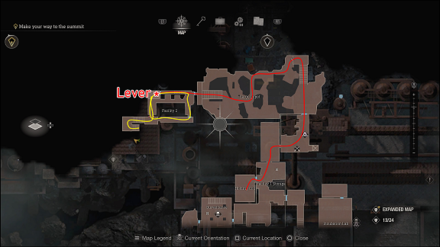
Reach Facility 2
Exit the room and give Ashley a boost so she can unlock the room north. To your right is a merchant room and the Destroy the Blue Medallions 5 request at the entrance.
Pass through the blue doors near the merchant to enter the Cargo Depot. Go up the stairs ahead and turn right to find a ladder you can drop down from that will take you to the other side of the yard. Head to the far west end of the depot and go up the stairs leading to Facility 2.
Defeat the Iron Maiden
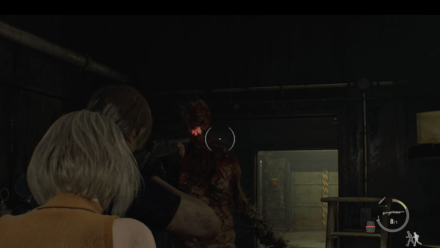
Clear the enemies in the room first then go up the stairs to your right to a control room. Order Ashley to hold the lever down then jump out the window.
Wait for the door to open and enter the narrow pathway. Run all the way to the other end to open a shortcut. At this point, more enemies will storm the room and try to capture Ashley.
When it's clear, call Ashley over and take the flight of stairs up on the southwest corner of the facility.
Find the sewage room by heading southeast and drop down. Cross to the other side through the small opening beneath the pipes and interact with the levers on the door.
The two levers must be pulled when their respective arrows go inside the red rectangle. Once inside, you can order Ashley to hide inside the locker while you take on the new elite enemy—Iron Maiden.
It will attack like a normal Regenerador at first but will release needles all over its body when it's down to its last plaga.
Restore Power to the Gate
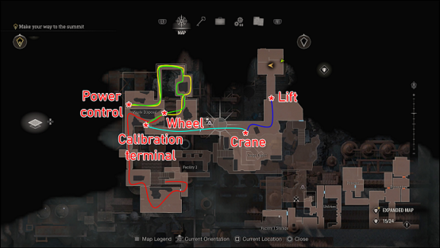
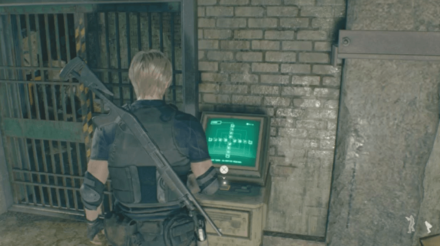
Call Ashley over and open the gate ahead with a smaller unlock zone. On the other side, get Ashley to turn the wheel to raise the bridge. Cross the bridge, turn left, and follow the path to the end until you see a switch that will reroute the power.
Immediately turn left after using the switch and shoot the enemies that will try to come for Ashley.
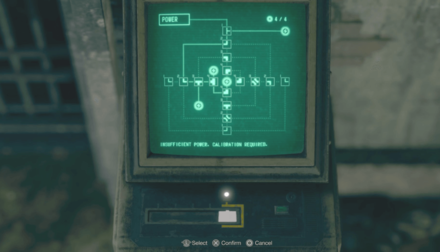
Solve the Electronic Lock Puzzle
| Solution | |
|---|---|
 |
|
| Map | Location |
 |
 |
Electronic Lock Puzzle Solutions
Run back to Ashley and check the terminal that has been turned on. Solve the calibration puzzle and pass through the gate.
Follow the path until you reach the next merchant room where you'll also find the Even More Pest Control request. Jump down the yard and interact with the crane to proceed.
Protect Ashley Until the Wall is Destroyed
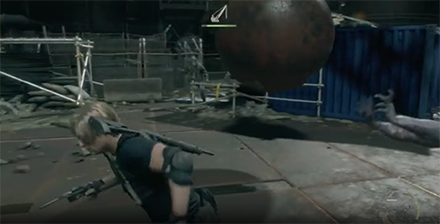
You must survive the next waves of enemies while also protecting Ashley and the crane to complete this objective. The enemies will stop coming once the wall is taken down.
You can use the large iron ball attached to the crane to take out enemies and save ammo.
Ride the Lift Up
Go to the next area and check the box on the left to find The Wandering Dead request. The gate to your right is a shortcut back to where you started the chapter.
Interact with the console and wait for the lift that will take you to the next area. Pass through the blue doors ahead and follow the path to find a large amber. Interact with the amber to trigger a cutscene.
Go After Ashley
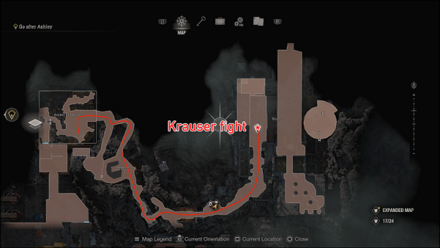
| Route Map |
|---|
 |
Follow Saddler
Follow Saddler's tracks through the gate and head down the campsite. You'll find a tent on the other side that will continue the path and lead you to the next merchant.
Reach Krauser
Further down the path, you will run into Krauser again. He will attack you from afar this time using his own submachine gun and explosive arrows. Shooting him a few times will make him charge at you and initiate a knife fight (though you can still use your other weapons). Deal enough damage to make him retreat and leave you alone for a while.
Enter the next building and go upstairs where you'll find a wheel that will raise the marked gate downstairs. Head back down and enter the maze.
Follow the path ahead until you find the first proximity mine. This maze is filled with these explosives, in addition to bear traps and turrets, that you can either avoid or shoot. Go to the other side and drop down.
You'll find another mine that you must shoot from the alcove where the crate is to destroy. Proceed through the next path lined with a bear trap and another mine. Watch out for Krauser shooting from above as well.
Turn left immediately and shoot down the turret ahead. Walk towards where the turret was and look for a passageway on your right then shoot the mine blocking it. Turn back and go around the other side where another turret is placed then pass through the path where the mine was.
Continue following the path to reach an area where Krauser will spam explosive arrows from above. There are covers you can use here but most of them unfortunately won't last for more than one arrow. After reaching Krauser, he will toss down grenades at you so step back a little.
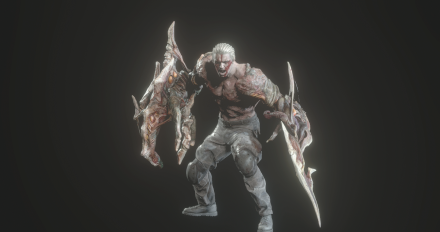
Go up the stairs and Krauser will initiate another knife fight. Defeat him here and he will transform and reveal his plaga.
Defeat Krauser
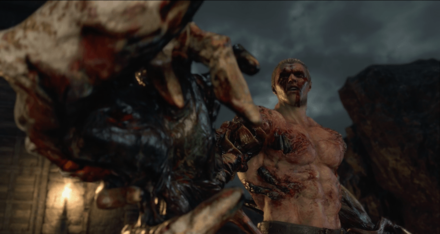
Make your way through the corridors until you get back outside. Krauser will attack you along the way so be prepared to parry and dodge. Once you're out, climb the ladder ahead to start the real fight.
Don't be intimidated by his blades. As long as you have strong parry game, he's good as smoked. Keep on parrying his melee attacks then get in some shots, preferably from a magnum, while he's staggered.
Occasionally, Krauser will jump out of the scene and prepare a plunging attack. You'll want to climb the ladder on either side to avoid this arena-wide attack.
Defeating Krauser rewards you with a cool knife, the Fighting Knife, and lowers the gate to the next chapter.
How to Beat Krauser (Transformed)
| ◄ Previous Chapter | Next Chapter ▶ |
|---|---|
|
Chapter 13 |
Chapter 15 |
Chapter 14 Tips and Strategies
| Chapter 14 Tips and Strategies |
|---|
|
|
Keep Your Distance From the Iron Maiden
The Iron Maiden is an elite-type Regenerador that can shoot spikes from a distance and has more durability. Due to the spikes growing out of its body, you can actually take damage if you get too close to it.
Lastly, if it's about to do its explosive death animation, take cover as the Iron Maiden will also release spikes around.
Chapter 14 Requests
Destroy the Blue Medallions 5
| Map View | In-Game View |
|---|---|
 |
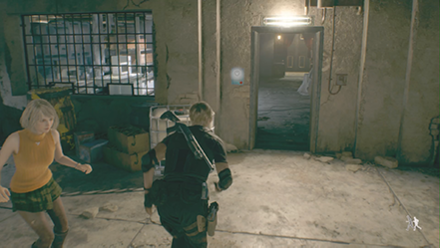 |
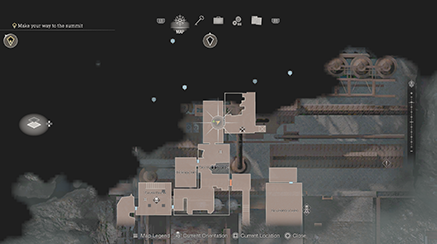
The Destroy the Blue Medallions 5 request note is located by the entrance of the Merchant shop.
Destroy the Blue Medallions 5 Request
Even More Pest Control
| Map View | In-Game View |
|---|---|
 |
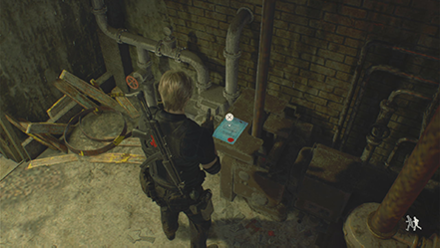 |
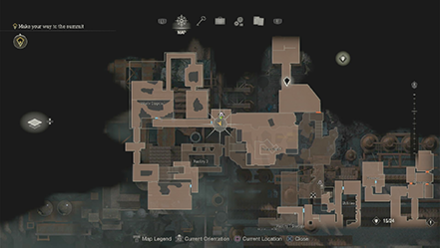
The Even More Pest Control request is found on top of a crate near the merchant located east of the Waste Disposal.
Even More Pest Control Rat Locations
The Wandering Dead
| Map View | In-Game View |
|---|---|
 |
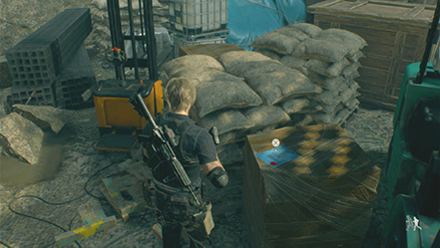 |
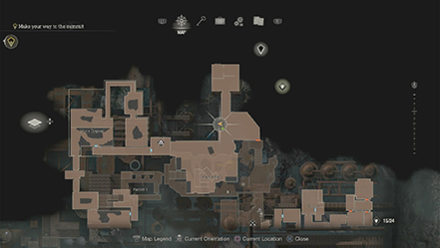
The request for The Wandering Dead is located on top of one of the crates directly north of the Crate Depot area in Chapter 14.
The Wandering Dead Location and How to Complete
Chapter 14 Collectibles
Clockwork Castellans
| Map Location | In-Game Location |
|---|---|
 |
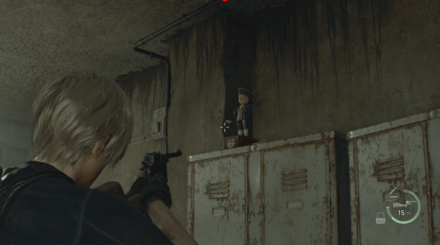 |
You can find this Clockwork Castellan past the Amber Storeroom, right before the Campsite. Before dropping down into the Campsite, turn around and enter the nearby building to find the Castellan on top of some lockers.
All Clockwork Castellans Locations
Yellow Herb
| Map Location | In-Game Location |
|---|---|
 |
 |
 |
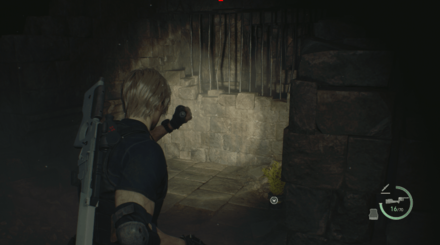 |
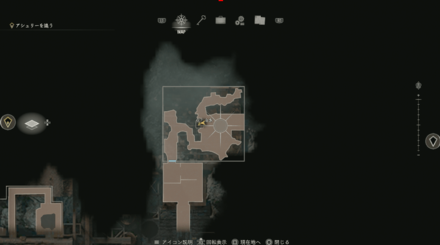
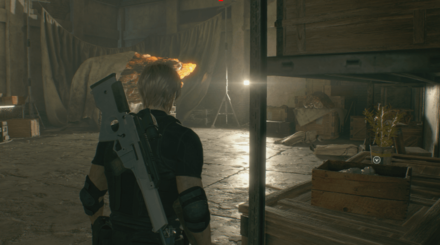
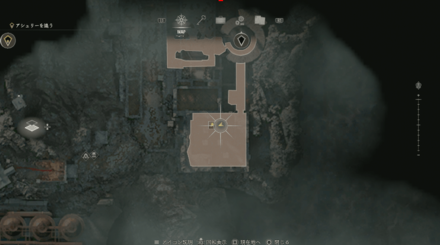
A Yellow Herb can be found in Chapter 14 in a shelf in the Amber Storeroom. A second Yellow herb can be found in the same chapter in the ruins after Krauser transforms.
Treasures
Crystal Ore
| Map Location | In-Game Location |
|---|---|
 |
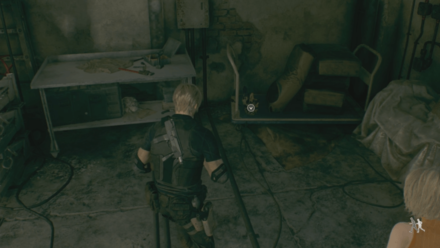 |
The Crystal Ore can be obtained at the corner of the Holding Cell where Ashley was imprisoned.
Alexandrite
| Map Location | In-Game Location |
|---|---|
 |
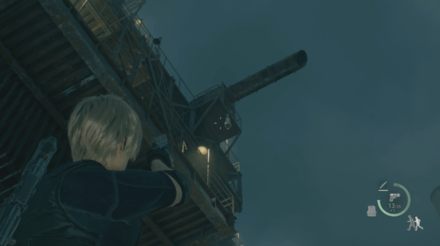 |
The Alexandrite can be obtained by shooting the container right above you after entering the Cargo Depot.
Gold Bangle
| Map Location | In-Game Location |
|---|---|
 |
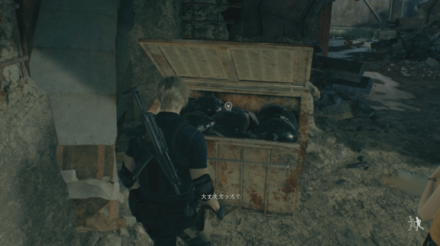 |
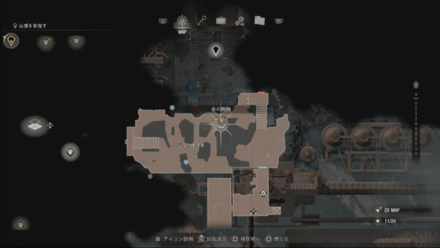
The Gold Bangle can be obtained from the dumpster on the left after descending the ladder in the Cargo Depot.
Ornate Necklace
| Map Location | In-Game Location |
|---|---|
 |
 |
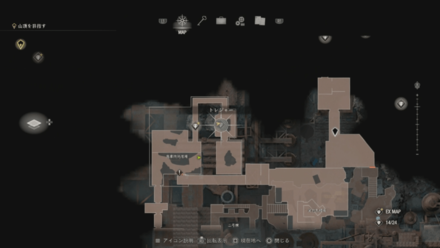
The Ornate Necklace can be obtained from an attache case in the control room of Waste Disposal.
Crystal Ore
| Map Location | In-Game Location |
|---|---|
 |
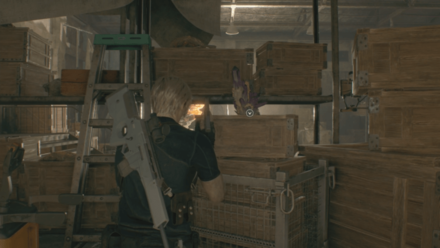 |
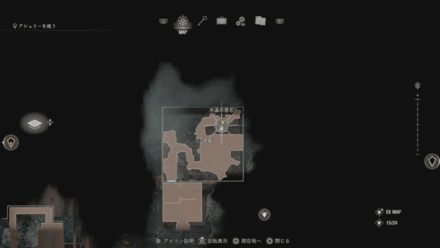
Another Crystal Ore can be obtained from a shelf in the northeast of the Amber Storeroom.
Gold Bar (L)
| Map Location | In-Game Location |
|---|---|
 |
 |
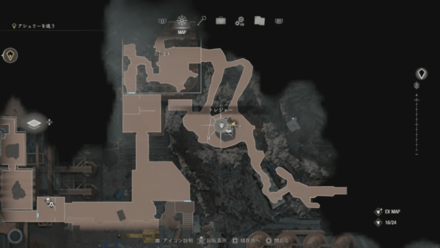
The Gold Bar (L) can be obtained from a treasure chest inside a tent.
Hidden Treasures
| Note: Hidden Treasures only appear with the Expanded Treasure Map from the Deluxe Edition. |
Accessory Hair Color Blue
| Map Location | In-Game Location |
|---|---|
 |
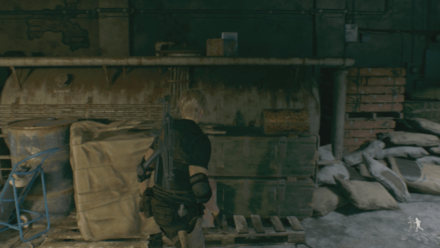 |
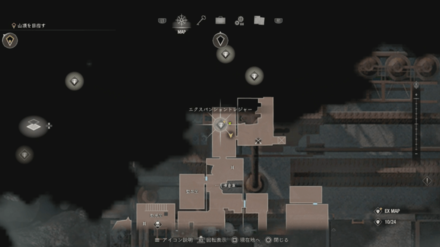
The Accessory Hair Color Blue can be obtained from a treasure chest on top of some boxes north of Facility 1 Storage.
Gold Token
| Map Location | In-Game Location |
|---|---|
 |
 |
The Gold Token can be obtained from a treasure chest on top of some boxes north of Facility 1 Storage.
Ruby
| Map Location | In-Game Location |
|---|---|
 |
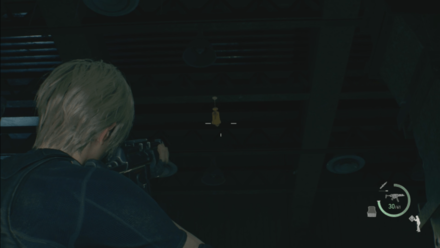 |
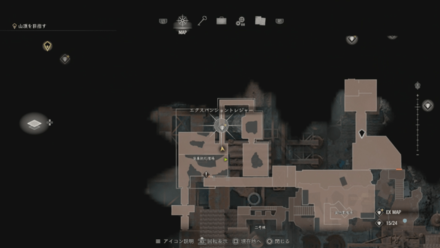
The Ruby can be obtained by having Ashley assist you at the Waste Disposal site to make a path. Shoot the container hanging from the bridge.
Spinel
| Map Location | In-Game Location |
|---|---|
 |
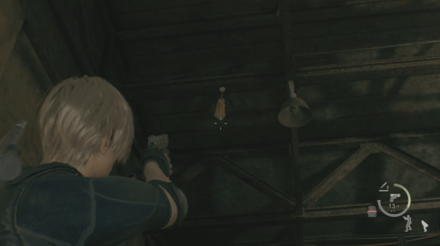 |
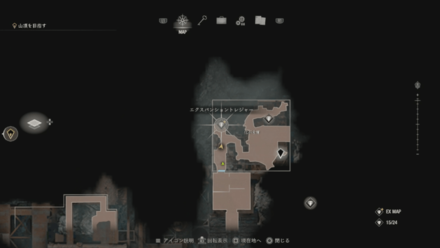
The Spinel can be found suspended in a container near the large box in the Amber Storeroom.
All Island Hidden and Expanded Map Treasures
Chapter 14 Bosses
Iron Maiden
 |
|
| First Chapter Appearance | |
|---|---|
Iron Maidens are Regenerators that are more persistent than them. They can attack using spikes hidden on their bodies and also come back to life even after destroying all of their Plagas in their bodies.
How to Beat Iron Maiden
- Use the Same Strategy against Regenerators
- Go for Follow-up Attacks to confirm the kill
- Keep Your Distance at all times
Krauser (Transformed)
 |
|
| Rewards | Fighting Knife |
|---|---|
| Chapter |
Chapter 14 |
How to Defeat Krauser (3rd Encounter)
- Stock Up on Items
- Use Shotgun or Fully Automatic Weapons
- Avoid the Middle Area When He's Leaping
How to Beat Krauser (Transformed)
Resident Evil 4 Remake Related Guides

Story Walkthrough: All Chapters
Village Chapters
| All Village Chapters | |
|---|---|
| Chainsaw Demo | Chapter 1 |
| Chapter 2 | Chapter 3 |
| Chapter 4 | Chapter 5 |
| Chapter 6 | - |
Castle Chapters
| All Castle Chapters | |
|---|---|
| Chapter 7 | Chapter 8 |
| Chapter 9 | Chapter 10 |
| Chapter 11 | Chapter 12 |
Island Chapters
| All Island Chapters | |
|---|---|
| Chapter 13 | Chapter 14 |
| Chapter 15 | Chapter 16 |
Author
Chapter 14 Walkthrough
improvement survey
03/2026
improving Game8's site?

Your answers will help us to improve our website.
Note: Please be sure not to enter any kind of personal information into your response.

We hope you continue to make use of Game8.
Rankings
- We could not find the message board you were looking for.
Gaming News
Popular Games

Genshin Impact Walkthrough & Guides Wiki

Honkai: Star Rail Walkthrough & Guides Wiki

Umamusume: Pretty Derby Walkthrough & Guides Wiki

Pokemon Pokopia Walkthrough & Guides Wiki

Resident Evil Requiem (RE9) Walkthrough & Guides Wiki

Monster Hunter Wilds Walkthrough & Guides Wiki

Wuthering Waves Walkthrough & Guides Wiki

Arknights: Endfield Walkthrough & Guides Wiki

Pokemon FireRed and LeafGreen (FRLG) Walkthrough & Guides Wiki

Pokemon TCG Pocket (PTCGP) Strategies & Guides Wiki
Recommended Games

Diablo 4: Vessel of Hatred Walkthrough & Guides Wiki

Fire Emblem Heroes (FEH) Walkthrough & Guides Wiki

Yu-Gi-Oh! Master Duel Walkthrough & Guides Wiki

Super Smash Bros. Ultimate Walkthrough & Guides Wiki

Pokemon Brilliant Diamond and Shining Pearl (BDSP) Walkthrough & Guides Wiki

Elden Ring Shadow of the Erdtree Walkthrough & Guides Wiki

Monster Hunter World Walkthrough & Guides Wiki

The Legend of Zelda: Tears of the Kingdom Walkthrough & Guides Wiki

Persona 3 Reload Walkthrough & Guides Wiki

Cyberpunk 2077: Ultimate Edition Walkthrough & Guides Wiki
All rights reserved
©CAPCOM CO., LTD. ALL RIGHTS RESERVED.
The copyrights of videos of games used in our content and other intellectual property rights belong to the provider of the game.
The contents we provide on this site were created personally by members of the Game8 editorial department.
We refuse the right to reuse or repost content taken without our permission such as data or images to other sites.


