Best Paladin Wand / Greatsword (GS) PvE Build
As of March 2025, Game8 has ended coverage of Throne and Liberty.
Thank you very much for your understanding and we hope you continue to enjoy Game8's guides!
This Paladin Wand and Greatsword (GS) build for Throne and Liberty (TL) combines the Greatsword and Wand's crowd control to deal damage-enhanced charge attacks while keeping yourself healthy. Read on to learn how to use the Paladin Greatsword and Wand build, including the best gears to equip, skill rotations, traits, and more.
 Attention! Attention! |
This build was last updated on December 2024; changes to the game since then have not been reflected in this build. |
|---|
| All Paladin Wand / Greatsword Builds | |
|---|---|
| Best Paladin Wand / Greatsword PvP Build | Best Paladin Wand / Greatsword PvE Build |
List of Contents
Paladin Wand / Greatsword Build Overview
Build Summary
| Jump to a Section | |||
|---|---|---|---|
This Wand / Greatsword build has two main words going for it: Crowd Control. It combines the Greatsword's ability to Stun/Shock with the Wand's ability to inflict Sleep, giving you free reign to deal massive damage with charged skills.
The build's playstyle revolves around sequencing your crowd control skills to maximize the amount of idle time your opponent suffers. While the enemy is recovering, that is your time to charge up your skills, allowing you to reap additional benefits such as increased damage and guaranteed Criticals.
In terms of DPS, this build only has the Greatsword's ability to deal burst damage to Sleeped/Stunned/Shocked opponents, so it is lacking in dealing consistent DPS to a single target and clearing multiple opponents since you do not have skills with low cooldowns. Having no cleanses for CC is also a blaring weakness this build suffers.
Stat Allocation
| Stat | Total | Points From Lvl. | Points From Gear |
|---|---|---|---|
| Strength | 51 | 16 | 25 |
| Dexterity | 30 | 20 | 0 |
| Wisdom | 30 | 13 | 7 |
| Perception | 10 | 0 | 0 |
| Fortitude | 10 | 0 | 0 |
| Stat | Total | Points From Lvl. | Points From Gear |
|---|---|---|---|
| Strength | 50 | 23 | 17 |
| Dexterity | 35 | 7 | 18 |
| Wisdom | 40 | 15 | 15 |
| Perception | 40 | 5 | 25 |
| Fortitude | 10 | 0 | 0 |
| Stat | Total | Points From Lvl. | Points From Gear |
|---|---|---|---|
| Strength | 70 | 19 | 41 |
| Dexterity | 31 | 3 | 18 |
| Wisdom | 50 | 19 | 21 |
| Perception | 40 | 8 | 22 |
| Fortitude | 10 | 0 | 0 |
Note: Base stats are always 10!
Regarding spec-ing your Stat Points, always prioritize getting 70 Strength for more survivability and the additional Heavy Attack Chance, letting you reach ludicrous amounts of burst damage and lessen Valiant Brawls Cooldown. The second priority would be 50 Wisdom to patch up some mana and Cooldown problems! Third, try and get 40 Perceptio for the additional Hit Chance and Buff Duration. Top the build off with 30 Dexterity for the increased Crit Chance.
Skills and Specialization
| Jump to a Section | |||
|---|---|---|---|
| Active Skills | |||||||
|---|---|---|---|---|---|---|---|
 Valiant Brawl Valiant Brawl Valiant Brawl Attacks 3 times in a row, each attack dealing 110% of Base Damage + 9 damage. 1--% more damage against Bosses. Every time a hit becomes a heavy attack, the remaining cooldown decreases by 20%.
▼  Cruel Smite Cruel Smite Cruel Smite Attacks 3 times in a row, each attack dealing 110% of Base Damage + 9 damage. 120% more damage against monsters. Every time a hit becomes a heavy attack, the remaining cooldown decreases by 20%. On Critical Hit or Heavy Attack, deals 88% +7 damage to the target within a 3m radius area.
|
Cruel Smite Attacks 3 times in a row, each attack dealing 110% of Base Damage + 9 damage. 100% more damage against Bosses. Every time a hit becomes a heavy attack, the remaining cooldown decreases by 20%. If the attack lands as a Critical Hit or heavy attack, deals 88% + 7 damage to the target within a 3m radius area. |
||||||
 Stunning Blow Stunning Blow Stunning Blow Deals 150% of Base Damage, with an 80% chance to Stun the target for 1.8s. Targets immune to Stun are Shocked for 4.2s. Every successful heavy attack sets Stun duration to 2.3s, and Shock duration to 5.2s
|
Cooldown ▼ Skill Cooldown decreases by 15%. |
||||||
 Death Blow Death Blow Death Blow Deals damage equal to 390% of Base Damage + 89. Against Bound, Sleeping, Shocked, or Stunned targets, damage increases by 30%. The damage is amplified by 80% against bosses.
▼  Death Blow Death Blow Death Blow Deals damage equal to 390% of Base Damage +82. Against Bound, Sleeping, Shocked or Stunned targets, damage increases by 30%. The damage increases up to 100% proportional to the charging time. The damage is amplified by 100% against monsters.
|
Damage Collection Damage increases by 100% based on collection time. Cooldown ▼ Skill Cooldown decreases by 15%. |
||||||
 DaVinci's Courage DaVinci's Courage DaVinci's Courage For party members within a 15m range, Max Health 480 ▲, Health Regen 120 ▲, and Attack Speed 15% ▲ for 12s.
|
Instant Healing Recovers Health by 200% of Base Damage + 200. Damage Reduction Damage Reduction increases by an additional 25. Cannot be stacked with DaVinci’s Chill Specialization. Duration ▲ Effect Duration increases by 3s. |
||||||
 Willbreaker Willbreaker Willbreaker Deals 100% of Base Damage to all enemies within a 3m semicircle and applies Weaken that decreases Melee, Ranged, and Magic Defense by 300 for 6s.
|
- | ||||||
 Ascending Slash Ascending Slash Ascending Slash Deals damage equal to 265% of Base Damage + 54. Applies Collision: Prone with a 80% chance against Bound, Sleeping, or Stunned targets, or those using Static Defense, for 2.5. For each Heavy Attack, Collision: Prone duration increases by 1s.
|
Additional Damage Boost Skill Damage Boost of the skill used next within 5s increases by 250. Cooldown ▼ Skill Cooldown decreases by 15%. |
||||||
 Devastating Smash Devastating Smash Devastating Smash Jump at a target and slash down with a Greatsword, dealing damage equal to 230% +49 to all targets within a 3m radius. Has a 42% chance to Stun the target for 2s.
|
- | ||||||
 Guillotine Blade Guillotine Blade Guillotine Blade A special growth skill that can only be grown with Precious Training Books: Omnipotence. Deals 630% of Base Damage + 80 damage. Deals 819% of Base Damage +104 damage to Collision: Prone or Shocked Targets. The damage is amplified by 100% against bosses. On hit, Weakens the target, decreasing Incoming Heal by 60% for s.
▼  Guillotine Blade Guillotine Blade Guillotine Blade A special skill that can only be grown with Precious Training Books: Omnipotence. Deals 630% of Base Damage + 80 damage. Deals 819% of Base Damage + 104 damage to Collision: Prone or Shocked targets. The damage is amplified by 120% against monsters. On hit, Weakens the target, decreasing Incoming Heal by 60% for 6s. The damage increases up to 100% in proportional to the charging time.
|
Cooldown ▼ Skill Cooldown decreases by 15%. Area Damage Inflicts 630% of Base Damage + 80 damage to a 3m radius area around the target if the attack is Critical or Heavy Attack hit. Damage Collection Deals 630% of Base Damage + 80 damage. Deals 819% of Base Damage + 104 damage to Collision: Prone or Shocked targets. The damage is amplified by 100% against bosses. On Hit, Weakens the target, decreasing Incoming Heal by 60% for 6s. The damage increases up to 100% in proportional to the collection time. |
||||||
 Swift Healing Swift Healing Swift Healing Heals friendly targets’ Health by 310% of Base Damage + 29. Can be used up to 2 times consecutively, and Mana Cost increases upon consecutive uses.
|
Range ▲ The use range increases by 5m. Healing Transfer Additionally heals self by 50% of the total heal. |
||||||
 Cursed Nightmare Cursed Nightmare Cursed Nightmare Fury Attack: Has an 80% chance to decrease Attack Speed and Move Speed by 30% for 3s, and Sleep: Curse for 3.2s afterwards (10s for monsters). Hitting a Sleeping target becomes a Critical Hit, and wakes the target.
▼  Cursed Nightmare Cursed Nightmare Cursed Nightmare Has a 80% chance to decrease Attack Speed and Move Speed by 30% for 3s, and Sleep: Curse for 3.2s afterwards (10s for monsters). Hitting a Sleeping target becomes a Critical Hit, and wakes the target.
|
Enhanced Nightmare Instantly falls asleep unless affected by Move Speed decrease. Cannot be stacked with Enhanced Mire Specialization. Deep Sleep Can be removed if attacked twice while Sleeping. |
||||||
 Time for Punishment Time for Punishment Time for Punishment Has a 90% chance to apply Weaken: Curse that decreases Skill Damage Resistance 80 for 9s.
▼  Enchanting Time Enchanting Time Enchanting Time Friendly target's Skill Damage Boost increases by 80 for 9s.
|
Effect Duration ▲ Duration increases by 3s. Enchanting Time Friendly target’s Skill Damage Boost increases by 80 for 9s. Cannot be stacked with Burning Time Specialization. |
||||||
 Karmic Haze Karmic Haze Karmic Haze Weakens the target and has an 80% chance to spread the Curse from the main target up to 3 other targets within a 5m range.
|
Range ▲ Karmic Haze’s curse transfer range increases by 2m. Cannot be stacked with Unlucky Clock Specialization. |
||||||
| Passive Skills | |||||||
 Robust Constitution Robust Constitution Robust Constitution Health Regen 10 ▲ and Max Health 470 ▲.
|
 Cold Warrior Cold Warrior Cold Warrior Against Shocked or Stunned targets, Magic, Melee, and Ranged Heavy Attack chances increase by 120 and Magic, Melee, and Ranged Critical Hit increase by 105.
|
 Vital Force Vital Force Vital Force Magic, Melee, and Ranged Hit 0.62 ▲, Skill Damage Boost 0.07 ▲, and Stun Chance 0.425 ▲ pero 100 of Max Health.
|
 Raging Frenzy Raging Frenzy Raging Frenzy If there are 3 or more enemies within a 5m radius, Skill Damage Boost 50 ▲.
|
||||
 Indomitable Armor Indomitable Armor Indomitable Armor Has a 25% chance to increase Magic, Melee, and Ranged Defense by 140 for 2s on being hit. Stacks up to 3 times.
|
 Devotion and Emptiness Devotion and Emptiness Devotion and Emptiness Skill heal 8% ▲ and Skill cooldown 10% ▼ during the day. Skill Damage over time 8% ▲ and Curse Skill cooldown 10% ▼ at night.
|
 Noble Revival Noble Revival Noble Revival Skill Heal 1.76% ▲ per 1,000 Max Mana.
|
 Selfless Soul Selfless Soul Selfless Soul Increases Mana Regen by 21.2 and Skill Heal by 4% per stack for 3s when you apply Heal and Regen with Active Skills to a friendly target. Stacks up to 5 times.
|
||||
| Defensive Skill | |||||||
 Iron Point Parry Iron Point Parry Iron Point Parry Defends against attacks. Increases Skill Damage Boost by 11% for skills used within 5s after defeating against a Fury Attack while stationary. Deals damage equal to 230% of Base Damage + 27 to targets within Attack Range, and Iron Point Parry changes to Murderous Draw on Defending against a Fury Attack within 0.5s, deals damage with a 80% chance to Stun the target for 3. Targets immune to Stun are Shocked for 6s. Wrath Attacks can’t be defended. Use with the directional buttons to defend against attacks while moving 4m in the designated direction for 0.5s. Upon defending against a Fury or Wrath Attack, Charging Draw is activated for 3s.
|
|||||||
Active Skills
The Greatsword skills included for this build have a heavy emphasis on the Stun/Shock mechanic. Skills such as Stunning Blow and Ascending Slash naturally synergize with Death Blow and Guillotine Blade, dealing multiplicative damage if sequenced correctly.
DaVinci's Courage is one of the key skills for this build as it provides passive sturdiness and increased AS (Attack Speed). Willbreaker then provides a damage increase by stripping the overall defense of enemies on hit. Devastating Smash was included as a filler but can be swapped for alternatives.
The Wand skills are mainly included as a means to support the Greatsword's capabilities by extending crowd-control with Cursed Nightmare and Karmic Haze, providing self-sustain with Swift Healing, and enhancing damage with Time for Punishment. The reason for running this build is actually due to Cursed Nightmare as it increases damage for Death Blow and Cruel Smite.
Prioritize leveling up your Greatsword skills first alongside Time for Punishment as these skills are the main part of your skill rotation. After doing so, level up Cursed Nightmare and Swift Healing before Karmic Haze for further support of the build with CC and survivability.
Passive Skills
This build utilizes a 5/3 split between Greatsword and Wand passives, all of which try to enhance this build's damage, defense, and healing.
The two best passives that you should prioritize leveling are Robust Constitution and Vital Force as these allow you to scale your main damage stats with your health. Cold Warrior is a close third as it improves the build's primary goal, hitting Heavy Attacks and Critical Hits. Raging Frenzy is then added to improve your mobbing capabilities, while Indomitable Armor provides you with more defense.
The first Wand passive you should level is Devotion and Emptiness since it provides percentage bonuses to Skill Heal or Damage. Prioritize Selfless Soul next since it perfectly pairs with DaVinci's courage, providing you with more Mana Regen upon skill activation. Noble Revival then provides you with more healing from your skills but is interchangeable with other passives.
Active and Passive Alternatives
| Active Skill | Specialization | ||
|---|---|---|---|
 Cursed Nightmare Cursed Nightmare Cursed Nightmare Fury Attack: Has an 80% chance to decrease Attack Speed and Move Speed by 30% for 3s, and Sleep: Curse for 3.2s afterwards (10s for monsters). Hitting a Sleeping target becomes a Critical Hit, and wakes the target.
|
> |
 Invincible Wall Invincible Wall
|
|
 Karmic Haze Karmic Haze Karmic Haze Weakens the target and has an 80% chance to spread the Curse from the main target up to 3 other targets within a 5m range.
|
> |
 Blessed Barrier Blessed Barrier Blessed Barrier Friendly target’s Magic, Melee, and Ranged Defense increase by 1,120 for 6s. Incoming Heal increases by 27% during the day, and Magic, Melee, and Ranged Endurance increase by 270 at night. The increased amount will be multiplied by 2 for 2s after the effect is activated.
|
Effect Duration ▲ Skill duration increases by 1s. |
 Devastating Smash Devastating Smash Devastating Smash Jump at a target and slash down with a Greatsword, dealing damage equal to 230% +49 to all targets within a 3m radius. Has a 42% chance to Stun the target for 2s.
|
> |
 Fountain of Life Fountain of Life Fountain of Life A special growth skill that can only be grown with Precious Training Books: Omnipotence. Creates a 3m radius area at the designated location for 6s. Part members within the area recover 65% of Base Damage + 42 every 0.5s.
|
- |
 Devastating Smash Devastating Smash Devastating Smash Jump at a target and slash down with a Greatsword, dealing damage equal to 230% +49 to all targets within a 3m radius. Has a 42% chance to Stun the target for 2s.
|
> |
 Blood Devotion Blood Devotion Blood Devotion A special skill that can only be grown with Precious Training Books: Omnipotence. Takes 40% of the damage intended for the designated party member for 6s. Only 100% of damage taken applied.
|
- |
| Passive Skill | Explanation | ||
 Noble Revival Noble Revival Noble Revival Skill Heal 1.76% ▲ per 1,000 Max Mana.
|
> |
 Saint's Oath Saint's Oath Saint's Oath On taking Skill Damage, has an 20% chance to apply Amitoi Heal, Incoming Heal, Recovery Crystal Heal, and Skill Heal 8% ▲ for 3s. Stacks up to 5 times.
|
When you can benefit off a heal from your team's designated healer. |
 Noble Revival Noble Revival Noble Revival Skill Heal 1.76% ▲ per 1,000 Max Mana.
|
> |
 Wraith's Beckon Wraith's Beckon Wraith's Beckon Increases the duration of your Curses by 1.2, and Curse chance increases by 4%.
|
When you need more skill duration for Cursed Nightmare for a skill rotations. Often only during early progression |
Depending on the situation, you can change Cursed Nightmare, Karmic Haze, or Devastating Smash with these skills if they do not apply:
 Invincile Wall - When an opponent has moves that cannot be parried.
 Blessed Barrier - When you need more passive healing from your skills.
 Fountain of Life - When you need to provide extra survivability for you and your team.
 Blood Devotion - When a member with high DPS is getting burst down and you have the means to take more damage.
Best Weapons
| Jump to a Section | |||
|---|---|---|---|
| Primary Weapon | |
|---|---|
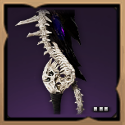 Tevent's Warblade of Despair Tevent's Warblade of Despair Tevent's Warblade of Despair Strength 4
Dexterity 3 Stun Chance 42 |
・Heavy Attack +80 ・Critical Hit +80 ・Hit +80 |
| Weapon Effect | Upon applying Collision, Shock, or Stun with Greatsword Skills, creates an area with a 1.5m radius around the target will be created that explodes in 1.5s, dealing 325% of Base Damage. |
The primary weapon for this build will be Tevent's Warblade of Despair as it provides us an essential increase to Critical Hit Chance, Max Health, and Weaken Chance. Not only that, but Tevent's Despair Trap provides even more damage, especially when applying Crowd Control on enemies..
The best traits to give Tevent's Warblade of Despair would be Heavy Attack, Hit, and Critical Hit. Prioritize farming for Heavy Attack to further increase the chances of x2 damage. If you would like to have more chances for a stun, it is okay to have Stun Chance as an alternative to Hit.
| Secondary Weapon | |
|---|---|
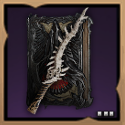 Tevent's Grasp of Withering Tevent's Grasp of Withering Tevent's Grasp of Withering Wisdom 4
Critical Hit 60 Cooldown Speed +19% |
・Heavy Attack +80 ・Critical Hit +80 ・Hit +80 |
| Weapon Effect | Applying Curse has a 15% chance of applying Weaken: Curse, which deals 35% of base damage over time every s for 30s |
The secondary weapon for this build will be Tevent's Grasp of Withering as it also provides us with Max Health, Weaken Chance, and Critical Hit Chance. Furthermore, Tevent's Hunger applies a DoT whenever you apply a Curse with your Wand skills..
The best traits to give Tevent's Grasp of Withering would be Heavy Attack, Hit, and Critical Hit; again getting as much Heavy Attack as possible.
Best Armors and Accessories
| Jump to a Section | |||
|---|---|---|---|
| Armors | |
|---|---|
 Ascended Guardian Hood Ascended Guardian Hood Ascended Guardian Hood Perception 4
Cooldown Speed +3.1% |
・Melee Endurance +160 ・Magic Endurance +160 ・Mana Regen +60 |
 Forsaken Embrace Forsaken Embrace Forsaken Embrace Max Health 425
Damage Reduction 10 |
・Max Health +600 ・Skill Damage Resistance +80 ・Debuff Duration -6% |
 Plate of the Field General Plate of the Field General Plate of the Field General Strength 2
Perception 1 Stun Chance 26` |
・Max Health +600 ・Melee Endurance +160 ・Ranged Endurance +160 |
 Ascended Guardian Gloves Ascended Guardian Gloves Ascended Guardian Gloves Perception 4
Mana Cost Efficiency +6.3% |
・Melee Endurance +160 ・Magic Endurance +160 ・Max Mana +600 |
 Breeches of the Executioner Breeches of the Executioner Breeches of the Executioner Dexterity 2
Wisdom 2 Stamina Regen 0.85 |
・Ranged Endurance +160 ・Magic Endurance +160 ・Debuff Duration -6% |
 Sabatons of the Field General Sabatons of the Field General Sabatons of the Field General Movement Speed +2%
Strength 4 |
・Melee Endurance +160 ・Ranged Endurance +160 ・Max Mana +600 |
| Accessories | |
 Collar of Decimation Collar of Decimation Collar of Decimation Strength 4
Melee Evasion 94 |
・Max Health +600 ・Skill Damage Boost +80 ・Buff Duration +6% |
 Ancient Saurodoma Bracers Ancient Saurodoma Bracers Ancient Saurodoma Bracers Dexterity 2
Mana Regen 20.25 Ranged Evasion 60 |
・Skill Damage Resistance +80 ・Max Mana +600 ・Debuff Duration -6% |
 Sapphire Dimensional Band Sapphire Dimensional Band Sapphire Dimensional Band Attack Range Increase 1.7%
Wisdom 2 Perception 2 |
・Max Health +600 ・Skill Damage Boost +80 ・Buff Duration +6% |
 Band of Universal Power Band of Universal Power Band of Universal Power Strength 1
Dexterity 1 Wisdom 1 Perception 1 |
・Max Mana +600 ・Skill Damage Boost +80 ・Buff Duration +6% |
 Belt of Bloodlust Belt of Bloodlust Belt of Bloodlust Move Speed +2%
Strength 2 Max Health 200 |
・Max Health +600 ・Skill Damage Resistance +80 ・Debuff Duration -6% |
To make full use of the weapon synergies between Wand and Greatsword, the build focuses on gathering as much Strength, Wisdom, and Dexterity as possible to get Heavy Attack Chance, Cooldown Speed, as well as Mana Sustain. The substats these provide will be Max Health and Damage Reduction from Forsaken Embrace, and some Mana Regen from the accessories.
The build also utilizes some 2-part bonuses for additional consistency. The Imperator set provides the build with an additional 150 Heavy Attack Chance to Melee. The Transcended One set then provides further Cooldown Speed to lessen the idle time between your skill rotations.
The defensive traits focus more on Endurance rather than Evasion as it makes tanking enemies up-front more reliable, especially with your self-sustain.
| List of References | |
|---|---|
| List of All Armor | List of All Accessories |
Best Runes
| Jump to a Section | |||
|---|---|---|---|
| Weapon Runes | |
|---|---|
 Tevent's Warblade of Despair Tevent's Warblade of Despair Tevent's Warblade of Despair Strength 4
Dexterity 3 Stun Chance 42 |
・Critical Hit Chance ・Max Health ・Weaken Chance Rune Synergy: ・Strength ・Critical Hit Damage Reduction |
 Tevent's Grasp of Withering Tevent's Grasp of Withering Tevent's Grasp of Withering Wisdom 4
Critical Hit 60 Cooldown Speed +19% |
・Critical Hit Chance ・Max Health ・Weaken Chance Rune Synergy: ・Strength ・Critical Hit Damage Reduction |
| Necklace Runes | |
 Collar of Decimation Collar of Decimation Collar of Decimation Strength 4
Melee Evasion 94 |
・Hit Chance ・Ranged Endurance ・Sleep Chance Rune Synergy: ・Wisdom ・Max Health |
| Bracelet Runes | |
 Ancient Saurodoma Bracers Ancient Saurodoma Bracers Ancient Saurodoma Bracers Dexterity 2
Mana Regen 20.25 Ranged Evasion 60 |
・Heavy Attack Chance ・Magic Endurance ・Skill Damage Resistance Rune Synergy: ・Max Health ・Bonus Damage |
| Ring Runes | |
 Band of Universal Power Band of Universal Power Band of Universal Power Strength 1
Dexterity 1 Wisdom 1 Perception 1 |
・Critical Hit Chance ・Ranged Endurance ・Weaken Chance Rune Synergy: ・Strength ・Max Health |
 Sapphire Dimensional Band Sapphire Dimensional Band Sapphire Dimensional Band Attack Range Increase 1.7%
Wisdom 2 Perception 2 |
・Critical Hit Chance ・Magic Endurance ・Weaken Chance Rune Synergy: ・Strength ・Max Health |
| Belt Runes | |
 Belt of Bloodlust Belt of Bloodlust Belt of Bloodlust Move Speed +2%
Strength 2 Max Health 200 |
・Hit Chance ・Health Regen ・Mana Cost Efficiency Rune Synergy: ・Max Health ・Damage Reduction |
Prioritize stacking Weaken Chance and the trifecta of Critical Hit, Heavy Attack, and Hit Chance on your Runes, as well as Endurance for durability. For the synergies, focus on Strength and WIsdom, as well as Max Health and Damage Reduction for even more durability.
Best Weapon Mastery
| Jump to a Section | |||
|---|---|---|---|
| Greatsword | ・Charge (9 Pts) ・Incapacitate (1 Pt) ・Face Off (9 Pts) |
|---|---|
| Wand | ・Damage (1 Pt) ・Recovery (9 Pts) ・Weaken (9 Pts) |
For the Greatsword, prioritize the Face Off tree as it provides you with a substantial boost in damage and the coveted Heavy Attack Chance! After that, spend nine points in the Charge tree for more durability and Cooldown Speed. Lastly, spend one point in the Incapacitate tree for additional Mana Regen.
As this build only uses the Wand as a supplementary self-buff, allocate points into the Recovery tree to get even more Cooldown Speed and Heavy Attack Chance. Next, focus the nine points on the Weaken tree to get additional Mana sustain. The last one point will be applied to the Damage tree for the extra damage stats.
How to Get Weapon Mastery Points
Best Guardian
| Jump to a Section | |||
|---|---|---|---|
| Best Guardian | |
|---|---|
 Vampire Slayer Ezekiel Vampire Slayer Ezekiel |
All defense +400. Deals damage over time equal to 0.6% of your Max Health every sec to hostile targets within a 2.5m radius. Restores Health by 20% of damage dealt to the targets. |
With this build having limited ways to deal AoE damage, Vampire Slayer Ezekiel's passive AoE damage that scales from your HP is incredibly helpful. This guardian allows you to be in the thick of battle with groups of mobs while simultaneously sustaining yourself over time.
Furthermore, the additional 400 Defense you gain is beneficial when you need to tank some hits while charging up your Greatsword skills.
Skill Rotations and Playstyle
| Jump to a Section | |||
|---|---|---|---|
| How to Play Wand / Greatsword |
|---|
|
|
Note: If the skills icons are confusing, some of the skill icons indicated here are using their specialized variants.
Sleep Single Target Burst
DaVinci's Courage For party members within a 15m range, Max Health 480 ▲, Health Regen 120 ▲, and Attack Speed 15% ▲ for 12s.
▶
Enchanting Time Friendly target's Skill Damage Boost increases by 80 for 9s.
▶
Willbreaker Deals 100% of Base Damage to all enemies within a 3m semicircle and applies Weaken that decreases Melee, Ranged, and Magic Defense by 300 for 6s.
▶
Cruel Smite Attacks 3 times in a row, each attack dealing 110% of Base Damage + 9 damage. 120% more damage against monsters. Every time a hit becomes a heavy attack, the remaining cooldown decreases by 20%. On Critical Hit or Heavy Attack, deals 88% +7 damage to the target within a 3m radius area.
▶
Cursed Nightmare Has a 80% chance to decrease Attack Speed and Move Speed by 30% for 3s, and Sleep: Curse for 3.2s afterwards (10s for monsters). Hitting a Sleeping target becomes a Critical Hit, and wakes the target.
▶
Death Blow Deals damage equal to 390% of Base Damage +82. Against Bound, Sleeping, Shocked or Stunned targets, damage increases by 30%. The damage increases up to 100% proportional to the charging time. The damage is amplified by 100% against monsters.
(Hold) ▶
Stunning Blow Deals 150% of Base Damage, with an 80% chance to Stun the target for 1.8s. Targets immune to Stun are Shocked for 4.2s. Every successful heavy attack sets Stun duration to 2.3s, and Shock duration to 5.2s
▶
Ascending Slash Deals damage equal to 265% of Base Damage + 54. Applies Collision: Prone with a 80% chance against Bound, Sleeping, or Stunned targets, or those using Static Defense, for 2.5. For each Heavy Attack, Collision: Prone duration increases by 1s.
▶
Guillotine Blade A special skill that can only be grown with Precious Training Books: Omnipotence. Deals 630% of Base Damage + 80 damage. Deals 819% of Base Damage + 104 damage to Collision: Prone or Shocked targets. The damage is amplified by 120% against monsters. On hit, Weakens the target, decreasing Incoming Heal by 60% for 6s. The damage increases up to 100% in proportional to the charging time.
(Hold) ▶
Cruel Smite Attacks 3 times in a row, each attack dealing 110% of Base Damage + 9 damage. 120% more damage against monsters. Every time a hit becomes a heavy attack, the remaining cooldown decreases by 20%. On Critical Hit or Heavy Attack, deals 88% +7 damage to the target within a 3m radius area.
▶
Devastating Smash Jump at a target and slash down with a Greatsword, dealing damage equal to 230% +49 to all targets within a 3m radius. Has a 42% chance to Stun the target for 2s.
|
If you need to burst down a single-target enemy that is vulnerable to stuns and sleep, this combo should do the trick! Before starting the combo, always make sure to apply DaVinci's Courage and Time for Punishment for optimal damage.
Starting the combo, use Willbreaker to lower their defense and activate Cruel Smite to set up its cooldown after the combo ends. Apply sleep to the target, and then charge up a Death Blow, which is a guaranteed critical with boosted damage. Due to Deep Sleep, they will still be asleep after Death Blow.
After that, re-apply more crowd control with Stunning Blow and then use Ascending Slash to attempt a prone status. Quickly charge up Guillotine Blade to get the bonus damage from the prone, and then use Cruel Smite again to end the combo.
Shock Single Target Burst
DaVinci's Courage For party members within a 15m range, Max Health 480 ▲, Health Regen 120 ▲, and Attack Speed 15% ▲ for 12s.
▶
Enchanting Time Friendly target's Skill Damage Boost increases by 80 for 9s.
▶
Willbreaker Deals 100% of Base Damage to all enemies within a 3m semicircle and applies Weaken that decreases Melee, Ranged, and Magic Defense by 300 for 6s.
▶
Cruel Smite Attacks 3 times in a row, each attack dealing 110% of Base Damage + 9 damage. 120% more damage against monsters. Every time a hit becomes a heavy attack, the remaining cooldown decreases by 20%. On Critical Hit or Heavy Attack, deals 88% +7 damage to the target within a 3m radius area.
▶
Stunning Blow Deals 150% of Base Damage, with an 80% chance to Stun the target for 1.8s. Targets immune to Stun are Shocked for 4.2s. Every successful heavy attack sets Stun duration to 2.3s, and Shock duration to 5.2s
▶
Death Blow Deals damage equal to 390% of Base Damage +82. Against Bound, Sleeping, Shocked or Stunned targets, damage increases by 30%. The damage increases up to 100% proportional to the charging time. The damage is amplified by 100% against monsters.
(Hold) ▶
Ascending Slash Deals damage equal to 265% of Base Damage + 54. Applies Collision: Prone with a 80% chance against Bound, Sleeping, or Stunned targets, or those using Static Defense, for 2.5. For each Heavy Attack, Collision: Prone duration increases by 1s.
▶
Guillotine Blade A special skill that can only be grown with Precious Training Books: Omnipotence. Deals 630% of Base Damage + 80 damage. Deals 819% of Base Damage + 104 damage to Collision: Prone or Shocked targets. The damage is amplified by 120% against monsters. On hit, Weakens the target, decreasing Incoming Heal by 60% for 6s. The damage increases up to 100% in proportional to the charging time.
(Hold) ▶
Cruel Smite Attacks 3 times in a row, each attack dealing 110% of Base Damage + 9 damage. 120% more damage against monsters. Every time a hit becomes a heavy attack, the remaining cooldown decreases by 20%. On Critical Hit or Heavy Attack, deals 88% +7 damage to the target within a 3m radius area.
▶
Devastating Smash Jump at a target and slash down with a Greatsword, dealing damage equal to 230% +49 to all targets within a 3m radius. Has a 42% chance to Stun the target for 2s.
|
Assuming that the opponent has immunity to the Sleep and Stun Status, adjust the rotation slightly to fit the Shock Duration. Remove Cursed Nightmare and Karmic Haze from the rotation and immediately use Stunning Blow to apply Shock.
Use Death Blow before Ascending Slash, and then proceed with the usual combo ender for maximum damage.
Mob Clearing
DaVinci's Courage For party members within a 15m range, Max Health 480 ▲, Health Regen 120 ▲, and Attack Speed 15% ▲ for 12s.
▶
Enchanting Time Friendly target's Skill Damage Boost increases by 80 for 9s.
▶
Devastating Smash Jump at a target and slash down with a Greatsword, dealing damage equal to 230% +49 to all targets within a 3m radius. Has a 42% chance to Stun the target for 2s.
▶
Willbreaker Deals 100% of Base Damage to all enemies within a 3m semicircle and applies Weaken that decreases Melee, Ranged, and Magic Defense by 300 for 6s.
▶
Cursed Nightmare Has a 80% chance to decrease Attack Speed and Move Speed by 30% for 3s, and Sleep: Curse for 3.2s afterwards (10s for monsters). Hitting a Sleeping target becomes a Critical Hit, and wakes the target.
▶
Karmic Haze Weakens the target and has an 80% chance to spread the Curse from the main target up to 3 other targets within a 5m range.
▶
Guillotine Blade A special skill that can only be grown with Precious Training Books: Omnipotence. Deals 630% of Base Damage + 80 damage. Deals 819% of Base Damage + 104 damage to Collision: Prone or Shocked targets. The damage is amplified by 120% against monsters. On hit, Weakens the target, decreasing Incoming Heal by 60% for 6s. The damage increases up to 100% in proportional to the charging time.
▶
Cruel Smite Attacks 3 times in a row, each attack dealing 110% of Base Damage + 9 damage. 120% more damage against monsters. Every time a hit becomes a heavy attack, the remaining cooldown decreases by 20%. On Critical Hit or Heavy Attack, deals 88% +7 damage to the target within a 3m radius area.
|
This combo is a variation of the Sleep Bomb combo, which incorporates the Greatsword to have more burst damage in exchange for the Curse damage. Group up enemies using your basic attacks, then proceed with the combo.
The main goal of this combo is to buff yourself up, leap to the middle with Devastating Smash, and then weaken their defenses with Willbreaker. After that, quickly apply the Sleep status after casting Time for Punishment before spreading the ailment to other enemies with Karmic Haze.
After doing this set-up, charge up and use Guillotine Blade to get a guaranteed critical to proc the AoE damage. Use Cruel Smite to clean up the remaining enemies. Remember that you should have the Area Damage specialization for this to work.
On Parry
Ascending Slash Deals damage equal to 265% of Base Damage + 54. Applies Collision: Prone with a 80% chance against Bound, Sleeping, or Stunned targets, or those using Static Defense, for 2.5. For each Heavy Attack, Collision: Prone duration increases by 1s.
▶
Cruel Smite Attacks 3 times in a row, each attack dealing 110% of Base Damage + 9 damage. 120% more damage against monsters. Every time a hit becomes a heavy attack, the remaining cooldown decreases by 20%. On Critical Hit or Heavy Attack, deals 88% +7 damage to the target within a 3m radius area.
▶
Guillotine Blade A special skill that can only be grown with Precious Training Books: Omnipotence. Deals 630% of Base Damage + 80 damage. Deals 819% of Base Damage + 104 damage to Collision: Prone or Shocked targets. The damage is amplified by 120% against monsters. On hit, Weakens the target, decreasing Incoming Heal by 60% for 6s. The damage increases up to 100% in proportional to the charging time.
▶
Stunning Blow Deals 150% of Base Damage, with an 80% chance to Stun the target for 1.8s. Targets immune to Stun are Shocked for 4.2s. Every successful heavy attack sets Stun duration to 2.3s, and Shock duration to 5.2s
▶
Death Blow Deals damage equal to 390% of Base Damage +82. Against Bound, Sleeping, Shocked or Stunned targets, damage increases by 30%. The damage increases up to 100% proportional to the charging time. The damage is amplified by 100% against monsters.
|
Upon parrying a Fury Attack, the opponent will either be Stunned or Shocked. Capitalize on this by attempting to prone an enemy with Ascending Slash and extending it with Cruel Smite. Immediately use a charged-up Guillotine Blade, then use the Stunning Blow + Death Blow Combo as an ender.
Stats
| Jump to a Section | |||
|---|---|---|---|
| Jump to a Stat |
|
|---|
Offensive Stats
| Stat | Value |
|---|---|
| Melee Hit | 992 |
| Ranged Hit | 912 |
| Magic Hit | 912 |
| Melee Crit. Hit | 806 |
| Ranged Crit. Hit | 766 |
| Magic Crit. Hit | 766 |
| Melee Heavy Attack Chance | 534 |
| Ranged Heavy Attack Chance | 284 |
| Magic Heavy Attack Chance | 284 |
| Skill Damage Boost | 340 |
| Buff Duration | 44% |
Defensive Stats
| Stat | Value |
|---|---|
| Melee Defense | 1,983 |
| Ranged Defense | 1,993 |
| Magic Defense | 1,470 |
| Melee Evasion | 286 |
| Ranged Evasion | 212 |
| Magic Evasion | 62 |
| Melee Endurance | 640 |
| Ranged Endurance | 576 |
| Magic Endurance | 576 |
| Skill Damage Resistance | 330 |
| Damage Reduction | 22 |
| Critical Hit Damage Reduction | 12% |
| Debuff Duration | -29% |
Body Stats
| Stat | Value |
|---|---|
| Max Health | 20,010 |
| Max Mana | 10,125 |
| Mana Cost Efficiency | 17.8% |
| Max Stamina | 100 |
| Move Speed | 600 | 4.9% |
| Skill Heal | 66.58% |
| Health Regen | 426 |
| Mana Regen | 567.95 |
| Stamina Regen | 43.1 |
| Cooldown Speed | 36.2% |
| Added Attack Speed | 5% |
Crowd Control Stats
| Stat | Value |
|---|---|
| Weaken Chance | 368 |
| Stun Chance | 478.5 |
| Petrification Chance | 200 |
| Sleep Chance | 242 |
| Silence Chance | 200 |
| Terror Chance | 200 |
| Bind Chance | 200 |
| Collision Chance | 200 |
| Bind Resistance | 100 |
Miscellaneous Stats
| Stat | Value |
|---|---|
| Bonus Damage | 12 |
| Range ▲ | 6.2% |
Item Set Stats
| Stat | Value |
|---|---|
| Field General Set | Melee Heavy Attack Chance 150 ▲ |
| Ascended Guardian Set | Cooldown Speed 7.5% ▲ |
Throne and Liberty Related Guides

Weapon Builds
 Spear Spear |
 Crossbows Crossbows |
 Daggers Daggers |
 Greatsword Greatsword |
 Longbow Longbow |
 Staff Staff |
 Sword and Shield Sword and Shield |
 Wand Wand |
All Build Guides
All Role Guides
 Best Healer Build Best Healer Build |
 Best Tank Build Best Tank Build |
 Best DPS Build Best DPS Build |
 Best Mage Build Best Mage Build |
Comment
Please fix the wand traits. Lequirus' Wand does not have a cooldown speed trait.
Author
Throne and Liberty: Wilds of Talandre Walkthrough & Guides Wiki
Best Paladin Wand / Greatsword (GS) PvE Build
Rankings
- We could not find the message board you were looking for.
Gaming News
Popular Games

Genshin Impact Walkthrough & Guides Wiki

Umamusume: Pretty Derby Walkthrough & Guides Wiki

Crimson Desert Walkthrough & Guides Wiki

Monster Hunter Stories 3: Twisted Reflection Walkthrough & Guides Wiki

Honkai: Star Rail Walkthrough & Guides Wiki

Pokemon Pokopia Walkthrough & Guides Wiki

The Seven Deadly Sins: Origin Walkthrough & Guides Wiki

Wuthering Waves Walkthrough & Guides Wiki

Zenless Zone Zero Walkthrough & Guides Wiki

Arknights: Endfield Walkthrough & Guides Wiki
Recommended Games

Fire Emblem Heroes (FEH) Walkthrough & Guides Wiki

Diablo 4: Vessel of Hatred Walkthrough & Guides Wiki

Cyberpunk 2077: Ultimate Edition Walkthrough & Guides Wiki

Yu-Gi-Oh! Master Duel Walkthrough & Guides Wiki

Super Smash Bros. Ultimate Walkthrough & Guides Wiki

Pokemon Brilliant Diamond and Shining Pearl (BDSP) Walkthrough & Guides Wiki

Elden Ring Shadow of the Erdtree Walkthrough & Guides Wiki

Monster Hunter World Walkthrough & Guides Wiki

The Legend of Zelda: Tears of the Kingdom Walkthrough & Guides Wiki

Persona 3 Reload Walkthrough & Guides Wiki
All rights reserved
Published by Amazon Games under license. ©2023-2024 NCSOFT Corporation. All rights reserved. THRONE AND LIBERTY and the THRONE AND LIBERTY logo are trademarks of NCSOFT Corporation. Used by Amazon Games under license. Amazon Games, Amazon, and all related logos are trademarks of Amazon.com, Inc. or its affiliates. The “PS” Family logo and “PS5” are registered trademarks of Sony Interactive Entertainment Inc. Steam and the Steam logo are trademarks and/or registered trademarks of Valve Corporation in the U.S. and/or other countries.
The copyrights of videos of games used in our content and other intellectual property rights belong to the provider of the game.
The contents we provide on this site were created personally by members of the Game8 editorial department.
We refuse the right to reuse or repost content taken without our permission such as data or images to other sites.


![Death Stranding 2: On The Beach [PC] Review | A Port That Delivers](https://img.game8.co/4447392/15310a0c9aa1b6843bb713b2ea216930.jpeg/show)


Please update with 2-star gear and accessories where applicable