Specter's Abyss (First Dungeon): How to Beat Heliber
As of March 2025, Game8 has ended coverage of Throne and Liberty.
Thank you very much for your understanding and we hope you continue to enjoy Game8's guides!
Specter's Abyss is the first Dimensional Circle dungeon and where you fight Heliber in Throne and Liberty (TL). Read on to see an overview of Specter's Abyss, a complete walkthrough of Specter's Abyss, how to beat Heliber, as well as the possible rewards and drops upon completion!
List of Contents
How to Beat Heliber
Heliber Boss Showcase
Disclaimer: This clear was done in the KR server and cleared slowly to showcase their mechanics.
Check out our 1-minute clear of Heliber!
Heliber Overview
| Heliber | |
|---|---|
 |
|
| Type | Undead |
| Passive | Freedom Stance: Bind Resistance ▲ |
How to Avoid Death Sentence
| Heliber Mechanics |
|---|
|
|
Reduce the Damage by Stacking
You can reduce the incoming damage of the Death Sentence by grouping together within its radius, sharing the damage among all the players inside.
Use Salvation Chain to Pull Allies
Players using the staff can activate the Salvation Chain to pull teammates out of the Heliber's range, helping them dodge its attacks. Since this attack can deal massive damage, be mindful of your teammates' positioning at all times to save them when the Heliber is about to swing its scythe.
Heliber Attack Patterns
AoE Cone Attack
Heliber raises its scythe and slams it into the ground, releasing projectiles that fan out in a cone. You can immediately morph and strafe sideways to move out of the cone's range.
AOE Fury Attack
Heliber releases a fury attack that damages players over a wide area. You can mitigate the damage from this attack by successfully parrying with your defensive skills.
Specter's Abyss Best Team and Roles
| Role | Explanation |
|---|---|
  Tank |
Weapon Combination: This weapon combo makes a great tank build to help the party take on the mobs of enemies encountered in the dungeon. Specter's Abyss Role: Responsible for taking all of the mob's aggro and grouping them up for the DPS to clean up. Heliber Role: Responsible for tanking damage from Heliber and directing its attacks away from the party, as well as helping soak damage from Death Sentence. |
  DPS |
Weapon Combination: This weapon combo is the most ideal for DPS players, having high damage output. Specter's Abyss Role: Responsible for clearing mobs in the dungeon, through AOE and single target damage. Heliber Role: Responsible for dealing damage to Heliber, and stacking Thunderclouds debuffs on the boss. |
  DPS |
Weapon Combination: This weapon combo can act as a flexible position within the team composition providing damage while aiding the team with utility. Specter's Abyss Role: Responsible for clearing mobs, marking high priority targets, and providing supplementary healing. Heliber Role: Responsible for marking and debuffing Heliber, while also providing supplementary healing. |
  DPS |
Weapon Combination: This weapon combo is a great Magic damage build that clears mobs and bosses efficiently. Specter's Abyss Role: Inflicts burn on groups in order to maximize damage from lightning spells. Heliber Role: Responsible for marking, debuffing, and dealing damage to Heliber. |
  DPS |
Weapon Combination: This weapon combo is a DPS build that allows the player to effectively clear mobs and bosses with the interactions between Lightning based skills and Burning and Frost debuffs. Specter's Abyss Role: Inflicts Frost on mobs to increase the range of Chain Lightning. Heliber Role: Inflict Thunderclouds and Burning on Heliber through skill rotations to deal damage and lower defenses. |
  Support |
Weapon Combination: This weapon combo is the quintessential Healer build. Use these weapons to provide healing to your teammates. Specter's Abyss Role: Responsible for sustaining the team's Health throughout the dungeon. Heliber Role: Heliber deals large AOE damage, especially with its Death Sentence Mechanic. Use the team-wide healing and shielding of the Wand and Staff build to keep teammates alive. |
Specter's Abyss Walkthrough
| Specter's Abyss Sequences | |
|---|---|
| 1 | 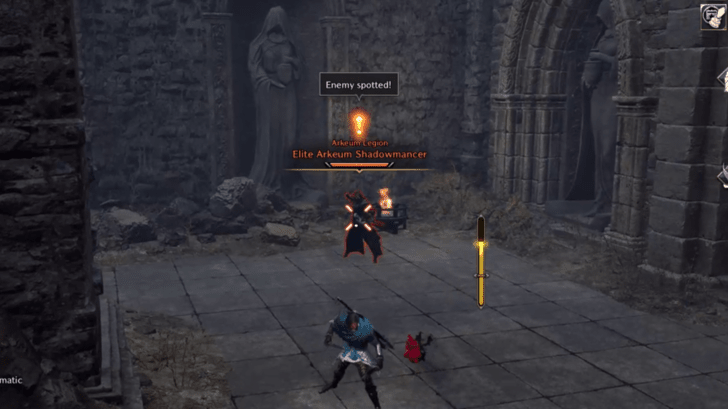 Defeat Elite Arkeum Shadowmancer After clearing the first room of enemies, proceed into the hallway. There, players will find a smaller group of enemies. Defeating them will spawn the Elite Arkeum Shadowmancer. Defeat the miniboss to progress further into the dungeon. ┗ How to Defeat Elite Arkeum Shadowmancer |
| 2 | 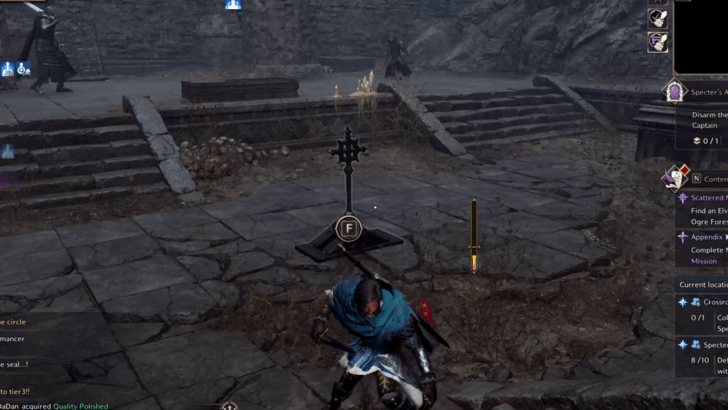 Pull the Levers Entering the hall past the corridor, the path forks in two. Clear the enemies in both areas and pull the levers in the middle of the rooms. This will make the area in the middle accessible. |
| 3 | 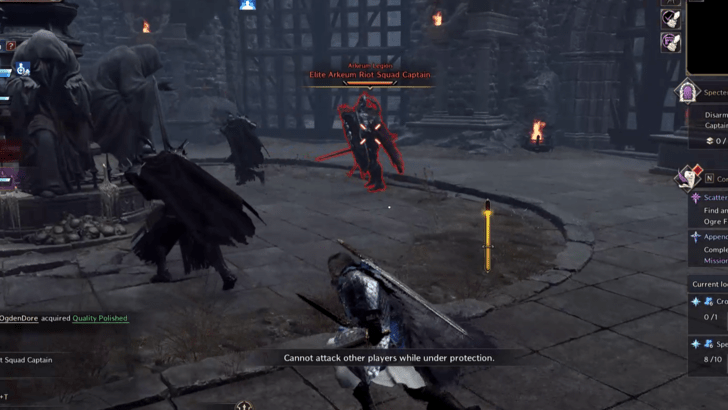 Defeat Elite Arkeum Riot Squad Captain Before proceeding to Heliber, clear out the room of any enemies, including the Elite Arkeum Riot Squad Captain standing guard at the entrance to the boss room. ┗ How to Defeat Elite Arkeum Riot Squad Captain |
How to Defeat Elite Arkeum Shadowmancer
When fighting the Elite Arkeum Shadowmancer, the only attack of note is the one that inflicts Silence on a player in the party, causing them to become immobile and unable to perform actions. Inflicting CC on the Shadowmancer will dispell the silence.
How to Defeat Elite Arkeum Riot Squad Captain
The Elite Arkeum Riot Squad Captain has a tendency to perform an attack that could potentially wipe teams. To counter this, when it begins charging, burst the shield with skills. When it breaks, inflict CC on the Riot Squad Captain to interupt the attack.
Alternatively, if the team cannot break the shield in time, gathering around the Healer or Tank for them to cast a team-wide shield can help the team survive..
Specter's Abyss Overview
| Required Level | Lv. 20 |
|---|---|
| Type | Dimensional Circle |
| Contract Token |
|
| Min. Combat Power | |
| Description | |
| Syleus turned the ancient underground tomb into his own lab, now known as Syleus's Abyss. The labyrinthian halls teemed with immortals and monsters, so Syleus created a follower, Heliber, to guard the lab. Ever the loyal servant, Heliber faithfully guides his master through the lab - and leads unwelcome visitors to their deaths. | |
Specter's Abyss Best Rewards and All Drops
Steel Flurry Crossbows
| Weapon | Stats |
|---|---|
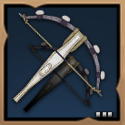 Steel Flurry Crossbows Steel Flurry Crossbows Steel Flurry Crossbows Dexterity 2
Critical Hit Chance 40 Max Mana 300 |
Type:
Damage: 14~53Atk Spd: 0.475s Range: 12m Modifiers: ・Dexterity 2 ・Critical Hit Chance 40 ・Max Mana 300 |
Steel Flurry Crossbows are a great set of Crossbows to farm for as they provide good stats. Aside from a boost to Dexterity, the increase in Critical Hit Chance and Max Mana offer more uptime and damage to players.
How to Get Steel Flurry Crossbows
Nature's End Shoes
| Armor | Stats |
|---|---|
 Nature's End Shoes Nature's End Shoes
|
Type: Feet Armor Melee Def: 86 Ranged Def: 76 ・Movement Speed +2.6% ・Perception 3 |
Nature's End Shoes is a valuable piece of footwear for any build. It provides Move Speed and a boost to the Perception stat, allowing you to hit breakpoints.
All Drops
Weapons
| All Weapon Drops |
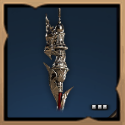 Dark Ritualist Staff Dark Ritualist Staff Dark Ritualist Staff Strength 1
Wisdom 3 Mana Cost Efficiency +4% |
 Steel Flurry Crossbows Steel Flurry Crossbows Steel Flurry Crossbows Dexterity 2
Critical Hit Chance 40 Max Mana 300 |
 Sword of Striking Sword of Striking Sword of Striking Strength 2
Collision Chance 175 |
|---|
Armor
| All Armor Drops |
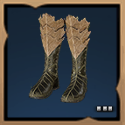 Feathered Drakeskin Boots Feathered Drakeskin Boots Feathered Drakeskin Boots Movement Speed +3%
Ranged Endurance 90 |
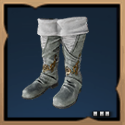 Glade Stalker Boots Glade Stalker Boots Glade Stalker Boots Hit Chance 50
Max Health 300 |
 Gloom Guard Winged Helmet Gloom Guard Winged Helmet Gloom Guard Winged Helmet Critical Hit Chance 30
Max Health 375 |
 Nature's End Shoes Nature's End Shoes Nature's End Shoes Movement Speed +2.6%
Perception 3 |
|---|---|---|---|
 Permafrost Shoes Permafrost Shoes Permafrost Shoes Wisdom 2
Hit Chance 10 Weaken Chance 25 |
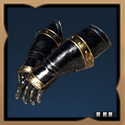 Ruthless Enforcer Gauntlets Ruthless Enforcer Gauntlets Ruthless Enforcer Gauntlets Stun Chance 75
Max Health 150 |
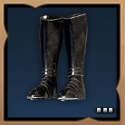 Ruthless Enforcer Sabatons Ruthless Enforcer Sabatons Ruthless Enforcer Sabatons Critical Hit Chance 55
Stun Chance 31 |
|
Accessories
| There are no Accessory Drops for this Dungeon. |
Items
| All Item Drops |
 Rare Polished Crystal Rare Polished Crystal
|
 Quality Polished Crystal Quality Polished Crystal
|
 Fermented Rotein Fermented Rotein
|
 Mana Blood Mana Blood
|
|---|---|---|---|
Other
| All Other Rewards | |
|---|---|
| Abyssal Contract Token Points (x500) | Training Dew: 10,000 Points |
Throne and Liberty (TL) Related Guides

All Co-op Dungeons: Dimensional Circles
Dungeon Guides
| 3-Star Co-op Dungeons | 2-Star Co-op Dungeons |
3-Star Dimensional Circle Coop Dungeons
 Rancorwood Rancorwood |
 Halls of Tragedy Halls of Tragedy |
 Chapel of Madness Chapel of Madness |
 Doomrot Grove Doomrot Grove |
 Twisted Laboratory Twisted Laboratory |
- |
2-Star Dimensional Circle Coop Dungeons
 Island of Terror Island of Terror |
 Voidwastes Voidwastes |
 Valley of Slaughter Valley of Slaughter |
 Carmine Rage Island Carmine Rage Island |
 Torture Chamber of Screams Torture Chamber of Screams |
- |
1-Star Dimensional Circle Coop Dungeons
 Death's Abyss Death's Abyss |
 Cursed Wasteland Cursed Wasteland |
 Temple of Slaughter Temple of Slaughter |
 Butcher's Canyon Butcher's Canyon |
 Tyrant's Isle Tyrant's Isle |
 Cave of Destruction Cave of Destruction |
Dimensional Circle Coop Dungeons
 Specter's Abyss Specter's Abyss |
 Roaring Temple Roaring Temple |
 Cave of Desperation Cave of Desperation |
Event Coop Dungeons
 Haunted Labyrinth Haunted Labyrinth |
Comment
Author
Throne and Liberty: Wilds of Talandre Walkthrough & Guides Wiki
Specter's Abyss (First Dungeon): How to Beat Heliber
improvement survey
03/2026
improving Game8's site?

Your answers will help us to improve our website.
Note: Please be sure not to enter any kind of personal information into your response.

We hope you continue to make use of Game8.
Rankings
- We could not find the message board you were looking for.
Gaming News
Popular Games

Genshin Impact Walkthrough & Guides Wiki

Honkai: Star Rail Walkthrough & Guides Wiki

Umamusume: Pretty Derby Walkthrough & Guides Wiki

Pokemon Pokopia Walkthrough & Guides Wiki

Resident Evil Requiem (RE9) Walkthrough & Guides Wiki

Monster Hunter Wilds Walkthrough & Guides Wiki

Wuthering Waves Walkthrough & Guides Wiki

Arknights: Endfield Walkthrough & Guides Wiki

Pokemon FireRed and LeafGreen (FRLG) Walkthrough & Guides Wiki

Pokemon TCG Pocket (PTCGP) Strategies & Guides Wiki
Recommended Games

Fire Emblem Heroes (FEH) Walkthrough & Guides Wiki

Diablo 4: Vessel of Hatred Walkthrough & Guides Wiki

Yu-Gi-Oh! Master Duel Walkthrough & Guides Wiki

Super Smash Bros. Ultimate Walkthrough & Guides Wiki

Pokemon Brilliant Diamond and Shining Pearl (BDSP) Walkthrough & Guides Wiki

Elden Ring Shadow of the Erdtree Walkthrough & Guides Wiki

Monster Hunter World Walkthrough & Guides Wiki

The Legend of Zelda: Tears of the Kingdom Walkthrough & Guides Wiki

Persona 3 Reload Walkthrough & Guides Wiki

Cyberpunk 2077: Ultimate Edition Walkthrough & Guides Wiki
All rights reserved
Published by Amazon Games under license. ©2023-2024 NCSOFT Corporation. All rights reserved. THRONE AND LIBERTY and the THRONE AND LIBERTY logo are trademarks of NCSOFT Corporation. Used by Amazon Games under license. Amazon Games, Amazon, and all related logos are trademarks of Amazon.com, Inc. or its affiliates. The “PS” Family logo and “PS5” are registered trademarks of Sony Interactive Entertainment Inc. Steam and the Steam logo are trademarks and/or registered trademarks of Valve Corporation in the U.S. and/or other countries.
The copyrights of videos of games used in our content and other intellectual property rights belong to the provider of the game.
The contents we provide on this site were created personally by members of the Game8 editorial department.
We refuse the right to reuse or repost content taken without our permission such as data or images to other sites.


![Slay the Spire 2 Review [Early Access] | Still the Deckbuilder to Beat](https://img.game8.co/4433115/44e19e1fb0b4755466b9e516ec7ffb1e.png/thumb)

![Resident Evil Village Review [Switch 2] | Almost Flawless Port](https://img.game8.co/4432790/e1859f64830960ce4248d898f8cd38d9.jpeg/thumb)


