Island of Terror Dungeon: How to Beat Kertaki
As of March 2025, Game8 has ended coverage of Throne and Liberty.
Thank you very much for your understanding and we hope you continue to enjoy Game8's guides!
Island of Terror is a 2-Star Dimensional Circle dungeon where you must fight Kertaki in Throne and Liberty (TL). See an overview of Island of Terror, a complete walkthrough of Island of Terror, how to beat Kertaki, including the best new rewards and drops upon completion!
List of Contents
How to Beat Kertaki
Kertaki Boss Showcase
Note: This clear was done in the KR server.
Check out our 2-minute clear of Kertaki focused around properly manuevering their mechanics!
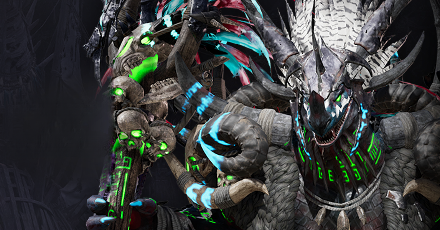
Kertaki Overview
| Kertaki | |
|---|---|
 |
|
| Type | Wildkin |
| Passive | Skillful Defense: All Endurance ▲ |
Kertaki Mechanics
| Kertaki Mechanics |
|---|
|
|
Kertaki will perform these mechanics in this order, along with its normal moves.
The mechanics will continue to repeat in this order, starting with the first after it's finished its third.
Rat Transformation Phase
At 90% HP, Kertaki turns everyone in the party into rats and creates a ring that inflicts Fear status on party members if they are hit by it.
To revert back to human, players can touch the flowers in the boss area, but players should not touch the flowers until this mechanic ends.
Even if they change back to human, they will still be vulnerable to Kertaki's attack, which will kill them in one hit, as they will lose the ability to use burrow.
During this phase, players must dodge Kertaki's attack with the Burrow skill. The Burrow skill replaces the player's first skill, similar to the rat mechanic of Toublek. Failure to dodge will cause the player to be eaten, resulting in instant death.
To properly deal with this mechanic, targeted players should burrow when Kertaki starts the animation for the attack. The same is true for the next person that Kertaki will target.
It is imperative that everyone in the party not be in the burrowed state at the same time. If Kertaki is targeting another player far away from them, players should unburrow.
Burrowed players should not unburrow until Kertaki is far enough away, as Kertaki can target them again and end up eating them if they are too close to the previous target.
If everyone is hidden and there is no target for Kertaki to chase, it will execute an attack that stuns everyone in the party, removing them from the burrowed state and leaving them vulnerable to Kertaki's next attack.
After a period of time, the green ring around Kertaki will disappear and the boss will be stunned for a short duration. This is a safe time for all party members to pick up a flower and continue the fight.
Meteor and Blue Flame Phase
In the first phase of Kertaki, he will cast meteors that drop onto players from the sky. After landing, the meteor will detonate after a short delay in the area where it landed.
Once detonated, blue flames will remain at the point of impact. The party must step on these blue flames to receive a debuff that will allow them to clear the smoke around the geysers.
The debuff will also cause damage over time. Healers should be ready to heal when a party member's health gets too low, or use a damage mitigation skill first.
In preparation for the third mechanic, clearing the fog is crucial. Kertaki casts the meteor twice, giving players a second chance to clear the fog around the geysers.
At the same time, players should also clear the fog around the flowers closest to the geyser. This will make it easier for players to get to the flowers when Kertaki repeats the rat phase.
Party leaders are encouraged to mark the locations of geysers to make it easier for party members to clear the smoke around them.
Anyone can clear the geysers, but it is crucial that the tank stays put and maintains aggro on the boss. If the tank wanders too far away from the boss, it could cause the boss to spam its Wrath attack.
Geyser Vents Phase
After the second Meteor is cast, Kertaki will begin to cast a massive AoE attack that deals massive damage and can instantly wipe out the team.
During this phase, each party member should run toward the charging geyser. The geyser will explode, lifting any players standing on it into the air, allowing them to dodge Kertaki's ground AoE attack.
If this phase repeats and Kertaki's HP is 50% or less, the boss will use this move twice. After the first geyser sends the players into the air, one of the other geysers will begin to charge.
Simply land on the next geyser to avoid the second attack.
Kertaki Attack Patterns
Kertaki follows and repeats this pattern the whole fight:
| Fireball ▶ Melee Spin ▶ AoE Charge |
Fireball Attack
Kertaki fires three fireballs in quick succession, which can be deadly to players with low survivability. After the third fireball, the player receiving this attack will be stunned.
Ideally, the tank should be the one to take this skill and mitigate some of the damage by blocking. They can't avoid the stun, but they have enough time to time their block for the next attack.
Melee Spin Attack
Following the Fireball attack and a stun, Kertaki will execute a powerful spinning fury attack that damages all nearby party members. Block this fury attack as usual to avoid taking damage.
AoE Charge Attack
Kertaki will then release a devastating AoE Charge attack that targets everyone in the area. To deal with this attack, simply use the block button and a directional input in any direction to perform a roll dodge.
If the tank loses aggro and the Kertaki targets a player at a distance, Kertaki can use this skill repeatedly.
Because players have limited stamina, it is imperative that the tank maintain aggro at all times.
Island of Terror Best Team and Roles
| Role | Explanation |
|---|---|
  Tank |
Weapon Combination: This weapon combo provides an excellent tank build with sufficient damage and crowd control to support the party through the dungeon and in the fight against Kertaki. Dungeon Role: The tank is responsible for drawing enemy aggro and grouping them up for the DPS to eliminate efficiently as the party progresses deeper into the dungeon. Kertaki Role: During the fight with Kertaki, the tank must stay close with the boss and absorb the Fireballs directed at the party. |
  DPS |
Weapon Combination: This weapon combo excels as a DPS build, offering both powerful AoE and single-target damage potential at close range. Dungeon Role: The DPS is responsible for clearing mobs efficiently and dealing high single-target damage to mini-bosses as the party progresses deeper into the dungeon. Kertaki Role: This build features the highest single-target damage skills, which can significantly shorten the fight against Kertaki. Its mobility also makes it easier to handle the boss mechanics effectively. |
  Healer |
Weapon Combination: This weapon combo is currently the top healer build, offering consistent AoE healing, burst healing, and the ability to cleanse enemy crowd control effects, significantly enhancing the party's survivability. Dungeon Role: The healer is responsible for keeping the party healthy at all times, ensuring sustained survivability throughout the dungeon. Kertaki Role: During the fight with Kertaki, the healer's primary focus is to keep the tank alive, as the tank will absorb the majority of Kertaki's damage. Additionally, the healer provides support to the party during the Meteor and Blue Flame Phase, helping and clearing the lizards to keep everyone alive. |
Island of Terror Walkthrough
| Island of Terror Sequences | |
|---|---|
| 1 | Activate the Reptilian Brazier Jump down from the cliff and ask your tank to pull the enemies on the right side near the stairs. From there, the rest of the team will activate the Reptilian Brazier and proceed towards the gate ahead, where players have to fight the Infuriated Reptilian Butcher. Note that players can skip most of the enemies in the center of the first room by heading straight for the brazier. ┗ Infuriated Reptilian Butcher |
| 2 | 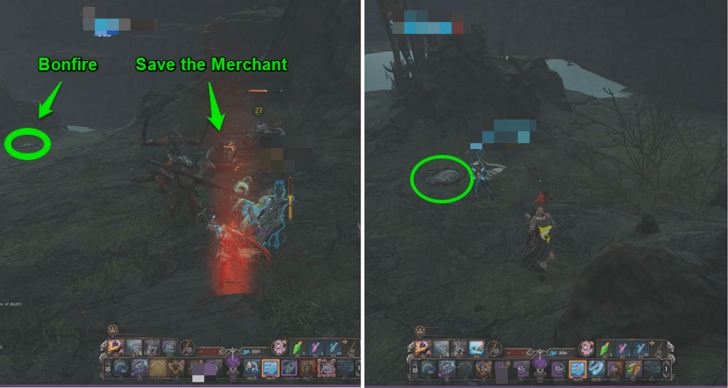 In the second room, the tank will take the left path, taking aggro from the mobs around the merchant so the party can safely deal DPS. Once the merchant is rescued, the party can proceed directly to the miniboss area, killing the two reptilian mobs along the way. Here, the party will fight the Infuriated Reptilian Executioner. ┗ Infuriated Reptilian Executioner |
| 3 | Use the Geyser to Fly Proceed to the next room and stand on the geyser to glide further into the dungeon. Players will enter another large room where the tank will need to take aggro from the enemies as the party crosses the room toward the Infuriated Reptilian Gladiator. ┗ Infuriated Reptilian Gladiator |
Infuriated Reptilian Butcher
The Infuriated Reptilian Butcher will become invisible, making it impossible to attack when it's health reaches below 50%. During this time, the tank must maintain aggro while the rest of the team steps aside to interact with the Luminescent Coral to make the miniboss visible again.
Infuriated Reptilian Executioner
This miniboss is straightforward. Simply jump over its fire attacks to avoid taking damage. Be extremely careful, as the damage from the fire wave can easily kill most players.
Infuriated Reptilian Gladiator
Throughout the fight, as damage is dealt to the miniboss, a red marker will indicate that the boss is preparing to target a player with its Charge attack.
Making the mini-boss hit the pillar will also cause the boss to be stunned for a few seconds, giving the players a short window of time to deal DPS.
Keep in mind that the Infuriated Reptilian Gladiator will perform this charge attack twice. The targeted player will be bound when the boss uses this move for the second time. This is where the Longbow becomes crucial, as it can cleanse the Bind with Purifying Touch.
The miniboss will then unleash a devastating AoE attack. Less equipped players may not be able to survive this, so the party can use a damage mitigation skill if necessary.
A Greatsword, Spear, or Wand user can expend their damage mitigation skill here, so don't be afraid to use them if needed.
Island of Terror New Equipment
Armor
| Armor | Stats |
|---|---|
 Gilded Raven Tunic Gilded Raven Tunic
|
Type: Chest Armor Set: Gilded Raven Set Melee Def: 178 Ranged Def: 162 ・Fortitude 3 ・Max Health 150 ・Ranged Evasion 34 |
Accessories
| Accessory | Stats |
|---|---|
 Ascended Guardian Bracelet Ascended Guardian Bracelet
|
Type: Bracelet Magic Def.: 180 Modifiers: ・Wisdom 2 ・Max Mana 300 ・Stun Resistance 21 |
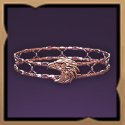 Forbidden Eternal Chain Forbidden Eternal Chain
|
Type: Belt Magic Def.: 240 Modifiers: ・Perception 1 ・Max Health 350 |
Island of Terror Best Rewards and All Drops
Phantom Wolf Tunic
| Armor | Stats |
|---|---|
 Phantom Wolf Tunic Phantom Wolf Tunic
|
Type: Chest Armor Set: Ghost Wolf Set Melee Def: 162 Ranged Def: 178 ・Strength 2 ・Weaken Chance 21 ・Magic Evasion 80 |
This versatile all-rounder armor performs exceptionally well in both PvP and PvE. It offers a balance of strength and weaken chance, which are two essential stats for DPS builds. Additionally, its excellent set effect can further boost your overall damage output.
Shock Commander Plate Armor
| Armor | Stats |
|---|---|
 Shock Commander Plate Armor Shock Commander Plate Armor
|
Type: Chest Armor Set: Chief Commander Set Melee Def: 170 Ranged Def: 204 ・Strength 4 ・Damage Reduction 4 |
Thanks to its massive strength boost, this armor is among the best available in the game for DPS players. It is an excellent choice to enhance survivability due to the max health and damage reduction it provides.
All Drops
Armor
| All Armor Drops | |||
|---|---|---|---|
 Gilded Raven Tunic Gilded Raven Tunic Gilded Raven Tunic Fortitude 3
Max Health 150 Ranged Evasion 34 |
 Ascended Guardian Raiment Ascended Guardian Raiment Ascended Guardian Raiment Perception 2
Max Health 300 Stamina Regen 1.65 |
 Phantom Wolf Tunic Phantom Wolf Tunic Phantom Wolf Tunic Strength 2
Weaken Chance 21 Magic Evasion 80 |
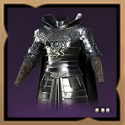 Plate of the Field General Plate of the Field General Plate of the Field General Strength 2
Perception 1 Stun Chance 26` |
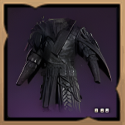 Shadow Harvester Tunic Shadow Harvester Tunic Shadow Harvester Tunic Bind Chance 41
Ranged Evasion 74 Stamina Regen 1.35 |
 Shock Commander Plate Armor Shock Commander Plate Armor Shock Commander Plate Armor Strength 4
Damage Reduction 4 |
 Swirling Essence Robe Swirling Essence Robe Swirling Essence Robe Dexterity 3
Wisdom 2 Heavy Attack Chance 33 |
 Deadeye's Cloak Deadeye's Cloak Deadeye's Cloak Hit Chance 40
Critical Hit Chance 50 |
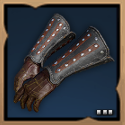 Handguards of the Resistance Handguards of the Resistance Handguards of the Resistance Hit 60
Weaken Chance 37 |
- | - | - |
Accessories
| All Accessory Drops | |||
|---|---|---|---|
 Forbidden Eternal Chain Forbidden Eternal Chain |
 Band of the Chosen One Band of the Chosen One |
 Ascended Guardian Bracelet Ascended Guardian Bracelet |
 Belt of Combat Prowess Belt of Combat Prowess Belt of Combat Prowess Melee Defense 120
Melee Evasion 60 |
Items
Other
| All Other Rewards | ||
|---|---|---|
| Dimensional Soul Shard: Kertaki | Abyssal Contract Token Points (x750) | Training Dew: 10,000 Points |
Island of Terror Overview
| Required Level | Lv. 50 |
|---|---|
| Type | 2-Star Dimensional Circle |
| Contract Token |
|
| Min. Combat Power | |
| Description | |
| Toublek, who was once an elven wizard, performed heinous magical experiments to return to his original form. In the end, he obtained the power he sought by engraving powerful magic onto his own body. However, the power created from such senseless slaughter eventaully ate away at Toublek's sanity. Toublek forgot his original goal of becoming an elf once again, and became the merciless tyrant, Kertaki, who sought nothing but even greater power. | |
Throne and Liberty (TL) Related Guides

All Co-op Dungeons: Dimensional Circles
Dungeon Guides
| 3-Star Co-op Dungeons | 2-Star Co-op Dungeons |
3-Star Dimensional Circle Coop Dungeons
 Rancorwood Rancorwood |
 Halls of Tragedy Halls of Tragedy |
 Chapel of Madness Chapel of Madness |
 Doomrot Grove Doomrot Grove |
 Twisted Laboratory Twisted Laboratory |
- |
2-Star Dimensional Circle Coop Dungeons
 Island of Terror Island of Terror |
 Voidwastes Voidwastes |
 Valley of Slaughter Valley of Slaughter |
 Carmine Rage Island Carmine Rage Island |
 Torture Chamber of Screams Torture Chamber of Screams |
- |
1-Star Dimensional Circle Coop Dungeons
 Death's Abyss Death's Abyss |
 Cursed Wasteland Cursed Wasteland |
 Temple of Slaughter Temple of Slaughter |
 Butcher's Canyon Butcher's Canyon |
 Tyrant's Isle Tyrant's Isle |
 Cave of Destruction Cave of Destruction |
Dimensional Circle Coop Dungeons
 Specter's Abyss Specter's Abyss |
 Roaring Temple Roaring Temple |
 Cave of Desperation Cave of Desperation |
Event Coop Dungeons
 Haunted Labyrinth Haunted Labyrinth |
Comment
Author
Throne and Liberty: Wilds of Talandre Walkthrough & Guides Wiki
Island of Terror Dungeon: How to Beat Kertaki
improvement survey
03/2026
improving Game8's site?

Your answers will help us to improve our website.
Note: Please be sure not to enter any kind of personal information into your response.

We hope you continue to make use of Game8.
Rankings
- We could not find the message board you were looking for.
Gaming News
Popular Games

Genshin Impact Walkthrough & Guides Wiki

Honkai: Star Rail Walkthrough & Guides Wiki

Umamusume: Pretty Derby Walkthrough & Guides Wiki

Pokemon Pokopia Walkthrough & Guides Wiki

Resident Evil Requiem (RE9) Walkthrough & Guides Wiki

Monster Hunter Wilds Walkthrough & Guides Wiki

Wuthering Waves Walkthrough & Guides Wiki

Arknights: Endfield Walkthrough & Guides Wiki

Pokemon FireRed and LeafGreen (FRLG) Walkthrough & Guides Wiki

Pokemon TCG Pocket (PTCGP) Strategies & Guides Wiki
Recommended Games

Fire Emblem Heroes (FEH) Walkthrough & Guides Wiki

Diablo 4: Vessel of Hatred Walkthrough & Guides Wiki

Yu-Gi-Oh! Master Duel Walkthrough & Guides Wiki

Super Smash Bros. Ultimate Walkthrough & Guides Wiki

Pokemon Brilliant Diamond and Shining Pearl (BDSP) Walkthrough & Guides Wiki

Elden Ring Shadow of the Erdtree Walkthrough & Guides Wiki

Monster Hunter World Walkthrough & Guides Wiki

The Legend of Zelda: Tears of the Kingdom Walkthrough & Guides Wiki

Persona 3 Reload Walkthrough & Guides Wiki

Cyberpunk 2077: Ultimate Edition Walkthrough & Guides Wiki
All rights reserved
Published by Amazon Games under license. ©2023-2024 NCSOFT Corporation. All rights reserved. THRONE AND LIBERTY and the THRONE AND LIBERTY logo are trademarks of NCSOFT Corporation. Used by Amazon Games under license. Amazon Games, Amazon, and all related logos are trademarks of Amazon.com, Inc. or its affiliates. The “PS” Family logo and “PS5” are registered trademarks of Sony Interactive Entertainment Inc. Steam and the Steam logo are trademarks and/or registered trademarks of Valve Corporation in the U.S. and/or other countries.
The copyrights of videos of games used in our content and other intellectual property rights belong to the provider of the game.
The contents we provide on this site were created personally by members of the Game8 editorial department.
We refuse the right to reuse or repost content taken without our permission such as data or images to other sites.
 Precious Polished Crystal
 Precious Stalon Ore
 Precious Emeret Ore
 Precious Rubrix Ore
 Precious Marind Ore
 Precious Parchment
 Precious Omnipotence Parchment
 Lizard Scale
 Fermented Rotein


![Slay the Spire 2 Review [Early Access] | Still the Deckbuilder to Beat](https://img.game8.co/4433115/44e19e1fb0b4755466b9e516ec7ffb1e.png/thumb)

![Resident Evil Village Review [Switch 2] | Almost Flawless Port](https://img.game8.co/4432790/e1859f64830960ce4248d898f8cd38d9.jpeg/thumb)


