Cave of Desperation Dungeon: How to Beat Lacune
As of March 2025, Game8 has ended coverage of Throne and Liberty.
Thank you very much for your understanding and we hope you continue to enjoy Game8's guides!

Cave of Desperation is a Dimensional Circle dungeon where you must fight Lacune in Throne and Liberty (TL). Read on to see an overview of Cave of Desperation, a complete walkthrough of Cave of Desperation, how to beat Lacune, as well as the possible rewards and drops upon completion!
List of Contents
How to Beat Lacune
Lacune Boss Showcase
Disclaimer: This clear was done in the KR server and cleared on high-level accounts.
Check out our 1-minute clear of Lacune!
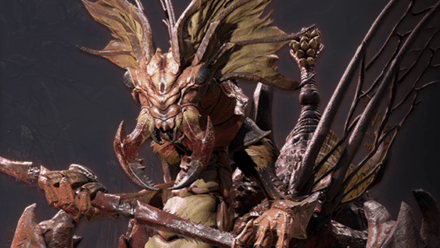
Lacune Overview
| Lacune | |
|---|---|
 |
|
| Type | Wildkin |
| Passive | Innate Defense: All Defense ▲ |
How to Avoid Lacune's AOE Attack
| Lacune Mechanics |
|---|
|
|
Blood Mist AOE Attack
When Lacune begins speaking in a foreign language, a red mist will slowly seep into the ground, marking the spot where a large pillar will emerge. Immediately move to the pillar and stand on it to evade the Lacune's Blood Mist AoE Attack. This will keep the party safe from a potentially team wipe.
Jump Down the Pillar and Defeat the Gem Ant
After this, Lacune will hover in the air shooting poison at the players. Jump off the pillar and move towards the platform with the gem ant and defeat it. This will bring Lacune back to the ground.
Lacune Attack Patterns
Weak Mist Attack
Lacune will occasionally perform a faster but weaker version of the Blood Mist AOE Attack that deals less damage. You can interrupt this move by continuing to attack Lacune if you deal enough damage.
Punch Attack
Lacune executes a fast-hitting single target punch that deals significant damage. You can parry it by perfectly timing your defensive skill.
Larvae Stun Attack
Lacune shoots larvae that latch onto a player, similar to the Mutant Princess Ant mechanic. When the larvae explode, they knock players up in the air. You can move close to other players to transfer the larvae, to reduce the number of players affected by crowd control when they detonate.
Cave of Desperation Best Team and Roles
| Role | Explanation |
|---|---|
  Tank |
Weapon Combination: This weapon combo makes a great tank build to help the party take on the mobs of enemies encountered in the dungeon. Cave of Desperation Role: Responsible for taking all of the mob's aggro and grouping them up for the DPS to clean up. Lacune Role: Responsible for tanking damage from Lacune and directing its attacks away from the party, as well as being the primary host to bear the larvae Lacune shoots out. Always stay within melee range of Lacune to prevent it from doing its deadly AOE attack. |
  DPS |
Weapon Combination: This weapon combo is the most ideal for DPS players, having high damage output. Cave of Desperation Role: Responsible for clearing mobs in the dungeon, through AOE and single target damage. Lacune Role: Responsible for dealing damage to Lacune, and stacking Thunderclouds debuffs on the boss. |
  DPS |
Weapon Combination: This weapon combo is a viable melee DPS build, allowing the player to stick with the tank during battles. This build also comes with some bulk, allowing the player to sustain themselves in the middle of a fight. Cave of Desperation Role: Responsible for clearing mobs and dealing CC. Lacune Role: Responsible for damaging Lacune. This build has to stay within melee range of Lacune in order for it not to do its deadly AOE Attack. |
  DPS |
Weapon Combination: This weapon combo is a great Magic damage build that clears mobs and bosses efficiently. Cave of Desperation Role: Inflicts burn on groups in order to maximize damage from lightning spells. Lacune Role: Responsible for marking, debuffing, and dealing damage to Lacune. |
  DPS |
Weapon Combination: This weapon combo is a DPS build that allows the player to effectively clear mobs and bosses with the interactions between Lightning based skills and Burning and Frost debuffs. Cave of Desperation Role: Inflicts Frost on mobs to increase the range of Chain Lightning. Lacune Role: Inflict Thunderclouds and Burning on Lacune through skill rotations to deal damage and lower defenses. |
  Support |
Weapon Combination: This weapon combo is a variation of the Healer build using a Longbow. Use these weapons to provide healing to your teammates, cleanse them of status effects and mark targets. Cave of Desperation Role: Responsible for sustaining the team's Health throughout the dungeon. Lacune Role: Use the team-wide healing and shielding of the Wand and Staff build to keep teammates alive. Use the Deadly Marker skill of the Longbow to mark Lacune and the Gem Ant to clear the boss faster. |
Cave of Desperation Walkthrough
| Cave of Desperation Sequences | |
|---|---|
| 1 | 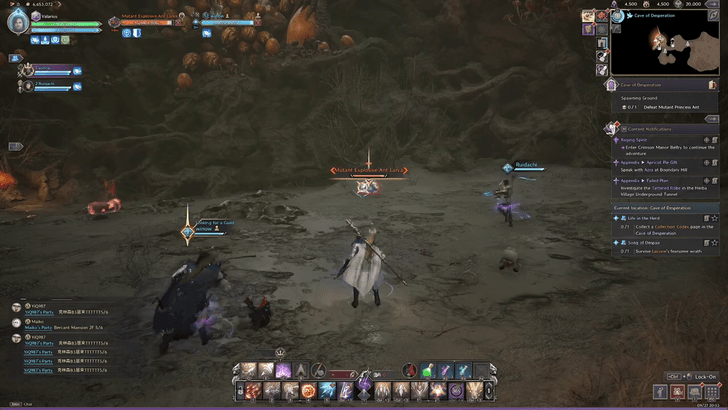 Spawn and Defeat Mutant Princess Ant The first miniboss of this dungeon, Mutant Princess Ant does not pose much of a major threat. To spawn it, destroy all the ant larvae. ┗ How to Defeat Mutant Princess Ant |
| 2 | 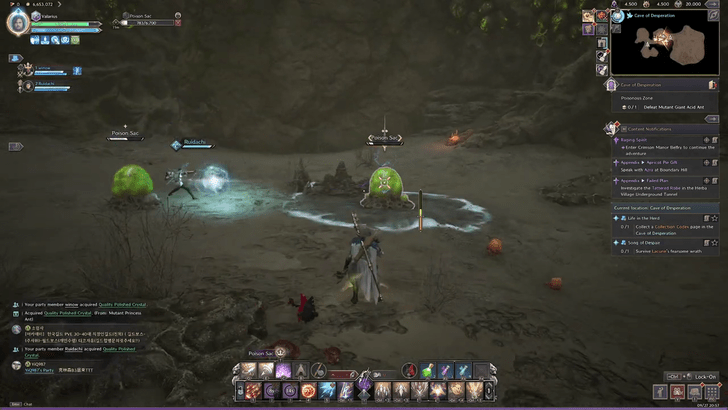 Defeat Mutant Giant Acid Ant Proceed into the next room and destory the poison sacs, doing so will spawn Poisonous Worker Ants who must be defeated before spawning a large ant egg. Destroy this to spawn Mutant Giant Acid Ant. ┗ How to Defeat Mutant Giant Acid Ant |
How to Defeat Mutant Princess Ant
When Mutant Princess Ant shoots out larvae onto the players, they must then come into contact with each other for the larvae to transfer and turn green. Failure to transfer the larvae will cause them to explode, dealing damage.
How and Defeat Mutant Giant Acid Ant
Mutant Giant Acid Ant has a tendency to put an acid pool below itself, before pulling players towards itself. This is a fury attack that can be parried.
Cave of Desperation Overview
| Required Level | Lv. 40 |
|---|---|
| Type | Dimensional Circle |
| Contract Token |
|
| Min. Combat Power | |
| Description | |
| Wizard Skultus of the Sylavean Order bestowed the gift of a Star Fragment upon the queen ant Lacune to bolster her abilities. She grew in size as well as power, and her chitin took on a shimmering golden hue. Seeing this, Skultus whispered a promise, or perhaps a prophecy: "You are destined to rule the underground." It wasn't long before it came to pass, and now Lacune now lords over the underworld from a clandestine throne—a secret space she used her magic to create for herself. | |
Cave of Desperation Best Rewards and All Drops
Malevolent Staff
| Weapon | Stats |
|---|---|
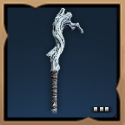 Malevolent Staff Malevolent Staff Malevolent Staff Hit 100
Weaken Chance 75 |
Type:
Damage: 47~85Atk Spd: 0.709s Range: 19.2m Modifiers: ・Hit 100 ・Weaken Chance 75 |
Malevolent Staff is a valuable weapon for playing builds centered around Magic Damage. It provides a boost to Hit Chance and Weaken Chance, allowing your character to be more consistent with its attacks.
Feathered Drakeskin Gloves
| Armor | Stats |
|---|---|
 Feathered Drakeskin Gloves Feathered Drakeskin Gloves
|
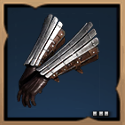
Type: Hands Armor Melee Def: 94 Ranged Def: 86 ・Range ▲ 5% ・Perception 2 |
Feathered Drakeskin Gloves is a good piece of gear in general. It allows players to reach Perception stat breakpoints, and gives an extra bit of range to ranged and magic players.
How to Get Feathered Drakeskin Gloves
All Drops
Weapons
| All Weapon Drops |
 Daggers of Slaughtering Daggers of Slaughtering Daggers of Slaughtering Strength 7
Bonus Damage 6 |
 Farshot Longbow Farshot Longbow Farshot Longbow Perception 4
Critical Hit 100 |
 Malevolent Staff Malevolent Staff Malevolent Staff Hit 100
Weaken Chance 75 |
 Relentless Cleaver Relentless Cleaver Relentless Cleaver Strength 2
Critical Hit Chance 50 Stamina Regen 1.5 |
|---|---|---|---|
 Steel Flurry Crossbows Steel Flurry Crossbows Steel Flurry Crossbows Dexterity 2
Critical Hit Chance 40 Max Mana 300 |
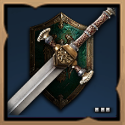 Sword of Striking Sword of Striking Sword of Striking Strength 2
Collision Chance 175 |
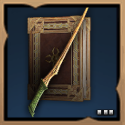 Treant Twig Treant Twig Treant Twig Wisdom 2
Weaken Chance 175 |
|
Armor
| All Armor Drops |
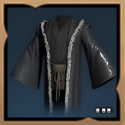 Elusive Hexweaver Drape Elusive Hexweaver Drape Elusive Hexweaver Drape Sleep Chance 87
Ranged Evasion 60 |
 Feathered Drakeskin Gloves Feathered Drakeskin Gloves Feathered Drakeskin Gloves Range ▲ 5%
Perception 2 |
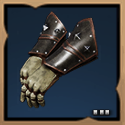 Glade Stalker Gloves Glade Stalker Gloves Glade Stalker Gloves Critical Hit 105
|
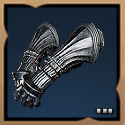 Gloom Guard Gauntlets Gloom Guard Gauntlets Gloom Guard Gauntlets Strength 2
Critical Hit 40 |
|---|---|---|---|
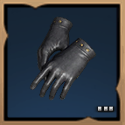 Nature's End Gloves Nature's End Gloves Nature's End Gloves Range ▲ 3%
Max Health 110 Ranged Evasion 50 |
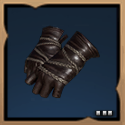 Permafrost Gloves Permafrost Gloves Permafrost Gloves Added Attack Speed +2.6%
Wisdom 1 Mana Regen 7.5 |
||
Accessories
| There are no Accessory Drops for this Dungeon. |
Items
| All Item Drops |
 Rare Polished Crystal Rare Polished Crystal
|
 Quality Polished Crystal Quality Polished Crystal
|
 Fermented Rotein Fermented Rotein
|
 Mana Blood Mana Blood
|
|---|---|---|---|
Other
| All Other Rewards | |
|---|---|
| Abyssal Contract Token Points (x500) | Training Dew: 10,000 Points |
Throne and Liberty (TL) Related Guides

All Co-op Dungeons: Dimensional Circles
Dungeon Guides
| 3-Star Co-op Dungeons | 2-Star Co-op Dungeons |
3-Star Dimensional Circle Coop Dungeons
 Rancorwood Rancorwood |
 Halls of Tragedy Halls of Tragedy |
 Chapel of Madness Chapel of Madness |
 Doomrot Grove Doomrot Grove |
 Twisted Laboratory Twisted Laboratory |
- |
2-Star Dimensional Circle Coop Dungeons
 Island of Terror Island of Terror |
 Voidwastes Voidwastes |
 Valley of Slaughter Valley of Slaughter |
 Carmine Rage Island Carmine Rage Island |
 Torture Chamber of Screams Torture Chamber of Screams |
- |
1-Star Dimensional Circle Coop Dungeons
 Death's Abyss Death's Abyss |
 Cursed Wasteland Cursed Wasteland |
 Temple of Slaughter Temple of Slaughter |
 Butcher's Canyon Butcher's Canyon |
 Tyrant's Isle Tyrant's Isle |
 Cave of Destruction Cave of Destruction |
Dimensional Circle Coop Dungeons
 Specter's Abyss Specter's Abyss |
 Roaring Temple Roaring Temple |
 Cave of Desperation Cave of Desperation |
Event Coop Dungeons
 Haunted Labyrinth Haunted Labyrinth |
Comment
Author
Throne and Liberty: Wilds of Talandre Walkthrough & Guides Wiki
Cave of Desperation Dungeon: How to Beat Lacune
improvement survey
03/2026
improving Game8's site?

Your answers will help us to improve our website.
Note: Please be sure not to enter any kind of personal information into your response.

We hope you continue to make use of Game8.
Rankings
- We could not find the message board you were looking for.
Gaming News
Popular Games

Genshin Impact Walkthrough & Guides Wiki

Honkai: Star Rail Walkthrough & Guides Wiki

Umamusume: Pretty Derby Walkthrough & Guides Wiki

Pokemon Pokopia Walkthrough & Guides Wiki

Resident Evil Requiem (RE9) Walkthrough & Guides Wiki

Monster Hunter Wilds Walkthrough & Guides Wiki

Wuthering Waves Walkthrough & Guides Wiki

Arknights: Endfield Walkthrough & Guides Wiki

Pokemon FireRed and LeafGreen (FRLG) Walkthrough & Guides Wiki

Pokemon TCG Pocket (PTCGP) Strategies & Guides Wiki
Recommended Games

Diablo 4: Vessel of Hatred Walkthrough & Guides Wiki

Fire Emblem Heroes (FEH) Walkthrough & Guides Wiki

Yu-Gi-Oh! Master Duel Walkthrough & Guides Wiki

Super Smash Bros. Ultimate Walkthrough & Guides Wiki

Pokemon Brilliant Diamond and Shining Pearl (BDSP) Walkthrough & Guides Wiki

Elden Ring Shadow of the Erdtree Walkthrough & Guides Wiki

Monster Hunter World Walkthrough & Guides Wiki

The Legend of Zelda: Tears of the Kingdom Walkthrough & Guides Wiki

Persona 3 Reload Walkthrough & Guides Wiki

Cyberpunk 2077: Ultimate Edition Walkthrough & Guides Wiki
All rights reserved
Published by Amazon Games under license. ©2023-2024 NCSOFT Corporation. All rights reserved. THRONE AND LIBERTY and the THRONE AND LIBERTY logo are trademarks of NCSOFT Corporation. Used by Amazon Games under license. Amazon Games, Amazon, and all related logos are trademarks of Amazon.com, Inc. or its affiliates. The “PS” Family logo and “PS5” are registered trademarks of Sony Interactive Entertainment Inc. Steam and the Steam logo are trademarks and/or registered trademarks of Valve Corporation in the U.S. and/or other countries.
The copyrights of videos of games used in our content and other intellectual property rights belong to the provider of the game.
The contents we provide on this site were created personally by members of the Game8 editorial department.
We refuse the right to reuse or repost content taken without our permission such as data or images to other sites.


